Read time 7 minutes
“When the user has a habit of creating multiple sticky notes and saving more minor but crucial information, you should read the article showing the complete process to recover the sticky notes in Windows 10. You can follow the procedure and recover all the deleted sticky notes.”
Sticky Notes is a Windows-based inbuilt application that mimics physical paper notes users often paste on their monitors. Though available with almost all classic versions of Windows OS, it became a modern app in Windows 10.
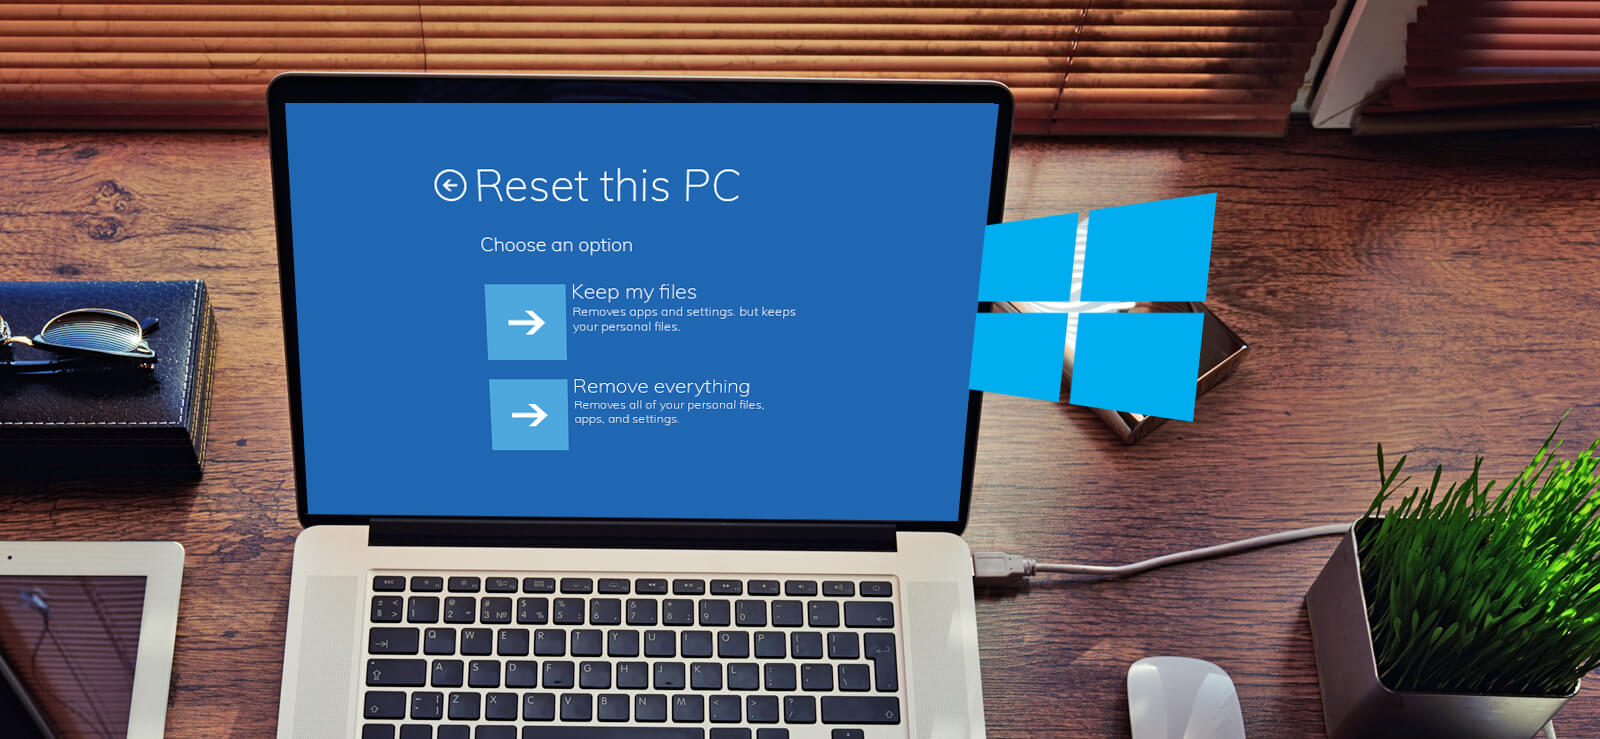
Earlier, Sticky Notes had no backup or archive feature, which means if deleted, it is gone forever. However, with the latest version update, i.e., Windows 10, you can now enable Sticky Notes to sync everything to the Microsoft cloud platform. Apart from Sticky Notes, you can enable data syncing for doc. files based on text editors like Notepad, MS Word, etc. In case, you have accidentally deleted notepad files from your Windows 10 machine, you can opt. to various methods available online to recover deleted notepad files from windows 10.
In case you haven’t turned on the Sync Now for your Sticky notes and accidentally deleted some of them, there are other workarounds to get your data back. Sometimes, data loss can also occur due to corrupt or damaged sectors on hard drives. In such scenarios, you must seek resources that helps you repair bad sectors in your windows 10 machine.
In this write-up, we will discuss some possible methods to recover, backup, and restore Sticky Notes on your Windows platform.
Open Sticky using another application
Whether you are working on a Windows 10 machine or any other windows platform like 7 or 8, the process to recover Sticky Notes is quite the same for all versions.
Follow the steps to retrieve your lost notes on any Windows machine.
Step 1: Press Win + R to launch the Run dialog box.
Step 2: Launch the Sticky Notes folder by specifying and executing the following address to the Run Command.
“C:\Users\UserName\AppData\Roaming\Microsoft\Sticky Notes”
Or, you can manually locate the folder by going consecutively to each folder as per the order described above.
Step 3: Right-Click on the StickyNotes.snt file and select Open with MS Word.
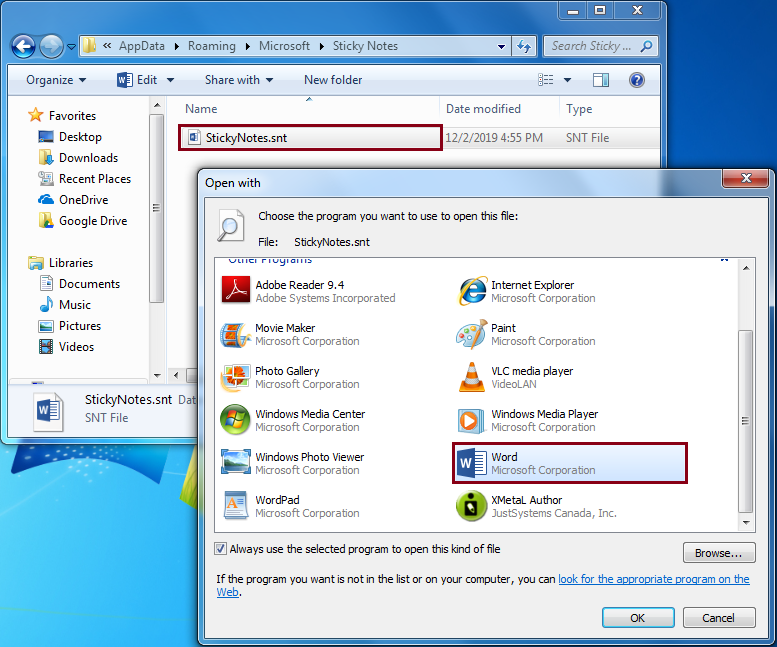
Step 4: MS Word will ask you to apply standard options to decode the file. Let the settings remain unaltered and click OK.
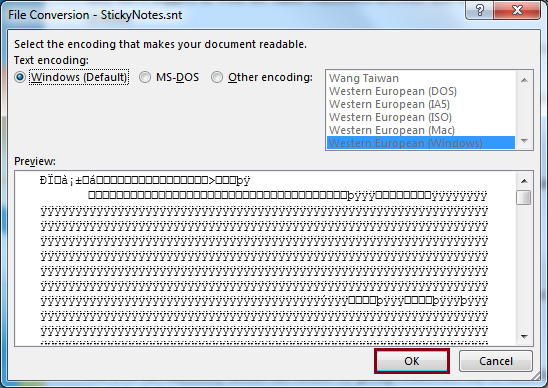
Step 5: Select the encoding to get your desired information back.
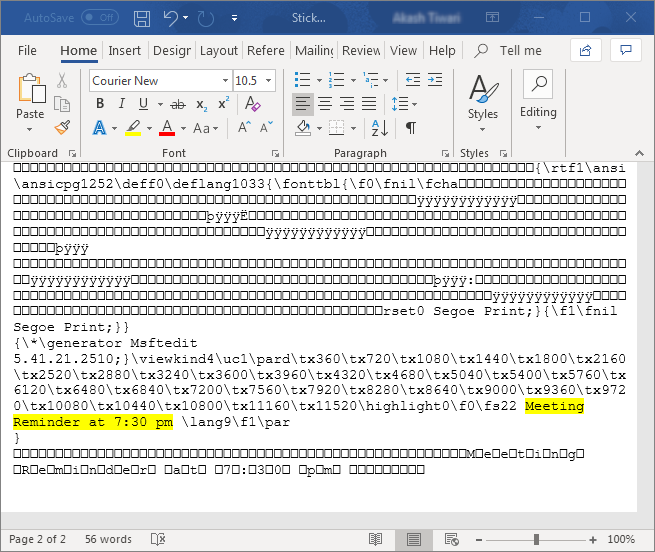
Note: When launched via a text editor like MS Word, the .snt file will show you a combination of ciphertext along with the information which was deleted from the Sticky Notes. View the data accordingly and mark the information which you think you might have deleted accidentally.
Backup your Sticky Notes On Windows 10
To back up Sticky Notes on your Windows 10 machine, follow these simple steps:
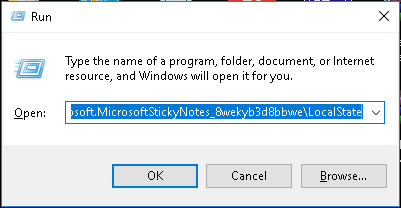
Step 1: Launch the Run Command dialog box by pressing Win +R key on your keyboard.
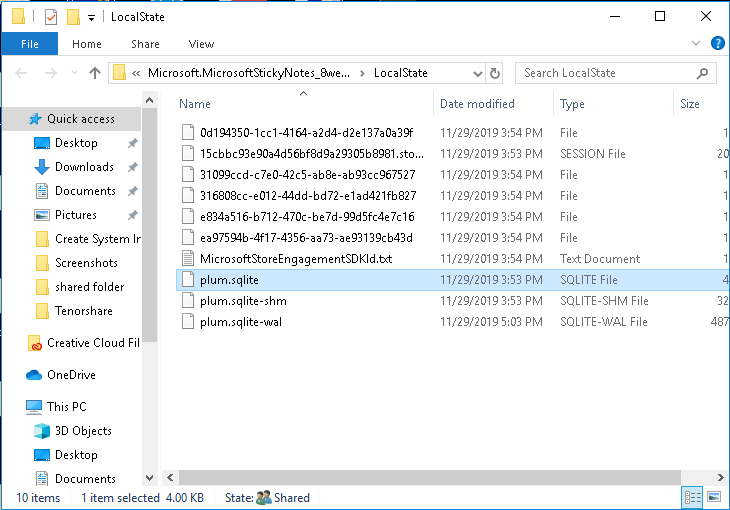
Step 2: Specify the following path in the Run Command and hit enter.
%LocalAppData%\Packages\Microsoft.MicrosoftStickyNotes_8wekyb3d8bbwe\LocalState
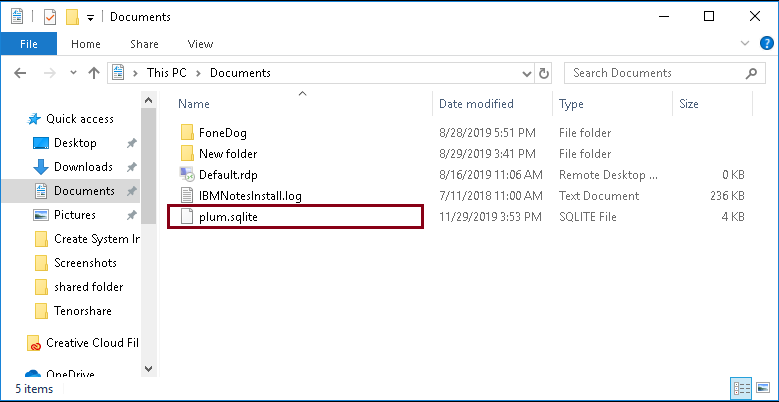
Step 3: Right-click on the plum.sqlite file and select Copy.
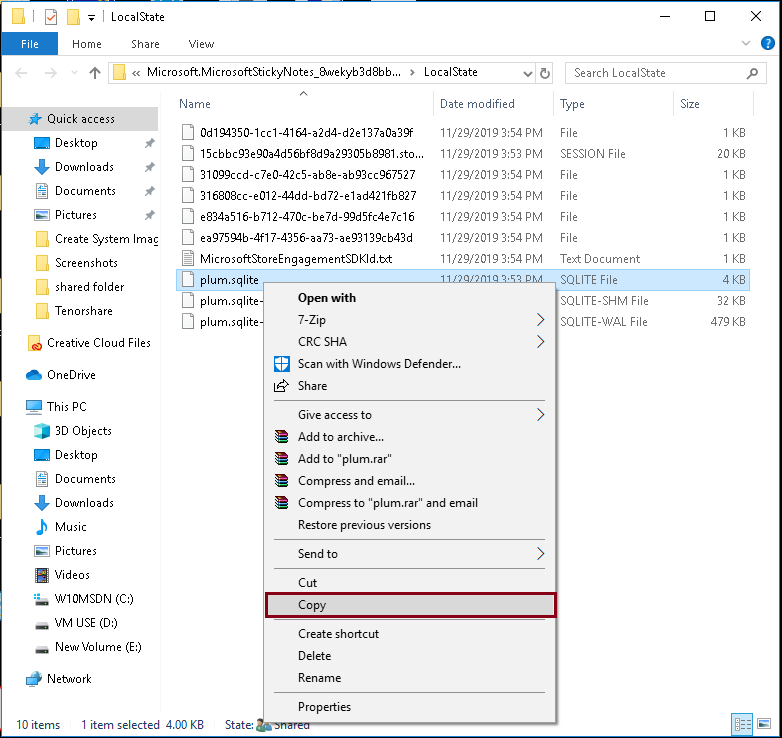
Step 4: Paste the copied file to a convenient directory.
Note: It is always recommended to choose external storage like a USB flash drive to back up your data files.
Restore Backup of your Sticky Notes
Now, as you have a backup, it’s time for you to restore the backup file and get your data back.
Follow these steps to restore your backup data.
Step 1: Launch Windows Explorer.
Step 2: Navigate to the folder where you had created the backup for your Sticky Notes.
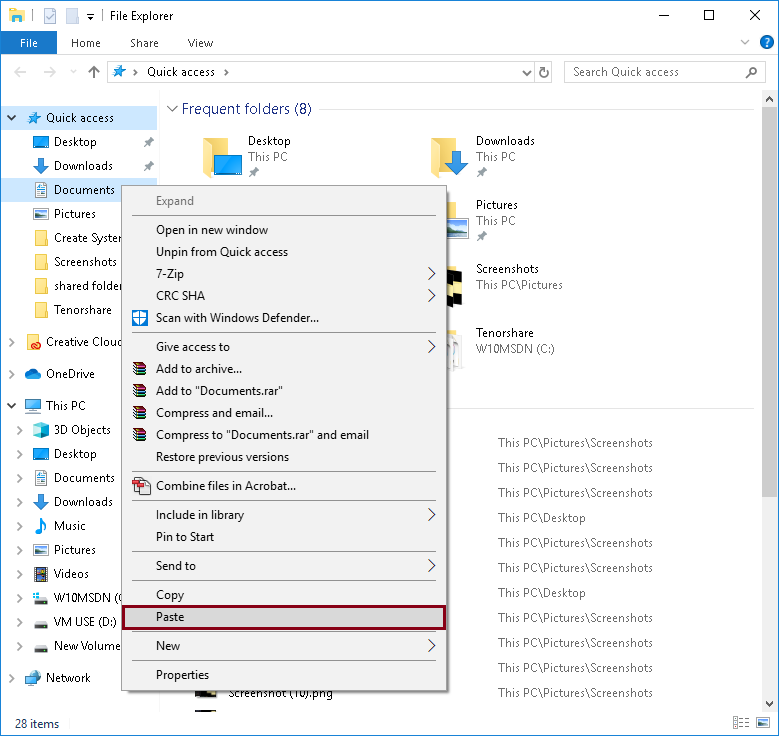
Step 3: Right-click >> Copy the plum.sqlite file.
Step 4: Press Win + R to launch the Run Command dialog box, specify the following path, and hit enter.
%LocalAppData%\Packages\Microsoft.MicrosoftStickyNotes_8wekyb3d8bbwe\LocalState
Step 5: Right-click within the destination folder and select Paste.
The backup file gets saved to its original location. You can now launch the Sticky Notes application, and all the notes that were previously saved to your desktop appear at the same location.
Enable the Delete Confirmation pop-up for Sticky Notes
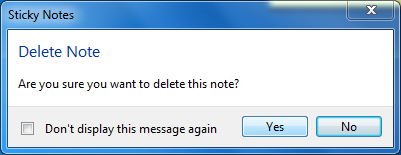
You can also enable the Delete Confirmation pop-up for your Sticky Notes in order to prevent deletion in the first place. Whenever you accidentally delete a Sticky Note, it will pop-up an alert message asking you “If you are sure to delete this note.”
Follow the steps to enable the delete confirmation pop-up for your Sticky Notes.
Step 1: Press Win + R to launch the Run Command dialog box.
Step 2: Type “regedit” and click OK.
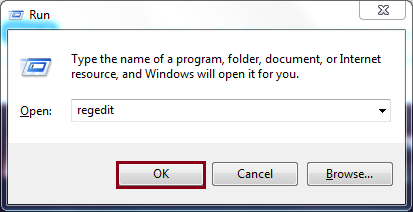
This command will launch the Registry Editor window on your system.
Step 3: Expand the directories in order:
HKEY_Current_User >> Software >> Microsoft >> Windows >> Current Version >> Applets >> Sticky Notes

Step 4: Double-click the PROMPT_ON_DELETE and alter the value from 0 to 1. Click OK after making the changes.
Now, try deleting a Sticky Note from your desktop; it will prompt an alert message asking for your confirmation to delete the note.
An Automated Method to recover Sticky Notes
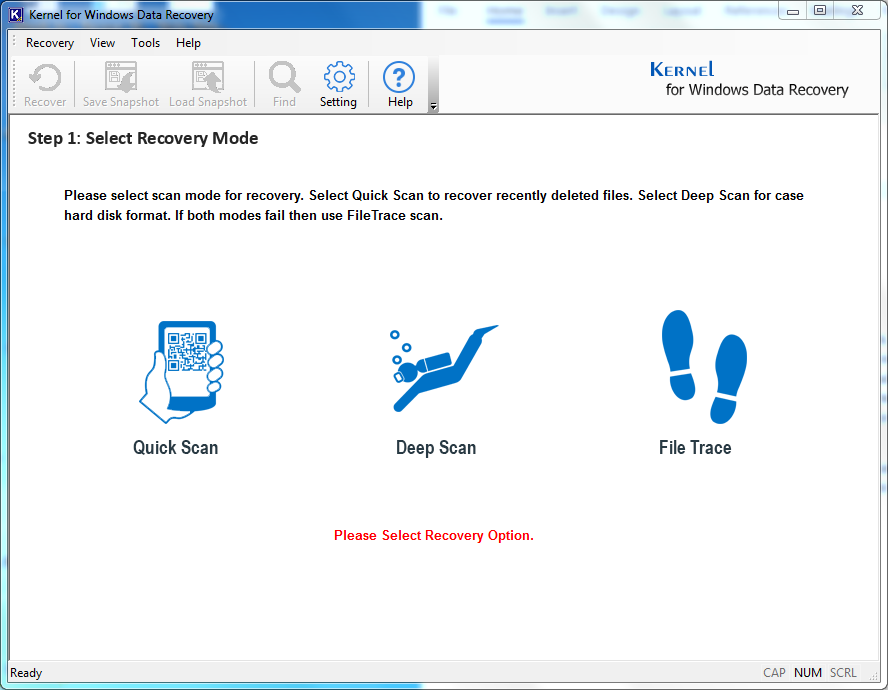
In case you are looking for a simple approach to recover your data, try using a reliable third-party tool. Kernel for Windows Data Recovery software is a recommended tool to recover lost or permanently deleted data from your Windows machine. You can use this tool to scan the drives and restore your deleted Sticky Notes. The tool takes a few steps to execute the task and provides effective results as compared to native manual methods.
Conclusion
There are various methods to recover your deleted or lost sticky notes. But if you fail with these methods, try an automated tool to recover deleted files or lost data from the Windows machine.