Read time 3 minutes
The PowerShell command New-MailboxExportRequest in Exchange Server is used to save the content of a mailbox of a user account. With this command, you can export a complete mailbox to an offline PST file as a backup. There are several businesses that have to constantly create and store backup of their data due to government-set guidelines.
However, sometimes when running this command users get an error saying that access for the given path is denied. The error halts the mailbox export process and creates confusion in the user’s mind. To help you clear your mind, in this blog, we will understand this error and learn how to fix “New-MailboxExportRequest Access to Path is Denied”.
What is a New-MailboxExportRequest Command in Exchange?
In Exchange Management Shell, there is a cmdlet to export a mailbox directly to a PST file in an accessible folder. The command helps to easily save any mailbox from the Exchange On-Premises server to your specified location. Many users also use this command to migrate EDB to Live Exchange Server. The syntax of the command is:
Note: This export command is available only in Exchange on-premises. To use it, you need to add the account to Mailbox Import Export role group.
Though it is an easy command to execute, sometimes an error can pop up. The error that gets displayed is:
Unable to open PST file ‘\\servername\sharename\user.pst’. Error details: Access to the path ‘\\servername\sharename\output.pst’ is denied.
+ CategoryInfo : NotSpecified: (0:Int32) [New-MailboxExportRequest], RemotePermanentException
+ FullyQualifiedErrorId : D7BD75A8,Microsoft.Exchange.Management.RecipientTasks.NewMailboxExportRequest
‘\\servername\sharename\user.pst’
Reasons for the ‘New-MailboxExportRequest Access to Path is Denied’ Error
While executing the cmdlet, the PST file location parameter should be a UNC path. The location should be a shared network with Read & Write permissions for Exchange Trusted Subsystem. Also, the user account performing the actions should have Mailbox Import Export permissions assigned to it. Unfulfillment of these requirements while executing the New-MailboxExportRequest command might lead to the aforementioned “Access to path denied” error. Some of the major causes of the error are:
- Missing Mailbox Import Export role assignment.
- Incorrect or invalid UNC network path.
- Insufficient shared folder permissions.
- Missing Read or Write access for the Exchange Trusted Subsystem
- Using a local drive path instead of a network share.
- Antivirus or security settings blocking the export process.
Easy Solutions to Fix “New-MailboxExportRequest Access to Path is Denied” Error
Since there are multiple reasons behind this error, here are a few advanced solutions to fix it. However, the first thing that you should check is the UNC path and the syntax of the command. If the command is perfect and you are still getting the error, then try the following solutions given below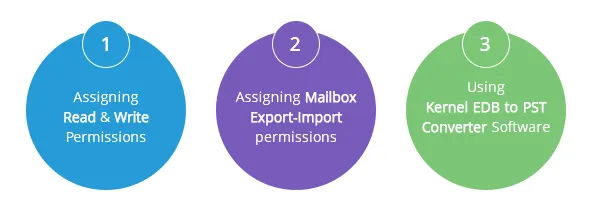
One of the reasons for the access path denied error is that the Exchange Trusted Subsystem does not have enough rights over the folder. You should grant the Exchange Server access to the shared drive (read and write permissions to the Exchange trusted subsystem group).
To assign Read/Write permissions to the Exchange trusted subsystem group, right-click on the shared folder and click on the Properties option. Then switch to the Security tab, select the Exchange Trusted Subsystem permission and under Permissions for Exchange Trusted Subsystem section, select the Read & Execute and Write permissions checkboxes and click on OK. The permissions are now assigned.
Users can create a new role group with Mailbox Import Export permissions and add the user to it.
To create a new role group, execute the following command in Exchange Management Shell as the administrator:
-Members“Domain\exadmin”-Display Name”Exchange Mailbox Import Export”
Assigning Mailbox Export Import permissions to the account in this way will help you perform the export operation without errors.
The above two solutions will fix the access denied issue for the majority of users. However, if for any reason the solutions did not work for you, you can turn to a professional tool Kernel for EDB to PST. The software can swiftly exports Exchange database mailboxes to Outlook PST files without any disturbing errors. User can easily save mailboxes of multiple users simultaneously to any desired location while keeping the original metadata and folder hierarchy intact. This robust tool also helps to repair corrupt EDB file and offers Office 365 migration as well.
How EDB to PST Converter Make It Easy to Export Mailboxes?
Specialized EDB to PST converter tools are designed to offer simple and fast operation. While the manual method of using the NewMailboxExportRequest method works, it offers very less features in comparison to the automated software. The main reasons why choosing the professional tool over the traditional method is a good idea are:
- Allow exporting multiple mailboxes simultaneously in a new or existing PST file.
- Advanced filters to save only what the users require.
- An interactive user interface that anyone can use it even if they are not familiar with EMS.
- Can repair corrupt EDB files and migrate mailboxes to any Exchange version.
- Save data in multiple formats, including PST, PDF, MSG, HTML, EML, etc.
Conclusion
When you get the “‘New-MailboxExportRequest Access to Path is Denied” error, check the path and verify the necessary permissions & roles. If none of these troubleshoots work for you, then you should try the recommended EDB to PST Converter. The tool is best suited to export multiple mailboxes at once with original key attributes, messages, attachments, etc., data items while maintaining the folder structure.
Frequently Asked Questions
Ans. Verify if you have the MAILBOX IMPORT EXPORT Role assigned, and also check the access level of the UNC path you specified in the cmdlet. These are the two most common mistakes users make when exporting emails and get the error. In case nothing works, call your admin or use a professional tool to export EDB to PST files.
Ans. The command allows you to save one mailbox at a time. You can use the same command multiple times for different users to export multiple mailboxes one after another.
Ans. You have to repair the EDB file using tools like ESEUTIL before you can extract any data from it. Alternatively, if the corruption is major, use specialized Exchange data recovery software to safely export all the mailbox data items.