Read time 8 minutes
Outlook email client is available for both Mac and Windows platforms. Outlook for Mac uses OLM format to save the data, whereas Outlook for Windows uses PST format to save the data. However, most of the organizations use both Mac and Windows system for work and the need to access OLM files on Windows and PST files on Mac can arise anytime.
For Outlook for Mac users, it is easy to import a PST file into their application. But it is difficult for them to export their Outlook for Mac emails to PST format so that they can be accessed in Microsoft Outlook in the Windows environment. We will discuss how Outlook for Mac users can import PST to Outlook Mac and export OLM files to PST format.
How to import PST to Outlook for Mac?
For transferring messages and other items from Windows Outlook to Mac Outlook, users can use the import feature of Outlook for Mac. Please note that only UNICODE-supported PST files can be imported into the Outlook for Mac application.
Follow these steps to import PST file to Outlook Mac:
Step 1. Transfer the PST file to your Macintosh system.
Step 2. Run Outlook for Mac and click File menu, then select Import.
Step 3. Now, choose Outlook Data File (.pst or .olm) and click the right arrow located at bottom right corner.
Step 4. Select Outlook for Windows Data File (.pst), and then click the right arrow.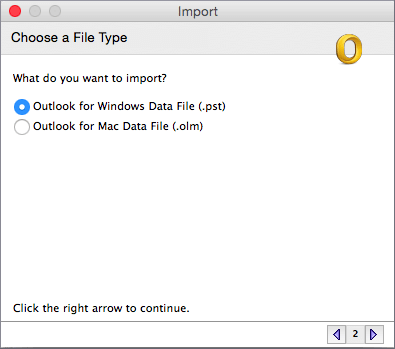
Step 5. Locate the data file on your computer, and then select Import.
Step 6. Once the import process is complete, select Done. The imported items will appear in the navigation pane listed under On My Computer.
So, here is the complete method to import PST to Mac Outlook.
How to export OLM files to PST?
When a user needs to access the Mac Outlook data in Windows Outlook, the OLM files are required to be converted to PST format. It is advised to backup OLM file first using the Export option in Outlook for Mac to save it into archive file format at the desired destination.
The method to export OLM to PST comes in different parts. Follow the steps below to easily export OLM files to PST format
Part 1. Set up IMAP account in Outlook for Mac
Step 1. Open Gmail then create IMAP account.
Step 2. Click on Tools >Accounts.
Step 3. Click on the plus icon and then New Account.
Step 4. Enter the credentials of your IMAP account and complete the set up.
Step 5. Once the set-up is completed, create a new folder in Gmail on Outlook for Mac.
Part 2. Move Outlook for Mac emails to IMAP account
Step 1. Launch Outlook for Mac and right click on the items you wish to export, navigate to Move and tap on Copy to Folder.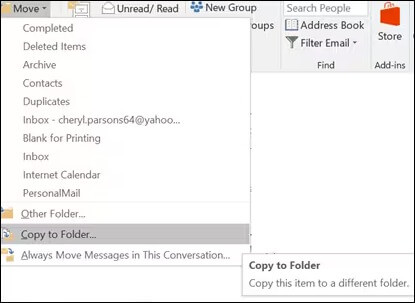
Step 2. Look for the folder you created earlier and click Copy.
Step 3. Moving ahead, click Send/Receive button and update the IMAP folder on Outlook for Mac.
Part 3. Sync IMAP account with Outlook on Windows
Step 1. Connect Outlook for Windows to that IMAP account.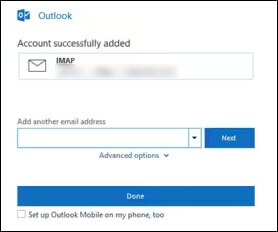
Step 2. Go to the File menu and click on Open & Export then Import/Export.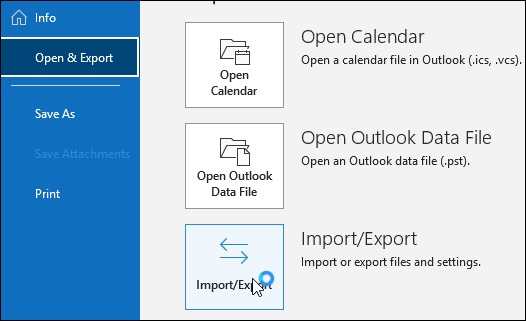
Step 3. Select Export to a file and tap on Next.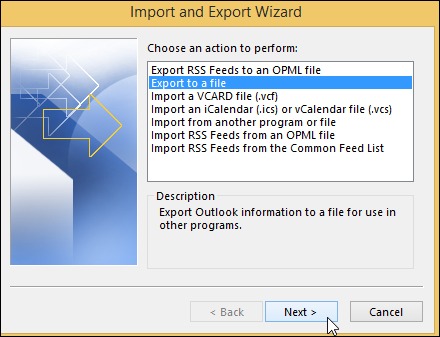
Step 4. Choose the Outlook Data File (.pst) format and hit Next.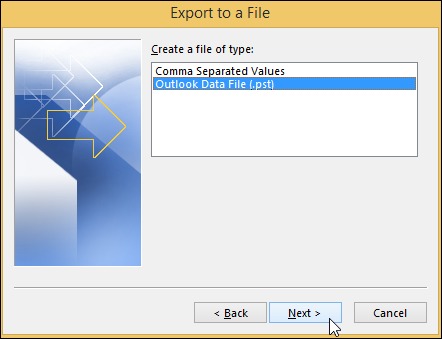
Step 5. Choose all the mailbox items with OLM files. Click on Next.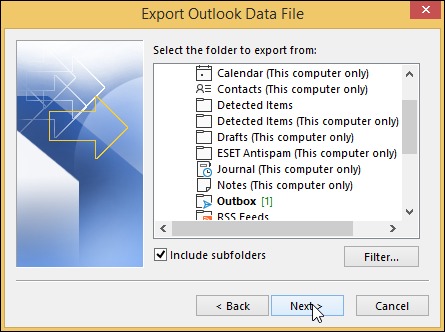
Step 6. Browse for your file destination and tap on Finish.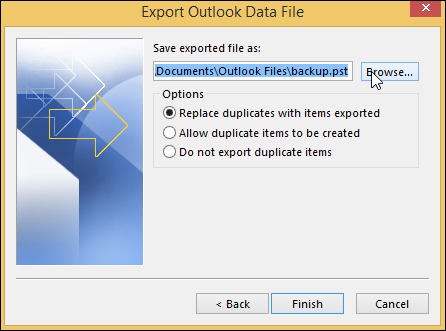
An automated approach to import PST file to Outlook Mac
The manual process is quite lengthy and time-consuming, and it is not a direct method too. For an easy way out, Outlook users can try a third-party OLM to PST converter tool like Kernel for OLM to PST. It is the best option when you look at importing OLM files into PST format. The software effortlessly converts the OLM files without any data loss. You can get a preview of mailbox data before converting it and can also generate a detailed analysis report.
Let us learn how to use Kernel OLM to PST Converter to export OLM files to PST files in a swift manner.
Step 1. Launch Kernel for OLM to PST Converter software. Click on the Select File option and then select the Single or Multiple File(s) option to convert. Click the Browse button.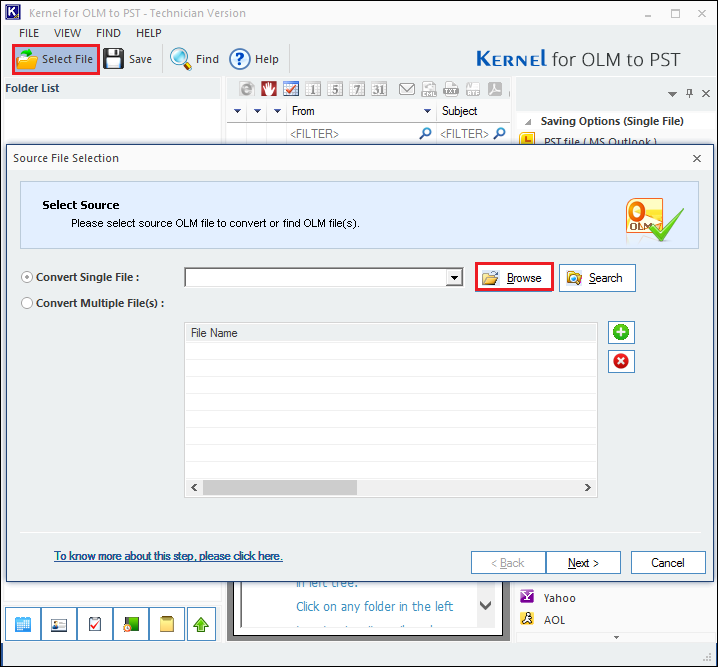
Step 2. Add the OLM file from its location and click Open.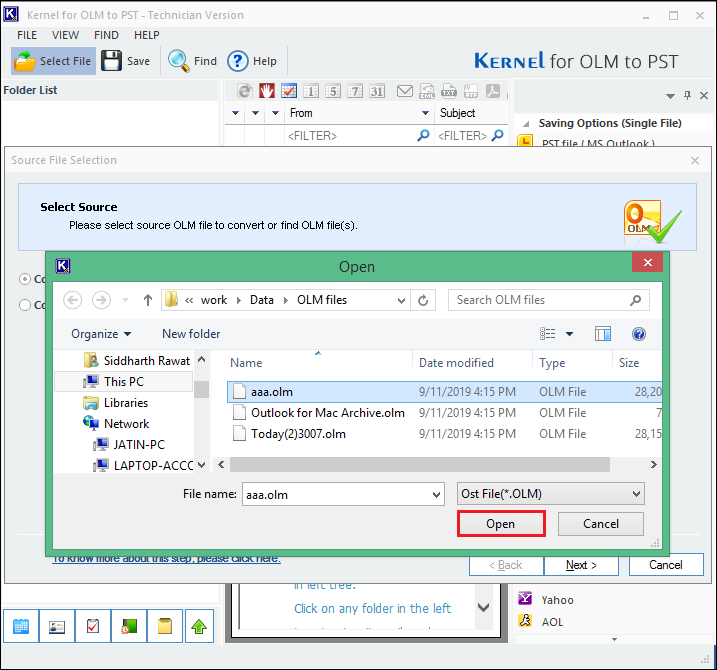
Note: You can click Search to search files on a system drive.
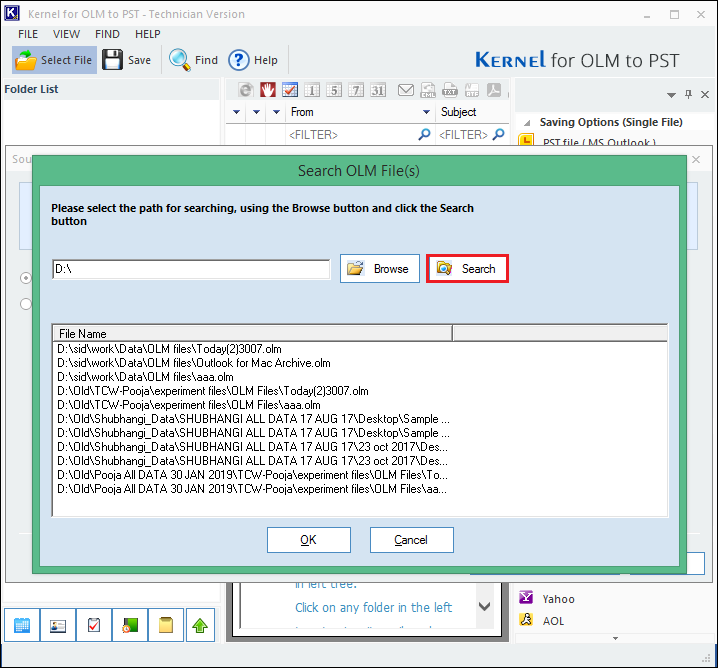
Step 3. After adding the required OLM file for conversion, click Next.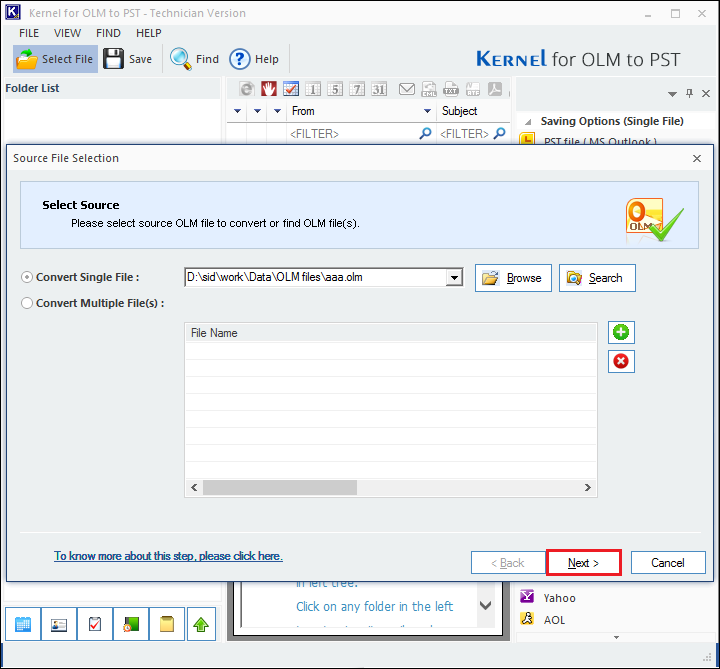
Step 4. The Process Information window will appear. Click Finish.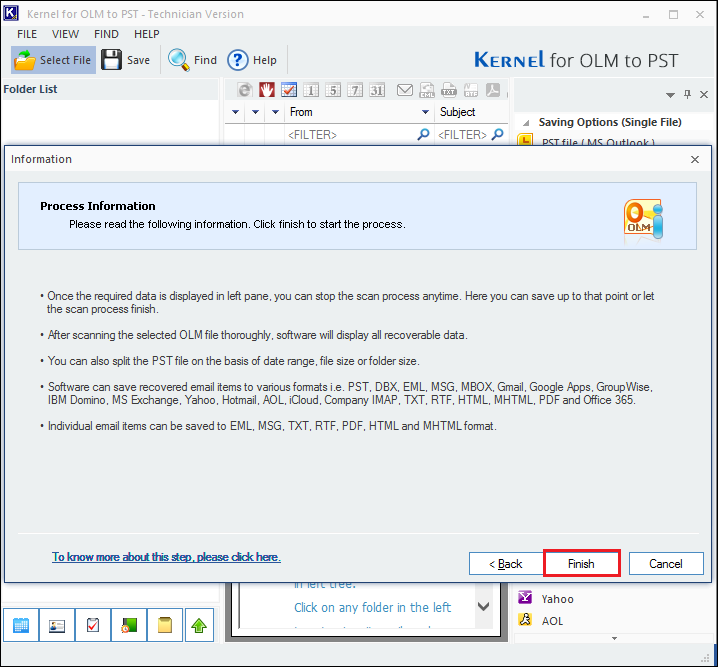
Step 5. The OLM file mailbox items will get listed. Select the required file folder from the left panel to view its preview.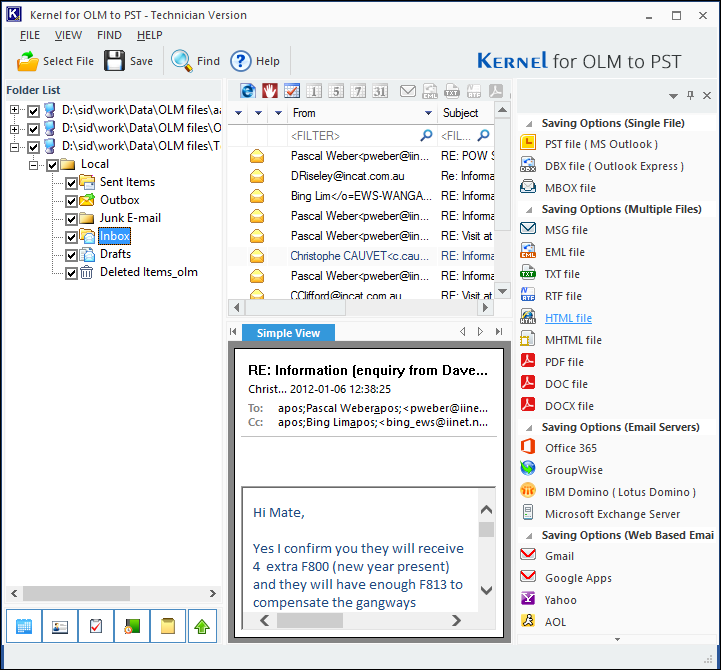
Step 6. Click on Save button and select the output type as PST file (MS Outlook) and click Next.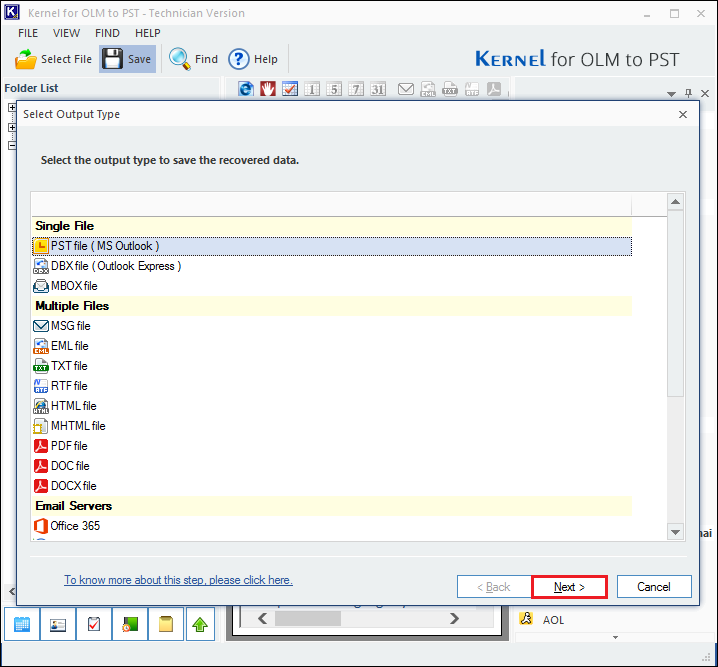
Step 7. Apply the filters provided as per your requirement on different criteria – From, To, Subject, Folder Name, Item Type, Date Range, etc. and click Next.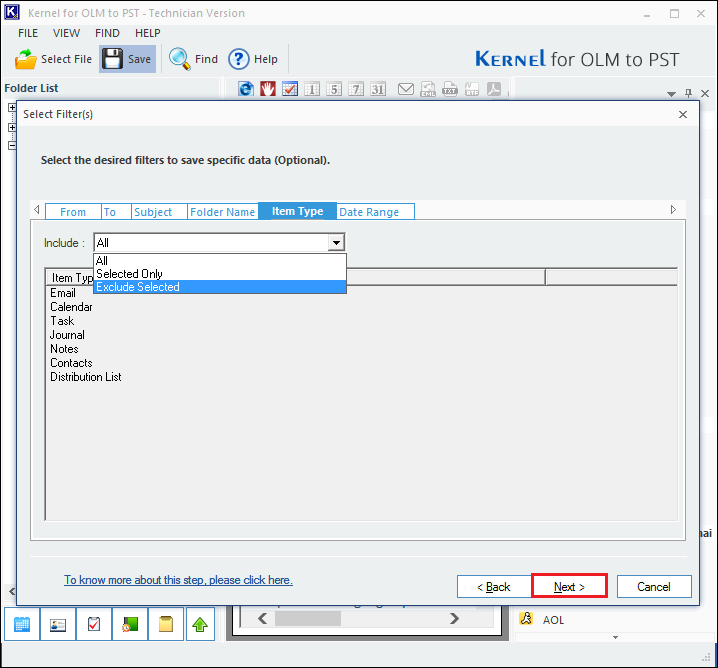
Step 8. In the Manage Recovered PST dialogue box, you can apply filters like split PST file or Attach prefix to store name. Once done, click Next.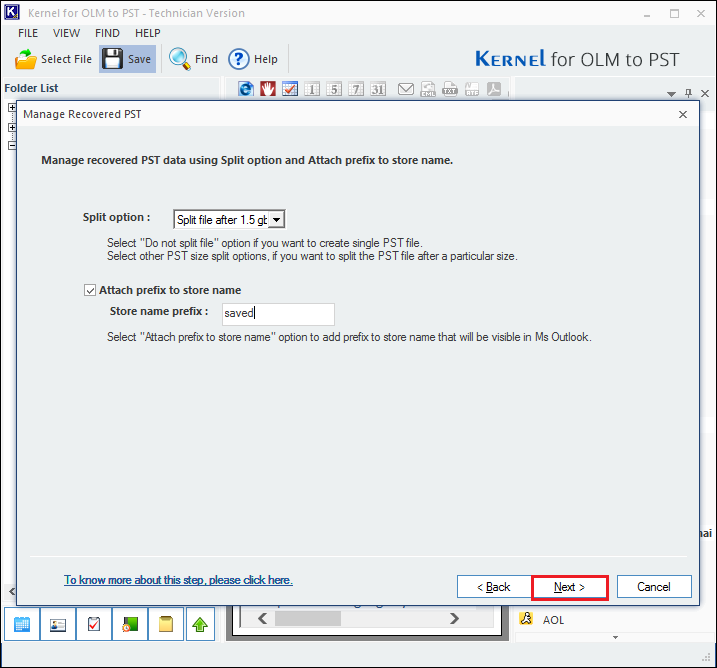
Step 9. Now provide the destination path to save this converted PST file and click Finish.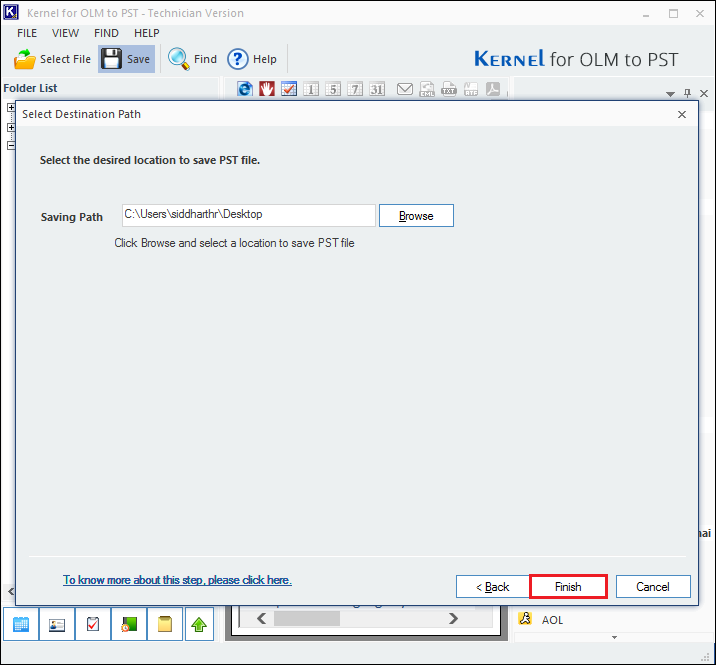
Step 10. Finally, it will show the successful migration dialogue box after migration is completed. Click OK to end the process.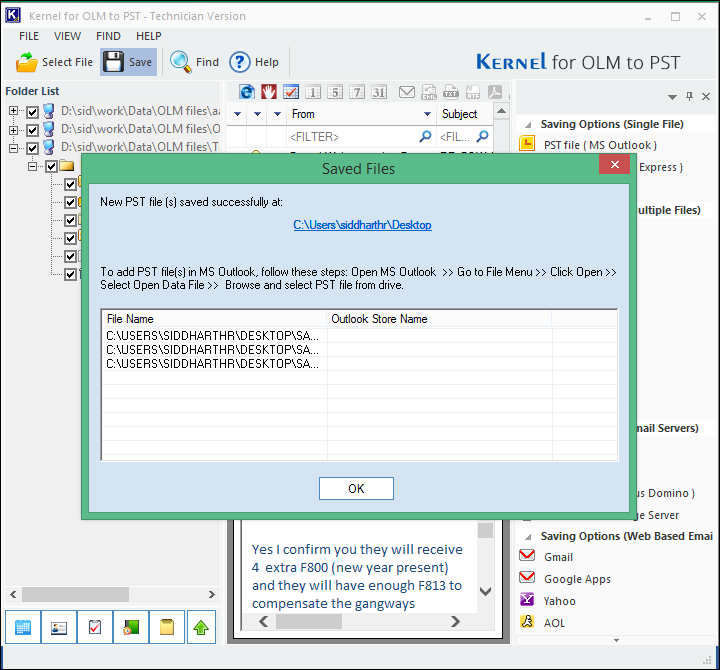
Conclusion
In this blog, we discussed how to import PST to Outlook for Mac application and export OLM files to Outlook PST with IMAP account configuration. However, there are many limitations of the manual procedures such as lengthy and time-consuming process, risk of data loss, etc. We have also provided a simple and efficient OLM to PST converter software for seamless conversion process. With this software, you can even import OLM files to Gmail, Office 365, and other platforms.


