Read time: 5 minutes
If you’re a Rackspace user, you may have been affected by the recent cyberattack that caused a massive outage on their Exchange Server. As per the last update, Rackspace recommends that users migrate their emails to Microsoft 365 & even offer free licenses until their servers are back online. It can be a confusing task for those unfamiliar with the migration process, especially when dealing with OST files. Don’t worry, as we will guide you through the process of migrating from Rackspace Hosted Exchange OST files to Microsoft 365 so that your emails will be accessible without any hassle.
Migrate Rackspace Hosted Exchange OST File to Microsoft 365 via EAC
The Exchange Admin Center (EAC) is the most viable platform for executing this transition. Here are steps to follow when migrating:
- Prepare your existing Rackspace environment
Before migrating to Microsoft 365, it’s crucial to review Rackspace so that the data is optimal for the migration. This step includes reviewing mailboxes, distribution lists, contacts & user accounts, as well as securing all necessary permissions for access. - Obtain the Rackspace server details
To start the migration process, you need the details of the Rackspace server hosting your mailboxes. Navigate to your Rackspace account and obtain this vital information. Specific login steps to locate the details may vary depending on the Rackspace email account type - Select a suitable Microsoft 365 license plan
Choosing the right Microsoft 365 license plan that suits your organizational needs is vital before starting the migration. Know the features, capabilities, and costs, then choose the plan as per your organization’s requirements. - Create the Migration endpoint & migration batch.
Connect to Exchange Online & set up a migration endpoint via the PowerShell cmdlets. An endpoint is a location that Exchange Online uses to communicate with the on-premises or hosted Exchange organization. Create a migration batch with a CSV file and define the source email account & its password, target email account and other relevant settings. After verifying the endpoint, start the migration batch.
Archive service subscription
Firstly, it is important to note that you can easily retrieve your emails if you have subscribed to Rackspace’s Archive service. The archive feature is functional and not impacted by this outage. Here are the steps to retrieve your emails using the Archive service.
- Sign in to the Archive Manager with your user credentials.
- Go to Domains & tap on Email Archiving.
- Choose your domain & tap on Manage My Archive.
- After successful sign-in, look for the archive you wish to access.
- Lastly, you need to download the archive in the OST format and import it to Office 365.
Note: Suppose you want to migrate old Rackspace Hosted Exchange OST files, and you notice that those files are inaccessible/corrupted. In this case, perform OST file repair and make the data accessible before migrating to Office 365.
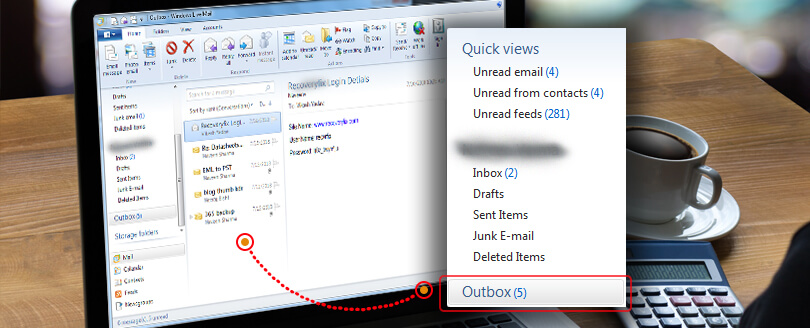
For users who want to access their archived data locally before migration, it may be necessary to import OST into Outlook first so mailbox contents are usable within the Outlook environment.
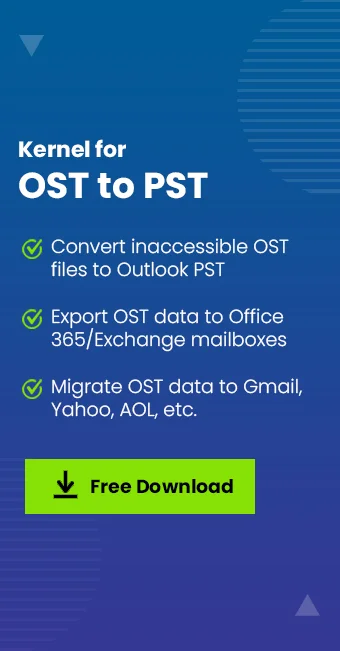
But what if you want to migrate from OST to Office 365 automatically? Well, the solution lies with the Kernel for OST to PST Converter – an exceptional OST to PST converter tool specifically designed to cater to the problematic scenarios that render access to old emails challenging.
This tool directly migrates Rackspace-hosted Exchange OST file to Office 365 in a few easy steps. For hands-on experience, get the free trial version, which saves 10 items/folder to Office 365 mailbox. Once satisfied with the features and capabilities, purchase the license to migrate unlimited data of any file size.
Step-by-Step Process to Migrate Rackspace Hosted Exchange OST file to Microsoft 365
Now, if you want to use this OST to PST Converter, here’s how to proceed:
- Firstly, access the tool and browse to select single or multiple OST files.
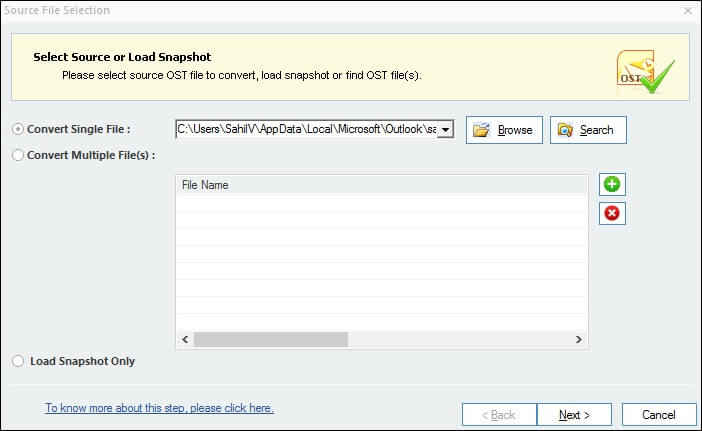
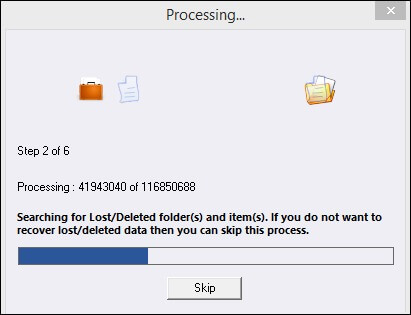
- Once you’ve chosen the OST file from its location, the process will begin, and you can view its content in the preview pane..
- After selecting the content, choose the Office 365 option as the output type.

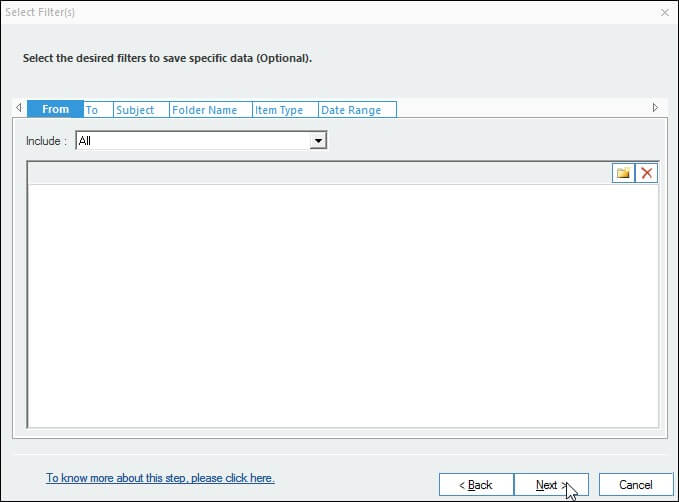
- Apply the required filters like From, To, Subject, Folder Name, Item Type & Date Range to get the specific data you need.
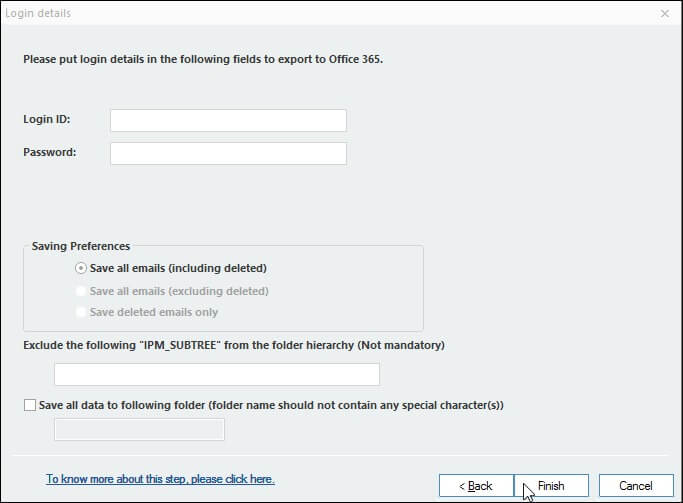
- Finally, provide your login credentials & click on the Finish button to start the automatic migration process.
Wrapping up
After considering the risk factors associated, it is safe to say that automation offers a less cumbersome & more reliable way to migrate emails from Rackspace Hosted Exchange OST files to Microsoft 365. Kernel OST converter helps you migrate large files without any loss of data and also facilitates multiple file conversion in batches. Moreover, its user-friendly interface adds an extra layer of convenience for users.
That is why you should use this software to switch from Rackspace-hosted exchange OST file to Microsoft 365. Therefore, now that the reason for switching and the perfect tool is known, go ahead and make a successful transition from your old to your new email domain without any hassle or risk.