

Read time: 9 minutes
User Query: Can I import an OST file into Outlook and access its mailbox content?
Ans: Yes, you can access OST file data in Outlook, but not directly. Convert the OST file to PST first, then import the output PST into Outlook to view the OST mailbox content.
You must be wondering why I need to convert the OST to PST? You have to do this because Outlook doesn’t support OST import operations. You can only import the PST file into it. The OST files are created automatically when you configure Outlook with an email server and allow you to access emails in an offline state. Microsoft never designed it to be a file type that you can move or import into any application, be it Outlook itself. For sharing, moving, or archiving mailboxes, you always rely on PST files.
Why Import OST files into Outlook?
There are certain reasons to import an OST file depending on the user’s situation. But the most significant ones that compel the user to import OST files are listed below:
- Performing OST recovery to retrieve data from corrupt files.
- Exchange Server downtime/maintenance.
- The Windows Domain Controller got disconnected.
- To migrate data from one system to another.
- To create a backup or archive a mailbox.
Things to do before you import a PST file into Outlook
For an error-free OST import operation, take care of these things:
- Microsoft Outlook email client: To access the OST and convert its content into PST, you must have Outlook installed on your system. Moreover, make sure it is updated to the latest available version.
- Disable antivirus: If you are using any antimalware program, disable it temporarily or exclude your OST files from scanning. The scanning can lock the OST file and cause issues during conversion.
- A professional OST to PST converter: If you are trying to import an orphaned, disconnected, or corrupt OST file into Outlook, you will need a specialized OST converter tool.
- Location of the OST file in your system: To import OST into Outlook, it is necessary to know the OST file location. Here are the steps to locate the OST file.
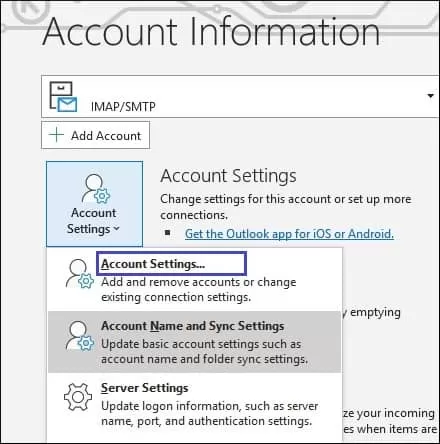
- Open Outlook, then click on the File tab. Click on Account Settings, then select Account Settings from the drop-down menu.
- Now, click on Data files, select your OST file account, and click on Open File Location.
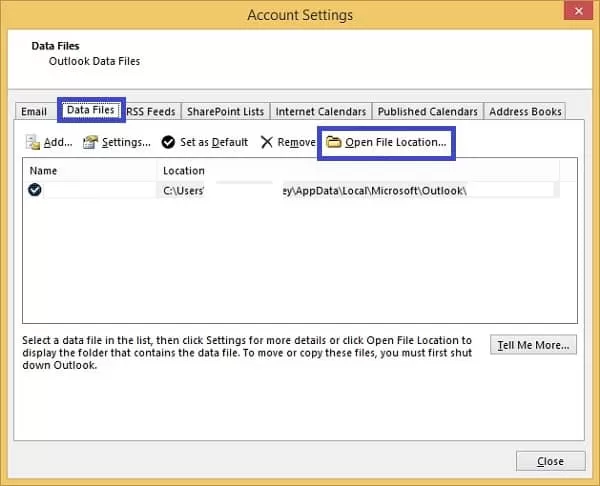
- Now, the new window will open with the default location of your OST file.
- Open Outlook, then click on the File tab. Click on Account Settings, then select Account Settings from the drop-down menu.
How to import OST file in Outlook effectively?
To add the OST file into Outlook, we will first convert the OST file into PST format and then import the PST file into Outlook.
Part 1: Methods to Convert OST file into PST
Use the following methods to export the Outlook OST file into PST.
Method 1. Export the OST file into PST
The Outlook’s export function allows you to save every data item and folder from the connected OST file into a portable PST file. This method also preserves the mailbox folder structure during conversion. Follow these steps to export the OST file:
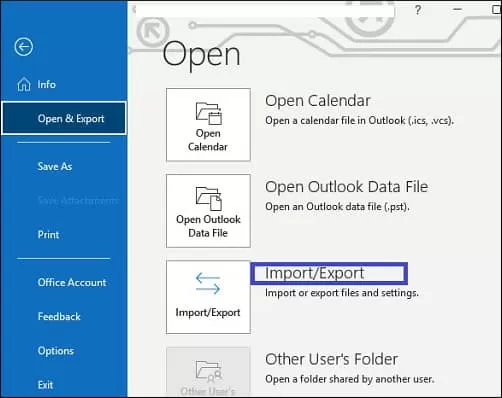
- Open Outlook, then click on the File tab. Select Open & Export and then click on Import/Export.
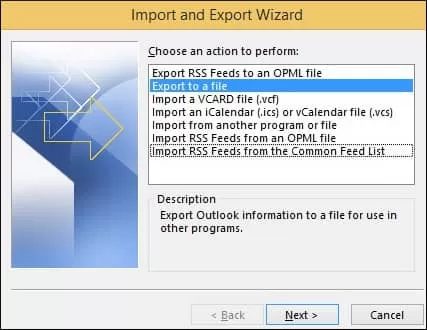
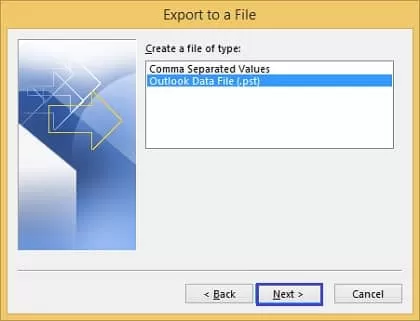
- Click Export to a file; then click on Next.
- Now select the Outlook data file .pst and click on Next.
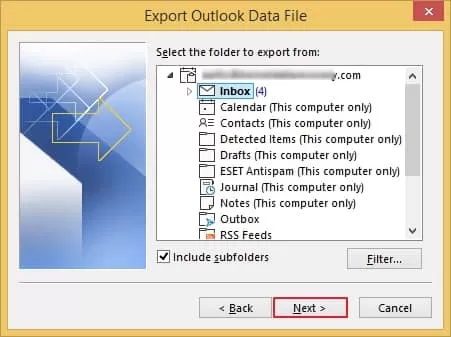
- Select the mailbox (OST file) you want to export. Click Next.
- Click the Browse option and specify the location to save the PST file. Select Replace duplicates with items exported option, then click on Finish.
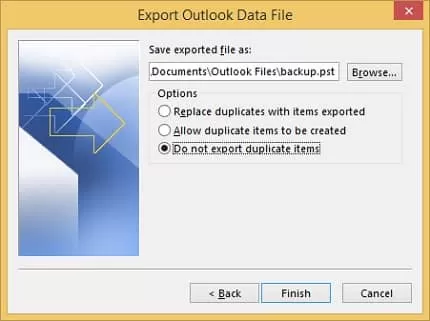
The new PST file containing all OST data will be created at your specified location.
Method 2. Manually move data from OST to PST
You can also create a new PST file and move the OST file data into it. Here are the steps to follow:
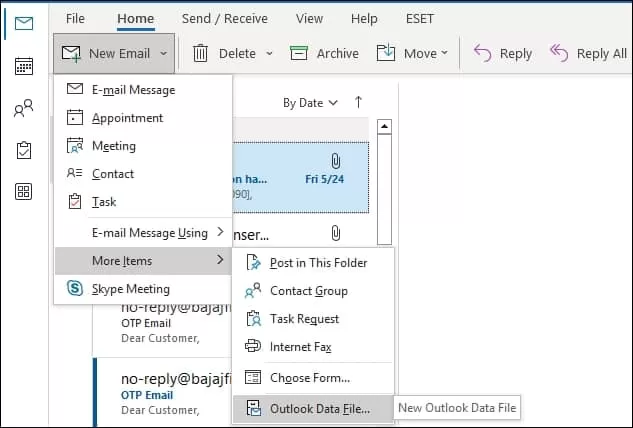
- Launch Outlook, click New Email, select More Items, and choose the Outlook Data File option. It will create your new PST file.
- Choose the emails from the platform and right-click on them to select the Move option > Other folder.
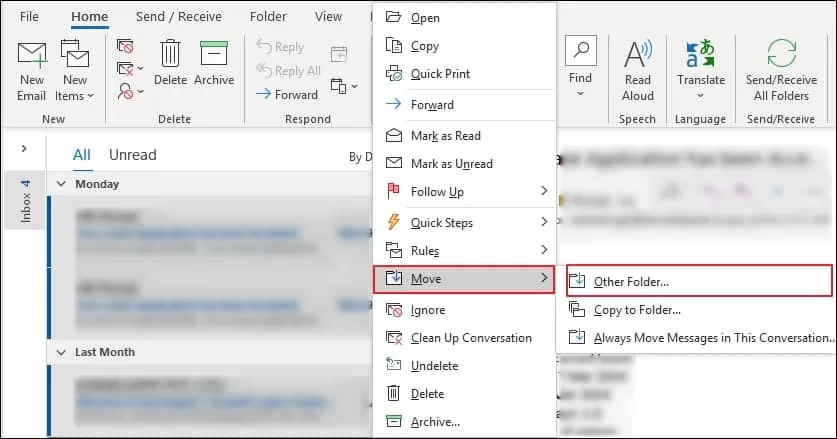
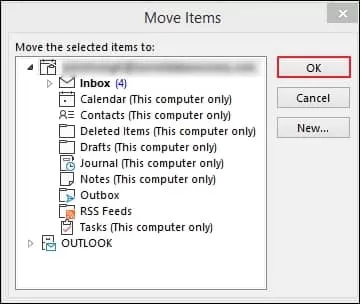
- Now, select the PST file (created in previous step) and click OK to copy the OST file items into the new PST file.
Method 3. Using the Archive feature
This method is not instant. But it helps to automate the task of saving OST emails or folders into PST using the Outlook Archive function. The Archive is a built-in feature in Outlook that helps you archive old emails from OST files into PST format. Follow the steps below to execute the task.
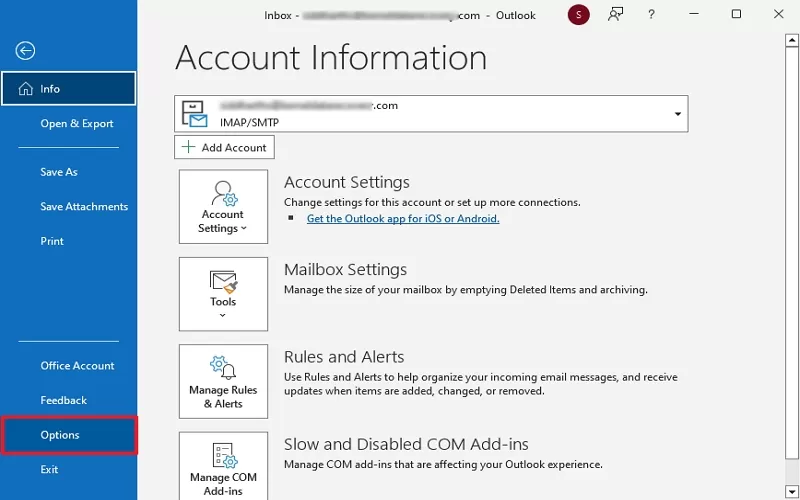
- Open Outlook, then click on the File tab, and select Options from the left panel.
- Select the Advanced option, then click on Auto Archive Settings.
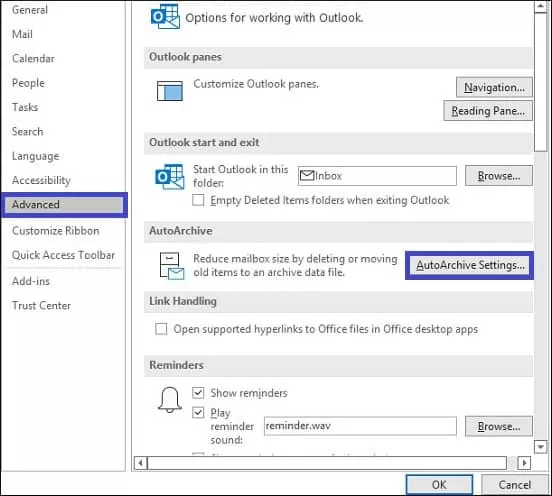
- Now, set up the auto archive settings as per your requirement. Set the day count to run auto archive, and set a count to clear old mails. After that, click OK.
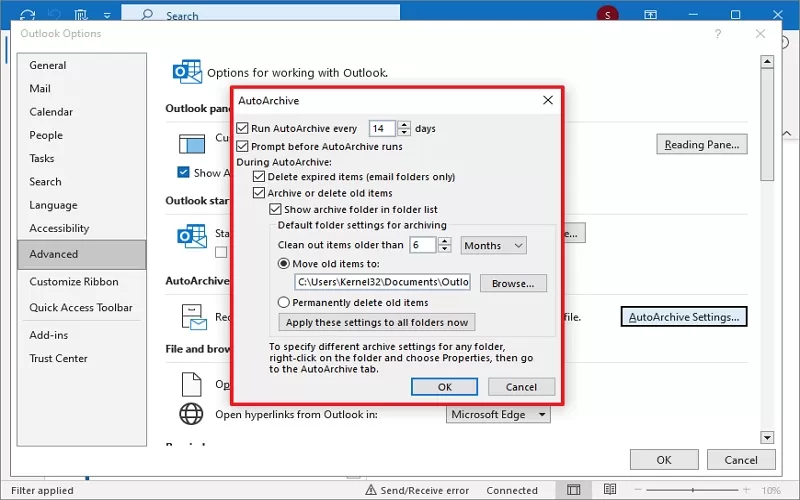
Outlook will automatically archive the OST data into PST format.
Method 4: Use a professional OST to PST converter
The above methods only work if you have Outlook installed, and the OST file is easily accessible. But to convert a disconnected or orphaned OST file, you need a dedicated OST to PST converter tool. Moreover, if your Outlook profile is corrupted or becomes inaccessible, an OST converter is your only way to save the OST file into PST.
Use the Kernel for OST to PST Converter tool for safe and accurate OST file conversion. You can convert single or multiple OST files with our tool. Furthermore, to avoid PST file corruption issues, the tool allows splitting the output PST file. It even helps you to retrieve OST file items like emails, attachments, calendars, contacts, tasks, etc., and save them to Outlook PST or Office 365/Exchange Server accounts.
It comes with the following advanced features:
- Converts multiple oversized OST files easily.
- Recover permanently deleted items of the OST file.
- Display recovered mailbox items in the preview section.
- Advanced filters for selective data conversion/migration.
- Maintain the original hierarchy and keep data safe from any losses.
- Save OST emails to PST, MSG, EML, HTML, and PDF formats.
- Support migration of multiple OST files to different servers and webmail.
Part 2. Import PST file into Outlook
After the OST file conversion, import the PST into Outlook with these steps:
- Launch Outlook, go to File tab and click on the Import/Export option.
- Click on the Import from another program or file option from the Import and Export Wizard.
- Select Outlook Data file(.pst) file format.
- Browse the location of the converted PST file and check the box of Replace duplicates with items imported.
Conclusion
For an active OST file (connected to Outlook), use the native export function to save the OST into PST and import the converted file. This is the most reliable way to import OST into Outlook. However, if your Outlook is not connected to an Exchange Server or the OST file is corrupted, manual OST conversion methods are insufficient. In that case, consider using the recommended OST to PST converter software. It can repair a corrupt OST file and save the recovered data into a healthy import-ready PST file. The tool also offers a free trial version for risk-free OST file conversion.
FAQs
A- Outlook cannot import the OST file directly. You have to first convert the OST into PST and then import the PST into Outlook.
A- Yes. You can either locate ScanOST.exe and use it for basic fixes or use a professional OST file repair tool.
A- If you delete the OST file intentionally or unintentionally, don’t panic. After deletion, the data moves into the Deleted Items folder. You can restore data from there until the retention period.


![How to Export Contacts from Outlook? [Direct Methods]](https://www.nucleustechnologies.com/blog/wp-content/uploads/2019/04/Complete-Guide-to-Export-Contacts-from-Outlook.jpg)