Related Posts
Guide to Migrate Public Folders from Exchange 2010 to 2016

Written By
Sandeep Saxena
Updated On
October 06, 2023
Read time: 5 minutes
Companies relying on on-premises Exchange Server still use public folders for data sharing. Public folders provide an excellent way to consolidate files, archives, and other common information between teams and the company.
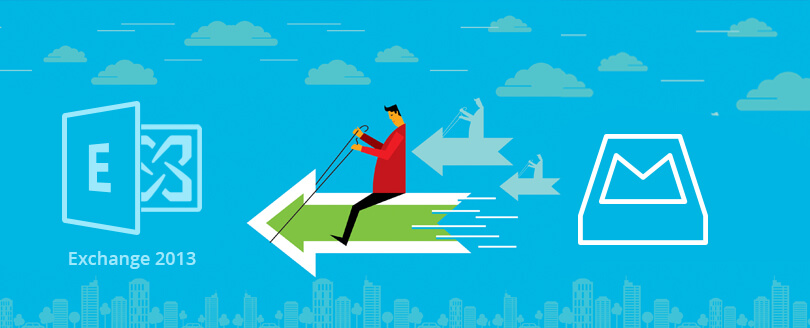
Exchange Server administrators often need to migrate public folders from one server to another due to various limitations or upgrade to a newer Exchange version. When it comes to migrating from Exchange Server 2010, you need to upgrade to a newer version as Exchange 2010 has reached the end of its support life cycle. So, there will be no more security patches, bug fixing, and service packs.
Today, we will help you understand how you can migrate public folders from Exchange 2010 to 2016 as an administrator.
Before you begin Exchange migration software for public folder, there are a few things that you need to keep in mind:
The batch migration is performed using the ‘MigrationBatch’ cmdlets and ‘PublicFolderMigrationRequest’ cmdlets for troubleshooting. Apart from that, you will need to use the following PowerShell scripts:
Export-PublicFolderStatistics.ps1: It allows you to create the folder name-to-folder size mapping file.
Export-PublicFolderStatistics.psd1: It is used by the Export-PublicFolderStatistics.ps1 script and should be stored in the same folder.
PublicFolderToMailboxMapGenerator.ps1: This script enables you to create the public folder-to-mailbox mapping file.
PublicFolderToMailboxMapGenerator.strings.psd1: This file is used by the above script and should be stored in the same folder.
Create-PublicFolderMailboxesForMigration.ps1: This script is used to create the target public folder mailboxes for the migration. It also calculates the number of mailboxes required to control the estimated user load based on the guidelines for the number of user logins per public folder mailbox.
Create-PublicFolderMailboxesForMigration.strings.psd1: This cmdlet is used by the above script and should be stored in the same folder.
You can download all these scripts from https://www.microsoft.com/en-us/download/details.aspx?id=38407
Now that you know how to create a migration batch for the public folder, you can start with the migration. The migration process contains the following steps:
After completing that, complete the public folder migration by using the following command:
If the public folders are successfully migrated, the status will display all the public folders. This is the process to migrate public folders from Exchange 2010 to Exchange 2016.
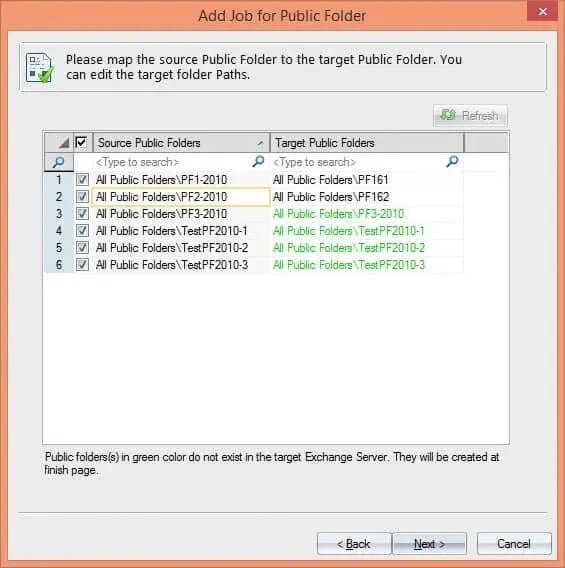
However, it is not feasible for every user to follow the above process, as it’s very complicated. It will also be tough to migrate exchange server 2013 to 2016. So, they need an automated solution to migrate the public folders. Although there are various Exchange Migration tools that can be used to migrate the mailboxes, Kernel Migration for Exchange is exceptional. It is integrated with intelligent algorithms that enable you to perform quick migration. With this tool, you can accomplish various types of Exchange Migrations in different environments.
It even allows you to perform pre-migration analysis and post-migration tasks while providing end reports. The tool supports almost every Exchange Server, including 2019, 2016, 2013, 2010, 2007, and 2003. With this solution, you can easily migrate all the public folders. It also migrates from Exchange Server to Office 365, so if you manual Office 365 migration failed as the recipient is not a mailbox, then you can use the software and map the mailboxes correctly before starting the migration.
Migrating Exchange public folders is an essential task for businesses that want to upgrade to a newer version. The process follows a specific approach for migrating the public folders. However, the manual approach is a bit tricky. This article highlights both the manual and automated approaches to migrating your public folders from Exchange 2010 to Exchange 2016.