Summary: New to photo editing and want to fix faded photos? Understand the reasons for faded pictures and then use Adobe Photoshop. PaintShop Pro, GIMP, or online tools for faded photo restoration easily. If your digital images get corrupted, use the recommended high-quality photo repair tool to make photos accessible.
“Last night, I found some old digital photos of my family but were quite faded. Definitely, the camera skills need an upgrade. I’ve never edited photos before. So, what are the easiest solutions to fix faded photos?”
With the faded family pictures, you may feel like a loss of heritage and frustration. They also cause problems when you try to print them because of faded, dull, or off-color complexions. So, you need the finest and most effective solutions to fix faded images.
In this regard, this guide will provide the best beginner-friendly solutions to enhance, and repair faded photos in no time. Let’s get started and make your faded family pictures vibrant!
Why the Digital Images Faded?
Digital images get dull and colorless due to many reasons, so we’ve shortlisted some significant of them. There are:
Using Low-Quality or Old Cameras: Low-resolution or older cameras may lack color and contrast, which leads to faded/outdated images.
Bad Lighting During Capture: Images also get faded, especially in skin tones or background colors, when they are taken in low or uneven light and brightness.
Compression Loss: Repetitive compressing the images loses a small bit of data that can reduce the color depth and image quality, making them fade.
Using Old Storage Devices: Images may also suffer from bit degradations, which affects the images, sometimes leading to fade/dullness.
Inappropriate Display Settings: Sometimes photos are good, but improper display, like low brightness or poor contrast, can fade pictures.
Partial Images Corruption: If the image files are corrupted due to system errors or bad sectors in storage devices, the image quality gets distorted and causes fading.
After analyzing the reasons, now let’s understand the old faded photo restoration techniques that truly work.
Top Solutions for Faded Photo Restoration
Here are some of the best ways that will help you to fix faded photos effectively. Go through each and pick old faded photo restoration solutions accordingly:
Method 1. Fix Faded Photos using Adobe Photoshop
Adobe Photoshop is an effective software that many professionals use to create, enhance and modify digital images. Primarily, it helps to edit, retouch, and modify graphics. Here are the steps to follow to fix faded photo in Photoshop:
Open your faded photos with Adobe Photoshop.
Right-click the Background layer option and choose Duplicate Layer.
Now, tap on the Image menu and try Auto Tone, Auto Contrast, and Auto Color.
Go to images, then Adjustments, and tap on Brightness/Contrast. Adjust contrast and brightness to make your photo balanced.
Note: For faded color photo restoration and tone adjustments, use Levels (Ctrl+L) or Curves (Ctrl+M).
Again, go to Image, then Adjustments, and tap on Hue/Saturation.
If your photo looks better, tap on File and click Save As to save faded photos in a high-quality format like PNG or JPEG.
Method 2. Fix Faded Photos using PaintShop Pro
PaintShop is another alternative to Adobe Photoshop. It is cost-effective and powerful photo editor software for Windows OS. You can also use this software for faded photo restoration. So, follow the steps below to repair faded photos:
Open your faded photo with the PaintShop Pro application.
Tap on the Image tab, choose Resize, and click on Advanced AI Powered Settings. Check the Resample Using option and select the AI Powered option from the dropdown.
Click the Adjust tab, tap on Color, and choose Fade Correction. Adjust the amount of correction control accordingly to make your photo more natural. Click OK.
Again, tap on the Adjust tab, choose Add/Remove Noise, and click the AI Artifact Removal option to remove unnecessary artifacts throughout the faded photo restoration.
Now, go to the File tab and tap on the Save option to save your recovered photos in a high-quality format.
Method 3. Fix Faded Photos using GIMP
GIMP is a free and effective software to edit and repair faded photos quickly. Below is the stepwise procedure that will help you with old faded photo restoration. Follow them carefully:
Open your faded photos with GIMP software and tap on Layer, then Duplicate Layer to create a duplicate layer.
Tap on the Colors tab > Levels. Adjust the Levels from the Histogram using the middle (grey) slider to fine-tune the mid-tones and overall brightness. Click OK.
Now, go to Color, then Curves. From Channel dropdown, adjust individual color channels (Red, Green, Blue) to fix specific tonal issues. Click OK.
Again, tap on Colors, then click Color Balance. Adjust Shadows, midtones, and Highlights to fix overall color casts accordingly. Click OK.
Click Colors > Hue-Saturation. Adjust the Hue, Saturation, and Lightness of the photo. Click OK.
Tap on Colors > Selective Color. Adjust the amounts of Cyan, Magenta, Yellow, and Black within specific color ranges. Click OK.
After these adjustments, your faded images will be fixed. Zoom in on the image to check for the need for refinement.
Click File and tap on Export As to save your restored images with a new name and file format.
Method 4. Fix Faded Photos using Online Tools
Several online tools can easily help in old faded photo restoration with their automated refurbishing procedures. They are user-friendly, effective, & give quick results and can even handle issues like fading, blur, scratches, etc. However, not every tool is reliable, so opting for the best and most effective tool is necessary to make a faded photo perfect.
Can you imagine that your photo got corrupted after performing a faded photo restoration procedure? Or do you need to recover or repair corrupted photos?
There’s always a possibility that the pictures might be damaged while editing due to human or technical error. So, you should rename the file, change the image format or use the SFC tool to repair and recover damaged/corrupted photos. But what if these methods fail or give undesired results?
Reliable Solution to Fix Photo Corruption
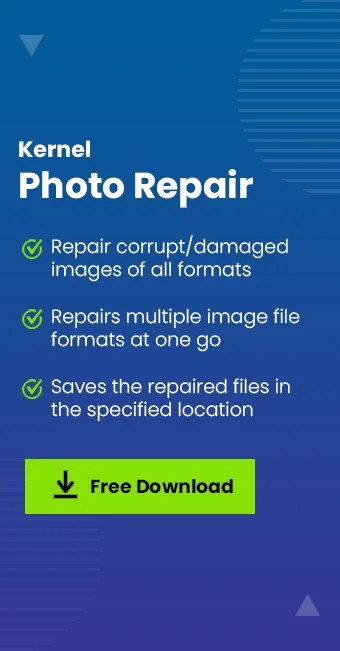
When manual methods fail to fix corrupted images, a professional Photo Repair tool is needed. Kernel Photo Repair is one such effective and powerful tool that helps to repair damaged/corrupted photos quickly. It also restores pixelated, distorted, disoriented, greyed-out, pictures from various formats, such as JPEG, JPG, BMP, GIF, RIFF, etc., easily. Key Highlights of the tool are:
Drag/drop feature to add multiple image files quickly.
Preserve original image structure, properties, and quality.
Repair multiple corrupted images of any format in one go.
Support RAW files from cameras of all brands and devices.
Resolve all kinds of image file issues and errors effectively.
Save time and effort with a quick and interactive interface.
Extensive support for all image formats and Windows Systems.
Repair images of external devices such as pen drives, USB flash drives, etc.
Wrapping Up
Faded photo restoration combines digital editing techniques and specialized software. Adobe Photoshop, PaintShop Pro, GIMP, and Online tools can help you to repair faded photos and old faded photo restoration effectively. But, if your images get corrupted during the process or for any other reason, you can restore pictures by changing names or formats.
If you fail to restore images with manual methods, then using a top photo repair tool should be your go-to solution. Download now and take the free trial!!
Commonly Asked Questions
Q-1. What is the best way to restore faded photos?
Using Adobe Photoshop or PaintShop Pro is a popular way to restore faded photos. With the various tools and filters available in the software, you can easily adjust the color balance.
Q-2. Is it possible to repair faded photos at home?
Yes, you can repair faded photos at home with the help of photo editing software on your device.


![How to Repair Grainy Photos? [Instant Solutions]](https://www.nucleustechnologies.com/blog/wp-content/uploads/2020/02/fix-grainy-photos.jpg)