Read time 8 minutes
Many times, upgrading to the most recent version of OS invites new issues and glitches, probably because the product is still in the development phase. Likewise migrating to the most recent version of Windows i.e. Windows 10 can affect the configurations of some existing programs.
One such issue that occurs mostly on Windows 10 platform is “The video stuttering and glitching issue.” It has been reported by many Windows 10 users that their video files fail to play via media player apps or even they encounter lagging issues while streaming videos on the net. There can be many factors which are causing this issue in Windows 10.
Let’s dive in depth and find out the main reason and ways to fix video stuttering and glitching issue.
Causes Behind Video Stuttering and Glitching Issue on Windows 10
If we talk about the reasons that lead to such fatal errors, there can be many. For better understanding of all the users, some of them have been mentioned below-
- An outdated media player on which you are trying to play the video.
- Not installed latest updates from Windows.
- Outdated graphics driver.
- Issues with the system configurations.
- Incorrect settings of the system or media player.
- Mild to severe level of corruption in the video file.
- Heavy virus attack on the system.
Manual Methods to Fix Video Stuttering and Glitching Issue
To get rid of the video stuttering and glitching issue, we need to perform a couple of troubleshooting techniques. Here is the list of troubleshooting techniques that one must execute:
We will go through each of them in a more detailed manner.
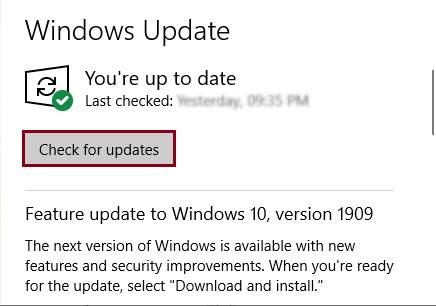
Methods 1: Check for Windows Update
Windows receives updates or patches periodically, the latest updates mostly target common bugs and errors. Although Windows automatically detects recent updates and installs them, sometimes updates may get interrupted. The best way is to check for the updates by yourself. Follow the below mentioned steps to do so:
- Go to Start and enter “Windows Update” in the search box.
- Click on the Update & Security option.
- Click the Check for updates button. If the recent update is current, you can skip this part.
iv>
Methods 2: Update Display Drivers
There is always a high probability that outdated display drives can cause video playback issues. We suggest updating your display drivers should be the priority when you encounter video stuttering issues on your Windows 10 platform. To update your recent display drives, follow the steps stated below:
- Right-click on the Windows icon and select Device Manager.
- In the Device Manager dialogue box, expand Display adapters, right-click the currently installed display driver and select Update Driver Software option.

Methods 3: Scan for Hardware Changes
Scanning your hardware for possible changes might help you resolve the issue quickly. You can scan your hardware components via the Device Manager panel. Here is how you can do a quick scan on your hardware components:
- Press Win + R to launch the Run Command dialog box.
- Type “devmgmt.msc” and hit enter.
- It will launch the Device Manager dialogue box.
- In the Device Manager dialogue box, right-click on the topmost Desktop category and select Scan for hardware changes.
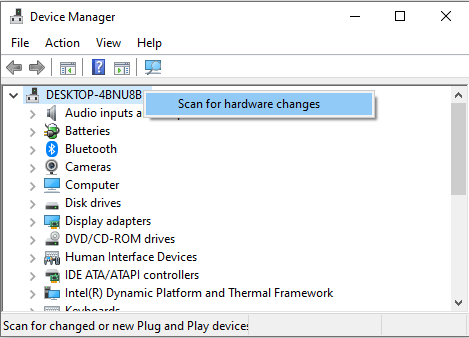
Once the process is complete, close the Device Manager window and try playing the files again.
Methods 4: Check the Power Management Settings
Every computer has a Power Management control system, which allows its users to make changes to their Power plans. Certain changes to the power settings may interrupt specific functionalities of your computer system. We suggest changing your Power Management settings to the default might sort out video playback issues. To make changes to your system’s Power Management settings, follow the steps stated below:
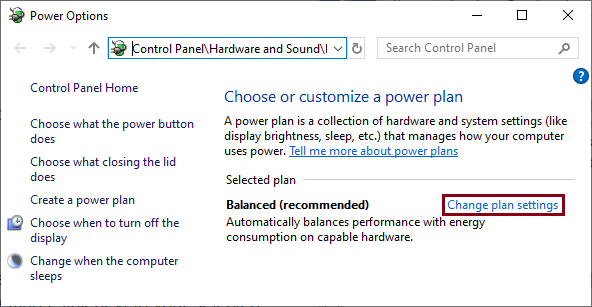
- Open Control Panel and select Power Options.
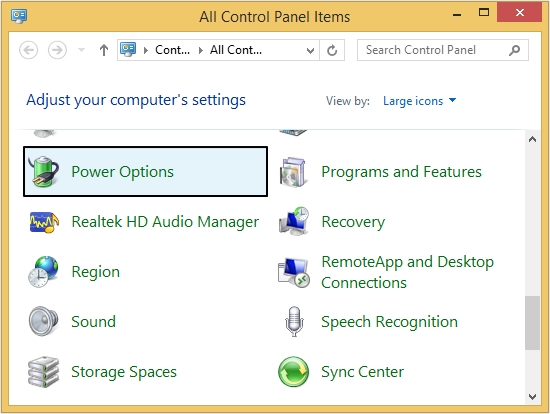
- In the Power Options dialog box, click the Change Plan Settings link.
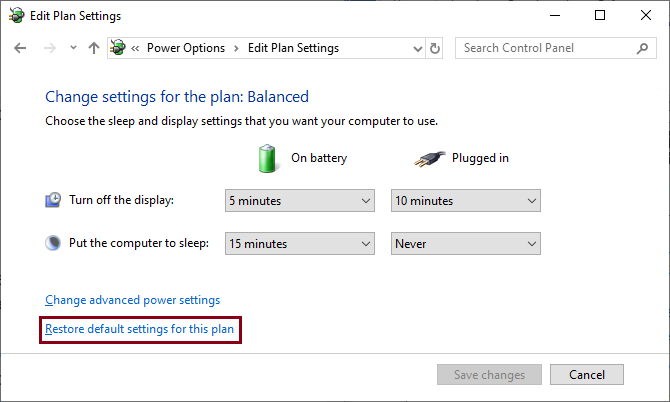
- Click Restore default settings for this plan.
- Click Yes to restore changes back to the default.
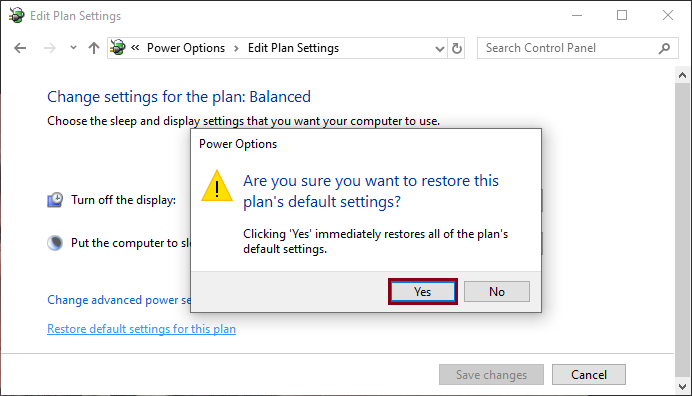
Once you successfully have made the changes, reboot your system and try accessing the videos again.
Methods 5: Change your Windows 10 Wallpaper Settings
Many users reported that when they enable slideshow for their desktop background for a short interval and play a video; every time the background changes, it skips a frame in the playing video. This probably can be considered as a bug in Windows 10. Fortunately, it can be sorted by just changing the settings for your desktop background.
Follow the steps given below to change the appearance settings on your Windows 10 machine.
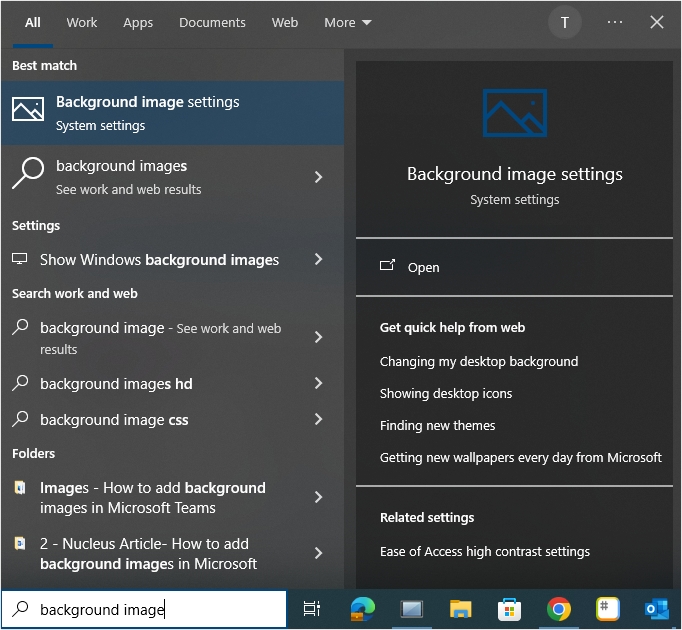
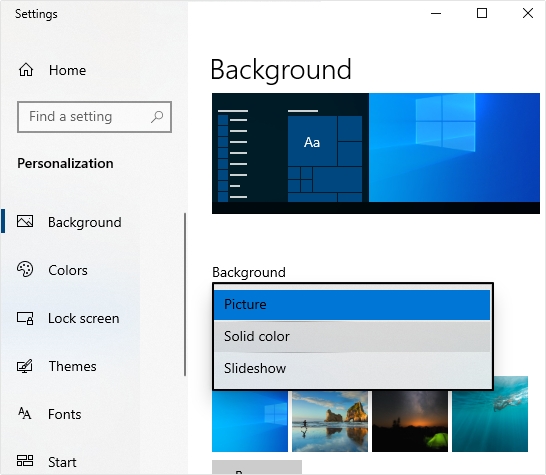
- Go to Start and search Background image settings.
- Change the Background mode by either selecting Picture or Solid color.
You can also change the frequency of your slideshow by changing the time interval to a considerable period like 30 minutes or 1 hour.
Methods 6: Alter the Number of Processors in MSConfig
Changing/limiting the number of processors (in the System Configuration settings) also helped many users to get rid of the video playback/stuttering issues. Though it may not work on every system, it’s worth giving it a try.
Follow the steps given below to change the number of processors from the System Configuration setting:
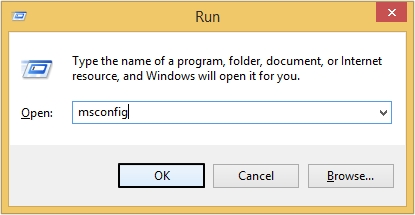
- Press Win + R to launch the Run Command dialog box and type “msconfig” and hit enter.
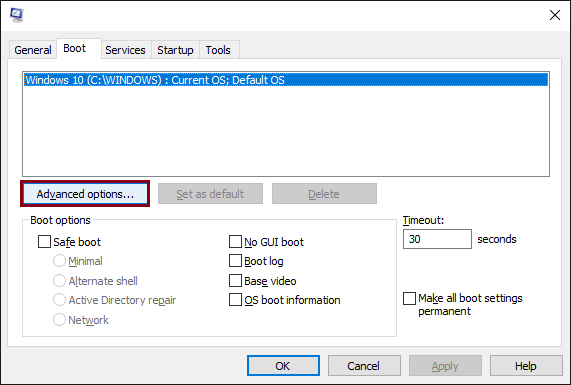
- Select the Boot tab and click on Advanced options.
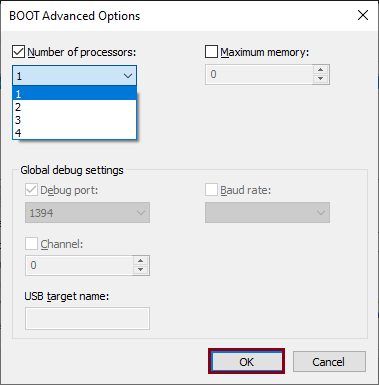
- It will open the Boot Advanced Options dialog box. Limit the number of processors to either one or two. Then, click OK to save the changes.
Note: Other minor solutions to fix stuttering and glitching issues include clearing browser cookies and temporary files on the system, checking the internet connection, switching browser, reducing video size and resolutions, etc.
In case of Corruption, Repair your Video File
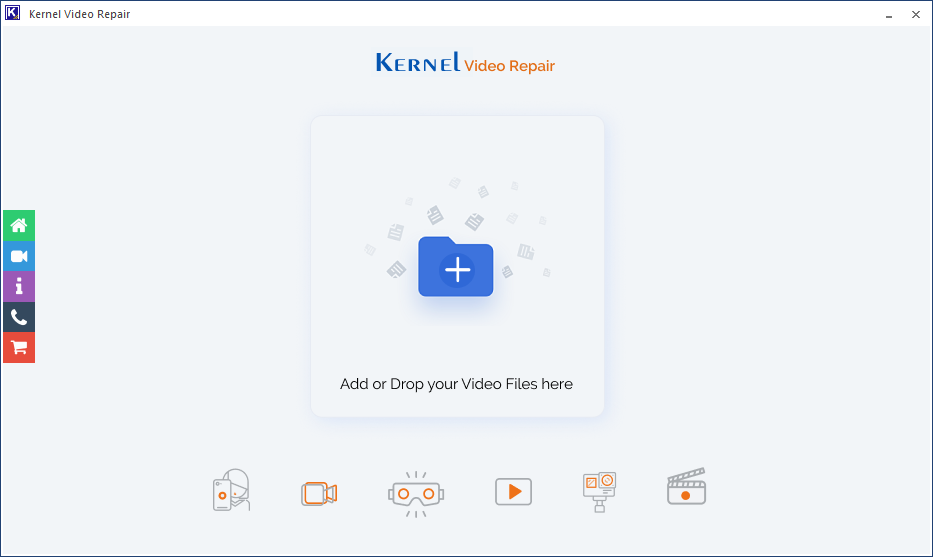
If you are done with almost every measure to fix the video inaccessibility issues and nothing seems to be a help, chances are that videos have gone corrupt. Corrupt videos will never become playable until the corruption or damages are completely fixed. To fix this, the best way is to try a reliable third-party video repair tool. We recommend using Kernel Video Repair to repair your corrupt or damaged videos. The tool is well equipped with every advanced technology that brings back the original state of corrupt videos and makes them playable again. Moreover, the tool offers support for a wide range of video file formats like MP4, MOV, MPEG, M4V, MKV, AVI, etc.
Moreover, the tool offers support to a wide range of video file formats like MP4, MOV, MPEG, M4V, MKV, AVI, etc.
Wrapping Up
This article contains all the information you require to fix video stuttering and glitching issues in your Windows 10 environment. Make sure you follow all the methods precisely; any irrelevant changes can lead to the scenarios becoming even worse. In case of corruption to the files, you can opt for the recommended Kernel Video Repair tool for an instant solution.