Outlook is one of the advanced email communication platforms that helps you to send and receive emails to anyone and anywhere. It is the most used application nowadays that offers advanced features. However, many times users face 0x8004010F: Outlook data file cannot be accessed error while working on their Outlook. This error typically occurs when Outlook cannot find the PST file, which halts email sending and receiving.
This article will give an overview of this error, common reasons, free manual methods to fix Outlook error 0x8004010F, and an automated solution to fix severe corruption issues from your PST files.
What is the 0x8004010F Error?
The “Send/Receive Error 0x8004010F: Outlook data file cannot be accessed” mainly occurs when you move the Outlook PST file to another location, or Outlook is unable to sync with its PST file.
This error abruptly stops you from sending/receiving emails on the Outlook platform. It will exploit your Outlook experience and throw you into a worst-case scenario and halt your business communications.
So, it becomes essential for users to fix this issue quickly. However, before moving to the solutions, let’s discuss the primary reasons behind the
Prime Reasons for Error 0x8004010F
Here are some of the major reasons behind the Outlook error 0x8004010F:
- Misconfigured Outlook Profile: The most common cause is when the send/receive settings or the data file are redirected to a non-existent or wrong PST file path.
- Corrupted OST/PST File: When your OST/PST file gets corrupted due to sudden Outlook closure, system crash, or large file size, it can throw you the 0x8004010F: Outlook data file cannot be accessed error.
- Incorrectly Configured Send/Receive Settings: The send/receive group for your email account might be disabled or misconfigured, failing to include the correct folders.
- Damaged Outlook Profile: The profile that manages your account settings and data file connections itself can become damaged over time.
- Antivirus Interference: When your Antivirus application abruptly stops your Outlook from working smoothly and locks your PST file.
How to Fix Outlook 0x8004010F Error?
Before knowing about the reliable solutions to fix the Send/Receive error in Outlook, make sure to restart your Outlook and check your internet connectivity. If these two things are ok, then move to the following methods:
Method 1: Locate the Outlook data file
Make sure to check the location of Outlook PST file on your computer. Find your Outlook data file easily by going to the File tab in Outlook> Account Settings > Data Files tab. The path listed there shows exactly where your PST file is stored on your computer.
Method 2: Disable Windows Defender
Temporarily disable Windows Defender to resolve the “Outlook Data File Cannot be Accessed” error. Go to Windows Security > Virus & threat protection > Manage settings. Disable “Real-time protection” on your system. Remember to re-enable it immediately after keeping your system secure.
Method 3: Disable Antivirus
You can also temporarily turn off your antivirus software to fix the Send/Receive error in Outlook. Find its icon in your system, right-click, and choose ‘Disable’ or ‘Pause protection.’ Restart your Outlook and check if the problem is fixed.
Method 4: Create a new Outlook profile
There is a chance that your old Outlook profile gets damaged or corrupted. Thus, create a new Outlook profile to fix Send/Receive error in Outlook.
Step 1: Open Control Panel and click on Mail.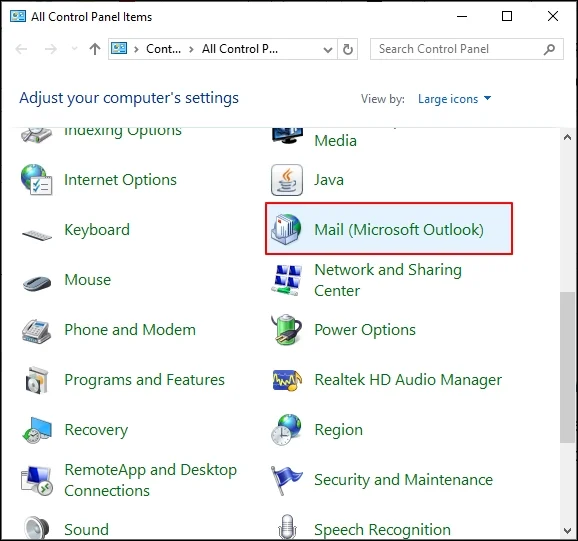
Step 2: In the Mail Setup wizard, go to the Show Profiles.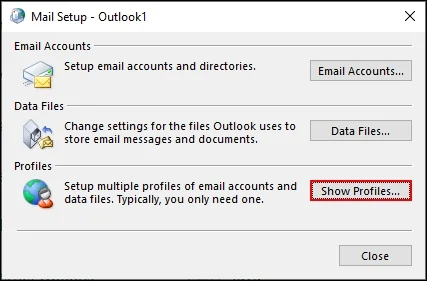
Step 3: In the Mail wizard, click on Add to create a new profile.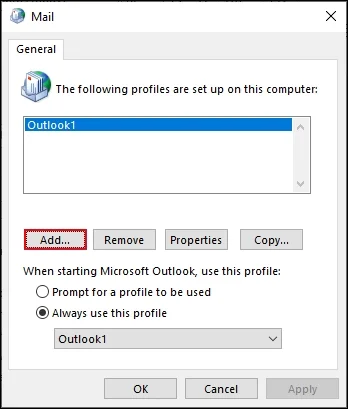
Step 4: Enter Profile Name and click OK.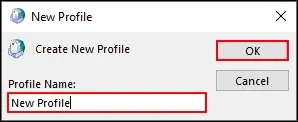
Step 5: In the Add Account wizard, enter account credentials and click Next.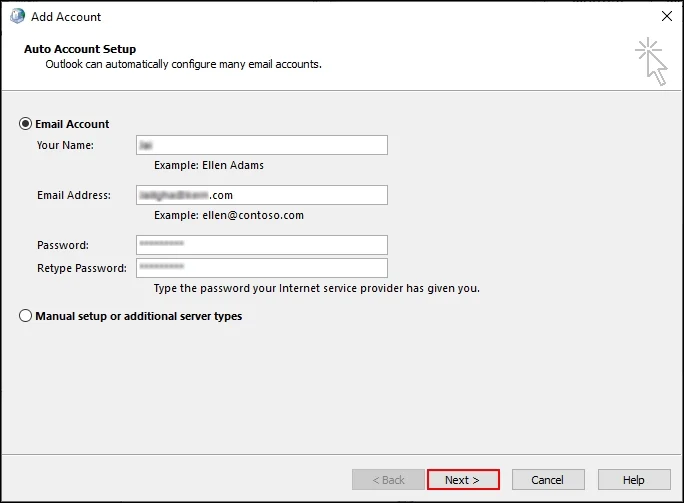
Step 6: Follow ongoing instructions to complete the creation of new Outlook profile.
Note: After creating a new profile, make it the default one to use.
Method 5: Check Outlook Settings
If your Outlook settings are improper, you can face various Outlook-related errors. Reviewing your Outlook settings can help you resolve common issues like Outlook error 0x8004010F. Here’s how to do so:
Step 1: Open Outlook and click on File.
Step 2: In Account Information, click Account Settings > Account Settings.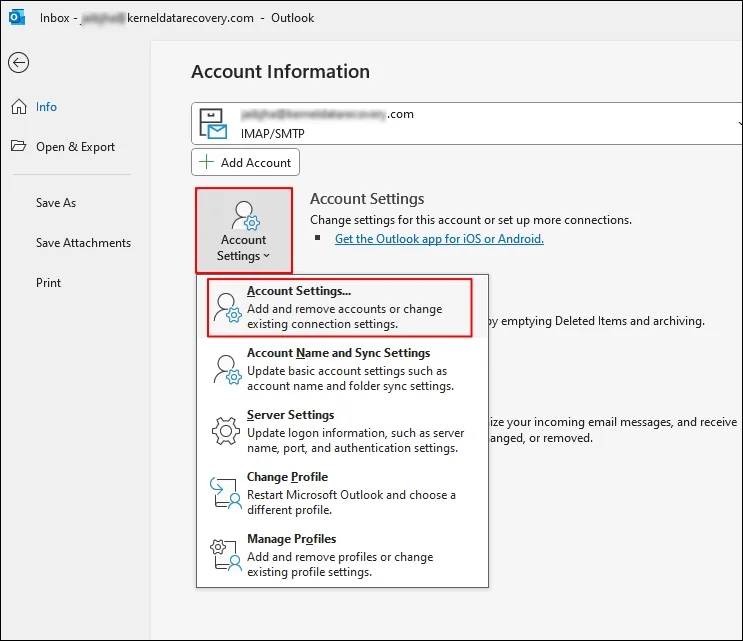
Step 3: Select your email account and click Change.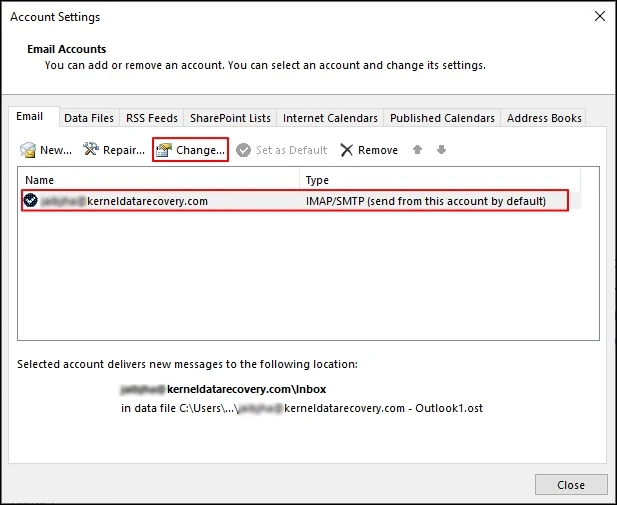
Step 4: Review and make necessary changes if needed and restart your Outlook.
Resetting Outlook settings to the default or changing necessary settings may help you fix this Outlook error. However, sometimes you find that some of the mail data is lost from the OST file after resetting the Outlook settings. In that case, use a reliable OST to PST Converter tool to retrieve lost data with complete accuracy and save it to a PST file.
Method 6: Repair Outlook
Sometimes, any virus or malware attacks damage your Outlook application, which can lead to the 0x8004010F: Outlook data file cannot be accessed error. Make sure to repair your Outlook application and fix Outlook error 0x8004010F. Follow the below steps to do it:
Step 1: Open Control Panel and go to Programs & Features.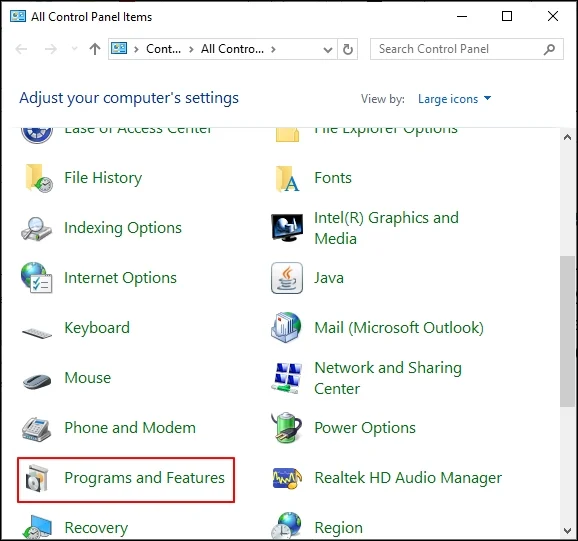
Step 2: Left-click on Microsoft 365 Apps and click on Change.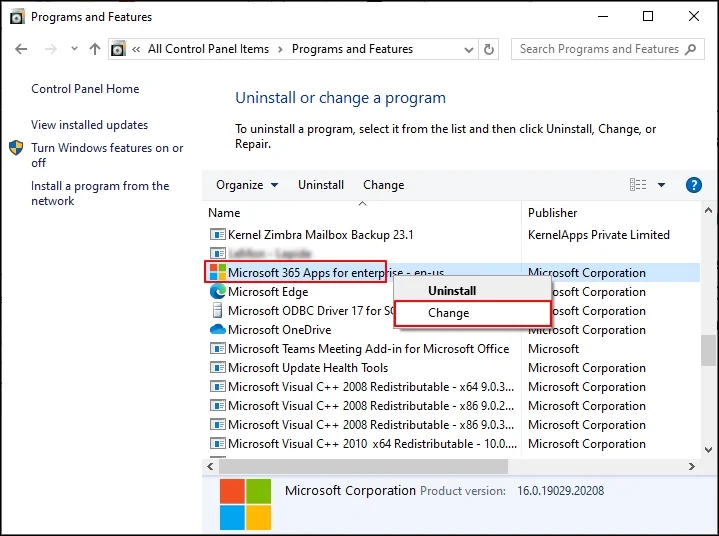
Step 3: In the following tab, select either Quick Repair or Online Repair according to your preference and click on Repair.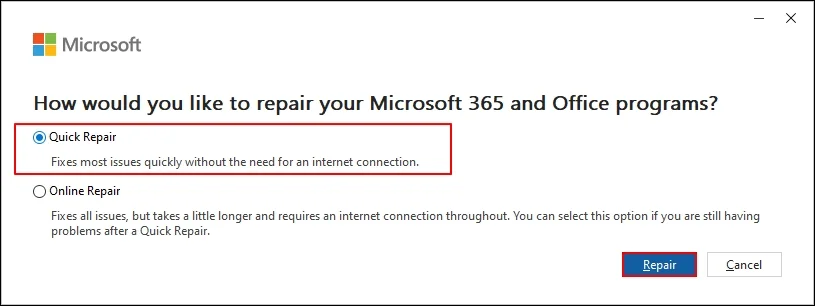
Step 4: After repairing Outlook, restart your application and enjoy error-free Outlook performance.
Method 7: Minimize Outlook mailbox size
Keep your Outlook mailbox size smaller for better performance. Regularly archive old emails, delete large attachments, and empty the Deleted Items folder. Consider using mailbox cleanup tools to manage size and maintain Outlook’s speed and reliability. You can also split large PST files to manage data effortlessly.
Repair Corrupt Outlook Data Files Using Advanced Software
If you are still experiencing the Outlook error 0x8004010F, there is a high chance that your Outlook OST/PST file is corrupted. In that situation, you must repair files quickly using reliable solutions. Use Microsoft’s free Inbox Repair Tool (scanpst.exe) to easily fix a corrupted OST/PST file and resolve the “Outlook Data File Cannot be Accessed” error.
However, the ScanPST software is not meant for highly corrupted and large-sized files. To efficiently deal with severely corrupted PST files, you need to use a professional PST file repair tool.
It is a feature-rich Outlook PST repair software that helps you repair severely corrupted PST files without any restrictions. It deeply scans the damaged files, extracts all recoverable items like emails, attachments, contacts, and calendar entries, and allows you to save them to a new, healthy PST file.
Advanced Features of the PST Repair Tool
- Repair corrupted PST files and recover all emails, notes, calendars, journals, tasks, and more with complete properties.
- Capable of repairing PST files of any size and any level of corruption without any limitations.
- Multiple filters to save specific emails and other data into a new PST file.
- Split large-sized PST files into smaller ones ranging from 1 GB to 45 GB.
- Offers a free trial version to repair and save 25 items per folder for free.
Conclusion
The Outlook error 0x8004010F is frustrating and can easily make your data inaccessible. Start with the manual methods like creating a new profile, repairing Outlook, changing Outlook settings, etc., as they can fix configuration-related issues quickly.
However, if the core problem is a corrupt Outlook data file, then use Microsoft’s built-in ScanPST tool. But, in case of a highly corrupt PST file, we recommend that you opt for an advanced Kernel for Outlook PST Repair tool. It makes sure maximum data recovery with minimal risk, getting you back to a smooth email experience without the fear of permanent data loss.
Frequently asked questions
A. If you follow the steps carefully and take all the precautions before applying manual methods, you may not lose your emails. Make sure to save a backup file of your data to avoid data loss.
A. Yes, Kernel for Outlook PST Repair supports all versions of Microsoft Outlook, from 2019 down to older versions like 2000 and 2003.
A. You can easily prevent this error by restarting your Outlook application, reducing the PST file size, and using a reliable antivirus software.