Read time: 8 minutes
Are you getting issues like OneDrive files/folders not synchronizing with the appearance of a yellow or red mark on the application icon? Then, it means that your “Microsoft OneDrive has stopped working.”
Also, while syncing files, users may get an error message like in the image below:

Why has Microsoft OneDrive stopped working?
Improper synchronization, connections, sign-ins, and settings could be the reasons behind it. Other common reasons behind the non-functioning of Microsoft OneDrive are listed as follows.
- Recent Fall Creators update on Windows 10 systems
- Lack of storage space (OneDrive or Local)
- Antivirus/firewall interference
- Limited file upload/download bandwidth
- Files stuck during synchronization
- Issues with online access to files
- Outdated application
- Improper connection
Solve the OneDrive has stopped working error
If your OneDrive has stopped working, you may have to try different fixes, one after the other, to make it functional again. Here are the methods:
- Restart OneDrive account: OneDrive can be restarted once, after closing the installed application on your system. The process is as follows:
- Move to the bottom right corner of the taskbar, click on the OneDrive icon, and then click Help & Settings icon, then select Quit OneDrive.
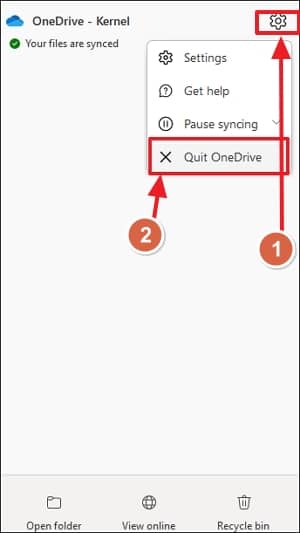
- Now, search for the OneDrive application on your system using the Search bar and select the resultant application to start and synchronize the data again.
- Move to the bottom right corner of the taskbar, click on the OneDrive icon, and then click Help & Settings icon, then select Quit OneDrive.
- Reconnect the OneDrive account: This is another way to fix the “OneDrive not working” issue. For this, disconnect or unlink the OneDrive account and then sign in to the account again.
- Go to the OneDrive for Business application icon on the taskbar and click on it. Click “Help & Settings > Settings.”
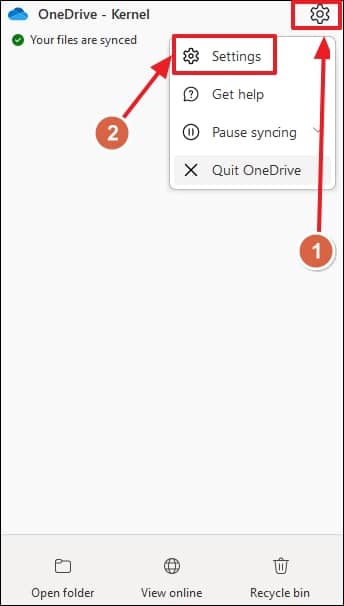
- The Microsoft OneDrive dialog box will open. Switch to the “Account” tab and click on the “Unlink this PC” link.
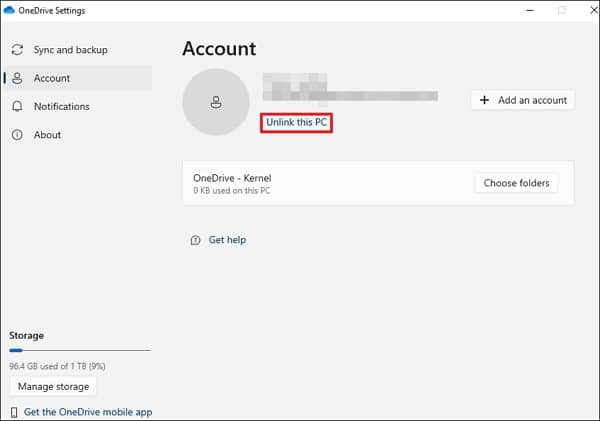
- Click on the “Unlink account” option to confirm unlinking.

- Next, add the email address of the OneDrive account and click Sign in.
- Enter the password and continue with the instructions.
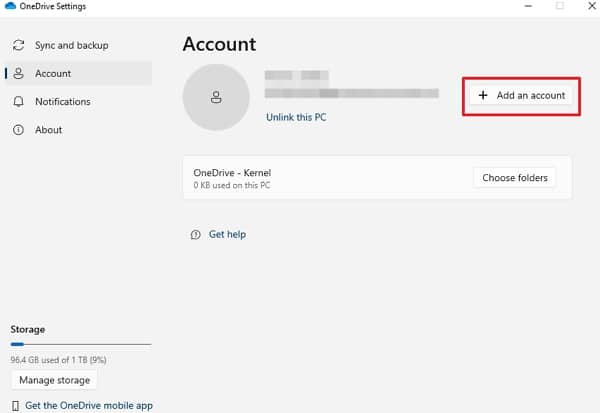
- If you want to add a different account, go to OneDrive Settings again and click the “Add an account” option under the “Account” tab and proceed.
- Go to the OneDrive for Business application icon on the taskbar and click on it. Click “Help & Settings > Settings.”
- Reset OneDrive Account: Resetting the OneDrive Account is another option that users can try to fix the settings or connections issue. The process to do this is as follows.
- Press Windows and R keys together to open the Windows Run dialog box. Type the following command and click “OK.”
%localappdata%\Microsoft\OneDrive\onedrive.exe /reset
- Wait for the resetting of the OneDrive account on the system, which involves the application icon disappearing and appearing.
- To confirm the appearance of the OneDrive application icon on your system, open the Windows run dialog box again and execute this command.
%localappdata%\Microsoft\OneDrive\onedrive.exe
- Press Windows and R keys together to open the Windows Run dialog box. Type the following command and click “OK.”
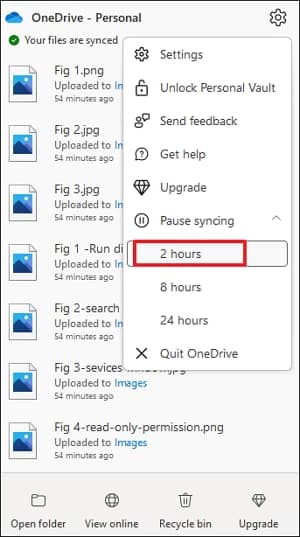
- Resync OneDrive Account: During the files upload in the synchronization, some heavy files get stuck and need to be removed to continue the synchronization process to work with the OneDrive application normally.
- Click on the OneDrive for Business application icon on the taskbar and click Help & Settings icon.
- Click on the “Pause syncing” option and select “2 hours” from the drop-down list.
- Go to the OneDrive folder on your system. Select the stuck files, go to the “Home” tab, and click on the “Move to” option to move the files to some other system drive folder from the list.
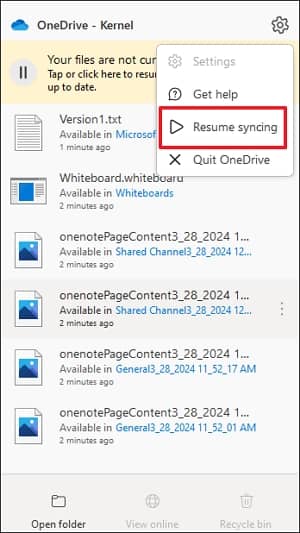
- Again, click on the OneDrive icon and go to “Help & Settings > Resume syncing.”
- Now go to the folder to which you have moved your files in synchronization, select them, click on the Move to option, click Choose Folder, and select your OneDrive folder to move the same.
- The synchronization of OneDrive files will be smoother now.
- Check online access to OneDrive: If you have already confirmed your internet connection, you should also check online access to OneDrive. Follow this procedure to continue.
- Click on the OneDrive icon on the taskbar and click View online option.
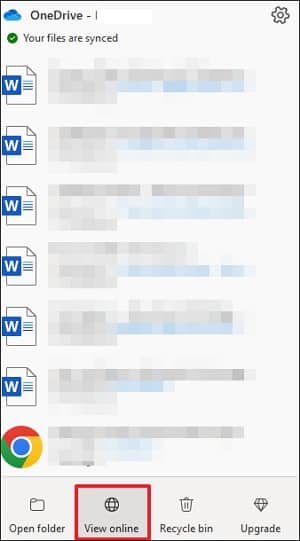
- It will redirect to the web browser sign-in window of the OneDrive account. Sign in to the account with the login credentials and check if you can access the synchronized files.
- Click on the OneDrive icon on the taskbar and click View online option.
- Disable security protections: As mentioned earlier, security applications like Windows Firewall or Anti-virus can affect the normal functioning of the OneDrive application on the system. Therefore, it is advised to disable these applications temporarily and check if it resolves the issue.
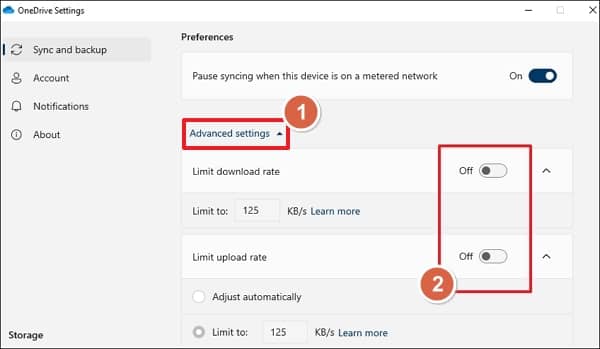
- Disable bandwidth limits on file download/upload: If users have set any throttling limits on the file downloading or uploading processes in the OneDrive settings, it is required to be disabled to let the OneDrive synchronization work properly. Disable the download/upload bandwidth limit with this process.
- Click on the OneDrive icon on the taskbar and navigate, navigate to Help & Settings > Settings.
- Click on Advanced setting and turn the toggle off for Limit download rate and Limit upload rate.
- Update the OneDrive application: If your OneDrive application is not up to date, then you should get the updated application. First, uninstall the existing OneDrive application from your system. Then, visit the OneDrive download official website to install the latest available version of the application.
- Understand limitations & restrictions on synchronization: If you are worried that some files are not synchronizing, you should understand the default limitations and restrictions related to OneDrive synchronization.
Know the following important points to avoid synchronization issues.- Unsupported characters and names: “, *, :, <, >, ?, /, \, |; lock, CON, PRN, AUX, NUL, COM1 – COM9, LPT1 – LPT9, _vti_, desktop.ini, and filename that begins with ~$.
- Do not synchronize files of more than 20GB in size
- Do not move the OneDrive folder to another location, as network share is not supported.
- Do not let the OneDrive folder path be longer than 400 characters.
- Save storage space: Due to the insufficient storage space, both in the local system and the OneDrive cloud, synchronization issues might occur, causing the OneDrive application to stop working. First, delete the cache & any temporary or unrequired files from your local system storage drives, and if it has adequate space, check the OneDrive cloud storage by clicking on the app icon and selecting “Help & Settings > Settings.”
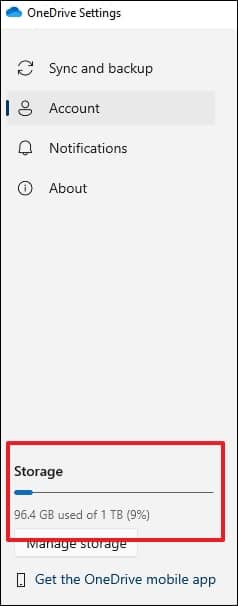
Get more storage by upgrading your current Microsoft 365 account subscription plan if the current storage is not sufficient for your needs.
Use an automated solution for efficient data migration
We hope that the above solutions can help you fix the OneDrive-not-synching problems on Windows 10 systems. If you want to migrate data from OneDrive for Business to OneDrive for Business, trust the Kernel Migration for SharePoint tool to transfer data without any hassles or restrictions.
For a successful data transfer operation, experts recommend creating a checklist for OneDrive migration. Apart from OneDrive migration, the tool also supports SharePoint migration across different tenants.
Conclusion
“OneDrive has stopped working” is a common problem many users face. There are many simple fixes for this issue, and one can try them one after the other till the issue is resolved. If you are looking for a tool to migrate data from/to OneDrive, then using the recommended SharePoint migration tool is the best option you have. We recommend creating a OneDrive backup before initiating any migration.