SharePoint users planning to migrate their sites can migrate from one tenant to another as well using the Cross-migration feature provided by Microsoft. However, SharePoint migration is comparatively more complex than migrating other Office 365 components. This complexity is because there are no straightforward methods available for SharePoint tenant to tenant migration and the success rate is very low. However, to resolve the concerns and technical complexity involved, using a professional SharePoint migration tool is the best solution.
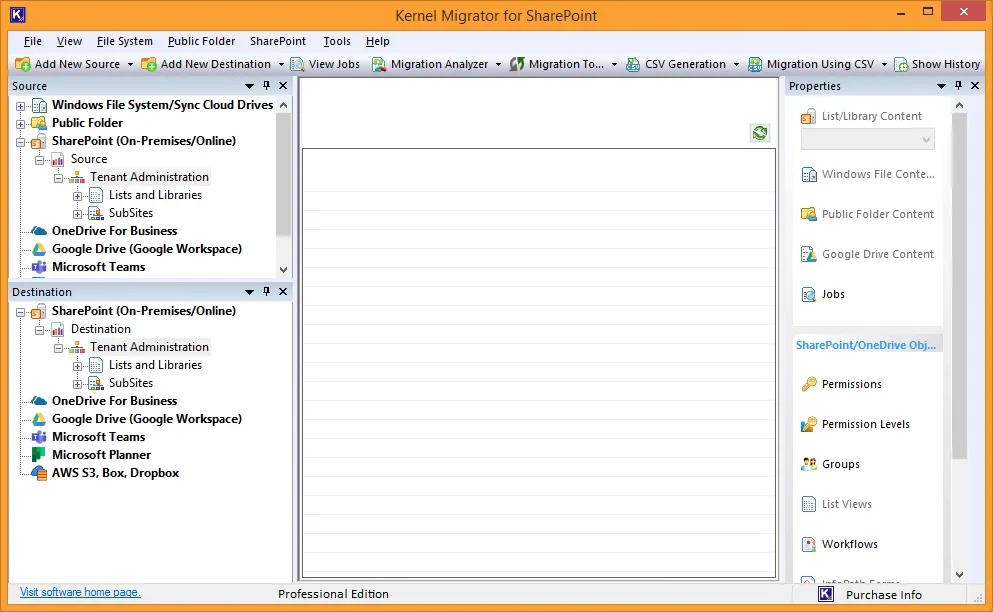
With the Kernel Migrator for SharePoint, migrating site collections, sites, contents, lists, libraries, etc., is easier. It follows a simplified process of adding a SharePoint site as the Source and another as the Destination to copy and move files between SharePoint.
Prerequisites for Tenant to Tenant SharePoint Migration
Before you start the migration process, it is important to prepare by arranging the prerequisites and the SharePoint source and destination environments. Here are some requirements that you should consider before executing the SharePoint tenant to tenant migration.
- An active subscription to Microsoft 365 is linked with SharePoint Online.
- Give admin access to a proficient individual from your organization.
- Check the destination tenant's configurations, licenses & settings for not experiencing compatibility issues.
- Learn about the permissions and structure of the MS 365 tenant site.
- Analyze the influence this migration will have on your team and stakeholders.
- Find out the size and amount of data you need to migrate.
The manual methods available for migrating SharePoint data require technical proficiency and are time-consuming. It won't be a wise decision to go with them. We suggest that you use a professional SharePoint migration tool to migrate all sorts of data, including SharePoint lists, libraries, permissions, sites, site collections, and other attributes.
How Admins Migrate SharePoint Tenant to Tenant with a Professional Tool?
Download the Kernel Migration for SharePoint tool for SharePoint tenant to tenant migration with minimum hassle. The interactive user interface of the software makes it easy, even for a non-technical person, to move content while restoring the permissions and data hierarchy. Features like pre-migration analysis help in identifying potential errors for the tenant to tenant SharePoint migration.
Easy Steps to SharePoint Tenant to Tenant Migration
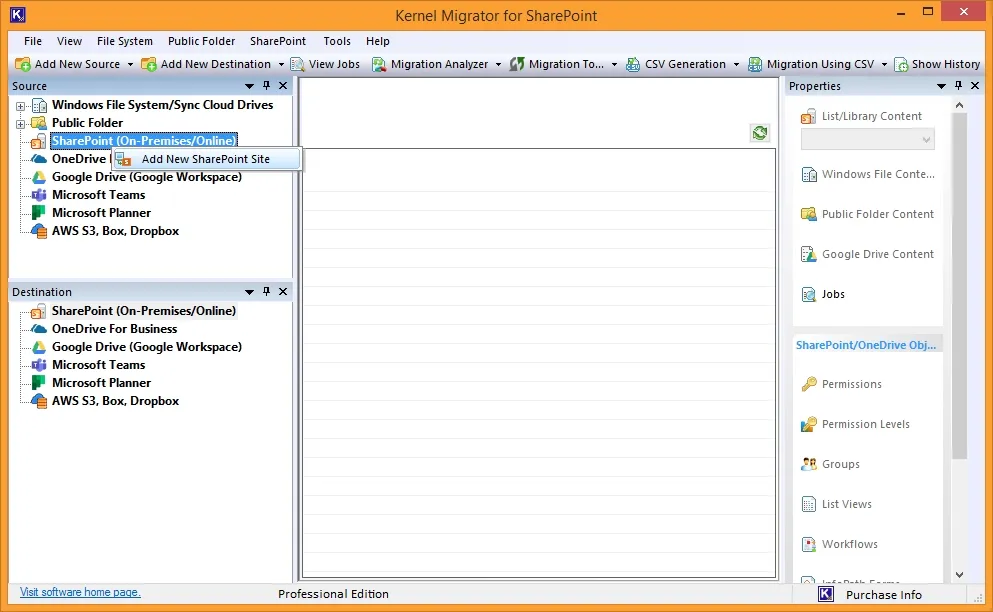
- Launch the tool and right-click the SharePoint (On-Premises/ Online) and select Add New SharePoint Site.
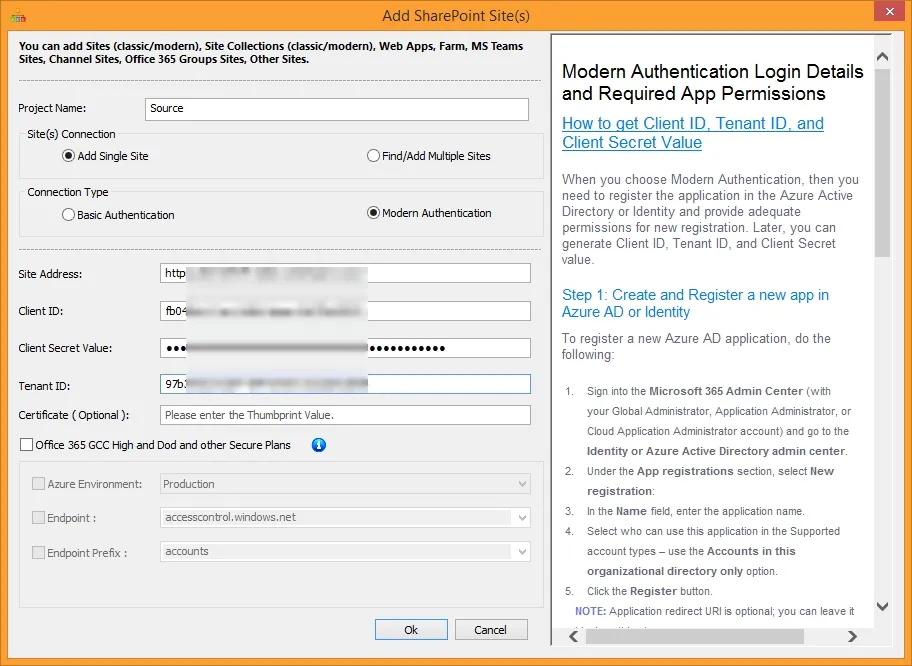
- Provide a Project Name, select Site Connection, and Authentication type. Input the Site Address, Client ID, Tenant ID, and Client Secret Value. Click OK.
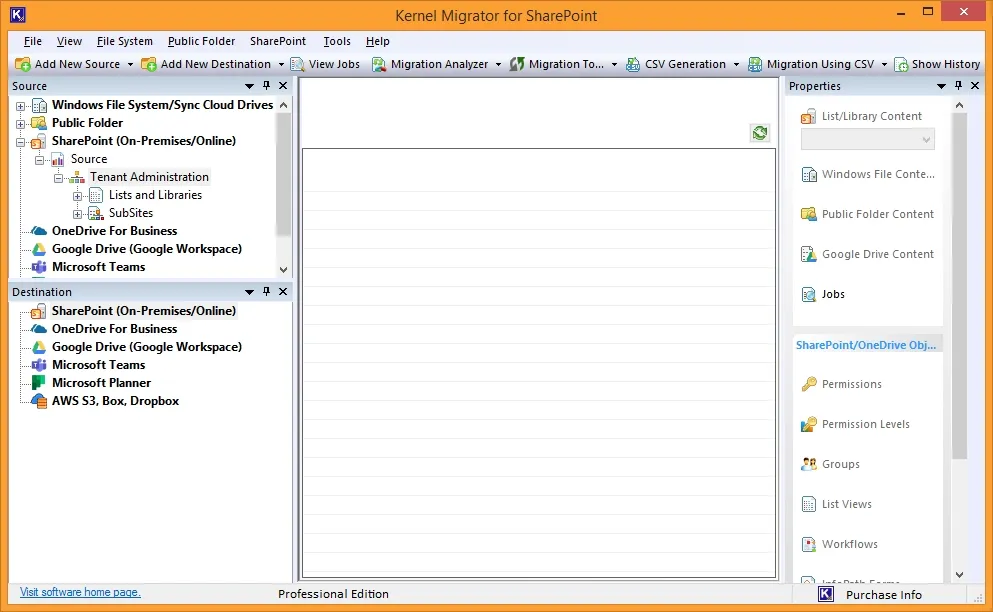
- The SharePoint Site tenant will be added as the Source. Expand the project name to see the contents in hierarchy.
- Now go to the destination pane and follow the same procedure to add the destination tenant.

- SharePoint tenant is added in the destination pane also.
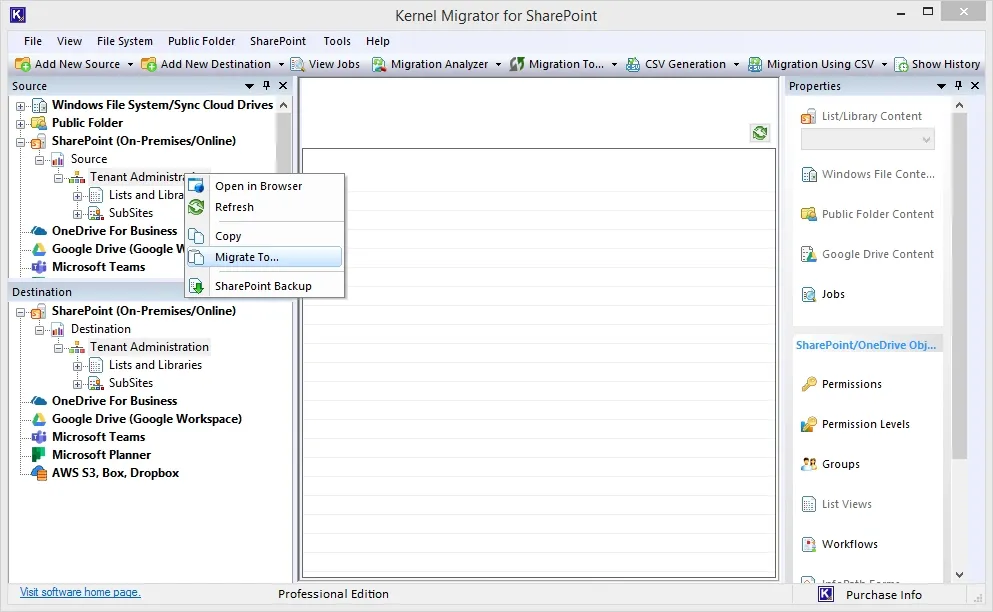
- In the source pane, expand the project name and right-click on Tenant Administration to select Migrate to.
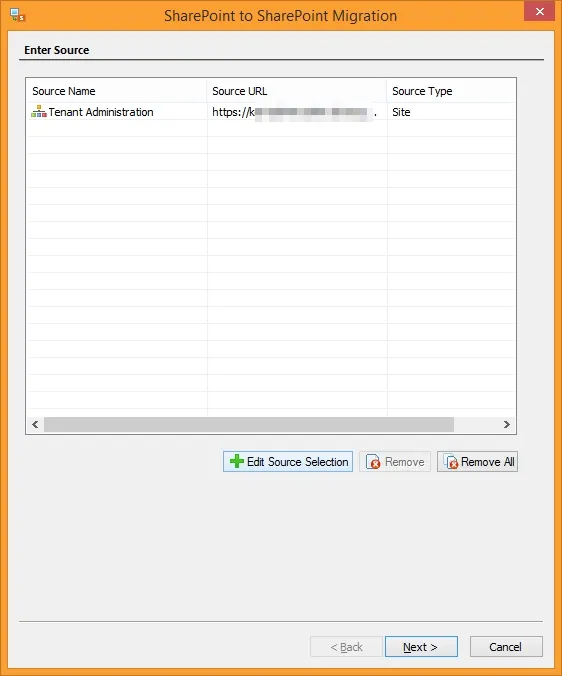
- Verify the source selection and use Edit Source Selection button to make any changes. Click Next.
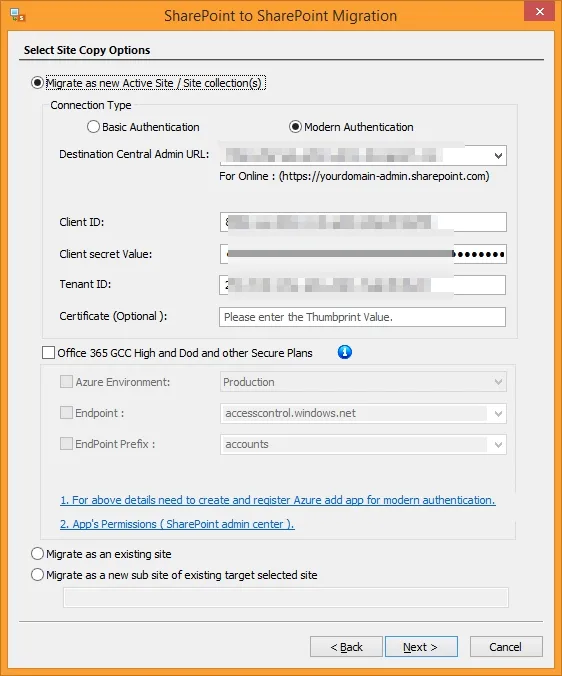
- Select Site copy options to decide whether you want to migrate a new active site, existing site, or as an existing subsite.
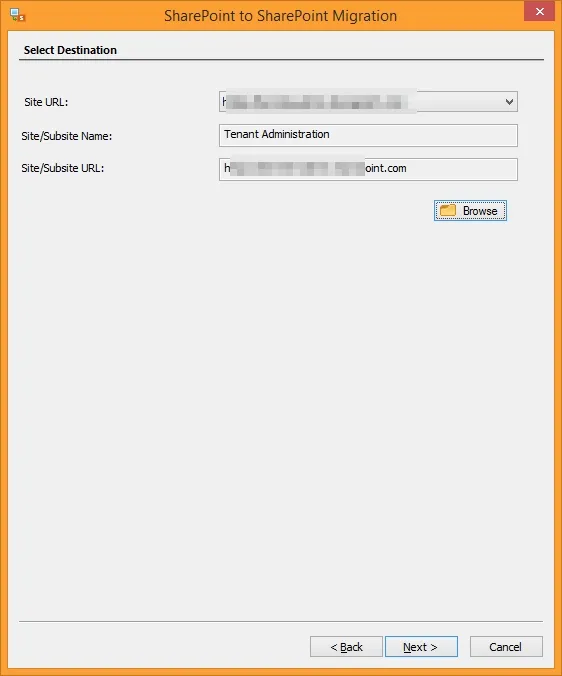
- Select destination site from the tenant using Browse.
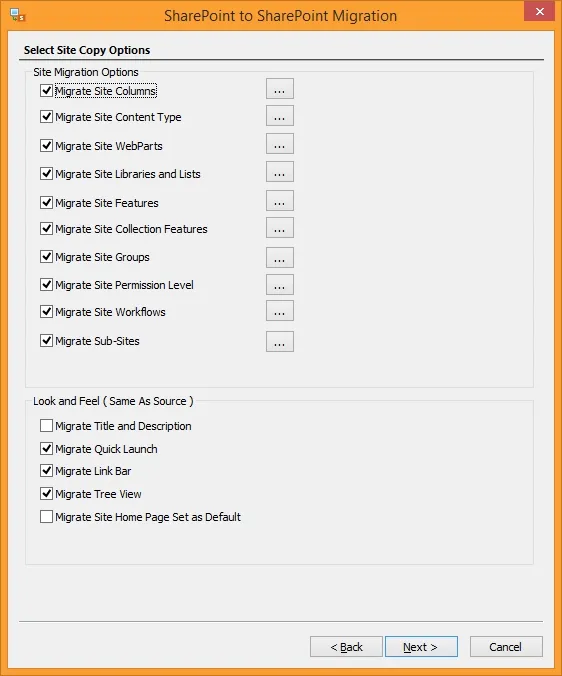
- Select from the Site Copy options to define everything you want in SharePoint Online tenant to tenant migration.
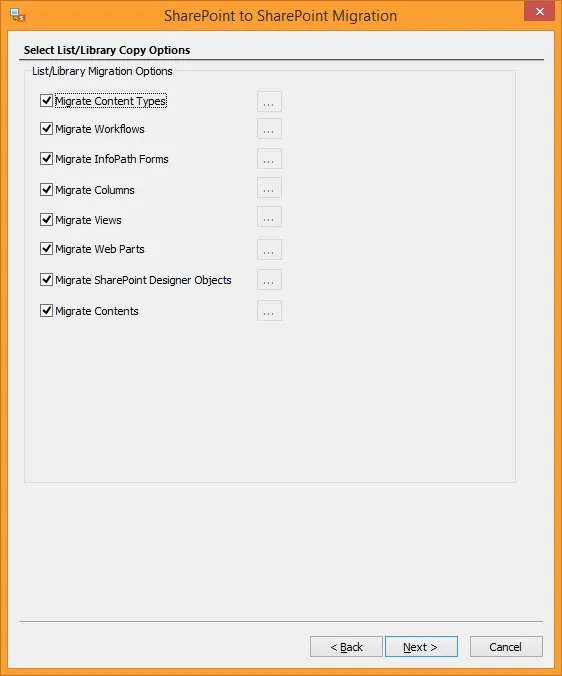
- Next, select List/ Library Copy options to include all that you want to migrate.
- Choose all the Item Copy options that you want to apply and data for selective tenant to tenant SharePoint migration.

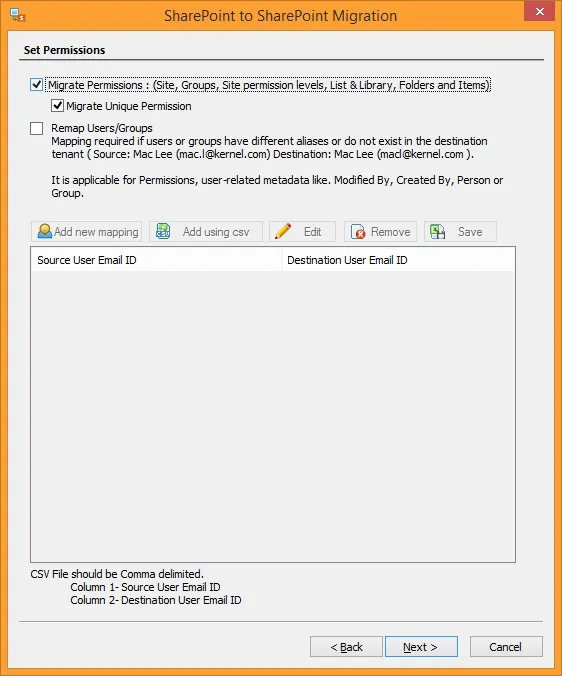
- Mark the checkbox Migrate Permissions to migrate data with its access levels and permission hierarchy.
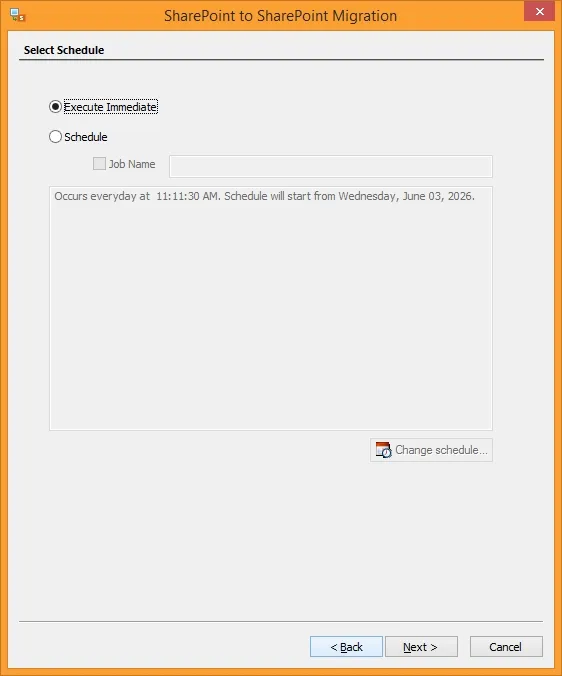
- Select from the options for scheduling the migration at a suitable period, or migrate SharePoint tenant to tenant immediately. Click Next.
- Check the migration summary that defines every detail of the content you’re migrating from the source to the destination. Click Next.
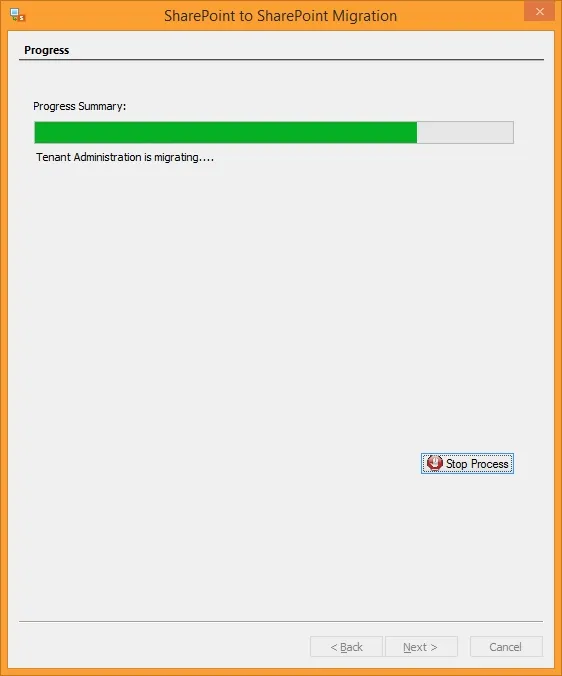
- The process of migrating SharePoint tenant to tenant has started. You can track the progress from the screen showing migration of objects.
- At last, you can get a whole migration report with the status of each migrated item. Click Finish.
Conclusion
With the above discussion, it is clear that for error-free SharePoint tenant to tenant migration, it is important to rely on an automated SharePoint migration tool, as native solutions can cause unexpected productivity losses. The Kernel Migrator for SharePoint tool boasts a range of advanced features, making tenant to tenant SharePoint migration a straightforward and trouble-free experience. It provides complete control of the migration process, and at the end, it yields a detailed migration summary mentioning all the aspects.
Frequently Asked Questions
Here are the answers to some of the common queries users asked regarding the SharePoint tenant to tenant migration.
Q. How to achieve a successful migration?
For an uninterrupted SharePoint tenant to tenant migration step by step, you need to do the following pre-migration planning:
- Clean up the source environment.
- Categorize and label the folders based on their usefulness.
- Get rid of the duplicate files and folders.
Q. Is it very important to backup SharePoint site before migration?
SharePoint backup is not an indispensable but a mindful practice of storing your SharePoint site data before migration. This will continue to provide you with access even if things go against your business.