A business organization has different departments, and each department has multiple teams that create a decent number of physical documents that is a hassle for the manager to handle. That’s where SharePoint Online comes into the scene where all the hassle is gone quickly. SharePoint Online is used by most tech-savvy businesses today to keep their data synchronized and up to date and to facilitate better teamwork, document management, and productivity.
It is an extremely useful platform that allows creating documents online, and the administrator has the right to share the documents, validate them, and arrange them in a better manner. You can also upload the existing documents from your computer to SharePoint online into several lists and libraries.
How to upload data to SharePoint?
When looking for how to migrate bulk data to SharePoint Online, there are four ways available. It includes using PowerShell scripting, manual drag and drop, Microsoft’s SharePoint Migration tool, and third-party tools. The data transfer from the file system to SharePoint is quite easy, however, the use of the drag-and-drop feature can take a lot of time, and PowerShell scripting needs you to be technically proficient.
The simple drag-and-drop process includes the following steps –
- In File Explorer, browse the file(s) you want to put on SharePoint.
- Open the SharePoint library in the web browser.
- Drag the data from its location in the file system to SharePoint library and drop there.
upload data to SharePoint online may appear straightforward initially, but the task becomes challenging when you’re dealing with a vast number of files scattered across numerous network-connected computers. Relying on manual methods in such circumstances appears impractical. That’s why most administrators prefer professional SharePoint migration solutions to migrate bulk data to SharePoint Online.
Use a professional tool for migrating data to SharePoint
To streamline the migration process and ensure a smooth bulk files migration to SharePoint, turning to a professional SharePoint migration tool is the perfect choice. This tool serves as a seamless bridge between your existing file system data and SharePoint, offering a versatile array of services tailored to your specific migration requirements, ensuring successful and efficient data transfer.
Make sure you first backup your data and test with a batch of files before migrating complete data. This will provide a clear picture of the issues that can occur during the actual transition. Resolve all the errors you encounter during this pilot migration, and then take all your data to SharePoint Online.
Here is complete procedure of migrating data to SharePoint using Kernel Migration for SharePoint:
![]()
Step 1: Generate CSV file
To proceed with the migration of bulk data to SharePoint, we need first to create a CSV file containing all the data that is to be migrated. Follow the process given below to create a CSV file.
- Go to the CSV Generation dropdown and select File System as we are migrating from the file server to SharePoint.
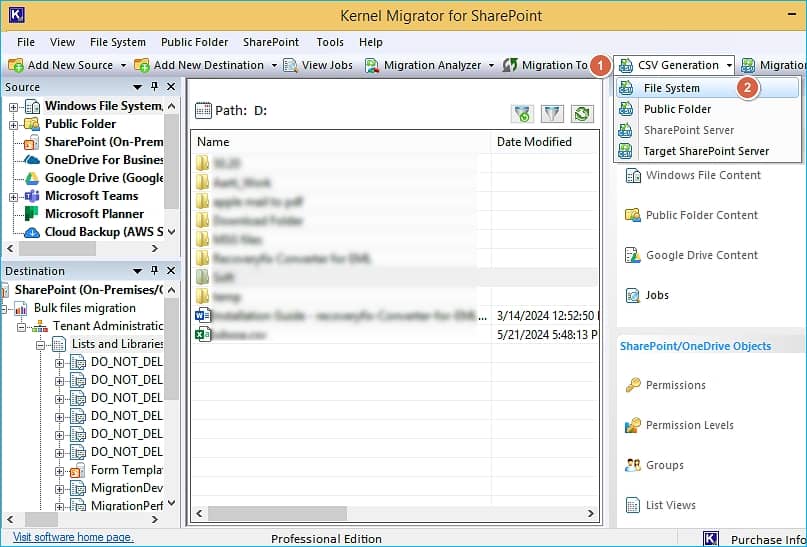
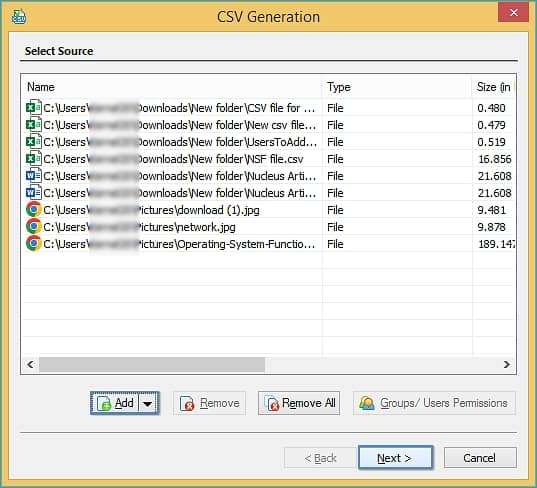
- Click on the Add button to select files or folders from your local or remote computer connected to the SharePoint migration tool. Click Next to proceed once files are added to the source.
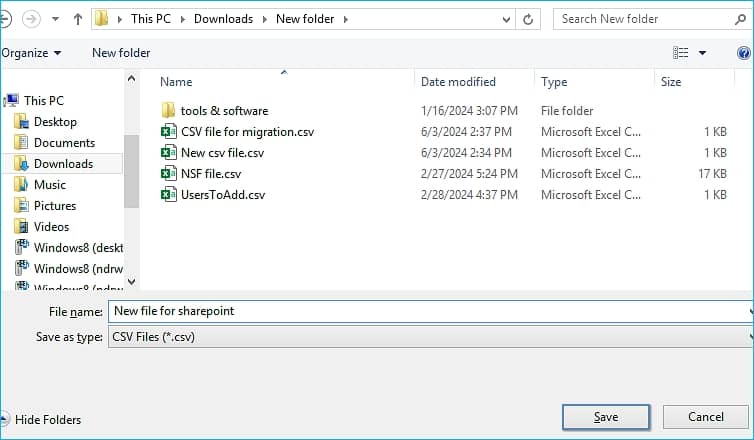
- Click on the Browse button to define the destination path to save the CSV file. Click Next.
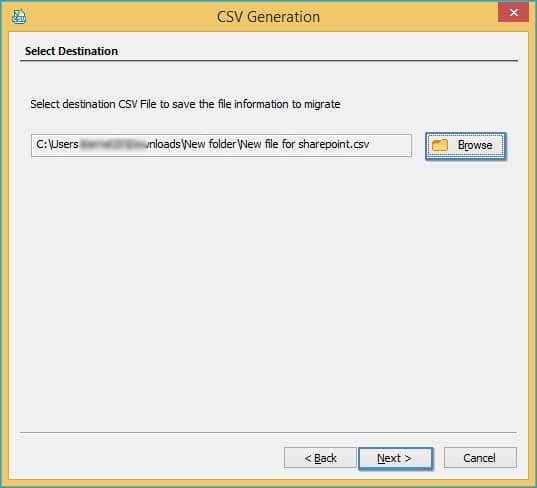
- Specify a name for your generated CSV file to store on your system.
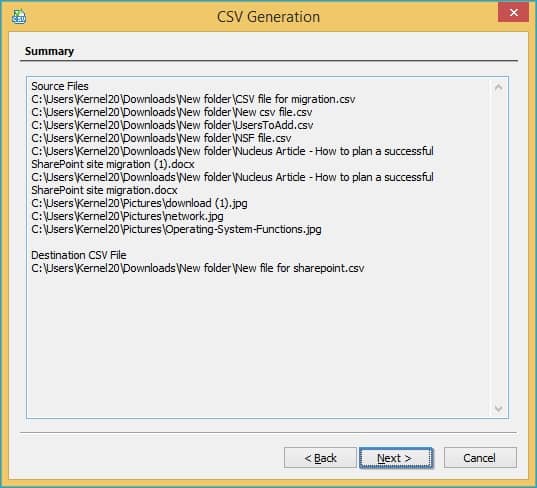
- Check the summary of the files and folders added thoroughly to convert to CSV files. Click Next, and the files will be added to the source.


Step 2: Add Destination
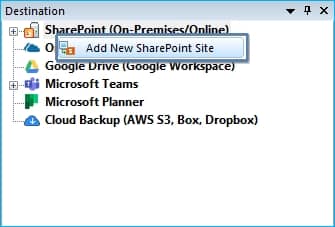
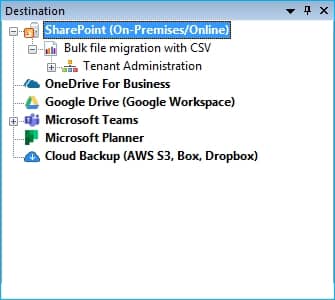
- Go to the destination pane, right-click on SharePoint (On-Premises/Online), and then select Add New SharePoint Site.
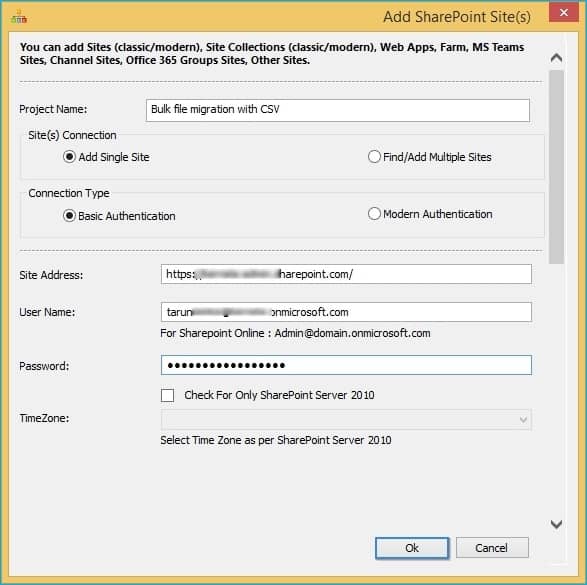
- Enter the credentials to connect the SharePoint site as a destination. You can go with either Basic Authentication or Modern Authentication and provide the details accordingly.
- You’ve added the site to the destination, and now, you’re ready to migrate your bulk data to SharePoint Online.
Step 3: Start the migration process
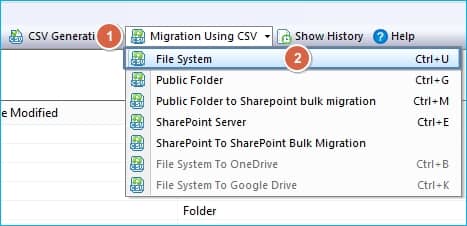
- Go to Migration using CSV dropdown and select File System.
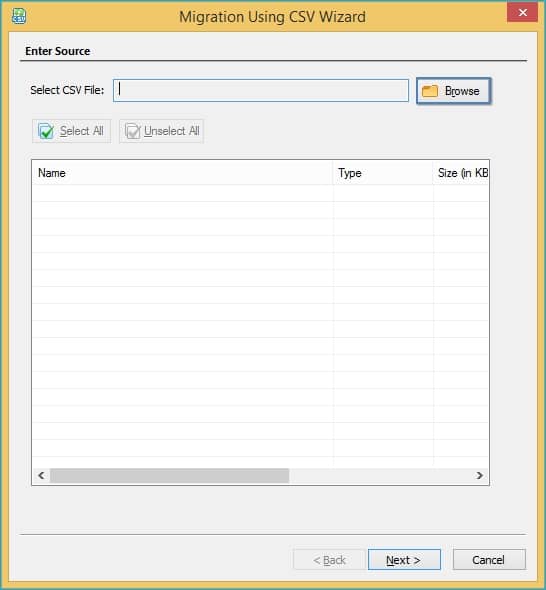
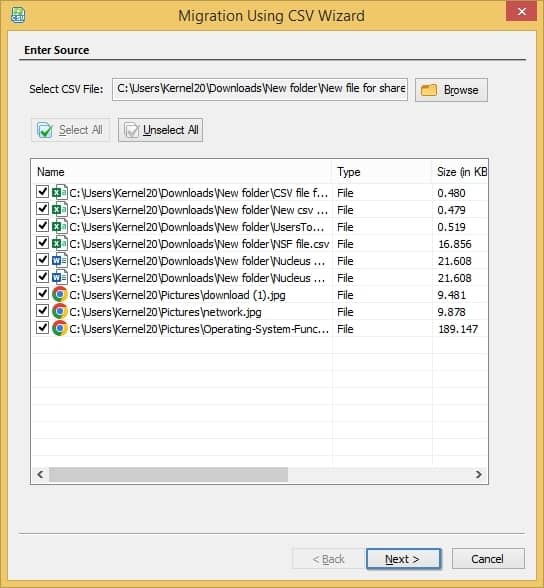
- Now, click the Browse button to access the CSV file you generated in the previous steps, select the CSV file, and click Open.
- As soon as you add the CSV file, all its items will appear to in a list. Here you can uncheck things added mistakenly, or you do not want to migrate them. Finally, click Next.
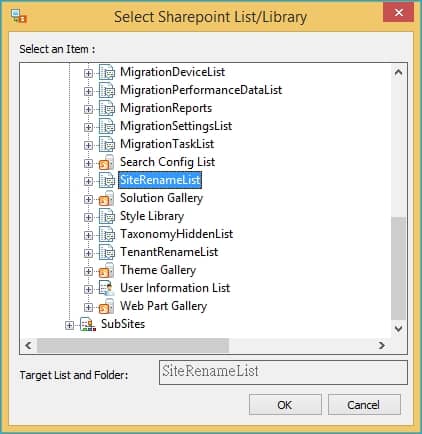
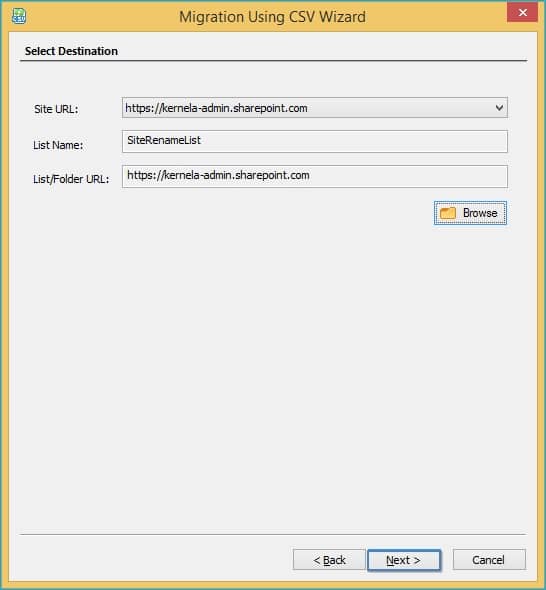
- Now select the destination SharePoint account by choosing the site URL, and then click the Browse button to select the destination list, library, or folder.
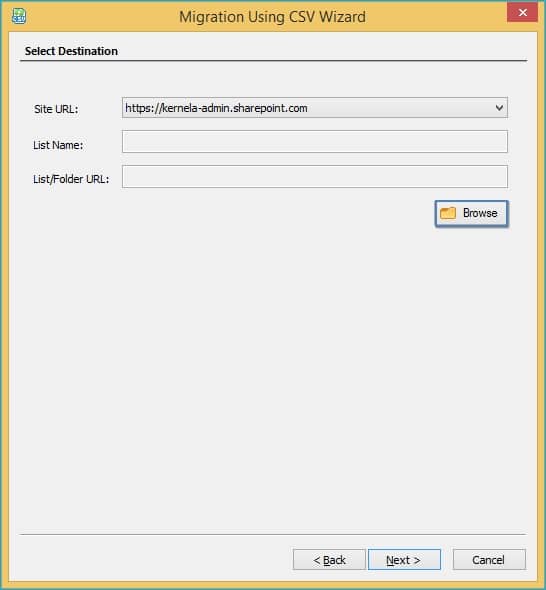
- Expand the list or subsites to go to the folder. After selecting the folder, click OK.
- After completing the required information for the destination SharePoint, click Next.
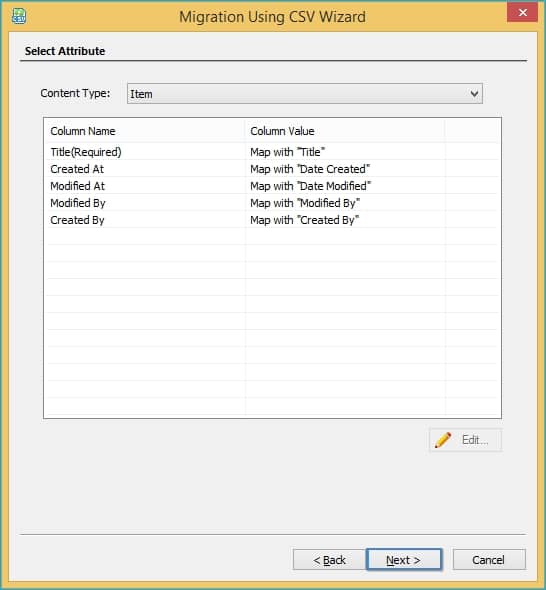
- The migrator tool will try to map the attributes of the content automatically. If it is unable to map the attributes, then it will leave the fields blank. You can modify the already selected attributes. Click Next.
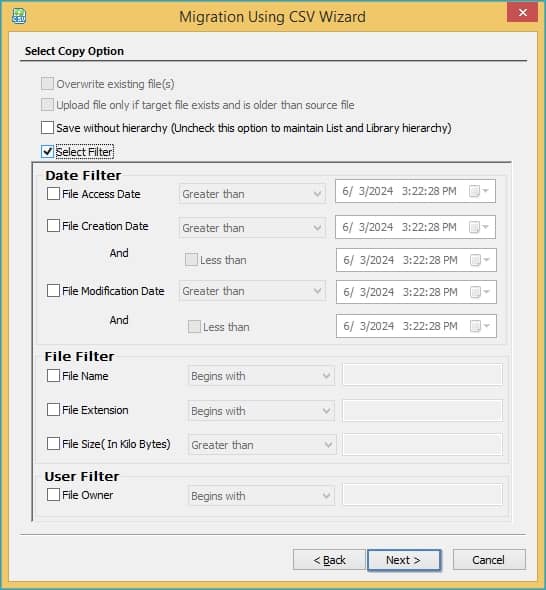
- Select the appropriate filters to pick and migrate the selective data in bulk to SharePoint. Click Next.
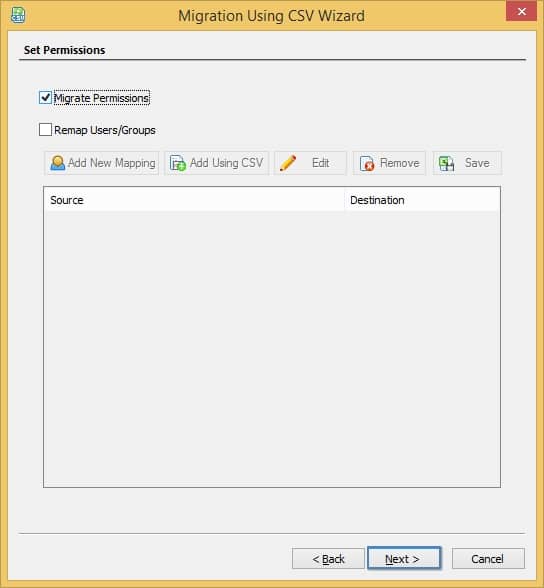
- In the next wizard, select Migrate Permissions if you want to migrate the permissions along with the files and folders.
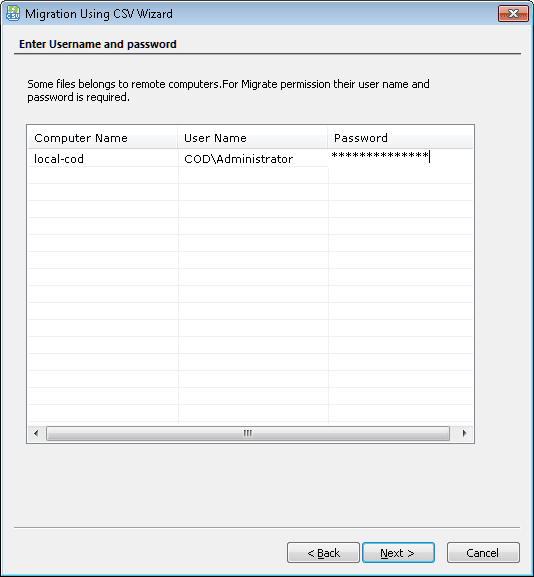
- Enter user credentials in the relevant columns for the displayed remote computer(s). The selected user should have enough rights to the content at the remote computer. You can provide the username in the format - Domain\Username.
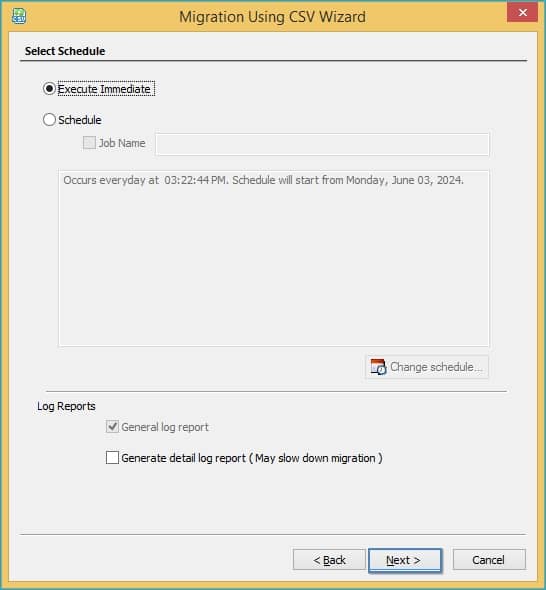
- Choose among two options to either run the migration instantly or schedule to run it later.
- The tool will provide a summary of the selected items and their respective destination on SharePoint Online.
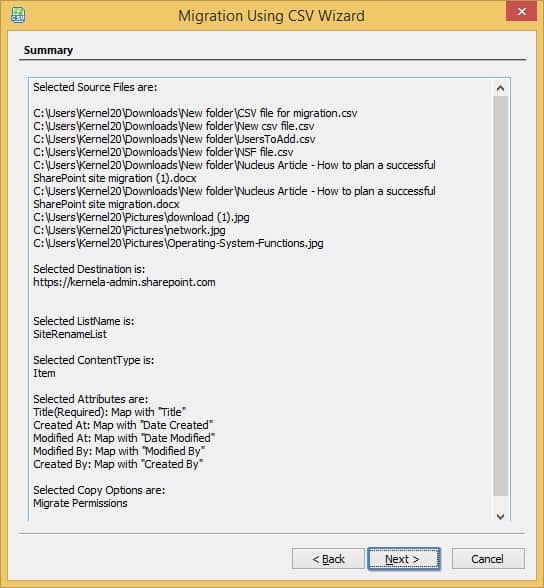
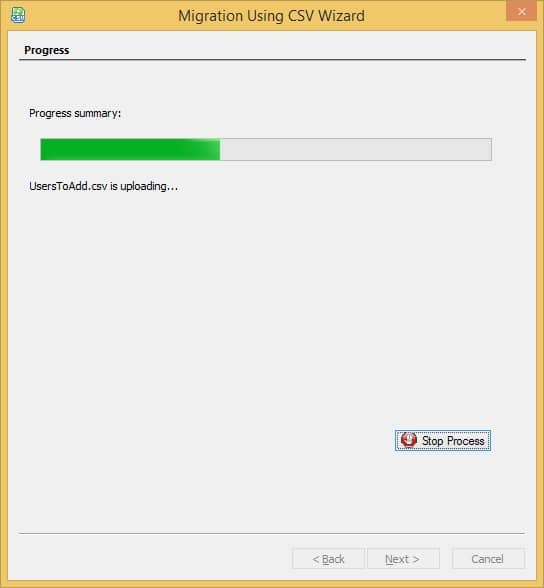
- The migration process begins.
- After a successful migration, the tool will provide a complete migration report presenting the status of each item. Click Finish to complete the process.


Conclusion
After using Kernel Migration for SharePoint, you can easily understand that the tool has an intuitive user interface and handles files of any size or type. Apart from file system data, it can conduct SharePoint-to-SharePoint, Exchange Public folder to SharePoint, File Server to Google Drive, and File System to One Drive migration
![]()