There are some professional Sharepoint Migration tools that helps you download SharePoint and OneDrive data to local drives. If you are able to download the OneDrive data directly to the Windows system, then the data will be available there as a backup. Kernel Migration for SharePoint does the exact job for you.
![]()
![]()
Let us understand the complete procedure to synchronize OneDrive to your personal account or school account. You can also synchronize OneDrive to work account.
For different Windows Operating System versions, OneDrive (Personal) account is added differently.
- For Windows 10, you have an installed OneDrive application which comes by default in your File Explorer (no need to install the desktop app). You just need to sign in to the OneDrive application only.
- For Windows 8.1/RT 8.1, there is a built-in OneDrive application which you can view on your system’s File Explorer.
- For Windows 7 or older versions
- First, you need to download the desktop app for OneDrive.
- Click on the downloaded exe and install it on your system.
- Once it is installed, it will ask you to enter the account email address. Provide your Microsoft account credentials and click Next.
- Follow the steps as per the instructions, and your OneDrive is now visible on the file explorer.
We are going to explain here how to synchronize OneDrive to your personal account in Windows PC with complete steps. Take a look.
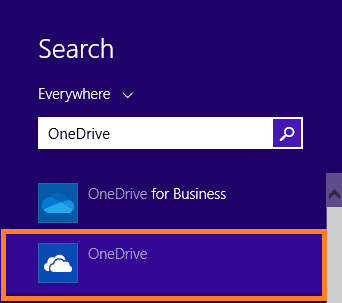
For Windows 8.1/RT 8.1
- On your PC, click on the Start option and then search for OneDrive. Click on the OneDrive icon.
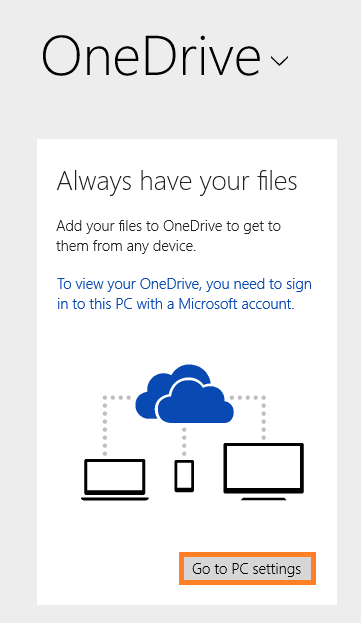
- It will ask you to sign through a Microsoft account. For that, click on Go to the PC Settings option.
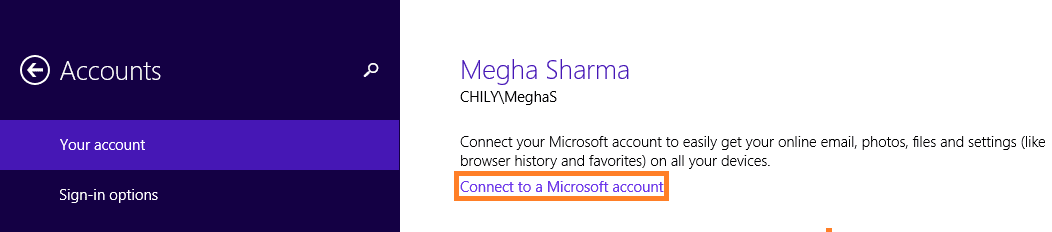
- Click on the Connect to a Microsoft account option.
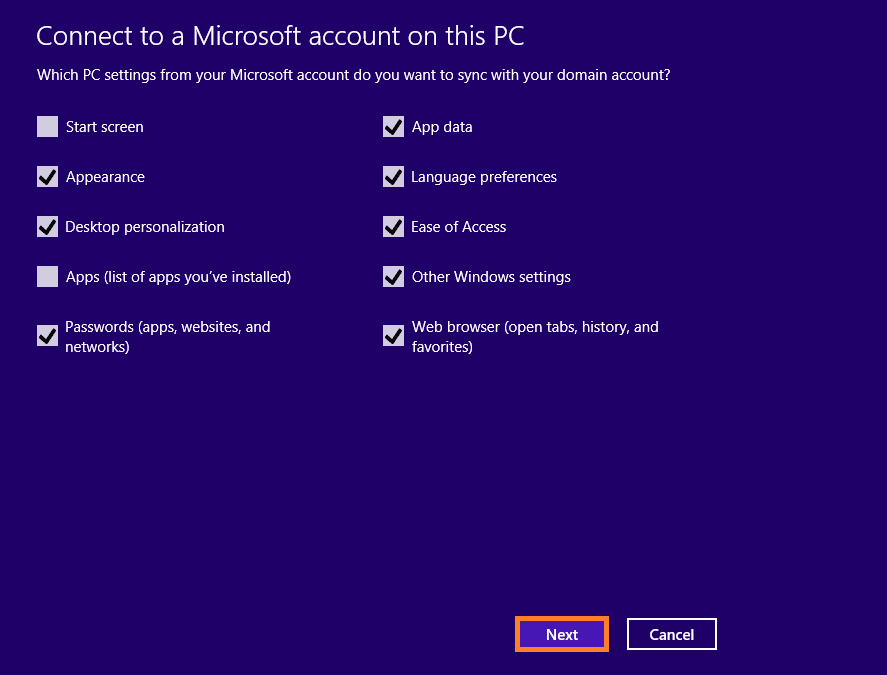
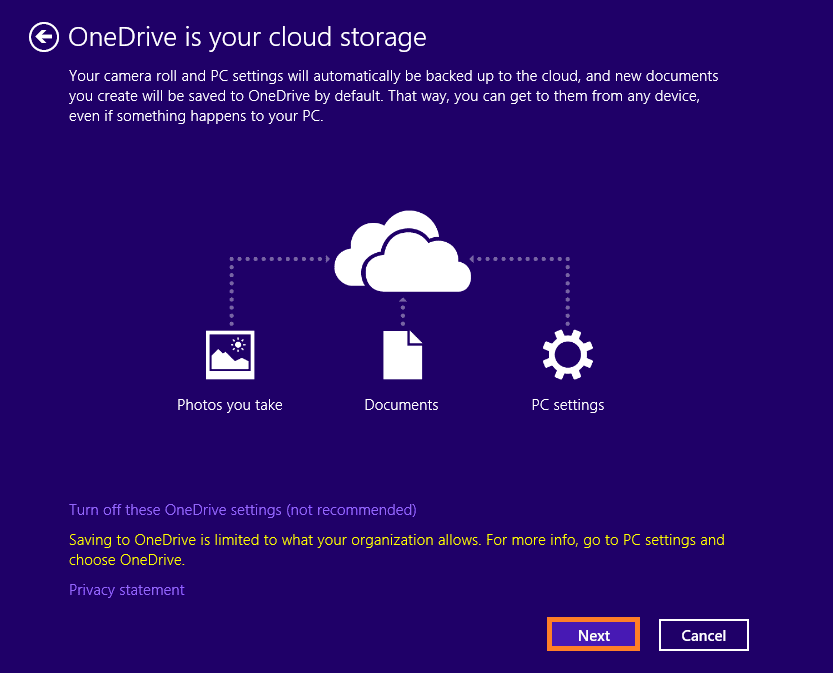
- Choose the PC settings for synchronization of Microsoft account to the domain account and click Next.
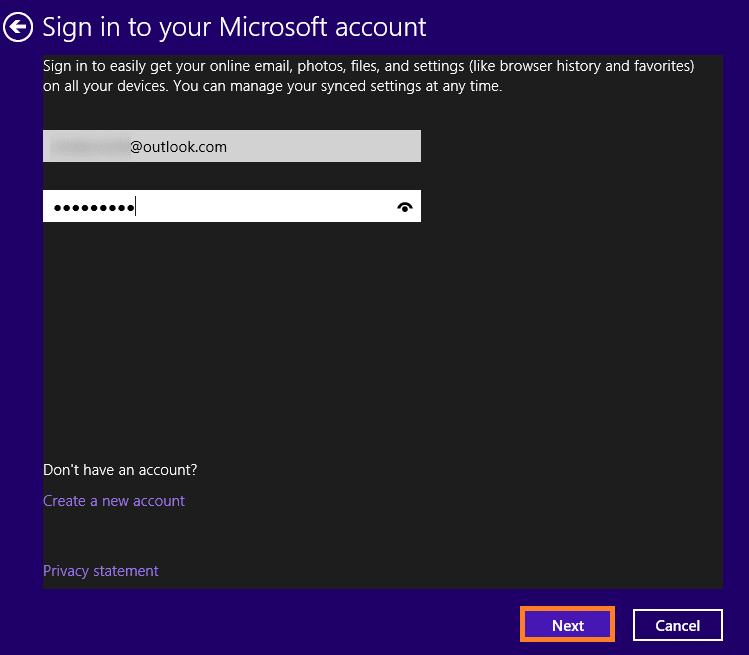
- Add your Microsoft account login credentials and click on Next.
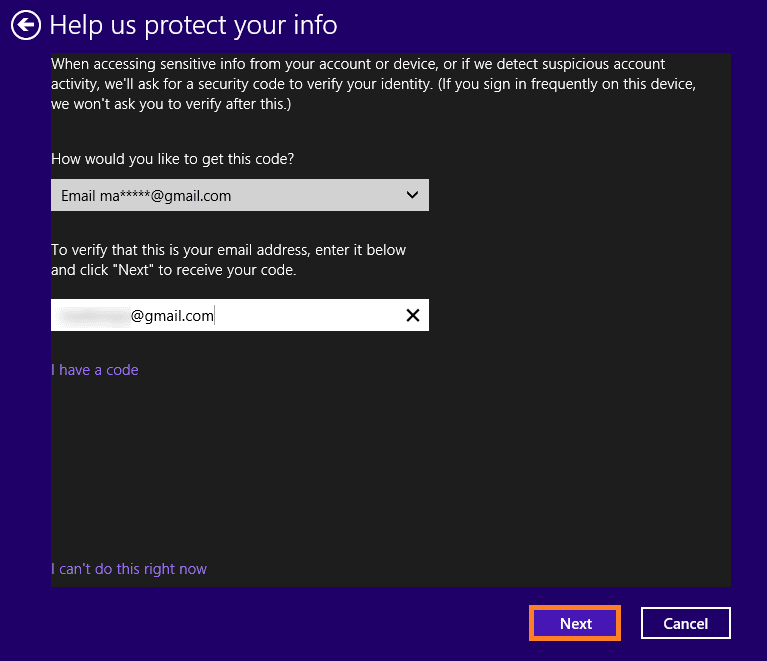
- It may ask to enter the recovery email ID for your account confirmation via code generation. Please add the complete recovery email address and click Next.
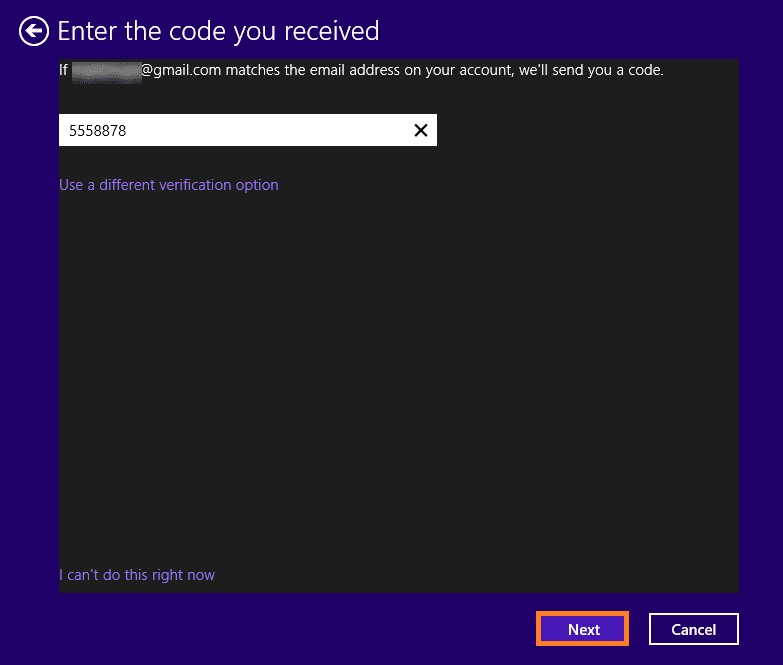
- A code will be sent to your entered email ID. Get that code, copy it, and paste here. Then click Next.
- Read the information and click Next to continue.
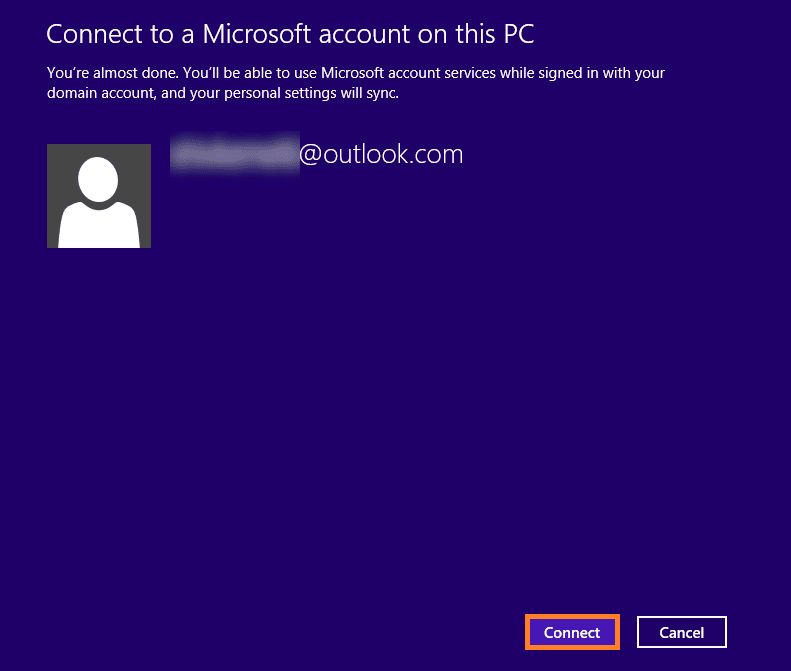
- Click Connect to connect your Microsoft account.
- The connection process will get started, and soon you can see your added Microsoft account in Accounts in PC Settings.

- Finally, move to the File Explorer of your system and click on the OneDrive icon. Now you can access all the data and content stored on the OneDrive Personal on your file system.


Hence, it is quite easy to connect Microsoft OneDrive to your PC if you try this above method.
Conclusion
OneDrive on Windows offers clean and simplest methods to sync your OneDrive data with work account or school account. You can also get the benefits of synchronization between OneDrive and personal account too. To migrate large sized data, Kernel Migration for SharePoint is available for your service too.