Read time 8 minutes
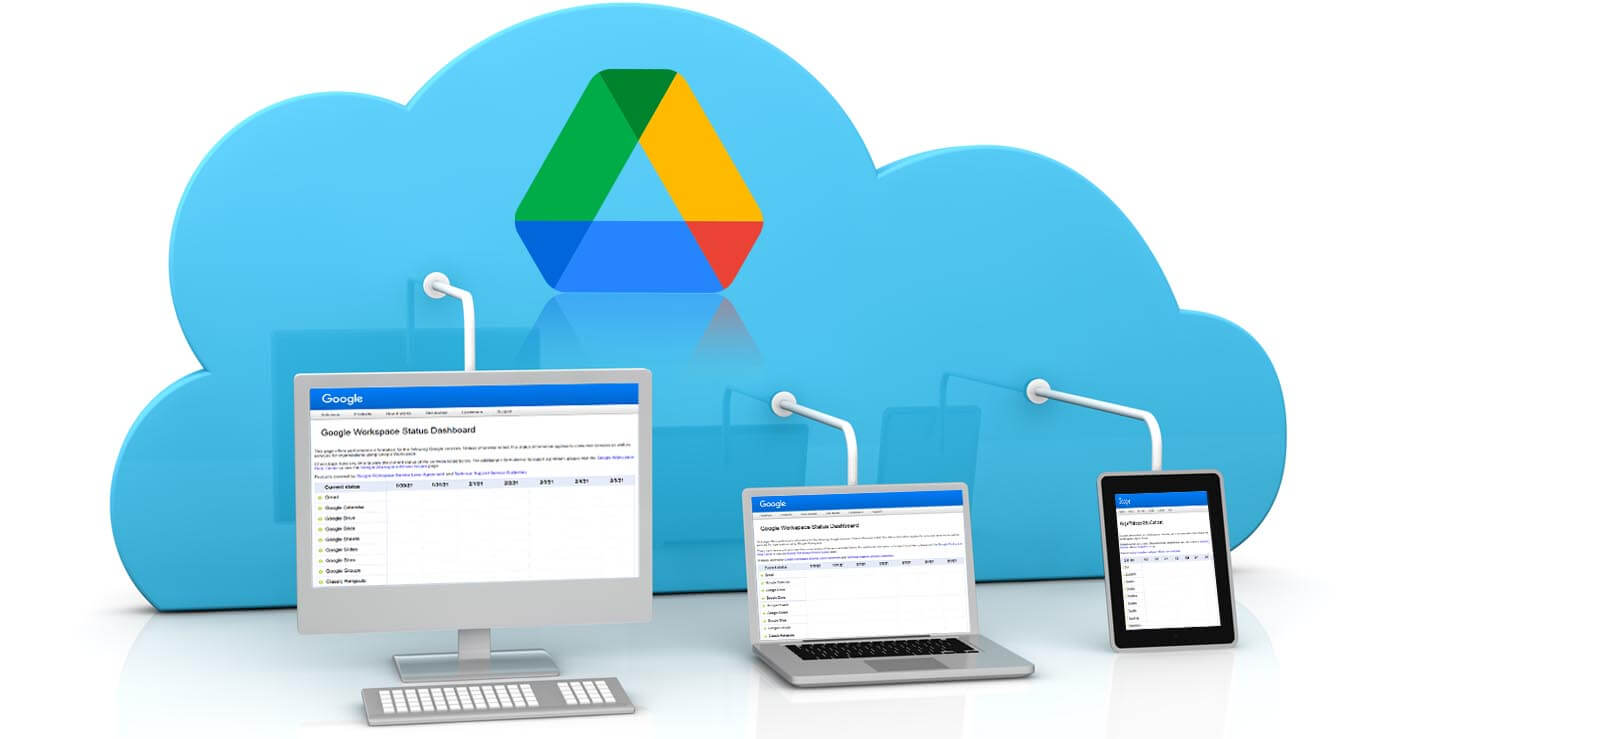
Backup & Sync from Google is a 2-way synchronization application that updates Google Drive and the local folder on the computer to keep them updated. Any files added or removed either in the cloud or the local folder get added or removed in the other. The backup and synchronization work for both cloud and system drive data. It is a native way to backup Google Photos locally as well.
This synchronization gets affected by various reasons, and processes get stuck, freezing the synchronization or displaying error messages, which ultimately halts the backup process.
- “There was a problem signing in.”
- “Something went wrong. There was a problem signing in.”
- “Sorry, Backup & Sync needs to quit.”
- “Sorry, Google Drive needs to quit.”
Let us go through some reliable fixes for the “Google backup not working” issue.
Reasons for “Google Backup Not Working”
- Bugs
- Poor internet connectivity
- Improper configuration or settings
- Incorrect account details
- Service outage
- Lack of storage space
- Oversized files or long filename
- Stuck files and folders
- Windows Firewall issues
- Proxy settings
Common methods to fix Google Backup issues
Try these basic fixes to get rid of the “Google Backup Not Working” scenario.
- Reboot the Local System
It is a simple step that can re-establish the connection between the Backup & Sync App for Google and the local system. So, try rebooting the system once to check the differences. - Restart Google Backup & Sync App
If rebooting the system was not effective, try restarting the synchronized application itself. Follow these steps:- Go to the lower-left corner of the taskbar on your system, click the “Backup & Sync” application icon, click 3 dots on the top right and select the “Quit Backup & Sync” option.
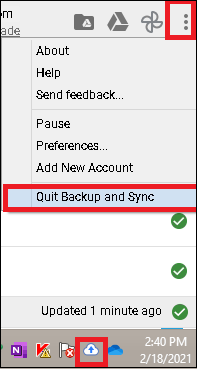
- The application will be closed.
- Now, search for “Backup & Sync from Google.” Select and click the same to launch it again.
- Confirm if the backup and synchronization are working now.
- Go to the lower-left corner of the taskbar on your system, click the “Backup & Sync” application icon, click 3 dots on the top right and select the “Quit Backup & Sync” option.
- Pause & Resume Google Backup & Sync App
When files are stuck, the backup and synchronization processes get halted, and the new data will not be updated. Users can try fixing the problem by pausing the backup & synchronization for some time and then resuming it.- Click on the App icon and then 3 dots on the top right. Select the “Pause” option. It will pause or hold the backup and synchronization.
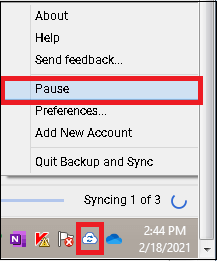
- Wait for about 10 to 15 minutes.
- Again, click on the Backup & Sync icon, click 3 dots, and then select the “Resume” option to resume the backup and synchronization processes.
- Check the progress of the synchronization.
- Click on the App icon and then 3 dots on the top right. Select the “Pause” option. It will pause or hold the backup and synchronization.
- Reinstall Google Backup & Sync App
The issue can be due to incorrect installation of the Backup & Sync application as well. So, try reinstalling the application once.Go to Control Panel and click on the Programs and Features option. Select the Backup & Sync and click on Uninstall to uninstall it from the system.
After the successful uninstallation of the application, go to link https://google.com/drive/download to download and install Backup & Sync on your Windows system again.
Additional Fixes
These fixes are helpful when you have no success after trying all the above common fixes.
- Run Google Backup & Sync as Administrator
Administrative permission is needed for some backup and synchronization processes to work adequately, and so users must launch the Backup & Sync application from Google as an administrator.Search Backup & Sync in the Search bar and select the application name “Backup & Sync from Google” right-click, and select “Run as administrator.” The application is run now with administrative privileges. Check if the processes are working normally.
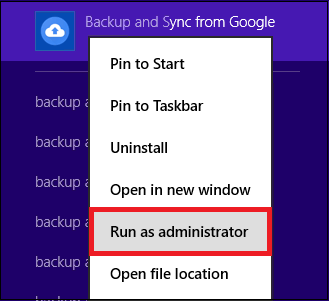
- Check Folder Settings for Synchronization
Users should check their Google Drive folder settings as some specific folders or users have been selected for backup earlier rather than the complete data causing incomplete backup as per your requirement. You can modify these settings as follows.- Click on the Backup & Sync app icon on the taskbar. Then click on 3 dots or the “More” option and select the “Preferences” option from the list.
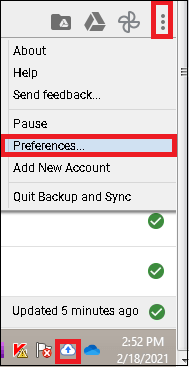
- On the Preferences – Backup and Sync page, click Google Drive on the left panel and then move to the right panel to select the “Sync everything in My Drive” option and click “OK.”
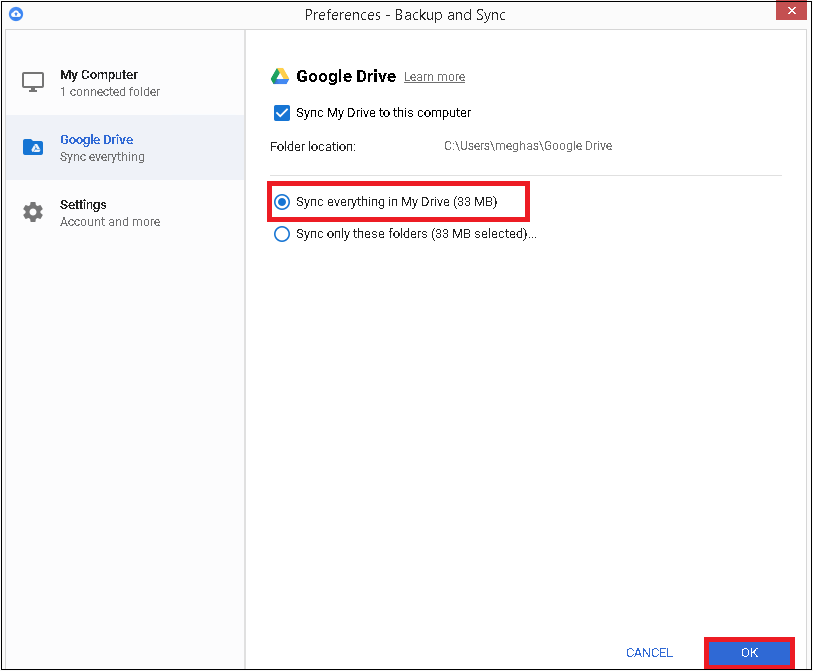
- Now, all folders on the local system will be lined up for synchronization and c backup.
- Click on the Backup & Sync app icon on the taskbar. Then click on 3 dots or the “More” option and select the “Preferences” option from the list.
- Add the Correct Account
Sometimes, users forgot to add the required account or add the account incorrectly for backup & sync, but this can be corrected easily with the application’s Add New account option, which allows users to add another Google account along with the existing one.- Click the application icon on the taskbar, click on 3 dots or the “More” option and select the “Add New Account” option.
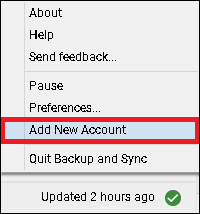
- Provide sign-in details for your Google account accurately and wait for the connection to be established.
- Continue synchronizing all your added Google account folders with the Folder settings option in the application.
- Click the application icon on the taskbar, click on 3 dots or the “More” option and select the “Add New Account” option.
- Check Size Limitations
Very large files in synchronization can cause problems, and users must have a check on the file. Also, file name character size does matter, and it must be less than 255 characters for quick and trouble-free backup and synchronization. - Modify Proxy Settings
The Proxy Settings (if enabled) in the network for the application need to be modified from the default, as synchronization can get affected through these settings.- Click on the application icon, click 3 dots or the “More” option and select the “Preferences” option.
- Next, click the “Settings” option from the left panel. Go to the right panel and click on the “Network Settings” option.
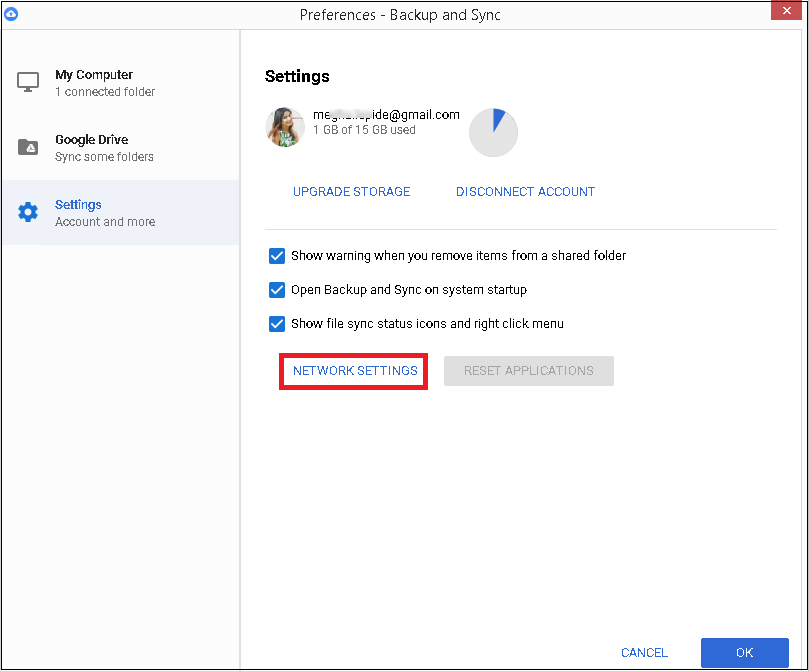
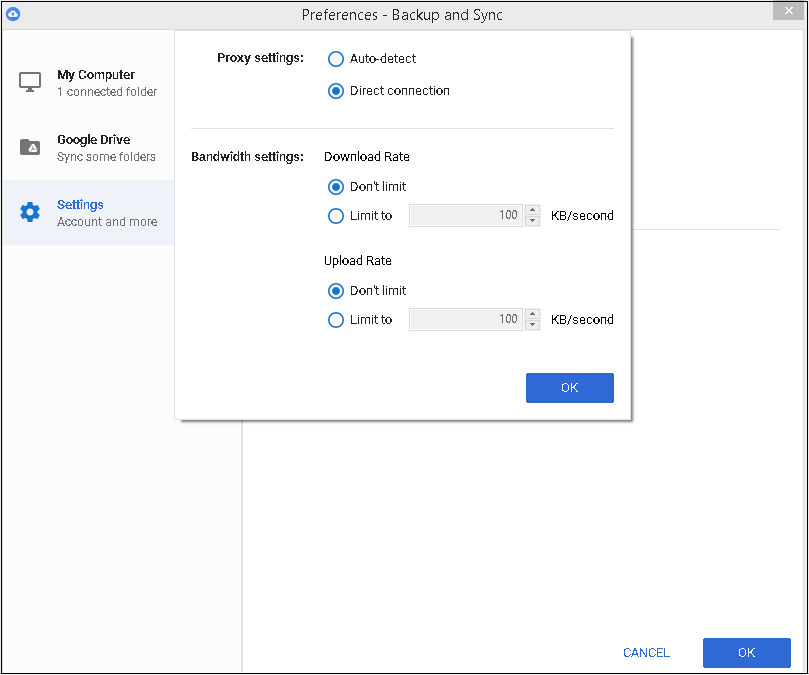
- Select the second option “Direct connection” under the “Proxy settings” section. Also, check that in the “Bandwidth settings” section, have Download Rate and Upload Rate set to “Don’t limit” option. Click “OK” to save these settings.
- Update Firewall Settings
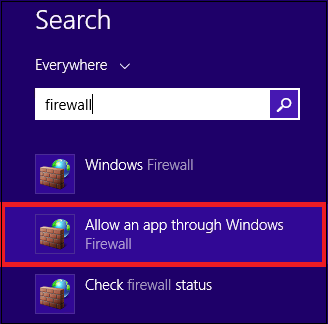
The system Firewall can affect or block the functioning of external applications such as Backup & Sync. However, the Firewall settings for the application can be checked and modified to resolve the related issues.- Search for “Firewall” in the search window on your system and select the “Allow an app through window” option to launch it.
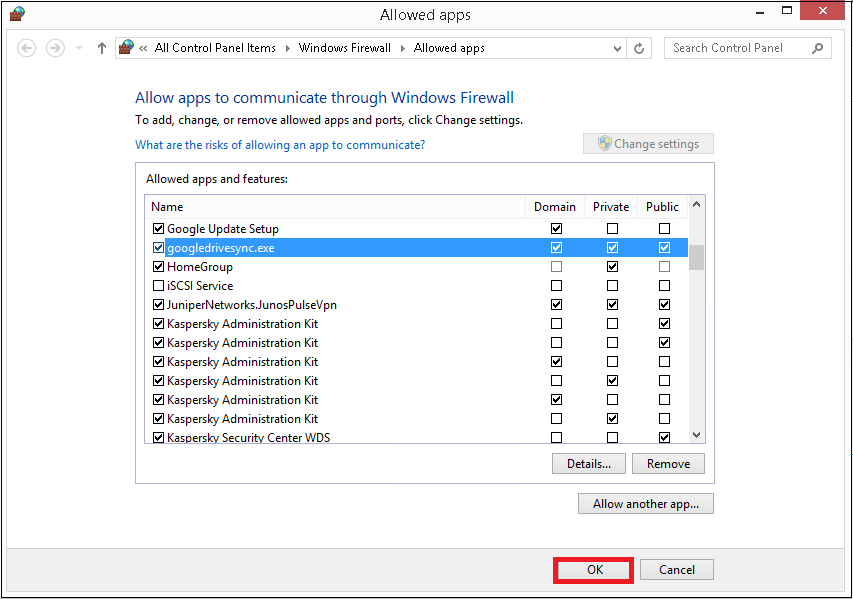
- Search for the Google Drive backup and sync exe in the list. If not found, click on the “Change settings” option, then click on “Allow another option” at the bottom to browse and add the Backup & Sync application exe in the list. Once added, select the options Domain, Private and Public against the exe chosen and click “OK” to secure these settings.
- It will remove the Firewall issues for the Backup & Sync application.
Backup Google Data with Kernel Google Workspace Backup and Restore
Kernel G Suite Backup is an efficient tool to backup G Suite data. You need not worry about any data modifications or deletions when you use the Kernel Google Workspace Backup and Restore tool, which directly backup G Suite Contacts/Calendars, G Suite Gmail, Hangouts Chat, Google Drive data etc.


