Read time: 7 minutes
Outlook calendar stores important entries like appointments, events, meetings, etc., to help manage work schedules effectively. However, sometimes due to migration to another platform, backup data, or just to store offline, users export Outlook.com calendar. The process often involves challenges creating a risk of missing or lost data. To avoid this, you need to follow a proper procedure and extract the calendar entries.
This article will be your detailed guide, explaining reasons behind the export, how to export using manual methods, and tips to view and store your Outlook calendar data. So, stay tuned and read the complete write-up.
Why should you export Outlook.com calendar?
Major reasons to export calendar from your Outlook account include:
- Backup necessary calendar entries to your PC to safeguard crucial information for easy recovery after disasters.
- Transfer Outlook calendar to Office 365 to access advanced scheduling and calendar management tools.
- Connect with third-party apps for enhanced functionality and performance.
- Manage a unified calendar within Microsoft 365 to efficiently organize multiple meetings, appointments, and events within an organization.
- Easy to keep a copy offline to access the calendar events anytime and anywhere.
- For saving the archives of old meetings and appointments to maintain records for future purposes.
Quick Methods to Export Outlook.com Calendar
Here are a few methods to export the calendar from Outlook on the Web:
Method 1: Use Outlook desktop application
Step 1: Launch Outlook desktop application on your PC.
Step 2: Go to Calendar icon on the left and select the desired one.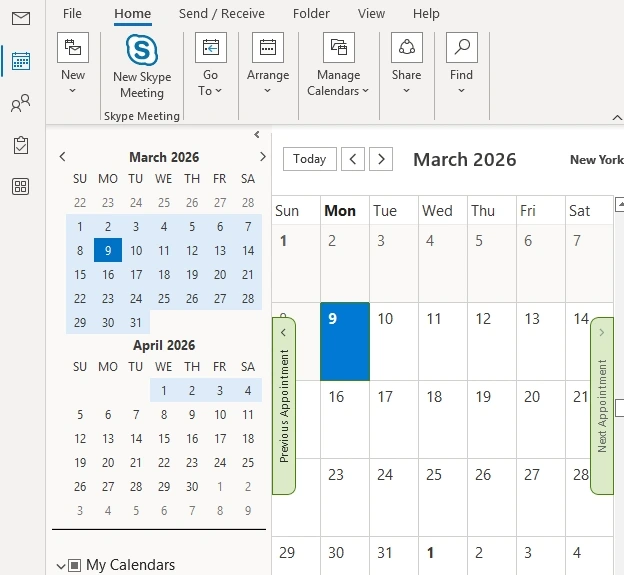
Step 3: Now, click on the File tab, and then Save Calendar.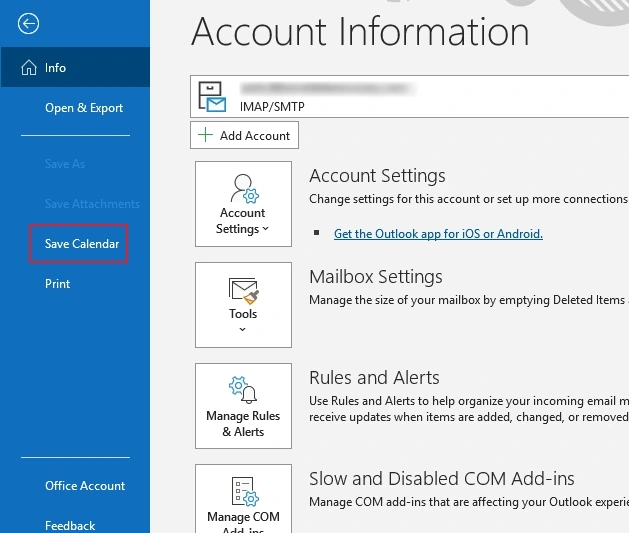
Step 4: Select iCalendar Format (.ics) and click Save.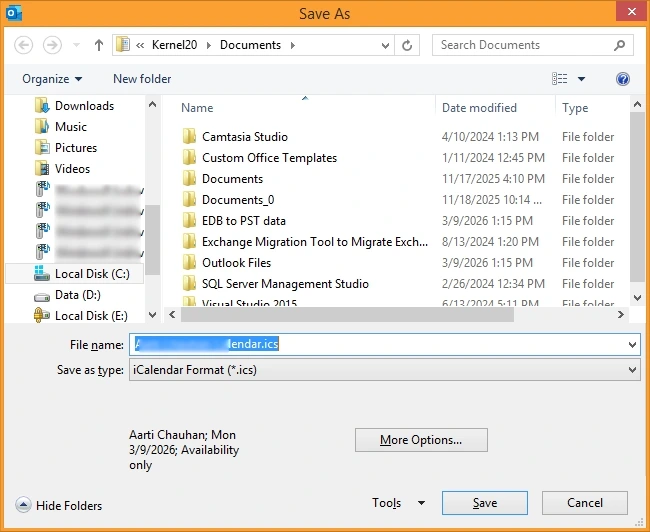
Step 5: If prompted, click on Change Dates and specify a date range to include.
Step 6: Click OK and the export process will begin.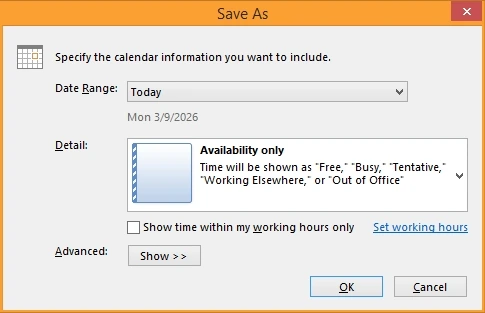
Method 2: Export Calendar as .ics using Outlook Web
This method explains how to save Outlook calendar to ICS file using Outlook on the Web:
Step 1: Open web browser and go to Outlook.com to sign in to your account.
Step 2: Open Calendar and then go to Settings > View all Outlook settings.
Step 3: Click Calendar and select Shared calendars.
Step 4: Select the calendar and assign permissions on Publish a calendar screen.
Step 5: Tap on Publish, copy the .ics link and paste in a web browser to download the calendar.
Whenever needed, you can import the .ics file in any other email application.
Method 3: Export Outlook calendar to PST
In this method, the calendar data is exported to a PST file and saved to your local machine:
Step 1: Open Outlook and go to File and then click Add Account.
Step 2: Enter Outlook credentials and click Connect to login.
Step 3: Complete two-factor authentication if needed.
Step 4: Now, go to File, then Open & Export and click Import/Export.
Step 5: Tap on Export to a file and select Outlook Data File (.pst).
Mark the Calendar folder and then provide the destination to save the PST file containing calendar items.
Issues in manual Oulook.com calendar export
Here are some issues that you might face when you export Outlook.com calendar:
- You can export individual calendars only, rather than a group.
- Large calendars or those with attachments might show issues.
- Any error can result in incomplete data export.
Professional-recommended solution to export calendar
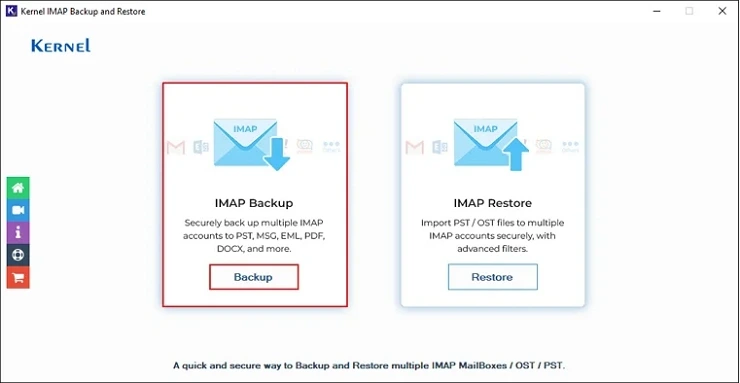
With manual methods to export the data, there’s always a risk of losing your important entries to errors and unstable internet connection. Therefore, you need to find a way that will allow you an easy and swift data download. For this, we suggest Kernel Outlook.com Backup tool that supports a secure backup of Outlook.com emails, calendars, and other data items.
The tool saves all the required and selective data items using advanced filters, preserving metadata, and other email properties. The incremental backup feature makes sure that only the recent data items are saved without creating any data duplicity.
Step-by-step process to export calendars from Outlook.com
- Run the the software and click on the Backup tab.
- Tap on the Add button to enter and add the Outlook account credentials.
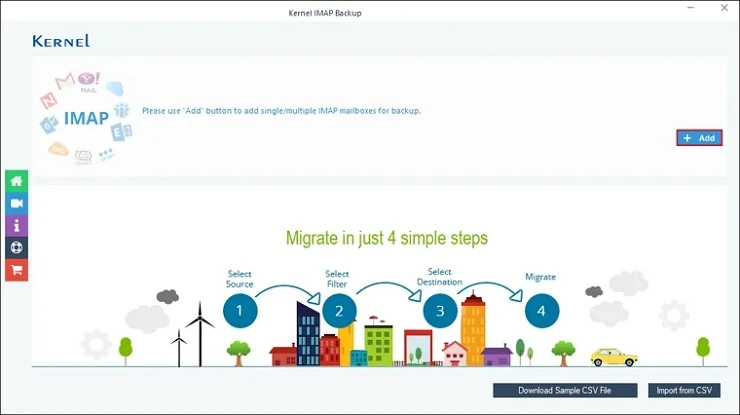
- Click Set Filter and Migrate to start folder enumeration of the added mailbox.

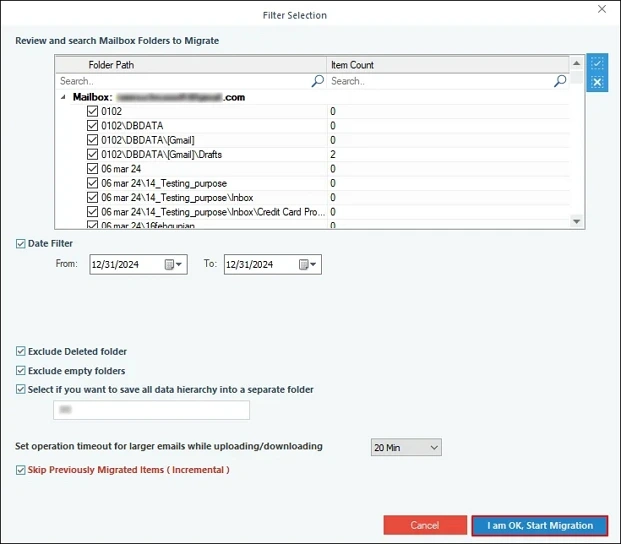
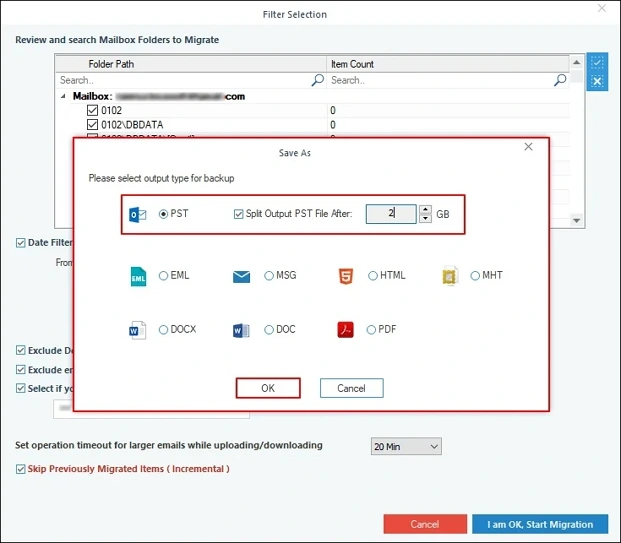
- Select the desired folders which include your Calendar data and apply the data filters. Click I am OK, Start Migration.
- Select Output file format as PST and provide the location to save the resultant file.
Conclusion
There are so many methods to export Outlook.com calendar to local storage. However, not all of them guarantee unaltered data backup. There are chances of errors and data loss throughout the process, which makes them less reliable. Use the recommended Outlook.com Backup solution to avoid the shortcomings of manual methods and easily export Outlook.com calendars without any hassle. Download the trial version of the tool and backup 10 items per folder for free.
Frequently Asked Questions
Ans: Exporting calendar from Outlook.com means you backup all or specific calendar entries and events to an ICS file format.
Ans: Follow the given steps to backup or export calendar:
1. In Outlook.com (OWA), sign in, and click Settings.
2. Tap on Calendar and then Shared calendars.
3. Go to Publish a calendar, select the desired, and select Permissions.
4. Hit Publish, tap on the ICS link, then download or save the file.