Read time: 4 minutes
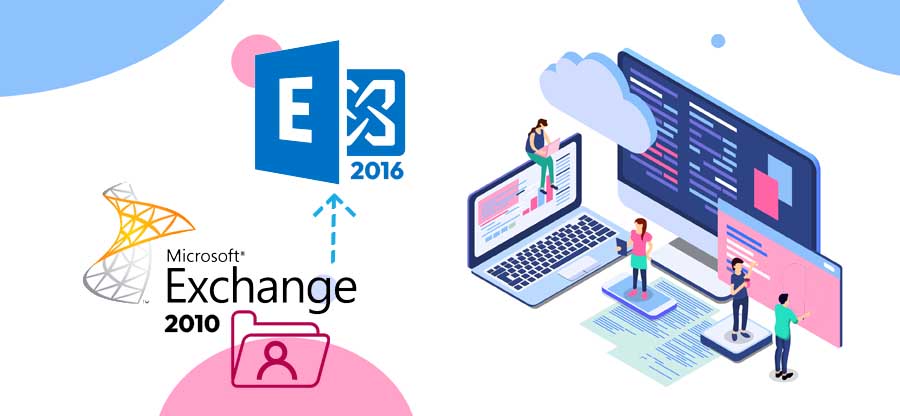
After the successful installation and configuration of Exchange Server 2019 on your premises, it is time to migrate data from the older version to Exchange 2019. Though it is advisable to use a professional tool for Exchange migration, we will use the Exchange Admin Center (EAC) and create a batch to migrate Exchange Server 2016 to Exchange 2019.
Exchange 2016 to 2019 Migration Guides
- Part 1: Important Points to Consider before Installing Exchange Server 2019
- Part 2: Prepare the Environment for Exchange Server 2019 Installation
- Part 3: Exchange Server 2019 – The Complete Installation Process
- Part 4: Configure Exchange Server 2019 Post the Successful Installation
- Part 5: Exchange 2016 to 2019 Migration Step-by-step Guide
Migrate Exchange Server 2016 to 2019
For migration from Exchange Server 2016 to 2019, you require both versions of Exchange in a single network. When both servers are live, it becomes easier to migrate the mailbox database.
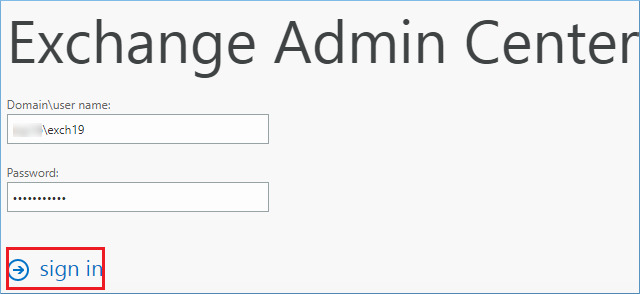
- You can start the Exchange Server migration using the Exchange Admin Center. Sign in to it using the admin username and password.
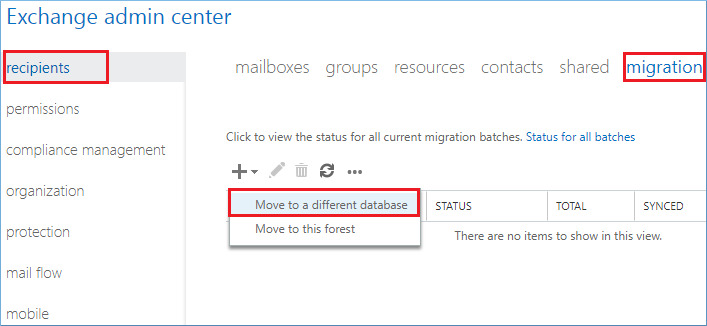
- In the recipients category, go to migration and click on the Add option. Choose Move to a different database.
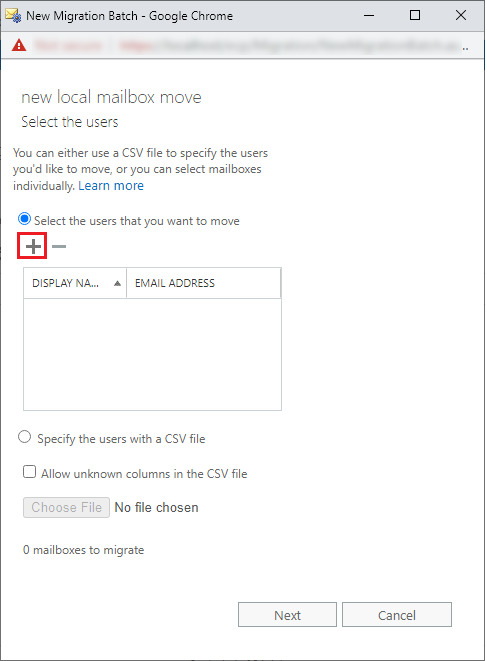
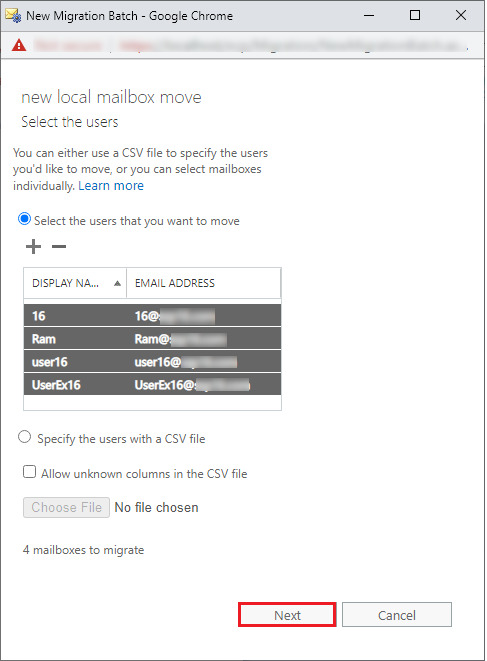
- Click on the Plus (+) icon to add user mailboxes that you want to migrate.
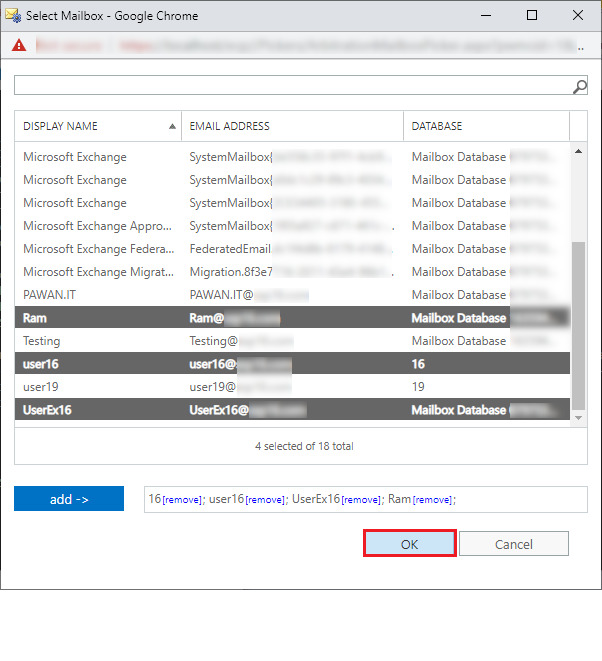
- Select the mailboxes from Exchange 2016 and click the Add button.

- After selecting mailboxes, click OK.
- The mailboxes are enlisted in the wizard for migration. Click Next.
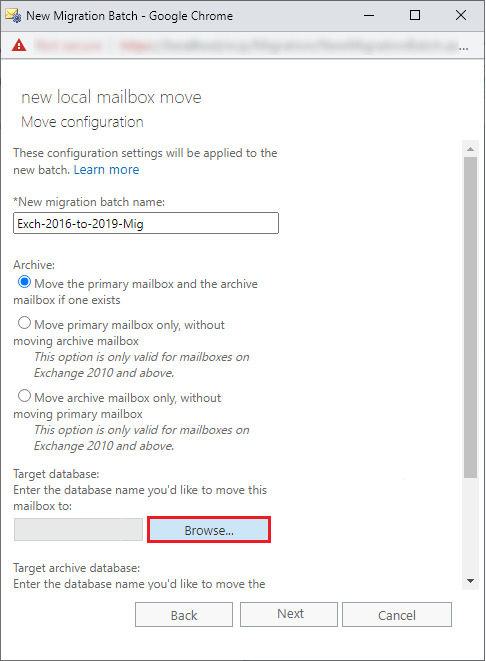
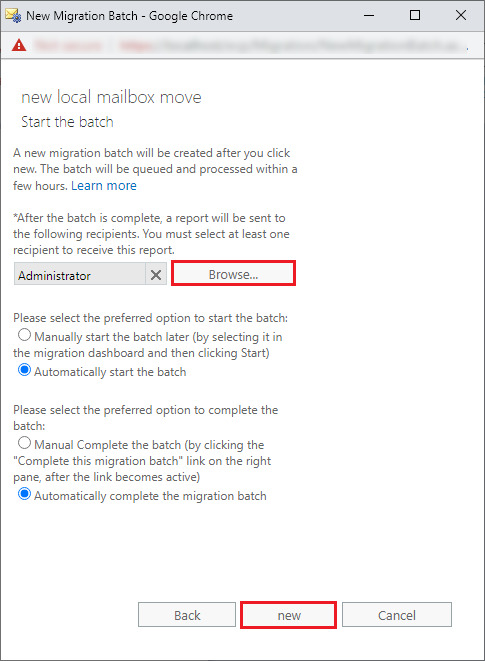
- Provide a new name to the migration batch and click the Browse option to select the target database.
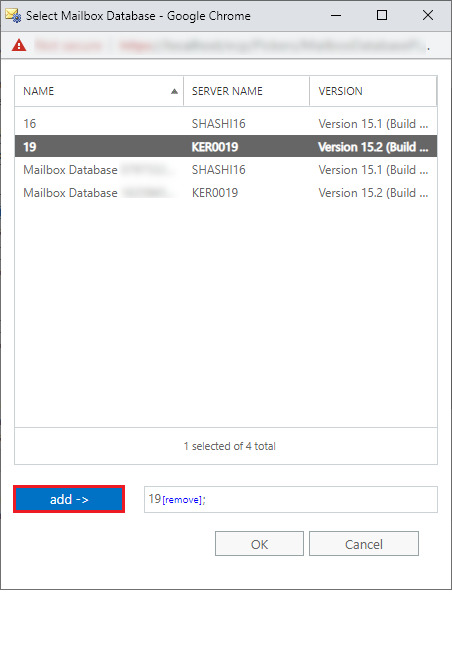
- Select the database from Exchange 2019 and click Add, then OK.
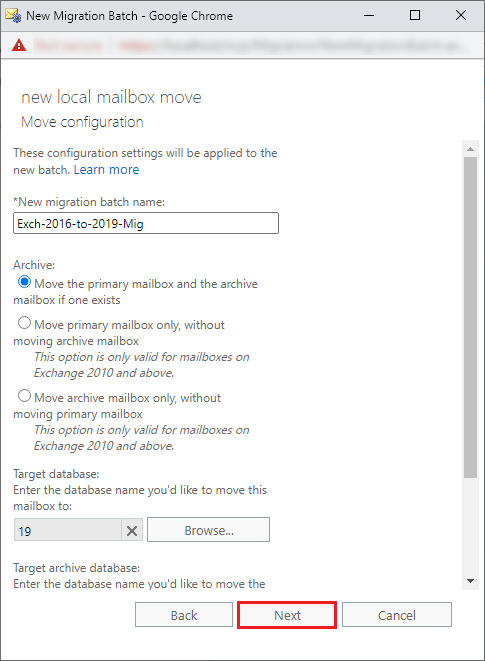
- Once the target database has been selected. Click Next.
- Use the browse button to select the recipient who will get the report when the batch is completed. Then, click New.
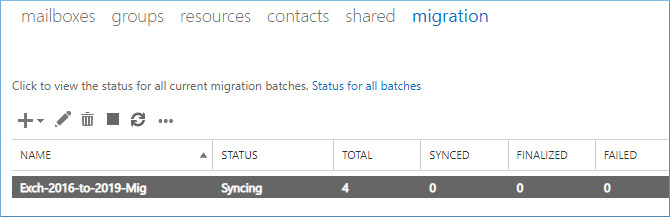
- The migration starts quickly, and you can see the status is syncing. When the migration to Exchange 2019 is complete, the FINALIZED column will show the migrated mailbox numbers.
Post-migration steps to follow
You can’t just leave everything and relax once you migrate mailboxes from Exchange 2016 to 2019. There are responsibilities that you must fulfill as an administrator before allowing the organization to hop on to work with Exchange 2019. Let us look at the activities:
- Spend time ensuring every data, email, mailbox, and setting is migrated.
- Adjust the DNS settings to direct emails to the new Exchange Server 2019.
- Check if users can access their emails through mobile devices without any hassle.
- Regularly monitor the server performance so that if any error pops up, you can resolve it quickly.
- Ensure that security measures, including firewalls, spam filters, and antivirus protection, are applied correctly.
An Easier Way to Move from Exchange Server 2016 to 2019
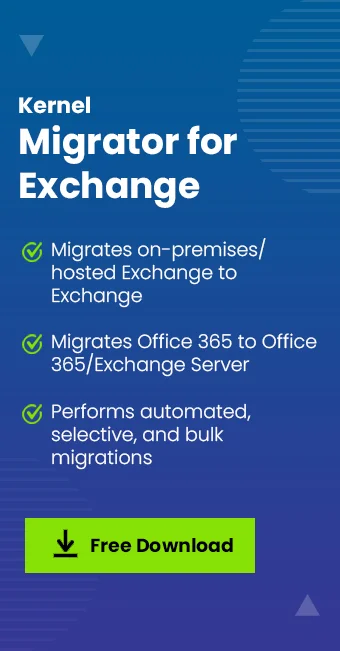
If you have experience in moving mailboxes between two different Exchange Server versions, the EAC manual method is easy for you. But someone who is doing it for the first time may get confused. Moreover, mapping mailboxes and setting up filters also confuse admins. Therefore, many admins choose to rely on a professional Exchange migration tool, like Kernel Migrator for Exchange. The tool allows you to:
- Migrate all mailboxes from one server to another.
- Support intra-forest, cross-forest, and hybrid migration.
- Helps to plan and execute migration with advanced features like pre-migration analysis.
- Accurate data transfer with user mapping (manual or automatic).
- Transfers metadata, pre-configured rules, along with permissions.
Final Words
Exchange 2016 to 2019 upgrade is more than a simple software update. Throughout the series, we discussed the prerequisites (Part 1), setting up the environment (Part 2), installing the Exchange Server 2019 (Part 3), configuring Exchange Server after installation (Part 4), and finally, in this final Part 5, we moved the mailboxes from your old 2016 Exchange version to the 2019 version.
For small-scale migration, you can create a batch using EAC. But to migrate bulk Exchange mailboxes in a large-scale migration, you should use the Kernel Migrator for Exchange. The tool simplifies the migration between different Exchange Server versions and also allows you to schedule the data transfer as per your convenience.
Frequently Asked Questions
Ans. No. Due to the Exchange “Online Move” feature in Exchange, users can keep using their Outlook while the data moves. However, when the migration completes, they will receive a prompt to restart Outlook.
Ans. Transferring the mailbox with 100GB of data will take several hours. Moreover, migration priority is lower than the normal day to day email activities priority. So, during office hours, the migration may be halted multiple times to make sure no other activity is affected. This results in longer migration time, so perform the data transfer after office hours.
Ans. Once the migration is over and verified, Exchange automatically deletes the data from the 2016 database to free up space. You don’t have to delete it manually.