Read time: 8 minutes
Microsoft SharePoint has earned a reputation as the best document management and collaboration platform due to numerous features designed to handle documents extremely well. When you are moving data between SharePoint sites, you need to be mindful, as you cannot just transfer the entire database. This is due to the two main reasons:
- Process will consume a lot of time
- Risk of downtime as well as data loss
However, cloud storage services like SharePoint store a massive amount of data, including unused, inactive, and outdated files or folders. Being a SharePoint administrator, it’s crucial to take action and perform a thorough clean up before the data transfer.
This article will take you through the process to clean up data before SharePoint migration and explain how to use a professional SharePoint migration tool to transfer with 100% accuracy.
Why perform data clean up before migrating SharePoint data?
Cleaning up data before SharePoint migration from the old environment simplifies the workflow. There are various benefits underlying the procedure, and some of them are mentioned below:
- Eliminating data duplicity: Data in the source environment often has a chance of storing duplicate data, which can be migrated to new cloud storage. Data cleanup allows you to organize and remove unnecessary data before moving it to the SharePoint server.
- Enhance data quality: When you have data in an organized structure, you’re transferring crucial data quality rather than migrating every bit you had in your previous environment. It will eliminate any data which is invalid, outdated, or redundant data.
- Lower time and efforts: When you clean up data before SharePoint migration in the source environment, you’re saving time and efforts that you might otherwise spend in arranging data at the destination. This process assures that the data transferred is accurate, complete, and ready for immediate use, which simplifies the overall data migration process.
- Creates more storage: The data cleanup process eliminates unnecessary items, which means the new environment will have more storage to keep important data files. It will indirectly lower the cost of buying more storage in the source environment.
- Enhanced content management: With the data cleanup strategy, admins can manage the overall content stored within the site. They can keep a backup of the less used or data that might only be needed for compliance purposes to an offsite location for future requirements.
SharePoint site administrators must have clear communication with all the team members before starting to clean up data prior to SharePoint migration. It would be better to have an understanding so that you don’t end up deleting files that you may need in the future for legal purposes.
How to execute SharePoint migration?
As soon as a new SharePoint site is deployed, you may think of migrating files and folders from your file share. This results in an unorganized SharePoint environment. After this, whenever you migrate, there will be risks of losing data due to the involved complexity. However, it is not a simple process. You need to plan the content migration, prepare to tackle the possible issues, create a checklist for SharePoint migration, prepare the destination environment, perform the migration, and communicate as well as onboard end users.
Here are the steps of the process that will help you declutter your source environment and achieve a hassle-free migration.
Step 1. Understand the source data well
Firstly, go through all the folders (and subfolders) and determine what information is suitable to migrate and what’s irrelevant or unnecessary in future endeavors. It will be an inventory cleanup that will reduce the overall size of the migratable data.
While going through all the folders, you can check out and clean various items that are not suitable for SharePoint migration-
- Application files
- Executable software codes
- Large individual files
- Folders that include more than 5000 items.
- Inactive sites or unsupported templates.
- Empty groups
- Empty lists & libraries
- Duplicate files
- Files containing multiple customized permissions.
- Older versions from the version history.
SharePoint collaborates with other MS Office applications like Word, Excel, PowerPoint, Access, OneNote, etc. to promote a productive environment. Many files in the list and libraries are the files created by these applications. Lately, with the new advancements, SharePoint can also store Image Web Part in a modern site. The Image Web Part can insert the image on a webpage from another site, user’s computer, or Web.
Identifying the crucial data and fixing the issues is vital for SharePoint migration. Most importantly, you will migrate system files to your SharePoint account that belongs to your business, so you do not want the migration process to fail.
Step 2. Classify the files, documents, and folders into categories
Once you have selected the useful content from different drives and folders, your next move should be to categorize them smartly. You can categorize the data based on their utility or ease of accessibility. The benefit of creating different data categories will simplify the migration process.
Next time, you can migrate a selected category as a single batch and try another category. Generally, the SharePoint files have mixed folder names like Policies and Procedures, customer files, project files, department files, etc. You can categorize them together in a simple manner to avoid confusion related to the information saved. You can also check SharePoint Online storage information that how much data you want to migrate.
Step 3. Inform the site owners
The site administrator is responsible for managing the data after migration, and they should have permission to do so. Also, take steps to make sure that users have proper access to the data in the new environment. Migrating metadata and permissions is also the major element for users to provide certain control over the data.
Migrate using the SharePoint Migration tool
Once you have sorted out the data for migration, it’s time to move sites from on-premises SharePoint to SharePoint Online. However, manual methods for SharePoint Online migration are complex and are less reliable. To help you narrow down your search, we recommend SharePoint Migration tool which will make the migration process hassle-free. It migrates selected sites, their pages, metadata, images, and other web parts while minimizing the chances of data loss.
The software lets you choose various sites, sub-sites, and entire collections with multiple filter options to hinder the non-required data from migration too. It also moves lists & libraries while protecting them and moving all versions for accessing the latest data after completing the migration. The software will automate the complete migration process with complete data security against all sorts of threats and issues.
Follow the steps to migrate data between SharePoint sites:
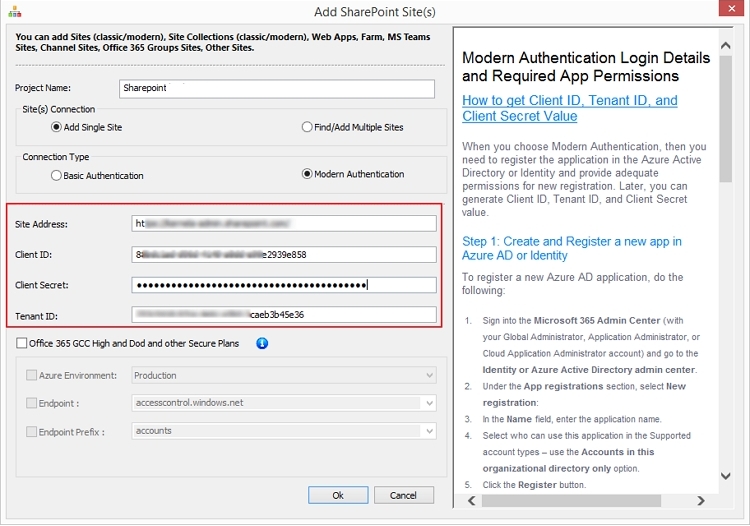
Step 1: Launch the SharePoint Migration tool and add source as well as destination SharePoint sites using the required credentials.
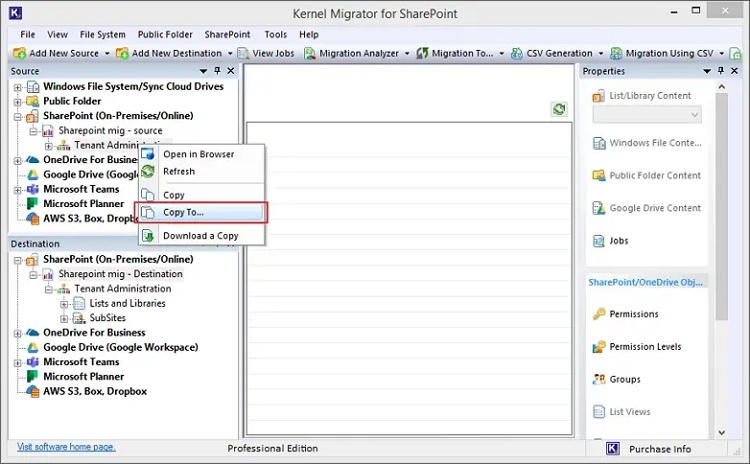
Step 2: Go to the source pane and right-click on the connected site and select Copy To and make the source selection.
Step 3: Select the Site Copy options and select the site destination URL.
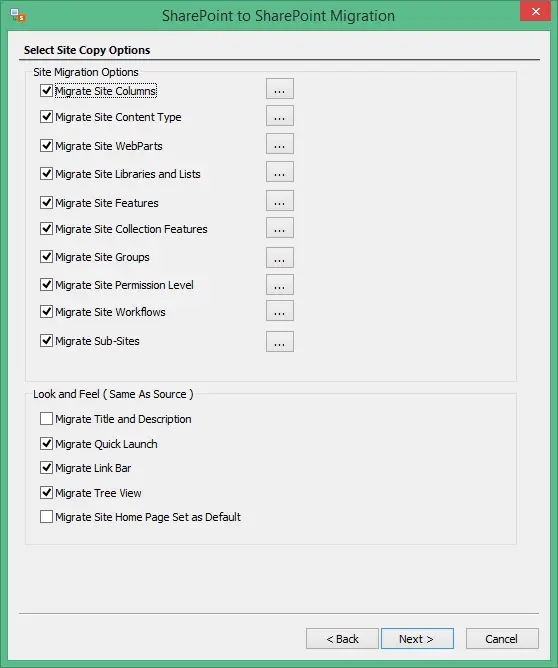
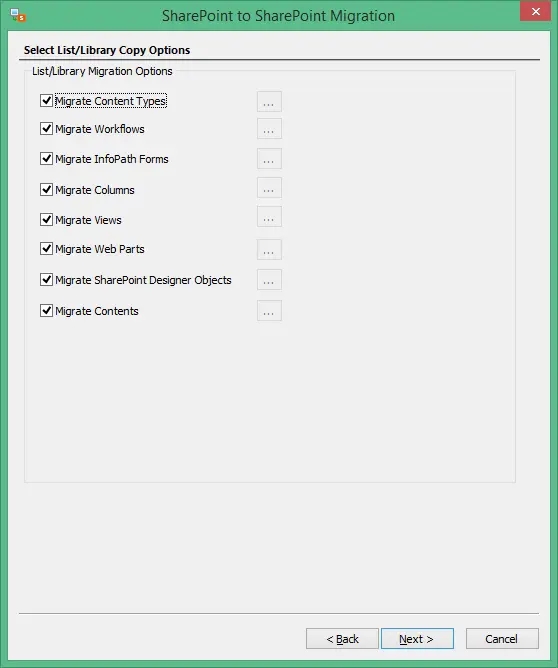
Step 4: One by one select Site Copy options and then List/Library Copy options.
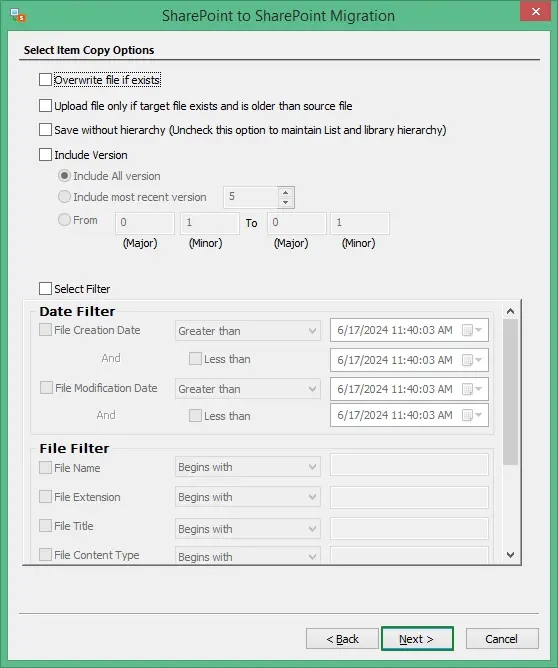
Step 5: Apply the suitable filters and select Migrate Permissions.
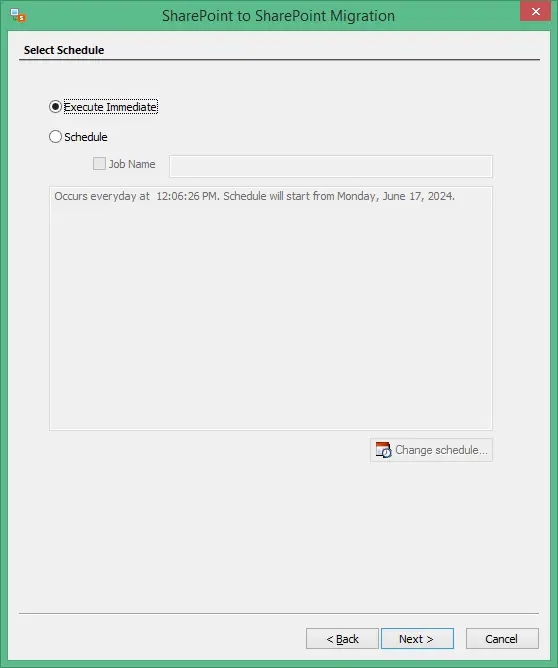
Step 6: Select to Execute Immediately or Schedule for later.
Step 7: The tool will start migrating data and show real-time processes. After completion, it allows you to save the report to your computer as a CSV file.
Final words
Data management is a sensible step that each SharePoint administrator must undertake. Clean up data before SharePoint migration to remove unnecessary risks and chances of migration failure. Following the data purging, you can proceed with a hassle-free SharePoint migration process using the recommended Kernel Migration for SharePoint. It supports all SharePoint versions, saves time, and minimizes risks. You can also select to make sure that all the users are assigned with the right permissions they owned earlier.