Read time 4 minutes
The Offline Storage Table (OST) file is the repository for storing mailboxes associated with Exchange Server on-premises and Microsoft 365 accounts. Other IMAP accounts like Hotmail, Yahoo, etc. also store the synchronized mailboxes in OST files. Its significance lies in the fact that the mailbox remains accessible and available when there is no connection between Outlook and the server.
The default location of an OST file is –
- C:\Users\AppData\Local\Microsoft\Outlook
Alternatively, if you are using the latest Outlook version, do this to quickly find your OST file location:
Open Outlook, right-click on the mailbox folder, and select Open File Location
Note: If you are using a legacy Outlook version, try this location:
- C:\Documents and Settings\Local Settings\Application Data\Microsoft\Outlook
Microsoft has fixed the size of an OST file at 50 GB. However, experts advise keeping the size of the OST file at an optimum level where it does not slow down Outlook or fill the storage in C drive.
Events like low disk space trigger the need to relocate the OST files. The following article will cover the method to change the location of OST file using Group Policy and gain some useful space.
Why change the OST file location?
The primary reasons for this are:
- Your C drive has limited space, and the OST file is growing rapidly due to shared mailbox data.
- You installed a secondary SSD drive and moved the OST file to the SSD for improved read/write speed.
- The company policy forces you to keep data on a drive other than the C drive.
- It’s a temporary thing; you are only changing OST file location for testing an environment.
How to change OST location using Group Policy?
In Windows Server platforms where Active Directory Services are developed by Microsoft, Group Policy Management Console plays an important role as an administrative tool to manage the complete environment. For such Outlook-based Exchange accounts in which cached mode is turned on, there is an option to change the OST file location using available GPO settings. Following the below steps to change OST location in Outlook 2019, 2016, 2013, 2010 –
-
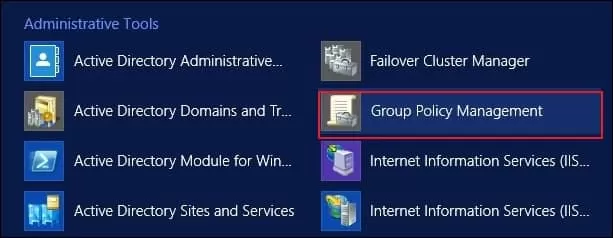
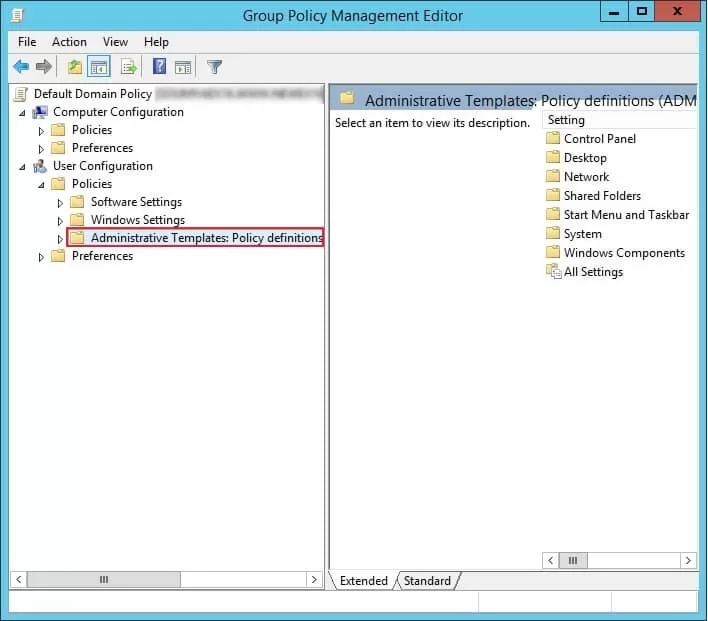
- In Windows Server, go to application, select and open Group Policy Management.
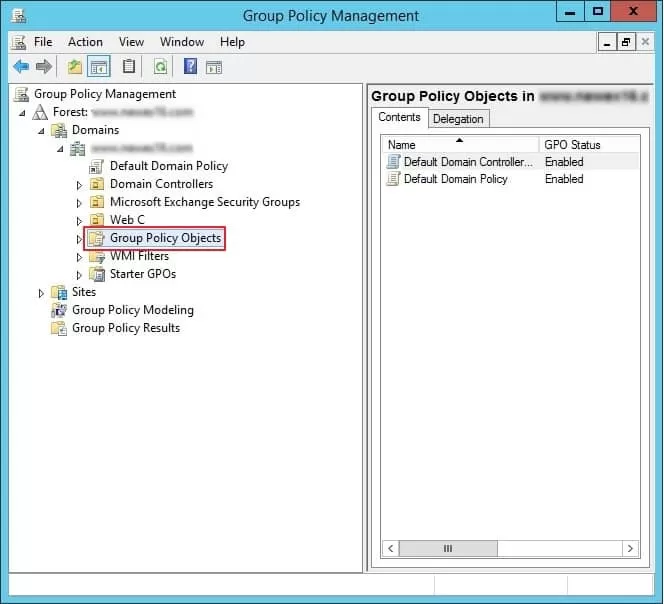
- Expand the Domains showing your current domain and go to Group Policy Objects option.
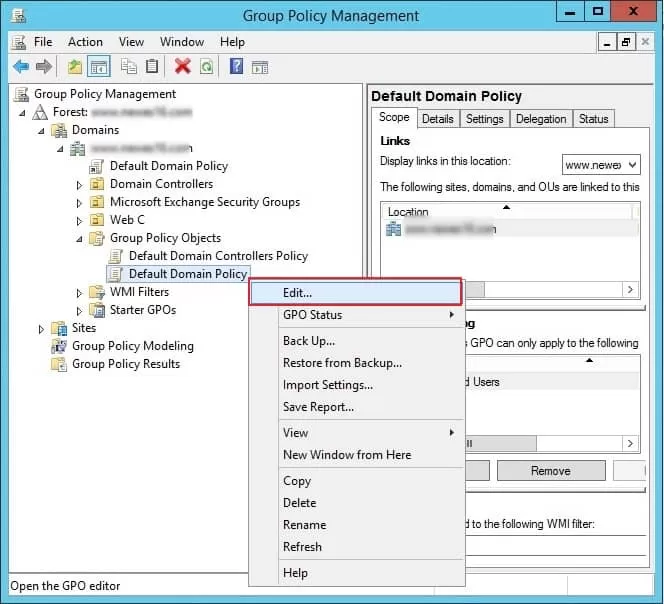
- Right-click to Default Domain Policy and click Edit. It will open Group Policy Management Editor.
- In Group Policy Management Editor, go to Administrative Templates under the Policies category.
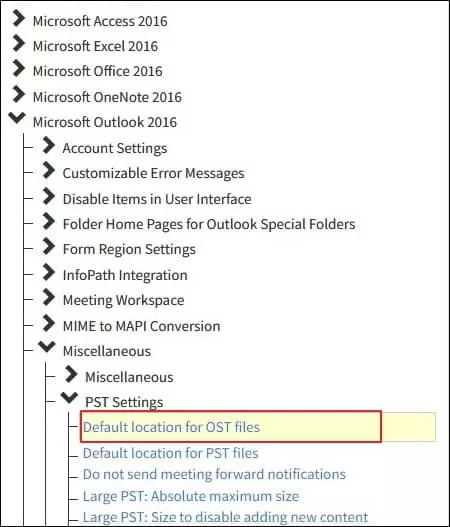
Note: In case you don’t see the Administrative Templates option, download and install the templates as per your Office version and restart the process from Step 1.
- Expand Microsoft Outlook, then miscellaneous, and double-click on the Default location for OST files.
- Click on Enabled option to enable the setting to change the default location for OST files. Then, click the Apply button.
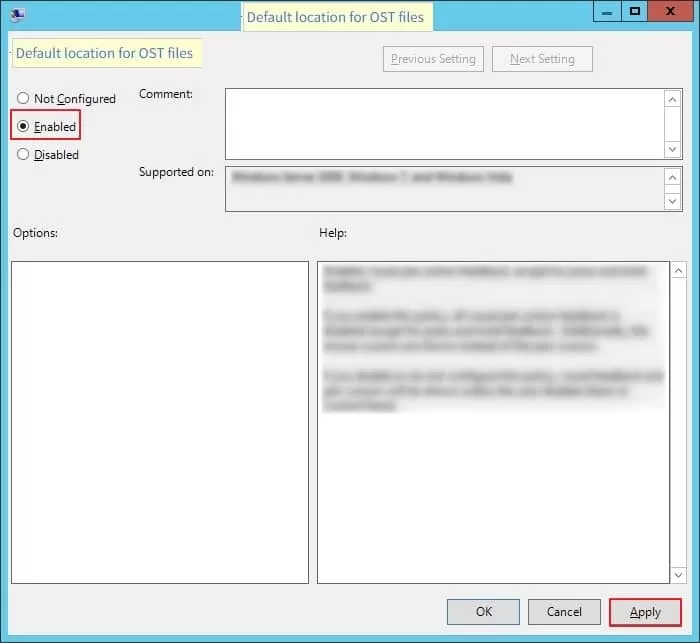
- Input the new location for the OST file and click OK.
Note: The changes will be applicable only to new OST files that are created when you add a new Outlook profile. For old OST files, you have to manually change the location.
Additional Group Policy Settings
There are many Outlook related settings you can change using Group Policy. Some of them are mentioned here:
- Cached Exchange Mode Sync Settings.
It enables the email messages from Outlook to synchronize locally by the date of the message. By default, Outlook synchronizes messages from the previous 12 months only. If you want to get rid of this limitation, then you can select the settings and click All from the list.
- Disallow Download Full Items
It turns off the Download Full Items option for Outlook.
- Disallow Download Headers
It turns off the Download Header option in Outlook.
- Disallow Download Headers the Full Items
It turns off the Download Headers, then Full Items in Outlook.
- Disallow On Slow Connections Only Download Headers
It turns off the On Slow Connections Download Only Headers option in Outlook.
- Download Public Folder Favorites
It synchronizes Public Folder Favorites in Cached Exchange Mode.
- Download shared non-mail folders
It synchronizes shared non-mail folders in the Cached Exchange Mode.
- Use Cached Exchange Mode for new and existing Outlook Profile
It configures new and existing Outlook profiles to add in the Cached Exchange Mode.
Common errors and their solutions when you change OST file location
These are a few common Outlook errors that you may get after the change in Outlook data file location.
Error 1: “The file path specified for the file .ost is not valid.”
This error indicates that the new path you specified in the Group Policy has invalid characters, or maybe the directory does not exist anymore.
To solve it, double-check the path you specified. In case the destination folder is not present, create it before launching Outlook.
Error 2: “Cannot start Microsoft Outlook. Cannot open the Outlook window.”
This error particularly appears when the new destination folder does not have the required read/write permissions, or it is a system-restricted directory.
To fix this error, right-click the folder, go to Properties > Security, and verify that you have Full Control permissions.
Error 3: Outlook freezes or displays “Not Responding”
You may have moved the OST to a network drive, like OneDrive. Microsoft strictly discourages it as it often causes latency issues or file-lock errors. To remove the error, you must change the path to the local drive that is physically attached to your system.
Final words
When you change Outlook OST location using Group Policy, don’t perform a domain-wide change. Instead, test the changes in a small, controlled environment to prevent errors and downtime. Moreover, I recommend running a full backup of your OST files. You can use the Outlook export function to save an OST file as a PST file. However, in case there are multiple OST files, use a dedicated Kernel for OST to PST converter tool for fast bulk backup in a single operation.
Frequently Asked Questions
Q. How to recover data from a corrupt OST file?Ans. If the OST file is connected to Exchange Server, you can recreate the OST file by deleting it. But if it’s an orphaned OST file, then you must use a professional OST recovery tool.
Q. My C drive size is still growing, even after I change Outlook OST location.Ans. Changing the OST location using GPO will only affect the new Outlook profile. If you are using the old profile, data will still be cached on the C drive. To free up space, you can use an OST converter and backup the mailbox to PST files and delete the backed-up data from the OST.
Q. How can I reduce the OST file size?Ans. To fix oversized OST file issues, try these methods:
1. Change the Cache Exchange Mode settings and set the slider to cache only 3 months of emails.
2. Compact the OST file.
3. Disable the shared mailbox item downloading. - In Windows Server, go to application, select and open Group Policy Management.