Read time: 11 minutes
Many users plan to move from BigPond to Office 365 for better security, cloud access, and business tools. However, the process may feel complex without the right guidance. This article explains simple steps to migrate or import BigPond mailbox emails to O365 without data loss.
Before delving into the manual or automated methods. Let’s explore the key reasons behind this migration below.
Why import BigPond mailbox emails to O365?
Go through some of the prime reasons that will help you understand why users need to shift their email communication platform from BigPond to Office 365.
Security & Reliability: O365 offers advanced threat protection, modern authentication, and better security features compared to older ISP-based webmail.
Modern Collaboration: Seamless integration with the Microsoft 365 productivity suite allows for better collaboration through Teams and shared calendars.
Storage & Performance: O365 provides superior mailbox storage capacities (up to 50 GB) and reliable, cloud-based access.
Future-Proofing: As BigPond (Telstra) email services have faced changes and limitations, moving to O365 ensures a more stable, up-to-date, and supported email platform.
Improved User Experience: Users benefit from better email organization, folder management, and enhanced, consistent access across multiple devices, including desktop and mobile apps.
How to migrate BigPond Webmail to MS Office 365 manually?
There is no direct way to Import BigPond Emails to M365. But via IMAP configuration in Outlook desktop client, you can accomplish BigPond to MS Office 365 migration in three parts. Let’s understand each part in detail.
Part 1: Configure BigPond IMAP account in Outlook Desktop Client
BigPond Webmail is an IMAP-based email client that allows users to create their accounts via IMAP authentication. It makes it easy to sync your BigPond Webmail account in Outlook. Let’s start adding your BigPond account in Outlook:
Step 1: Open Outlook and go to the File > Add Account under Account Information.
Step 2: Enter BigPond account details, like full BigPond email address, ending in @bigpond.com, @bigpond.net.au).
Step 3: Choose Advanced options and check “Let me set up my account manually”.
Step 4: Select IMAP and enter Server Settings like:
- Incoming Mail Server: imap.telstra.com
- Incoming Port: 993
- Encryption: SSL/TLS
- Outgoing Mail Server: smtp.telstra.com
- Outgoing Port: 465 (or 587)
- Encryption: SSL/TLS
Finally, enter your password and complete the account setup.
Part 2: Export BigPond mails to PST using Import/Export tool
Outlook offers an advanced built-in Import/Export tool to export the entire mailbox in a PST file. With this option, you can easily save all your BigPond emails in a PST file.
Step 1: Open Outlook and click on File.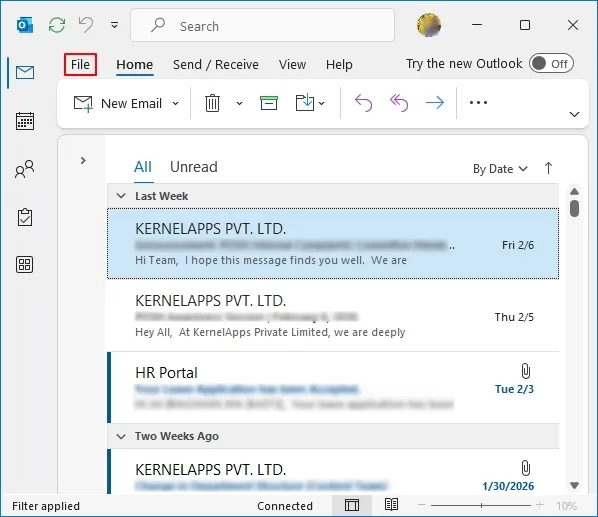
Step 2: Click on Open & Export and Import/Export.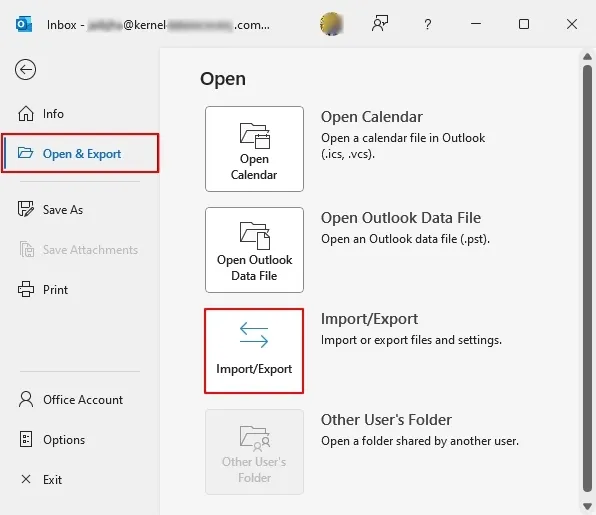
Step 3: In the following window, select Export to a file and click Next.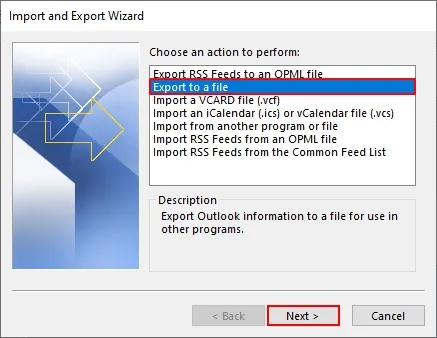
Step 4: Select Outlook Data File (.pst) to Create a file of type in the destination.
Step 5: Select your BigPond mailbox and click Next.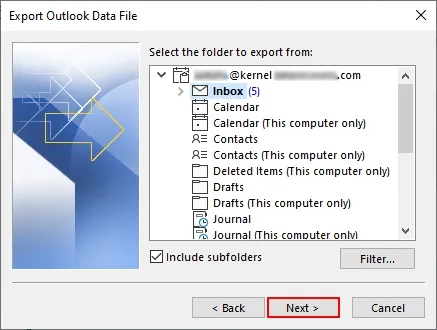
Step 6: Browse and select the saving PST location and click on Finish to export your BigPond mailbox in a PST file.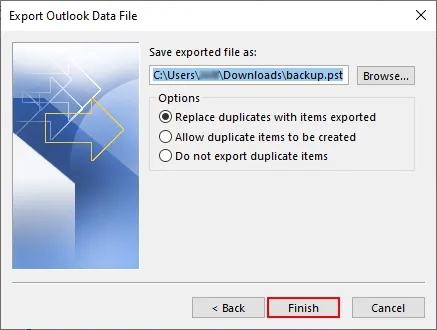
Part 3: Import PST file in Office 365 account
Now, when you have a BigPond data embedded PST file, it’s time to import that PST file into your Office 365 account. You can use Outlook’s Import or Export option to import your PST file in Office 365 account.
Step 1: Open Outlook and click on File.
Step 2: Go to the Open & Export and click on Import/Export.
Step 3: Select Import from another program or file and Next.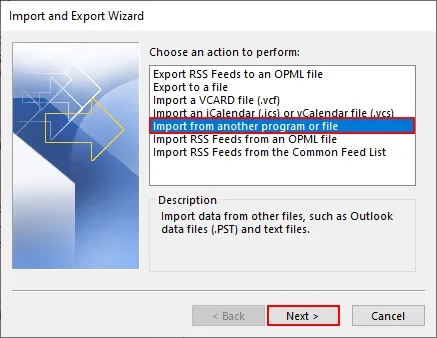
Step 4 : Select file type to import from as Outlook Data File (.pst) and click Next.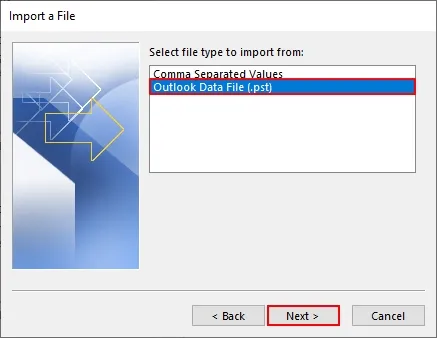
Step 5: Browse and select PST file. Click Next.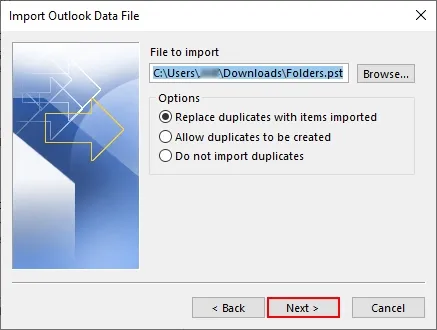
Step 6: Select BigPond account and click Finish to complete the BigPond to MS Office 365 migration.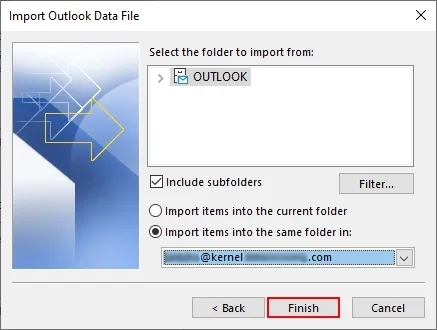
Limitations of the manual method
Data Scope: Only email messages, folders, and subfolders are transferred via IMAP. Contacts, calendar entries, and tasks are not migrated using manual export or import.
Item & Size Limits: Microsoft restricts IMAP migration to a maximum of 500,000 items (emails) per user, and any individual email file exceeding 35 MB will not migrate to the destination account.
Archival Policy Conflicts: If BigPond has active retention or archival policies, the Outlook cannot move archive messages in the Office 365 account.
Disrupted Connection: Bandwidth and server-side limits from BigPond can slow down the migration process. It is recommended to increase connections to improve performance.
“New Outlook” Sync Issues: Some users report that connecting BigPond accounts directly to the “New Outlook for Windows” app causes sync issues with calendar items and overall connectivity.
Professional way to import BigPond mailbox emails to O365
Securely import BigPond Webmail to MS Office 365 with our professional Kernel IMAP to Office 365 Migration tool. With its advanced filter mapping feature, you can simply map your BigPond users to Office 365 users and streamline the BigPond to Microsoft 365 account migration. Let’s explore some of the robust features of this IMAP to Office 365 migration tool:
Prime functionalities of the IMAP to Office 365 tool
- Migrate IMAP emails to Office 365 with complete integrity and folder structure.
- Transfer BigPond emails to Office 365 Mailbox, Shared, Archive, or Public Folder.
- Offers advanced filters for precise email transfer by date or folder.
- Skip previously migrated items with incremental migration to save time and avoid duplicity.
- Migrate large-sized mailboxes without file size limits or errors.
- Generate detailed migration reports in CSV for migration validation.
- Free trial version to download and save up to 10 items per folder for free.
Step-by-step process for BigPond to Office 365 mailbox migration
Step 1: Download, install, and launch the Kernel IMAP to Office 365 Migration tool.
Step 2: On the software’s home screen, click on Let’s Connect on IMAP to Office 365 Migration tile.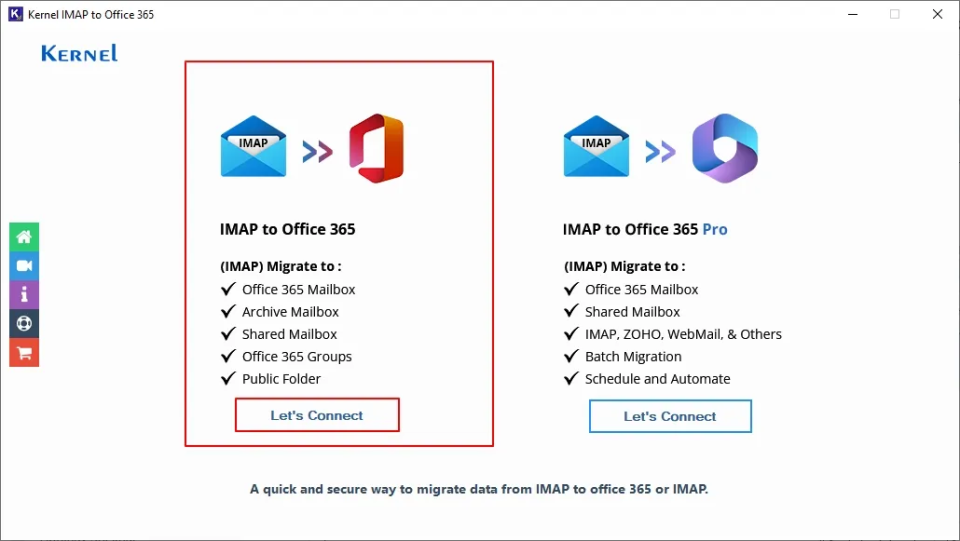
Step 3: In the following window, click on Add in the Add Source section.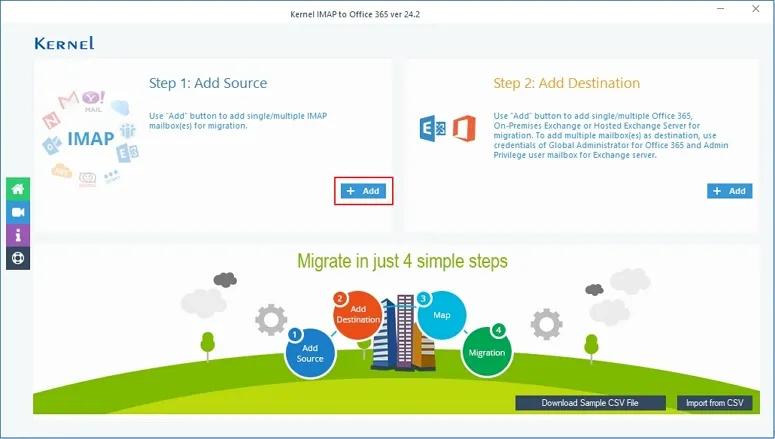
Step 4: The software offers two different login types, such as Modern Authentication and Basic Authentication, to add a BigPond account. For now, we are going with Modern Authentication and click OK.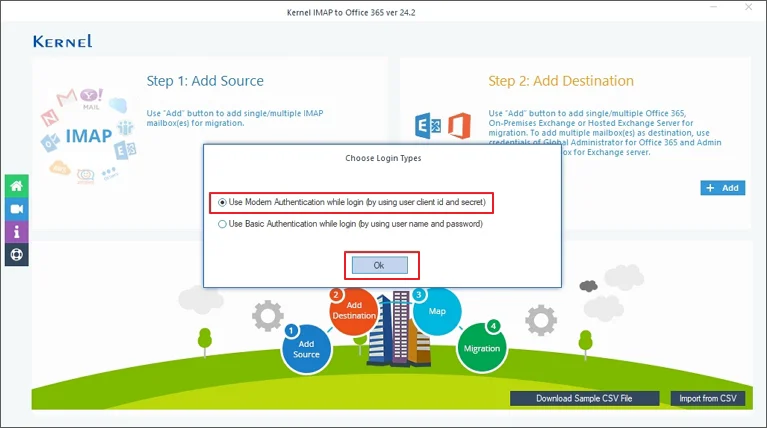
Step 5: Enter BigPond login details, such as Server Name/IP as bigpond.com, User Email/Login id, Password, and Port Number. Finally, click Add.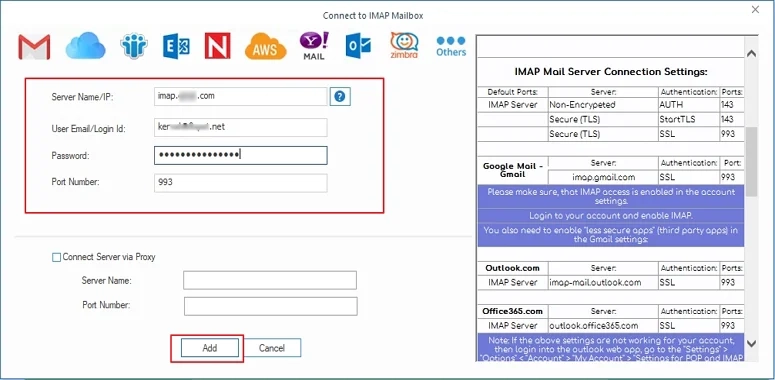
Step 6: Click Add in the Add Destination tab.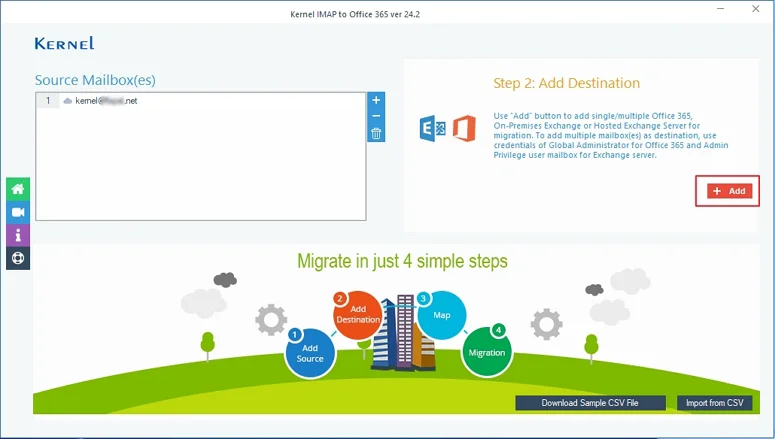
Step 7: Again, select Modern Authentication in Choose Login Types and click OK.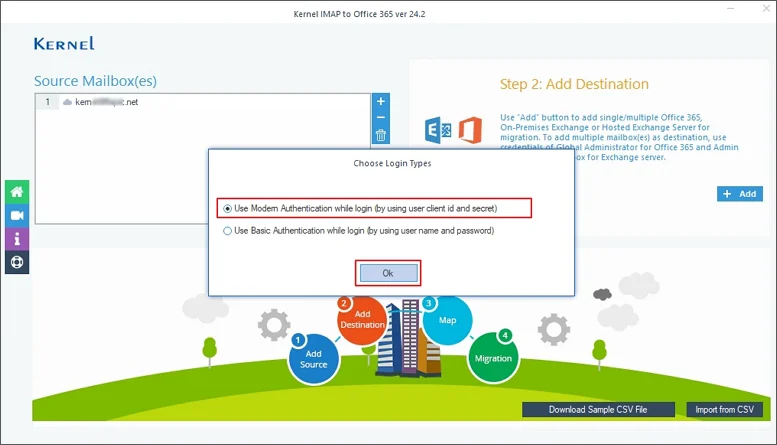
Step 8: Enter Office 365 details like Tenant ID, Client ID, and Client Secret Value. Click on List all Mailboxes using above credentials, and the tool will list all the Office 365 users. Select the desired user and click Add.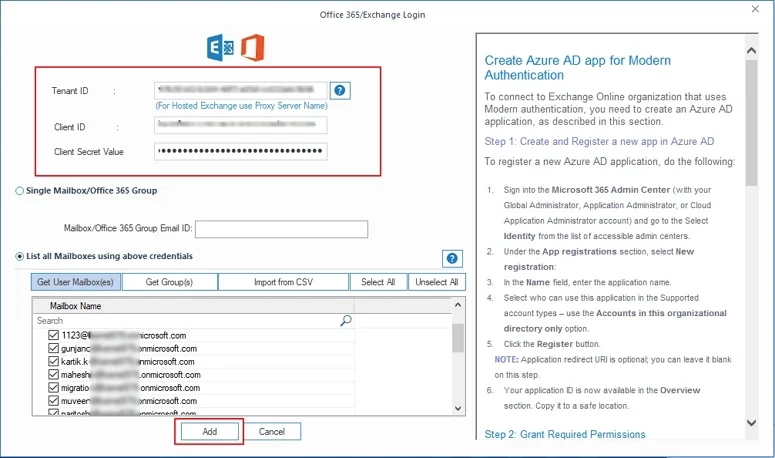
Step 9: Now, map your source BigPond user to Office 365 user and click on Set Filter and Migrate.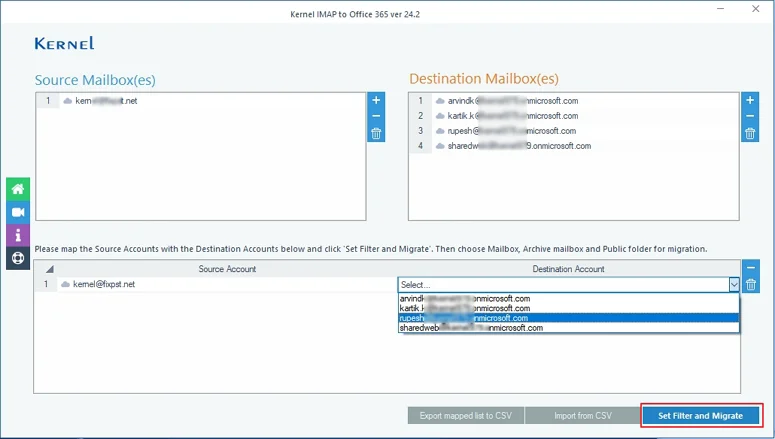
Step 10: Select the destination mailbox type in which you want to import BigPond emails, and click Migrate.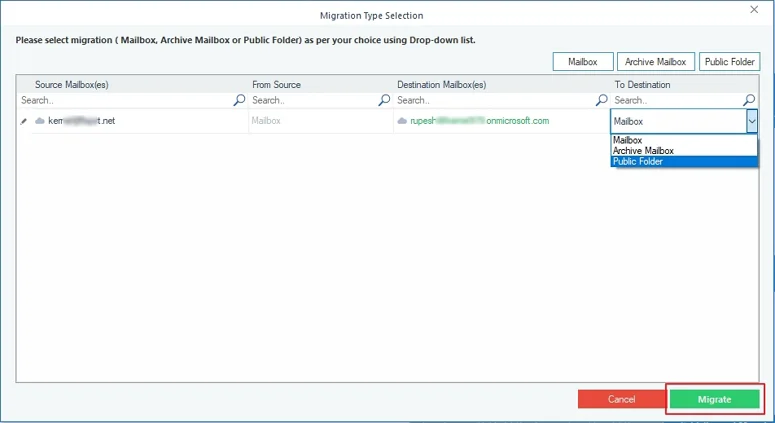
Step 11: The software will start enumerating all the folders from the source BigPond account.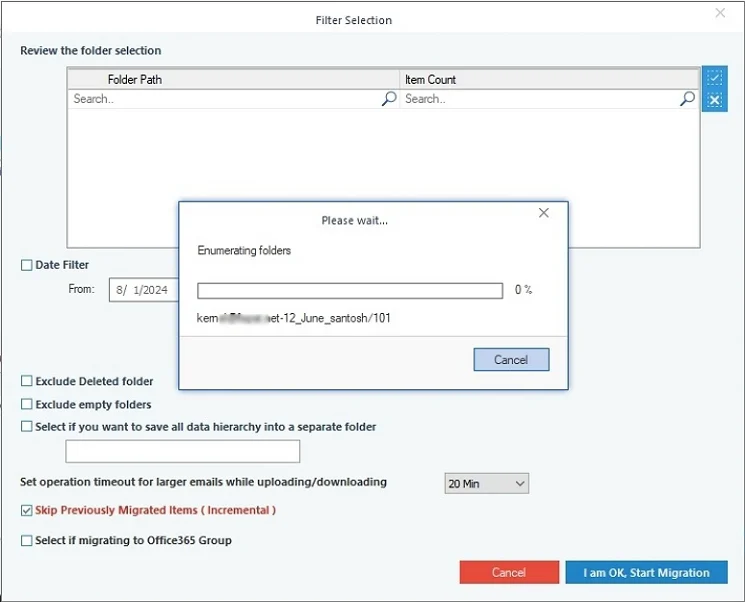
Step 12: In the Filter Selection window, review your data, apply necessary filters for selective BigPond to MS Office 365 migration, and click on I am OK, Start Migration.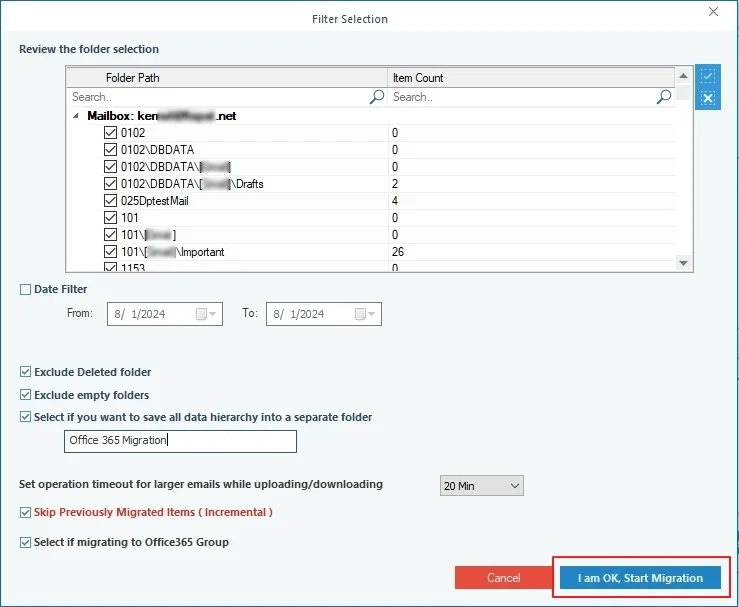
Step 13: The software will start and securely migrate BigPond Webmail to MS Office 365. Click OK.
Step 14: Finally, click on OK or Save report to CSV to download a detailed migration report for data tracking purposes.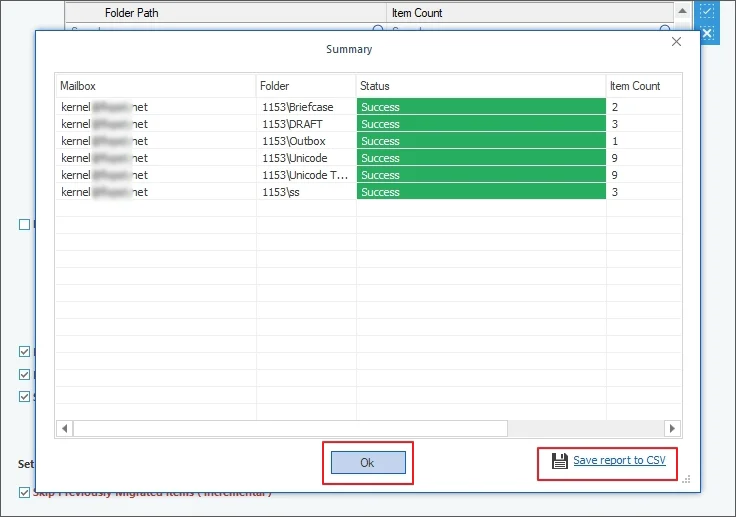
As you see, that’s a simple BigPond to Microsoft 365 account migration with our automated tool.
Conclusion
This article covers a manual method to migrate emails from BigPond to Office 365 Mailbox. However, the manual method carries multiple limitations that put your important data at risk. To avoid associated risks and for 100% migration results, use the recommended IMAP to Office 365 Migration tool.