Kernel Amazon WorkMail to Office 365 is a trustworthy, beneficial tool to migrate Amazon WorkMail mailboxes to Office 365 and Exchange (hosted & on-premise). The procedures are quite simple to execute with highly advanced and robust features. The tool offers selective migration of data with smart filters and options. It also saves data to individual folders - Public folder and Archive mailbox.
How to perform mailbox migration using Kernel Amazon WorkMail to Office 365?
Kernel Amazon WorkMail to Office 365 allows two modes of migration for the mailboxes.
Migrate single WorkMail mailbox
To migrate single WorkMail mailbox to Office 365/Exchange (On-premise & hosted), follow the steps as given under:
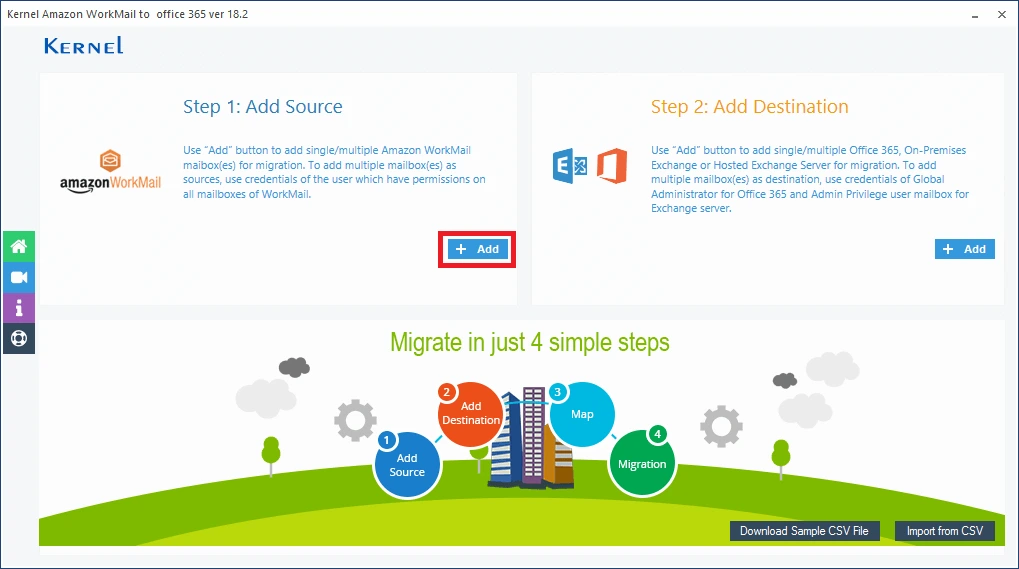
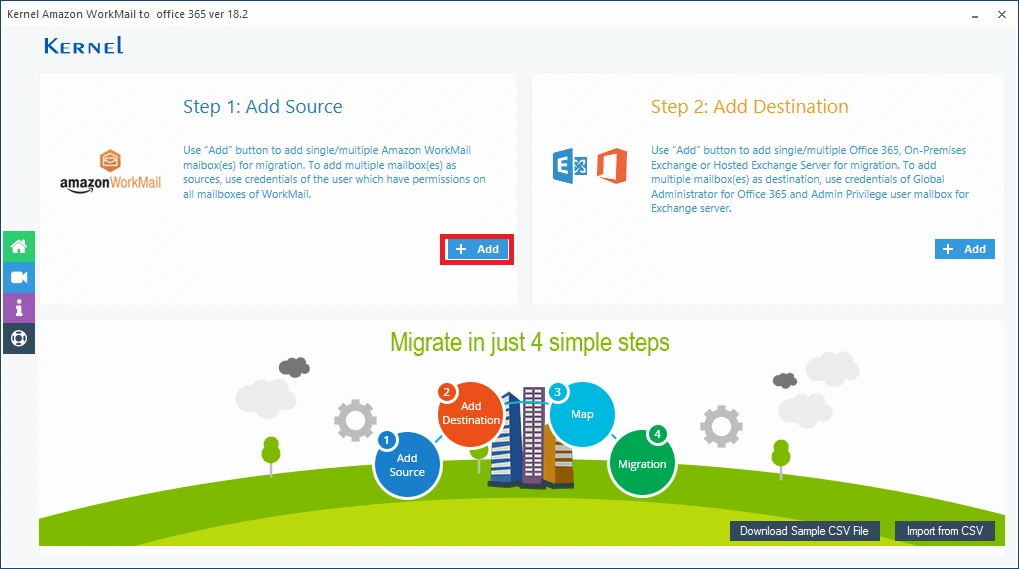
Step 1: Launch the Kernel Amazon WorkMail to Office 365 application. To add the Source (Amazon WorkMail), click Add button.
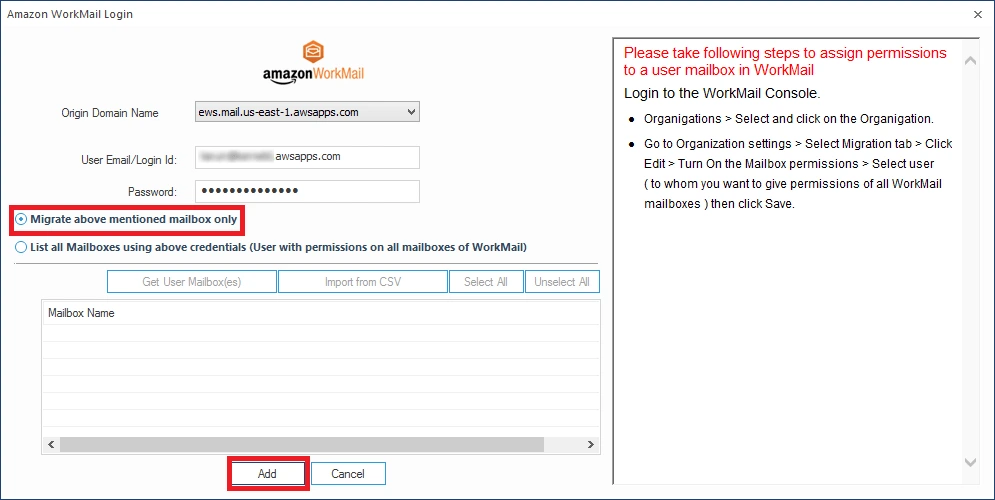
Step 2: The login page for Source (Amazon WorkMail) is opened. Provide the login details (User ID & password) along with Origin Domain Name. You can choose the domain name according to your region where your mailbox is located.
For us-east-1 - smtp.mail.us-east-1.awsapps.com
For eu-west-1 - smtp.mail.eu-west-1.awsapps.com
For us-west-2 - smtp.mail.us-west-2.awsapps.com
Note: If you don't know the region where your mailbox is located, contact your system administrator.
Now, select Migrate above mentioned mailbox only and click Add.
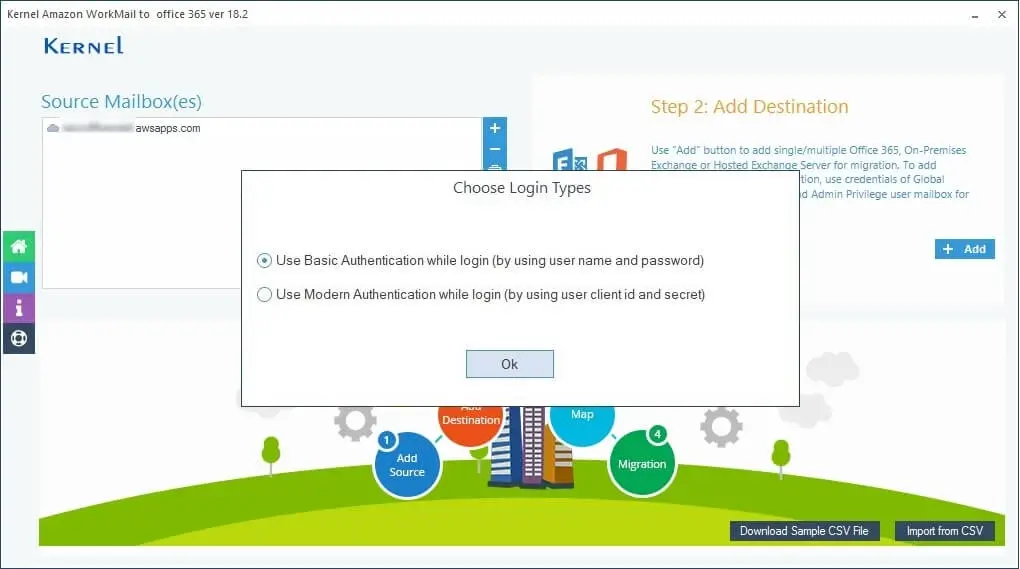
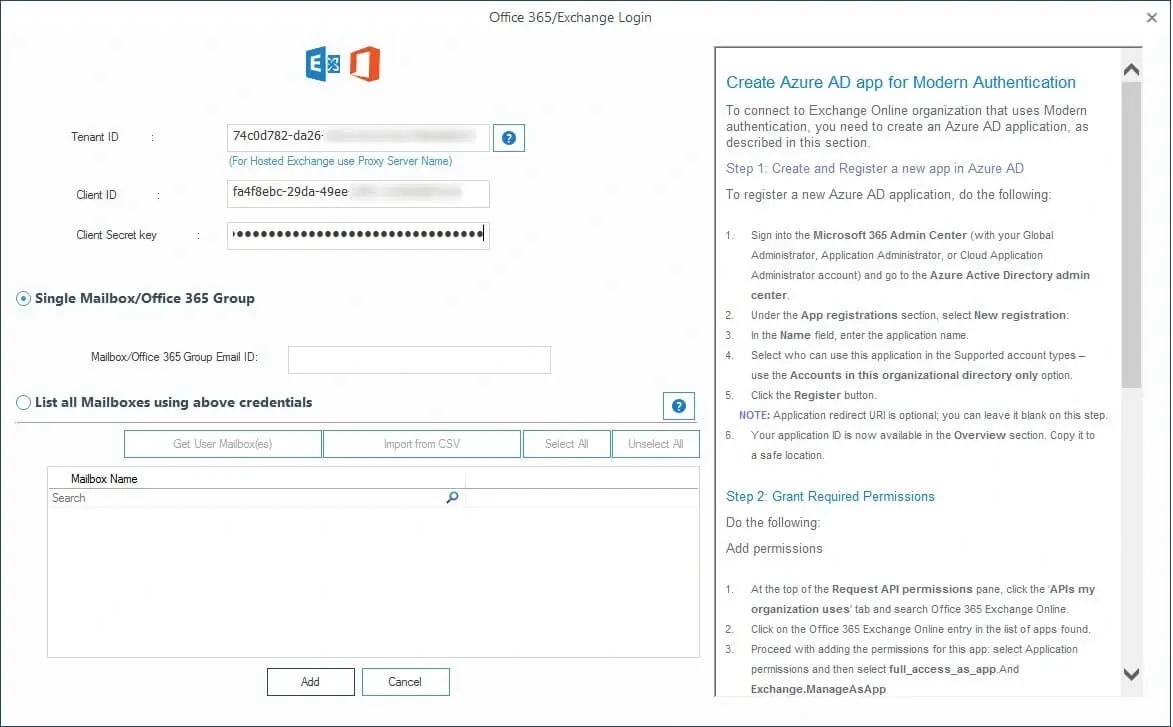
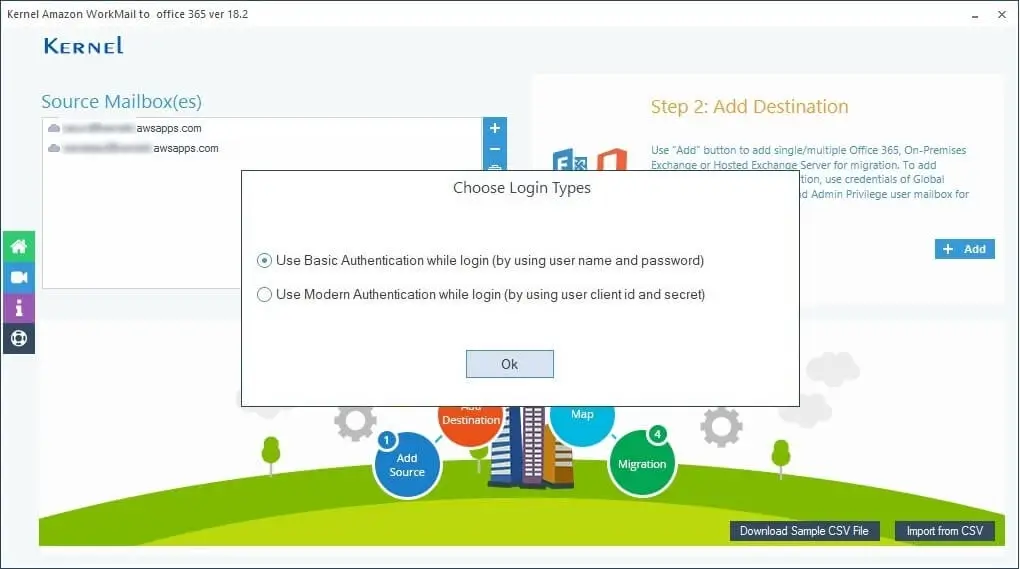
Step 3: Add the destination account (Office 365/Exchange) by clicking Add on the right side. Two login methods will appear that you can choose.
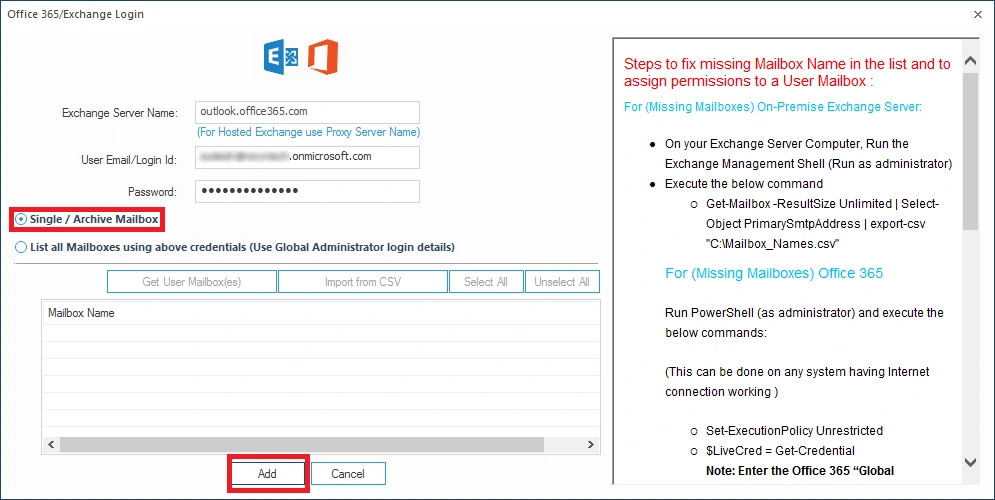
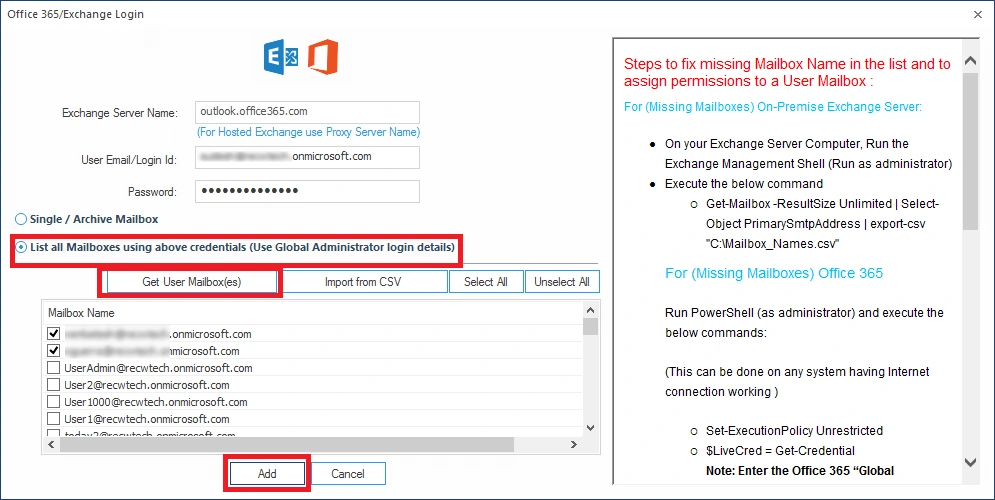
In the Office 365/Exchange Login page, provide the source (Exchange Server/Office 365) credentials as:
To add Exchange Server (hosted & on-premises) as source, enter:
- Server name (without domain name)
- User Email/Login id (username@domain name format)
- Password
- Server name (outlook.office365.com)
- User Email/Login id (username@domain.onmicrosoft.com)
- Password
To add Office 365 as source, enter:
Step 4: Now select Single/Archive Mailbox and click Add. Here, we are discussing migration to Office 365.
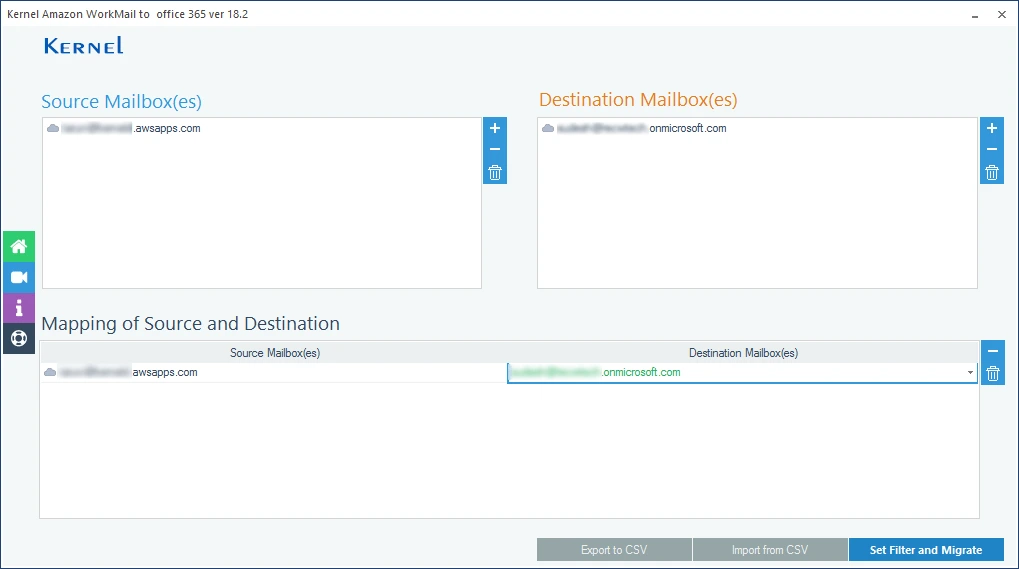
Step 5: After adding Source and Destination mailbox, perform mapping and click Set Filter and Migrate.
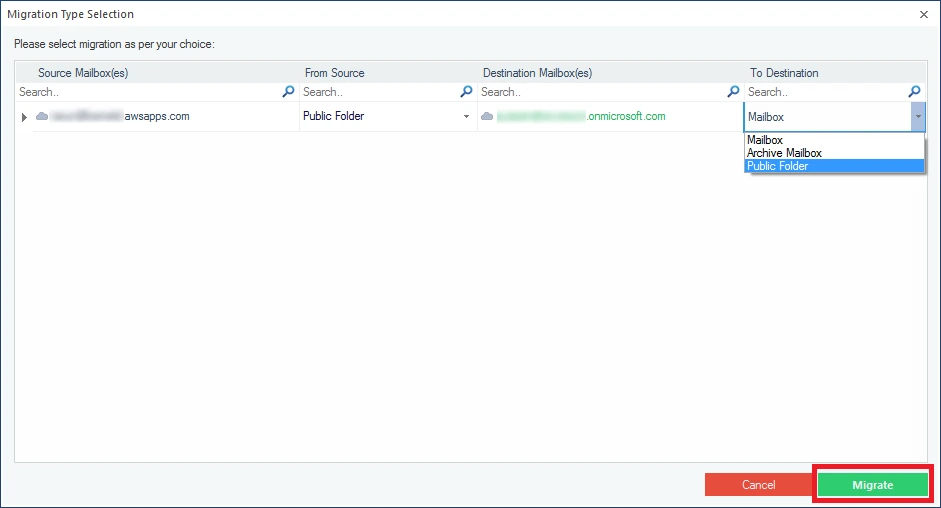
Step 6: In Migration Type Selection dialogue box, you can choose folders to migrate from Source and for destination. You can select either Mailbox, Public folder or Archive mailbox. Make your choice and click Migrate.
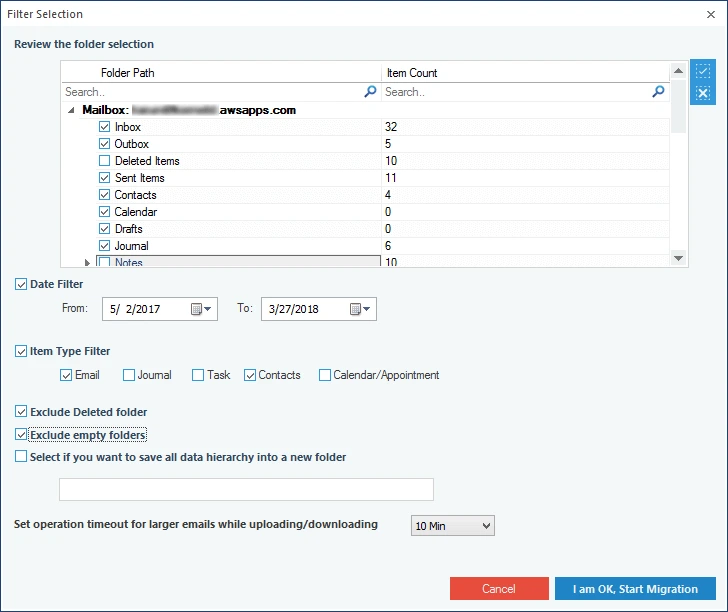
Step 7: In the Filter Selection window, choose the filtering options as required:
- Review PST Folders to Migrate: Select the folders to migrate
- Date Filter: Provide a date range to filter items
- Item Type Filter: Select the item types that are to be migrated
- Exclude Deleted folder: Select to exclude Deleted item folder from migration
- Exclude empty folders: Exclude empty folders from the migration
- Select if you want to save: Provide a folder name (to save the data with hierarchy inside a mailbox folder)
- Migrate data in to the following folder: Provide a folder name (to save the data inside Office 365 mailbox)
- Set operation timeout: Select an upper time limit for migration (the migration will be rejected if it exceeds this time limit)
Finally click I am OK, Start Migration.
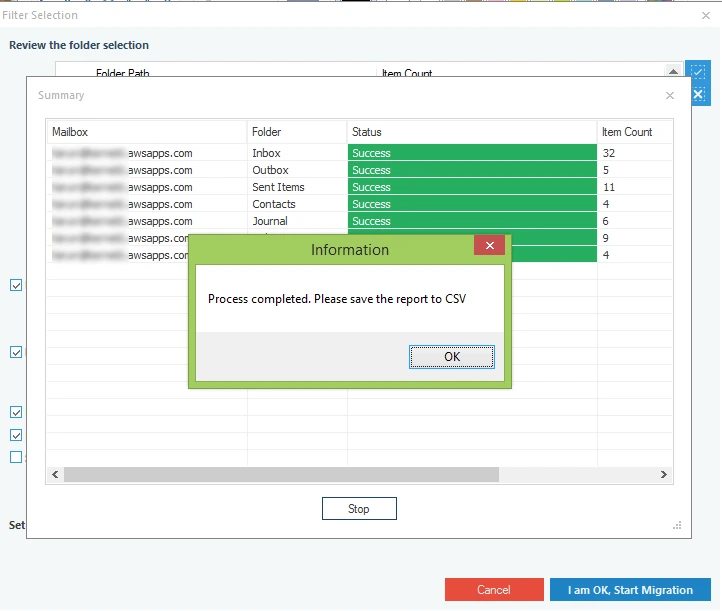
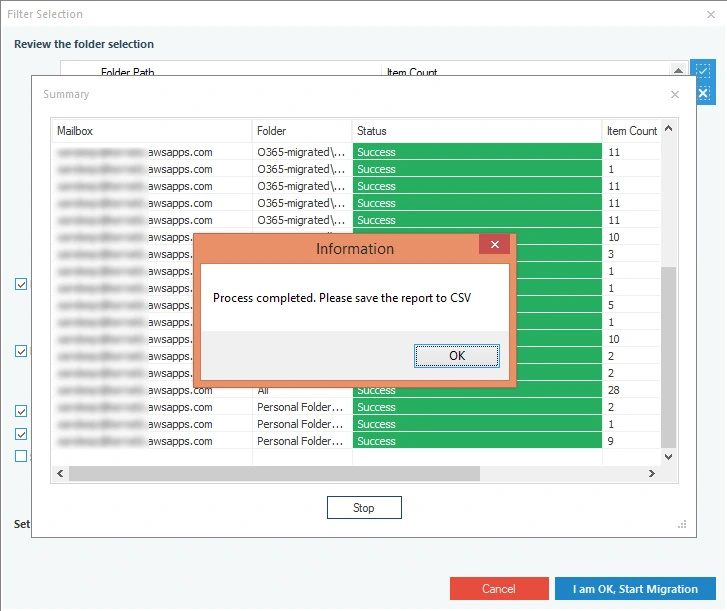
Step 8: Once the mailbox data is exported to the destination, process completed information is displayed like this.
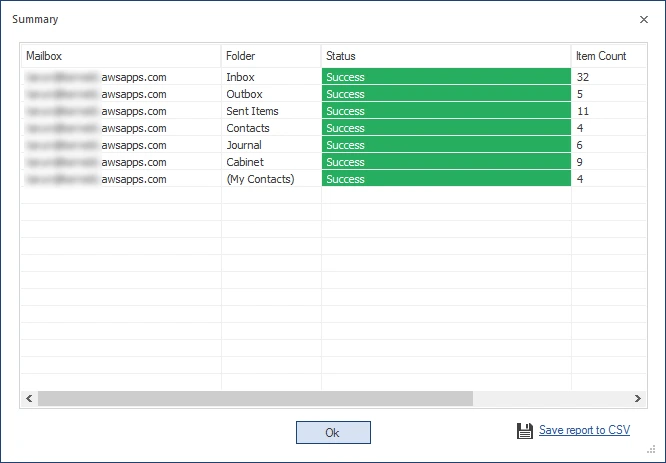
Step 9: To save this migration report in CSV format, click Save report to CSV.
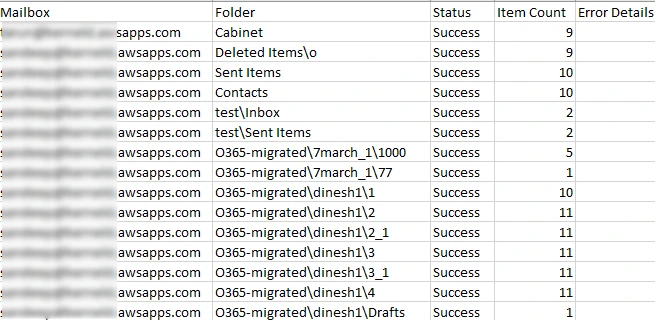
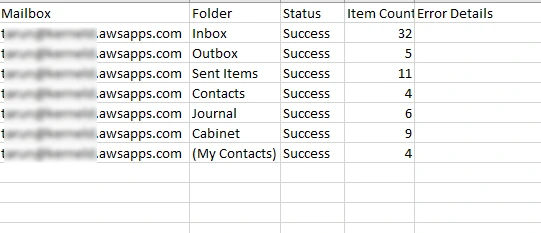
Thus, single mailbox is migrated through Amazon WorkMail account to Office 365. The saved CSV report will be displayed like this.
Migrate multiple WorkMail mailboxes
Using an Amazon WorkMail account with user having permissions on all mailboxes of WorkMail, you can migrate multiple WorkMail mailboxes to Office 365/Exchange mailboxes. Follow the steps to perform this migration.
Step 1: Launch the Kernel Amazon WorkMail to Office 365 application. Click Add in Add Source box to add Amazon WorkMail account as source.
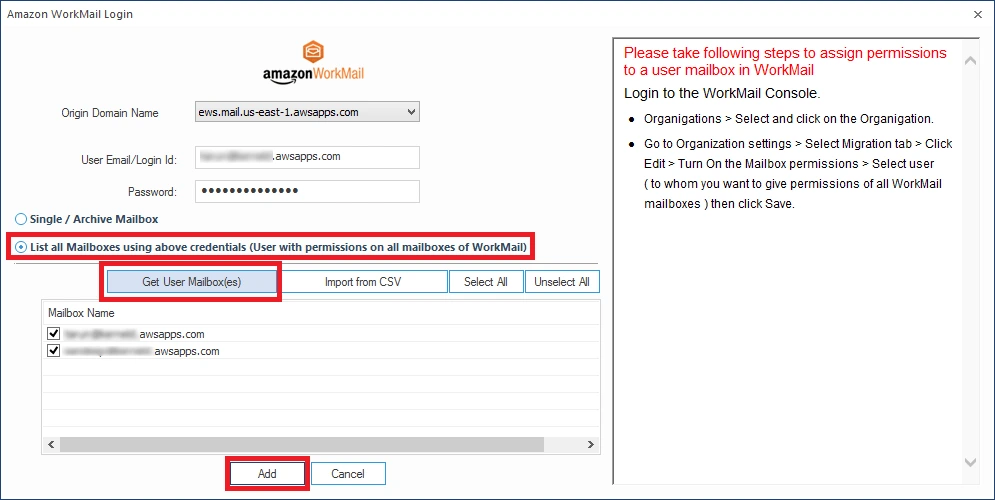
The login page for Source (Amazon WorkMail) is opened. Provide the login details (User ID & password) along with Origin Domain Name. You can choose the domain name according to your region where your mailbox is located.
For us-east-1 - smtp.mail.us-east-1.awsapps.com
For eu-west-1 - smtp.mail.eu-west-1.awsapps.com
For us-west-2 - smtp.mail.us-west-2.awsapps.com
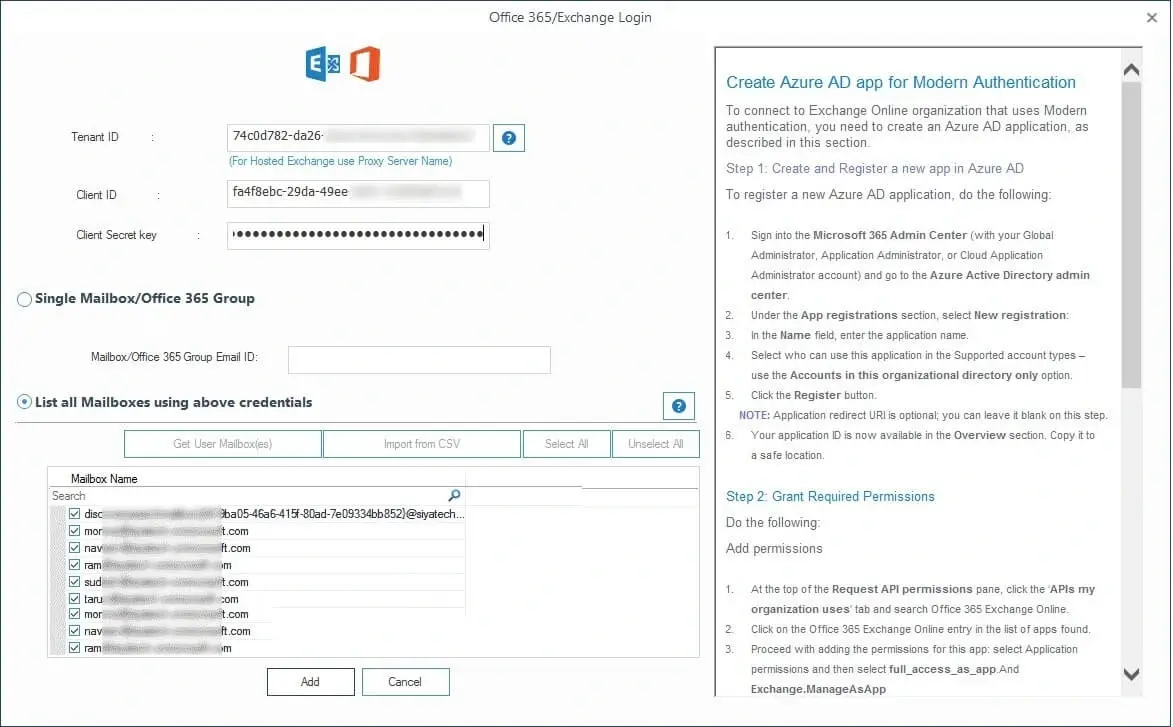
Step 2: Now, select List all Mailboxes using...., click Get User Mailbox(es) and click Add.

Step 3: The required mailboxes get added as the Source. Now click Add on the right side to add Office/Exchange mailboxes as Destination. Choose the suitable login type. Click, Add.
Step 4: Provide the login details (Global Administrator) for your Office 365 account. Select List all Mailboxes...., click Get User Mailbox(es) and finally click Add.
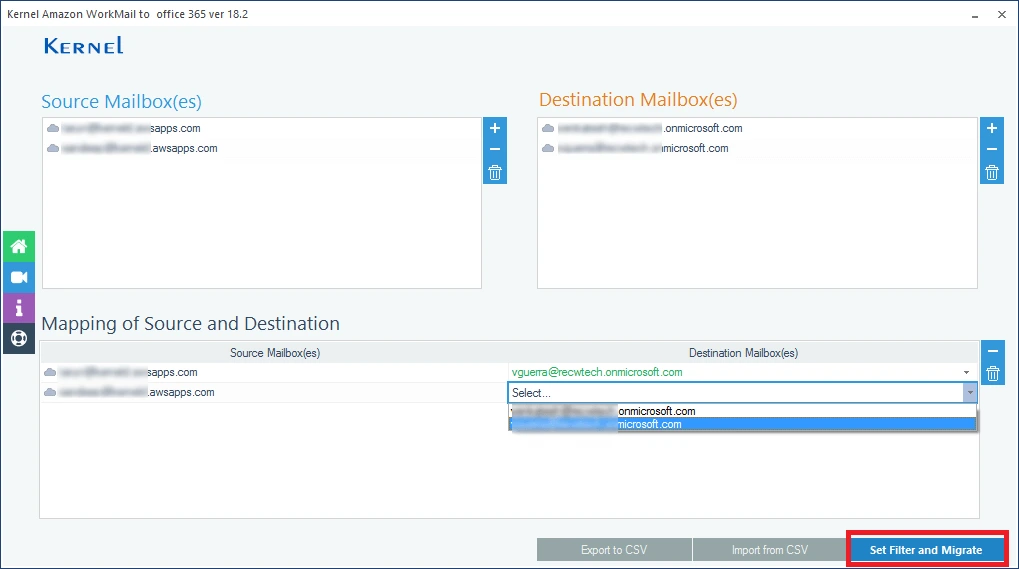
Step 5: Now that Source and Destination mailboxes are added, you can map mailboxes from Source to Destination according to your requirement. After mapping, click Set Filter and Migrate.
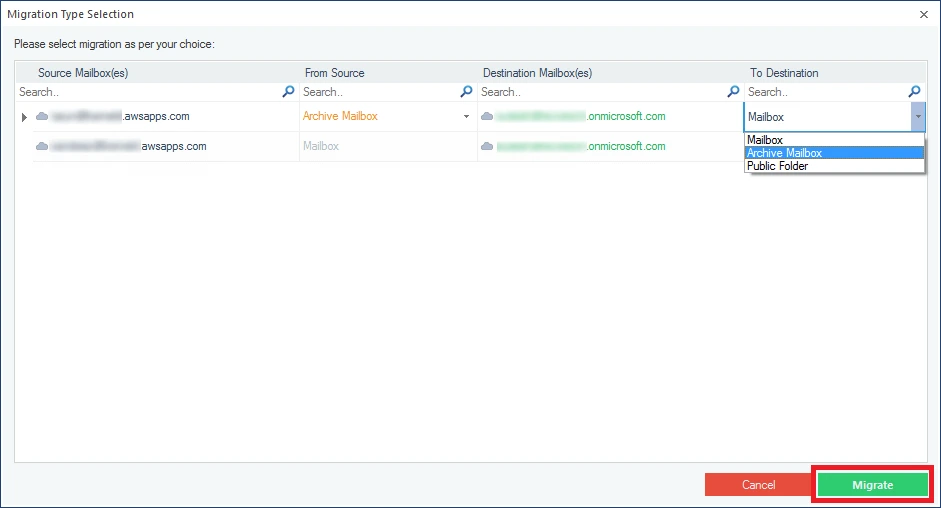
Step 6: In the next step, choose the mailbox folder type - Mailbox, Public folder and Archive Mailbox for both Source and Destination mailboxes. After desired selection, click Migrate to continue.
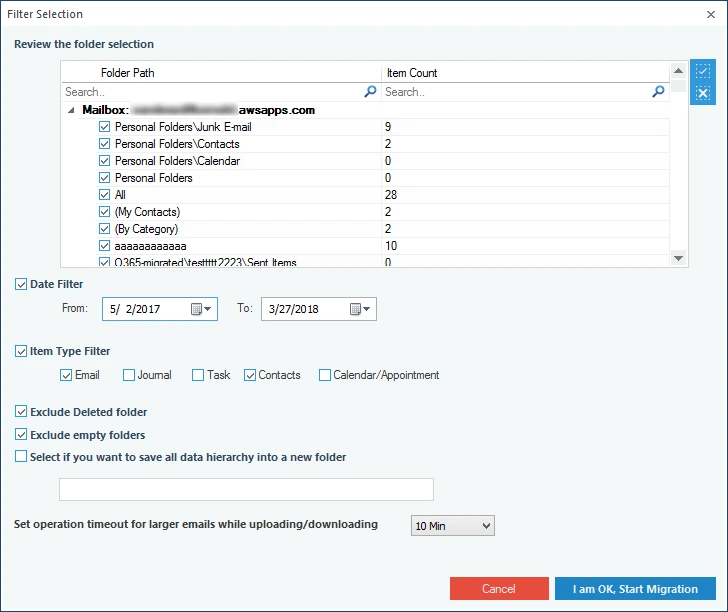
Step 7: In the Filter Selection window, choose the filtering options as required:
- Review PST Folders to Migrate: Select the folders to migrate
- Date Filter: Provide a date range to filter items
- Item Type Filter: Select the item types that are to be migrated
- Exclude Deleted folder: Select to exclude Deleted item folder from migration
- Exclude empty folders: Exclude empty folders from the migration
- Select if you want to save: Provide a folder name (to save the data with hierarchy inside a mailbox folder)
- Migrate data in to the following folder: Provide a folder name (to save the data inside Office 365 mailbox)
- Set operation timeout: Select an upper time limit for migration (the migration will be rejected if it exceeds this time limit).
Finally, click I am OK, Start Migration
Step 8: Once the filters are applied to the mailboxes data, the migration process starts. When, it gets completed, process completed information is shown.
Step 9: After the migration is performed, you can save the report in CSV file by clicking on Save report to CSV.
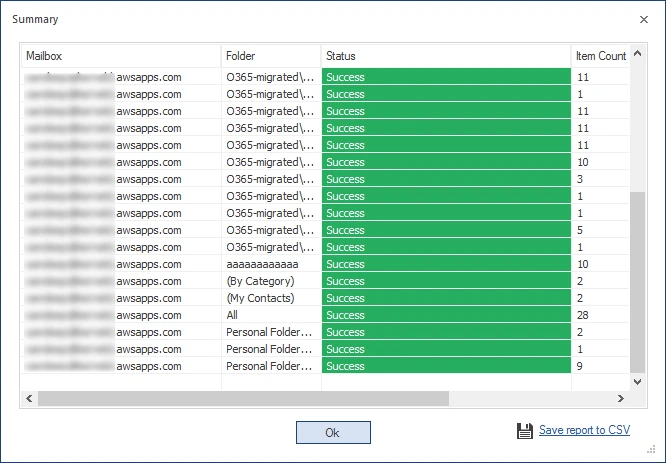
Hence, the multiple mailboxes of Amazon WorkMail is migrated to Office 365 account mailboxes. The CSV report that you saved is seen like this.