For smooth migration between OneDrive and SharePoint Online accounts, some important permissions are required in the SharePoint admin center. You should follow the steps to add the permissions-
Login to your SharePoint admin center using the following URL- https://<domain-name>-admin.sharepoint.com/_layouts/15/appinv.aspx/
In

It will take you the requested page to add the permissions.
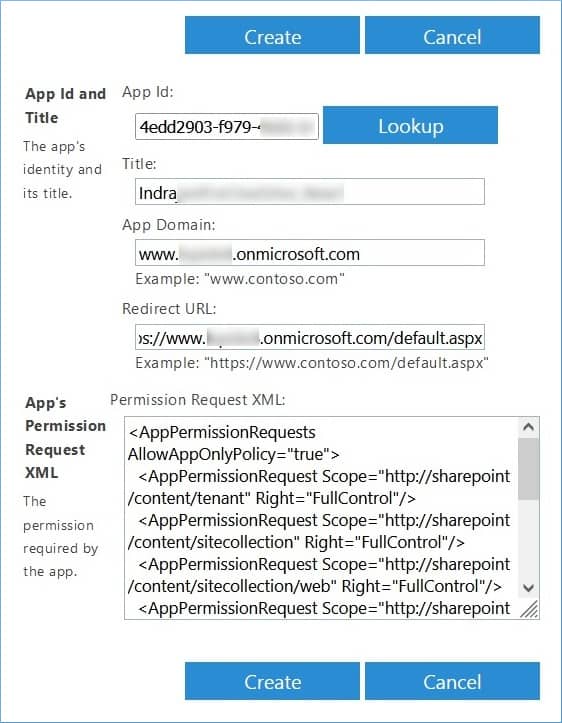
In the App ID field, input the Client ID that was generated while registering the application in Azure Active Directory. You can access Client ID in Overview section. Click Lookup after giving the Client ID.
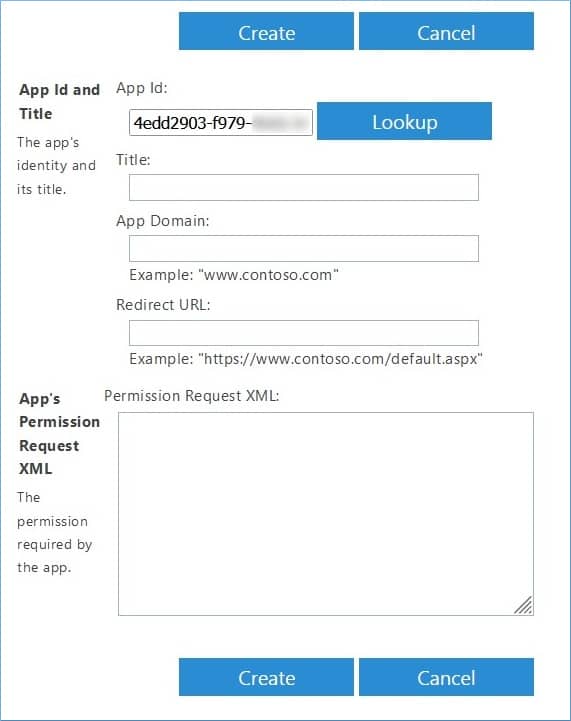
After checking the details, the Title field will be filled with registered app name automatically. Then, you need to input App domain (www.domain.onmicrosoft.com) and Redirect URL (https://www.domain.onmicrosoft.com/default.aspx).
In the Permission Request XML, copy-paste the following permissions-
<AppPermissionRequests AllowAppOnlyPolicy="true">
<AppPermissionRequest Scope="http://sharepoint/content/tenant" Right="FullControl"/>
<AppPermissionRequest Scope="http://sharepoint/content/sitecollection" Right="FullControl"/>
<AppPermissionRequest Scope="http://sharepoint/content/sitecollection/web" Right="FullControl"/>
<AppPermissionRequest Scope="http://sharepoint/content/sitecollection/web/list" Right="FullControl"/>
<AppPermissionRequest Scope="http://sharepoint/search" Right="QueryAsUserIgnoreAppPrincipal"/>
<AppPermissionRequest Scope="http://sharepoint/social/tenant" Right="FullControl"/>
<AppPermissionRequest Scope="http://sharepoint/taxonomy" Right="Write"/>
</AppPermissionRequests>
After that, click Create.
The wizard will ask you if you trust the app with the given permissions. Click Trust It.

Wait for a little to save the permissions and later you can continue with the OneDrive or SharePoint Online migration.