How to use Kernel Mac OLM to Office 365 migration software?
It is the macOS-based software that can migrate an unlimited number of OLM files towards Office 365 with the help of several properties and benefits.
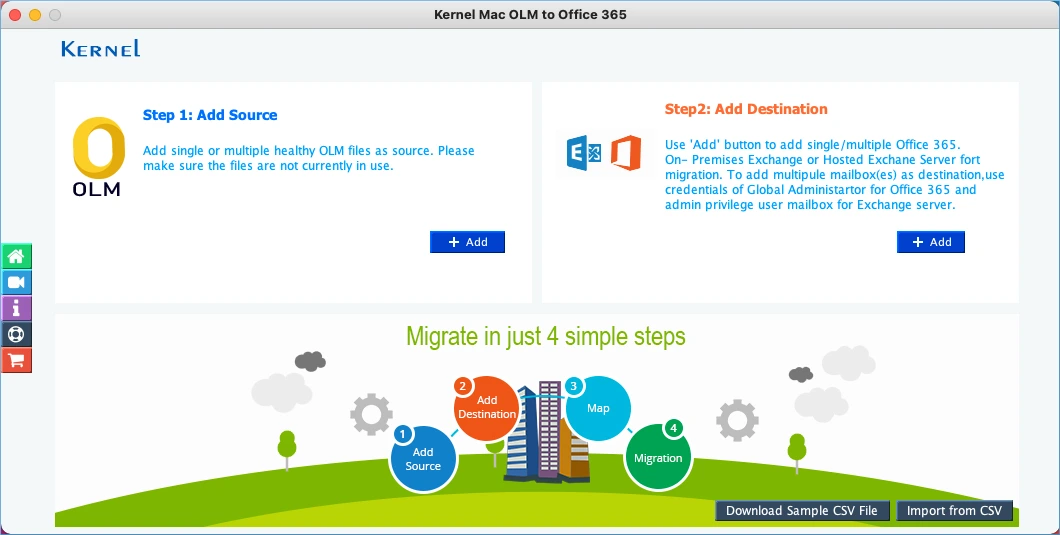
On the home screen of the software, click Add on source section to add the OLM files.
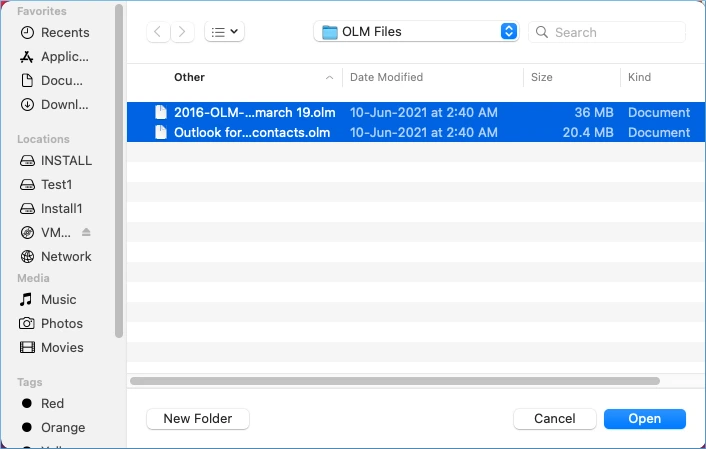
Choose the OLM files from their saving folders. Click Open.
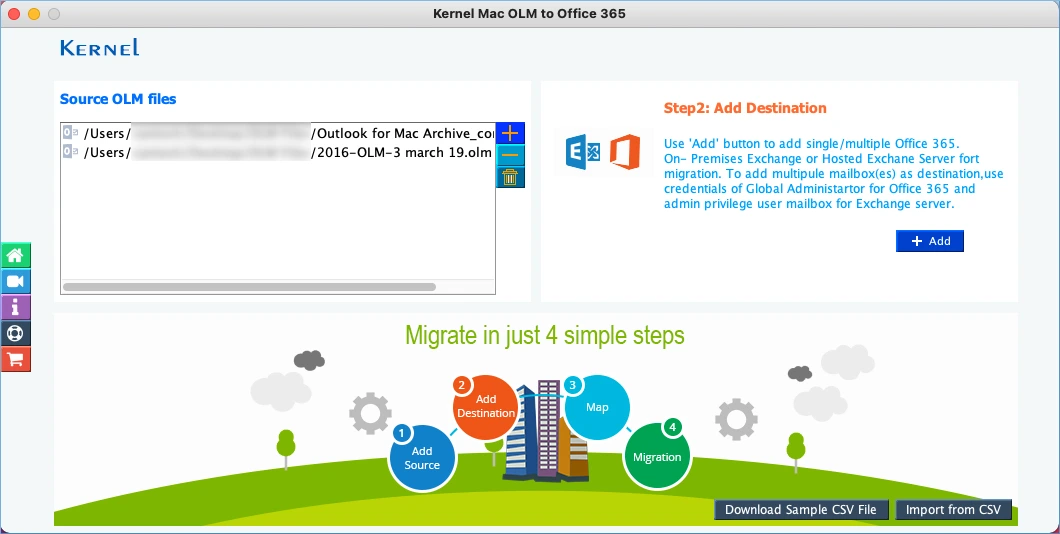
After selecting the OLM files, click Add on the destination section.
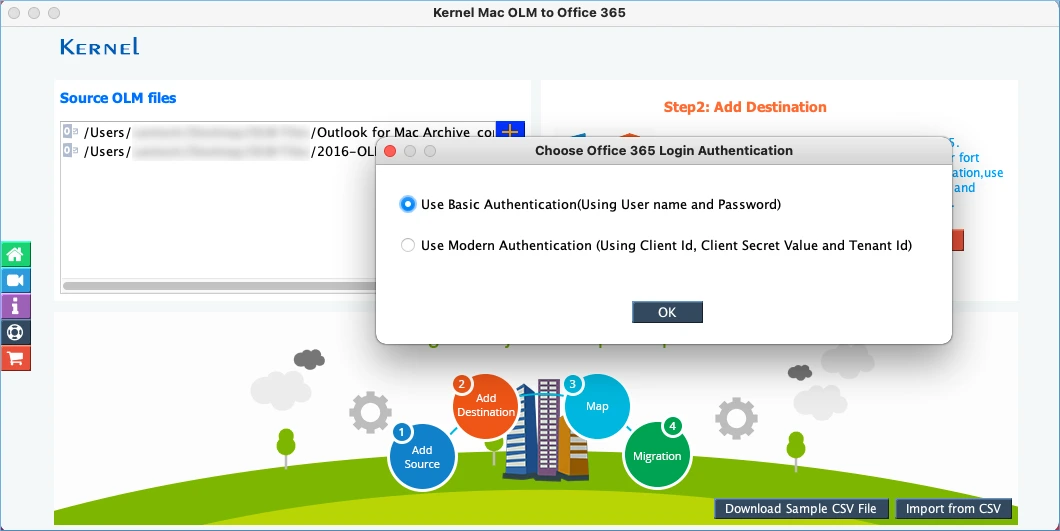
There is two available login method – Basic and modern authentication. Choose any one and click OK.
If you choose the Basic authentication option, then you require to input the credentials of the Office 365 mailbox. Then, choose between either single or multiple mailbox options. If you want to migrate multiple mailboxes, then choose the second option – ‘List all mailboxes using above credentials’ and click Get User Mailbox(es).
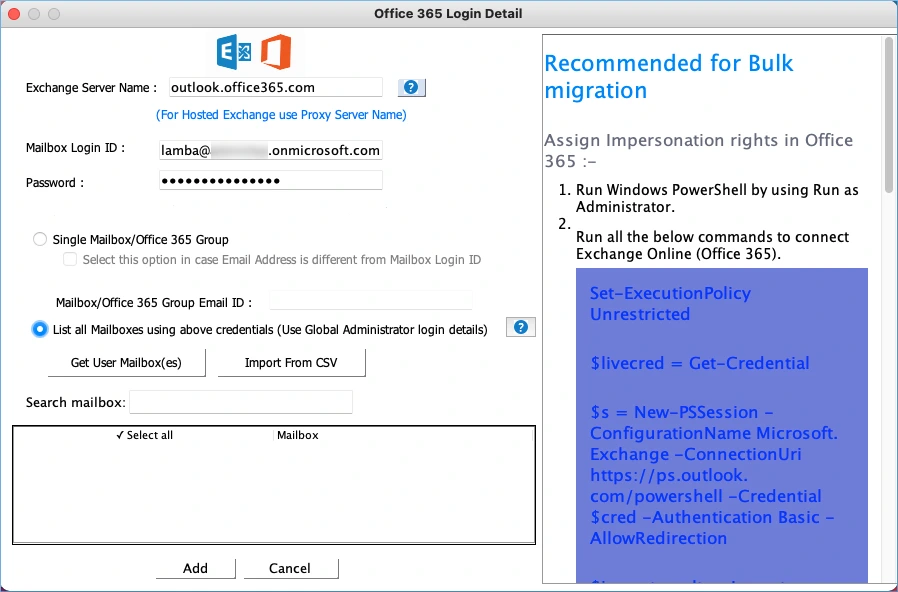
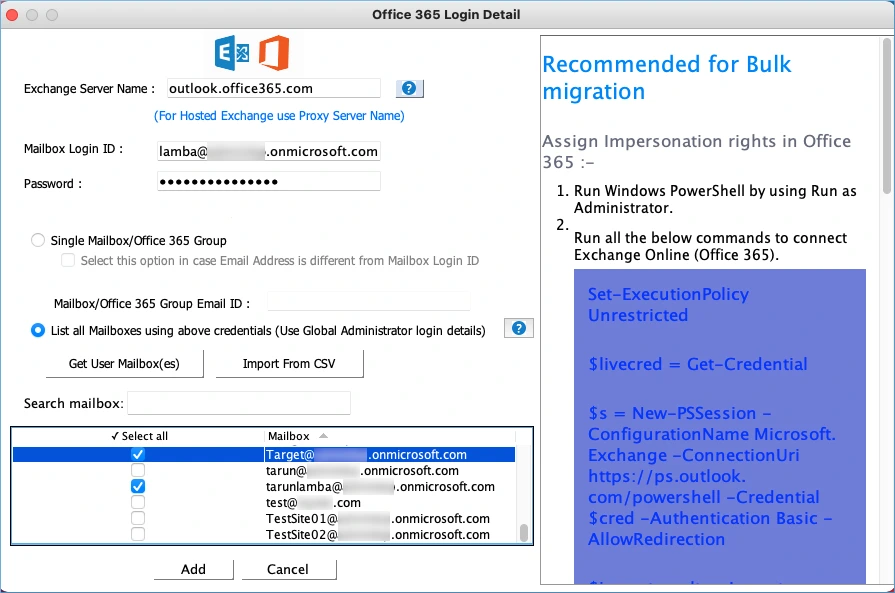
Select the important mailboxes in which you require to move the OLM file’s data. Then, click Add button.
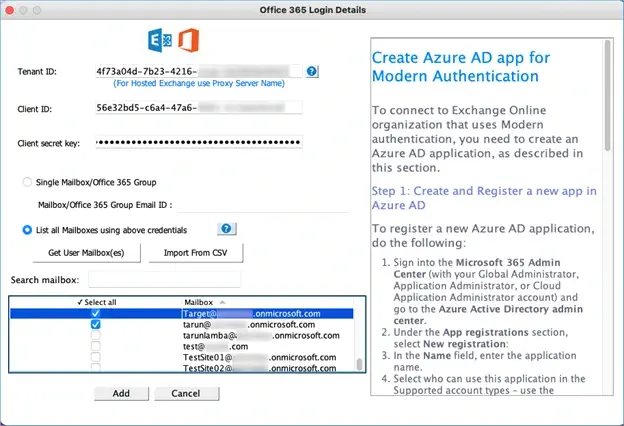
If you choose a modern authentication method for login, then you require to input Tenant ID, Client ID, and client secret key details. Then, choose the second option to select multiple mailboxes and click Get User Mailbox(es).
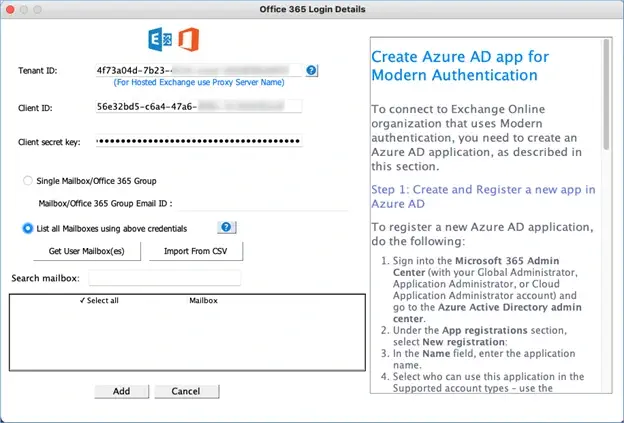
Choose the mailboxes and click Add button.
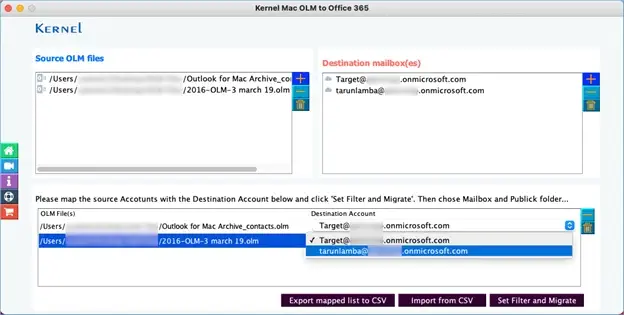
Map the OLM files with their respective destination accounts using the given drop-down list. Then, click Set Filter and Migrate.
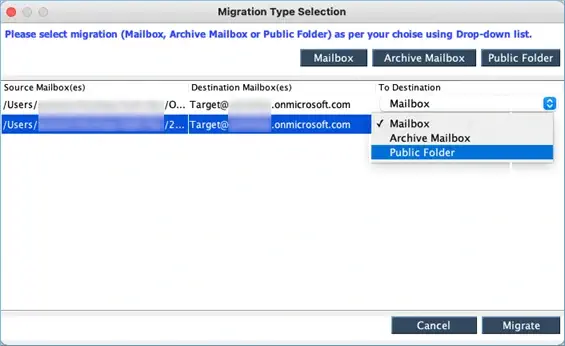
If you want to migrate the data into different folders, then you can choose between mailbox, archive mailbox, and public folder. Make your selection and click Migrate option.
The software is expanding the mailbox items.
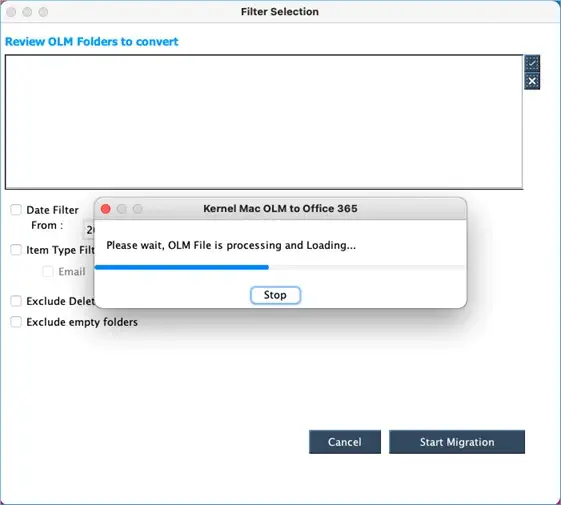
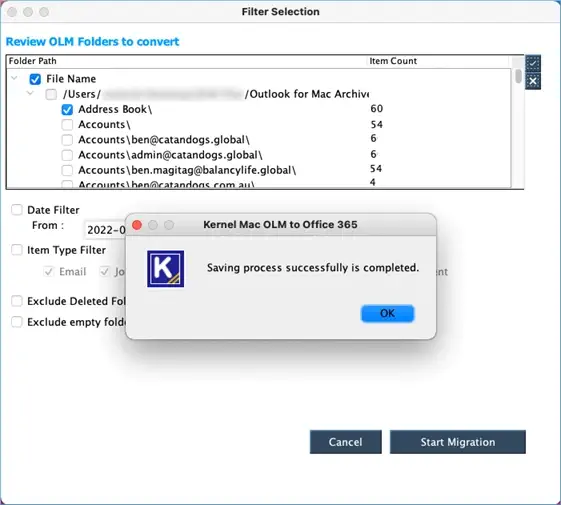
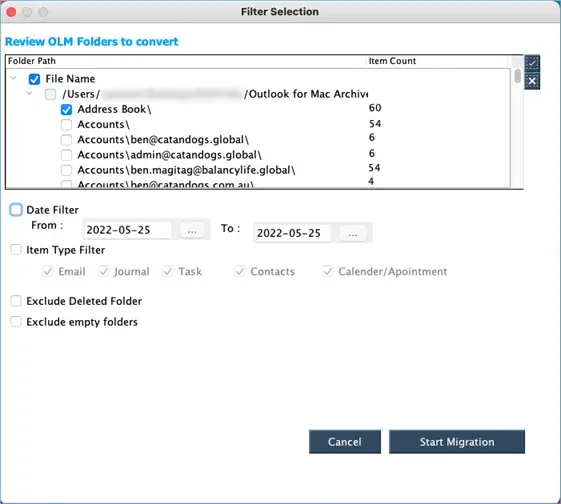
The Filter Selection page is important as it provides several options to apply multiple filters.
- Date Filter – Use From and To date options.
- Item Type Filter – apply the checkbox to select Email, Journal, Task, Contacts, and Calendar/Appointment.
- Exclude Deleted Folders – Stop the deleted folders from migration.
- Exclude empty folders – Stop the empty folders from migration.
- After applying filters, click the Start Migration button.
The software will migrate the data quickly and show a successful message after completion. Click OK.