How to Backup IMAP sever data to PST?
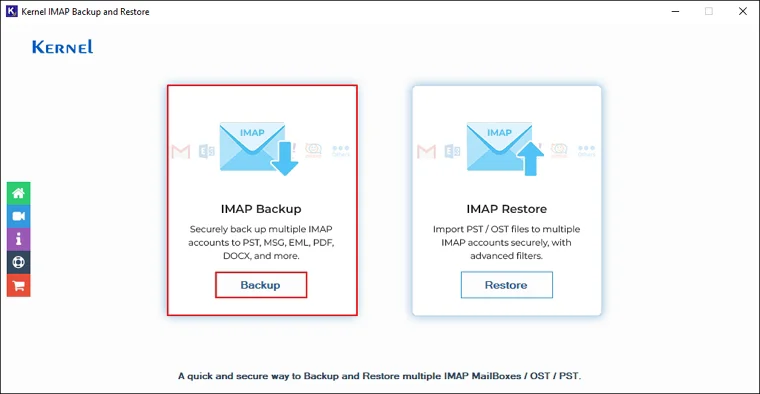
Step 1: Launch the software and click the Backup option from the home screen.
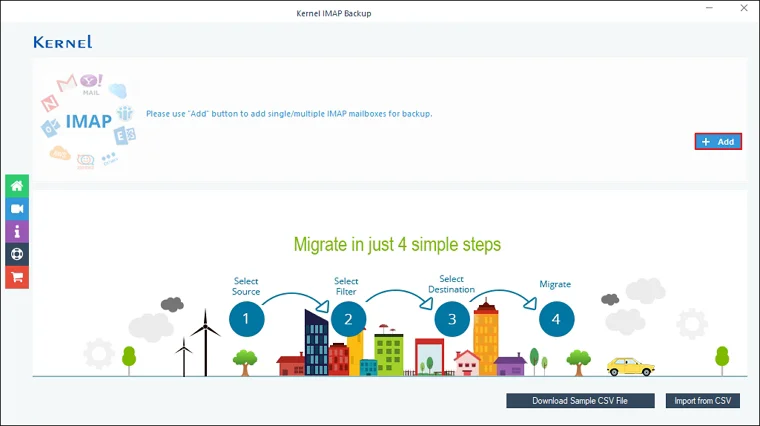
Step 2: Click Add to select the IMAP account for backup.
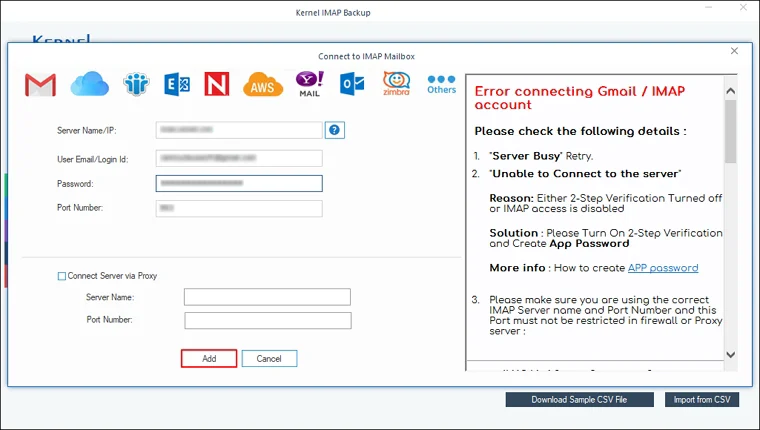
Step 3: In the Connect to IMAP Mailbox window, add IMAP account by entering credentials like Server Name/IP, User Email/Login Id, Password, and Port Number. Also, you can add an IMAP account through Connect Server via Proxy by entering Server Name and Port Number.
After entering essential credentials, click on Add.
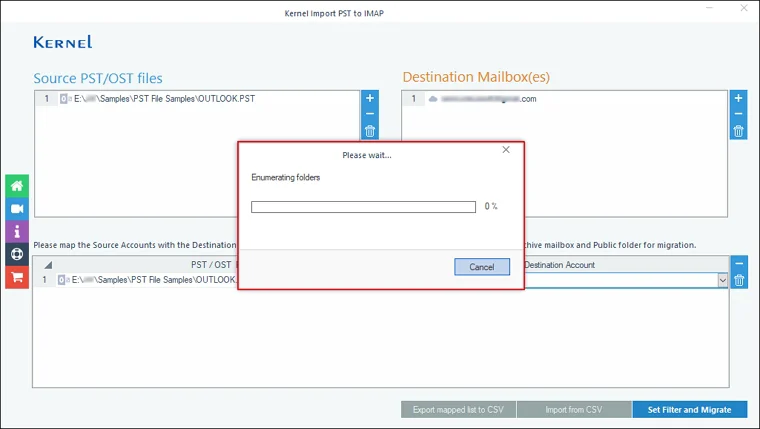
Step 4: Verify IMAP mailbox and click the 'Set Filter and Migrate' option.

Step 5: The software will start and show live Enumerating folders process.

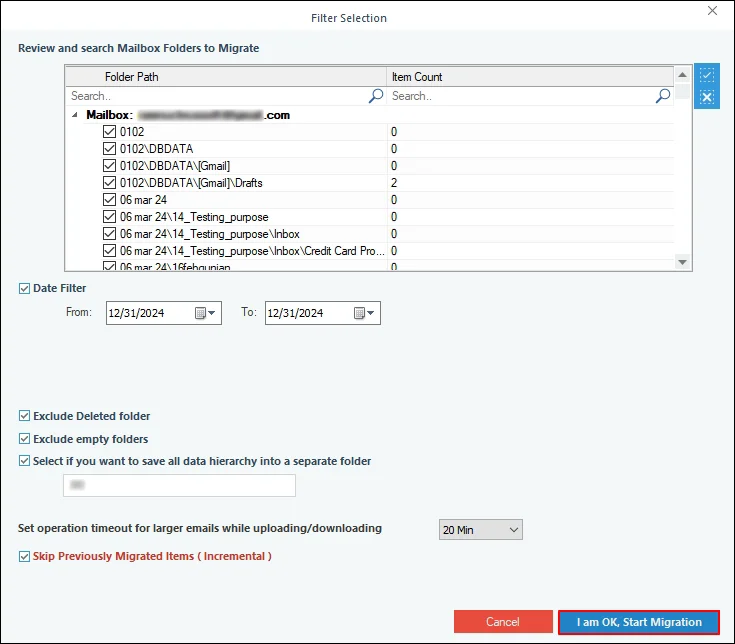
Step 6: In the Filter Selection window, apply necessary filters from:
- Review and search Mailbox Folders to Migrate: Select essential files or folders for backup.
- Date Filter: Select From and To dates to backup data according to date.
- Exclude Deleted folders: It will skip backing up deleted folders.
- Exclude empty folders: This option will exclude empty folders to backup.
- Select if you want to save all data hierarchy into a separate folder: It will backup your entire IMAP account data into a separate folder.
- Set operation timeout for larger emails while uploading/downloading: This option will backup the files in the selected time, if the data takes longer time than selected, then the software will skip backing up the file.
- Skip Previously Migrated Items (Incremental): Backup incremental data and avoid duplicity in the backup file.
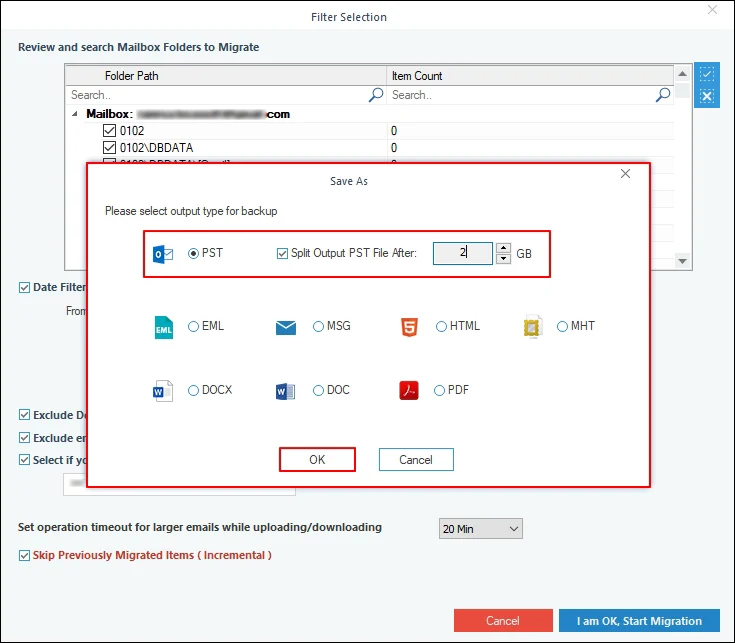
Step 7: In the Save As window, Select PST file and check Split Output PST File After option to create multiple backup PST files and click OK.
Step 8: In the Browse For Folder wizard, select a destination folder to save the backed-up file and click OK. Also, you can click Make New Folder to create a new folder to save backup PST files.

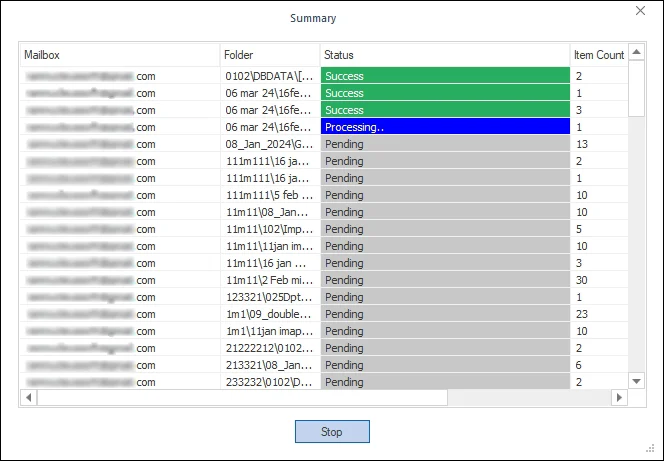
Step 9: The software will start and show live backup process.
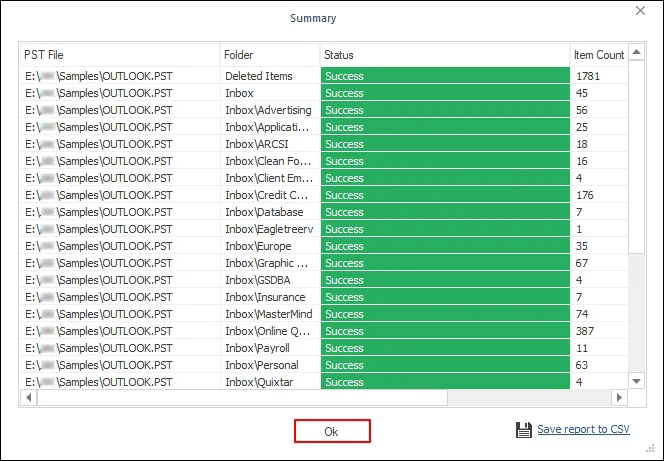
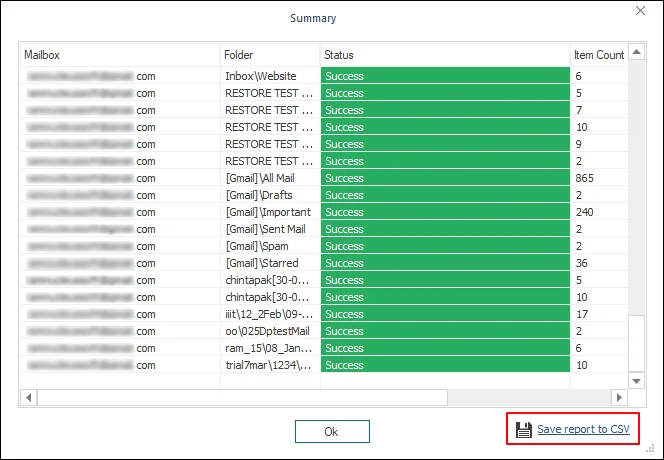
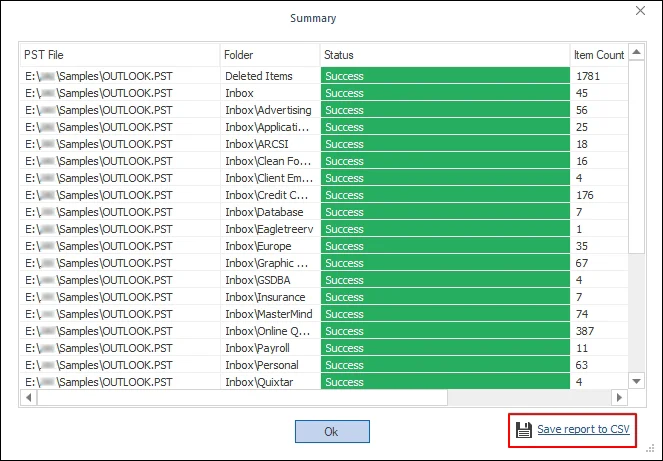
Step 10: Once the backup process is completed, the software will pop up “Process completed. Please save the report to CSV” message and click OK.
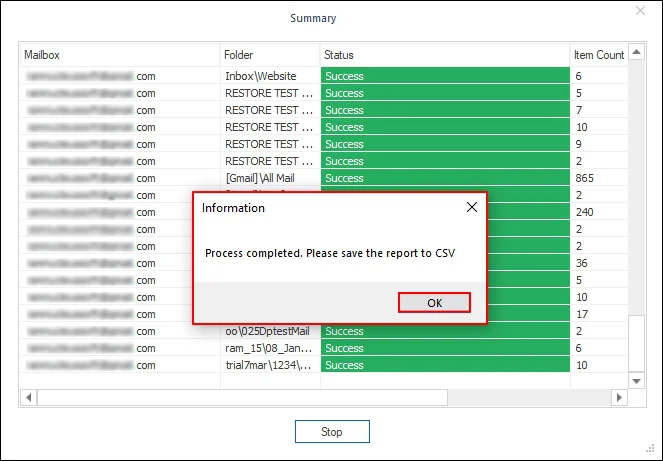
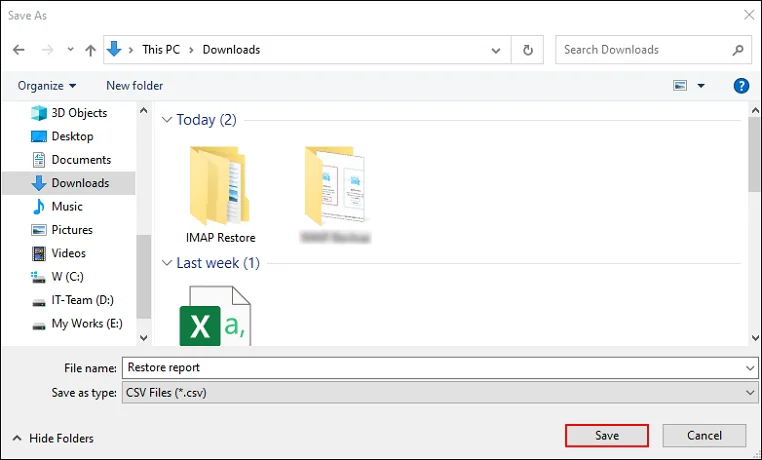
Step 11: Click on Save report to CSV option to generate and download a detailed backup report.
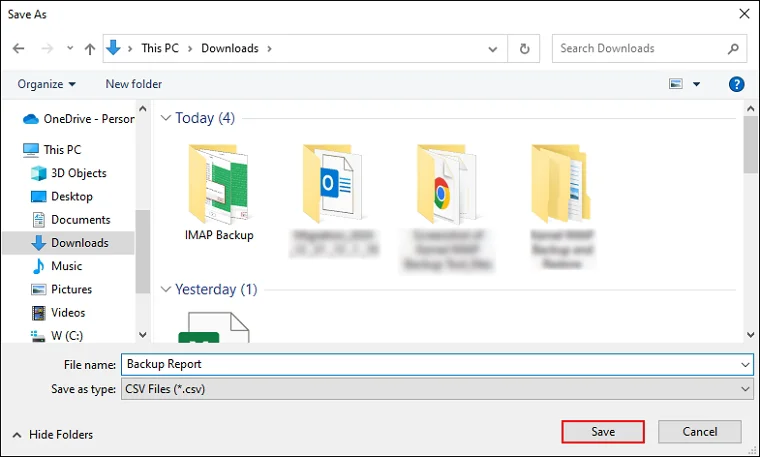
Step 12: Select a specific folder to Save the backed-up report in your local drive.
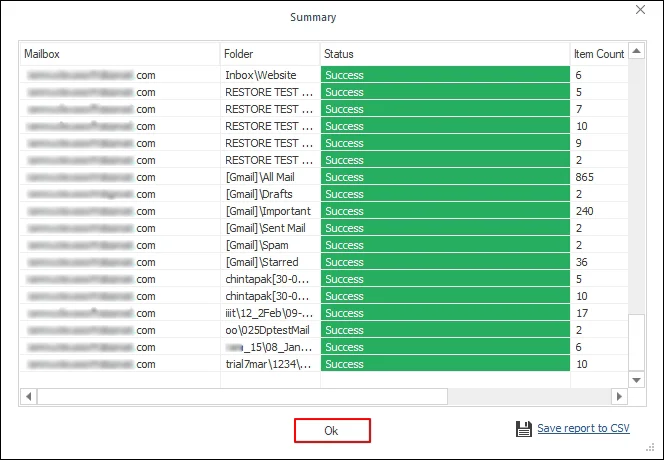
Step 13: Finally, click on OK to end the backup process.
How to restore PST file data into IMAP Accounts
Step 1: Install and launch the Kernel IMAP Backup and Restore software.
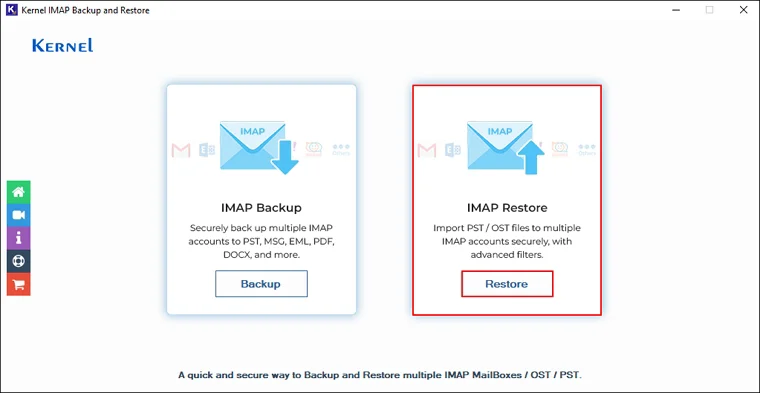
Step 2: On the software’s homepage, click on IMAP Restore tile.
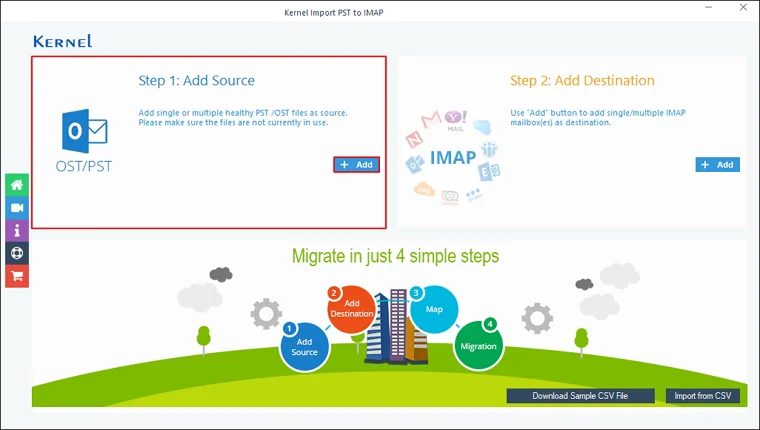
Step 3: Click on Add in the Add Source tile.
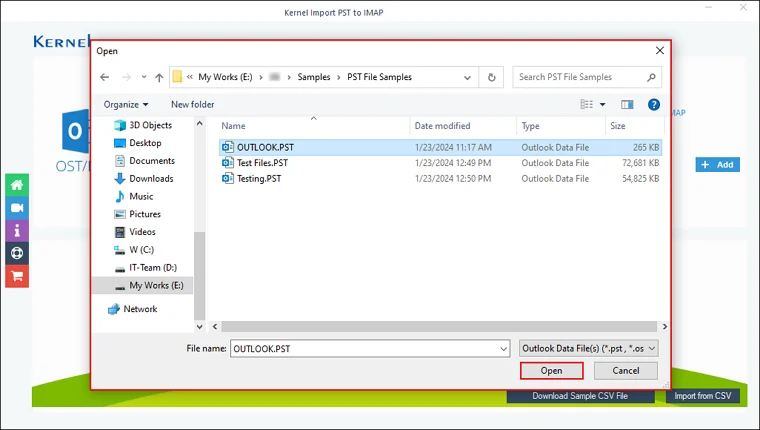
Step 4: Select the PST file you want to import into IMAP accounts and click Open.
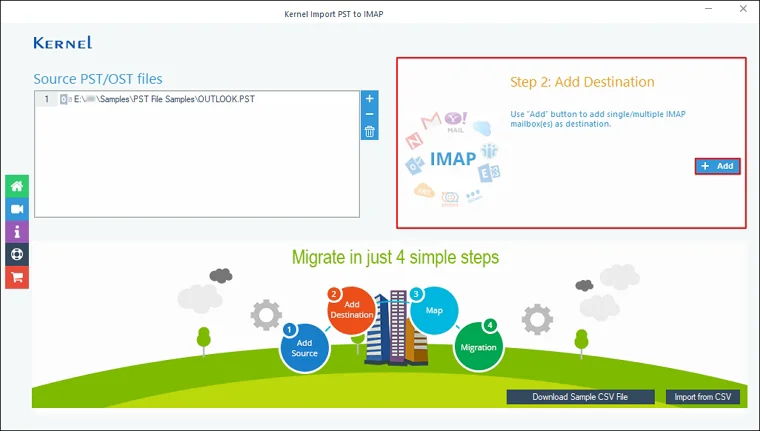
Step 5: Click on Add in the Add Destination tile.
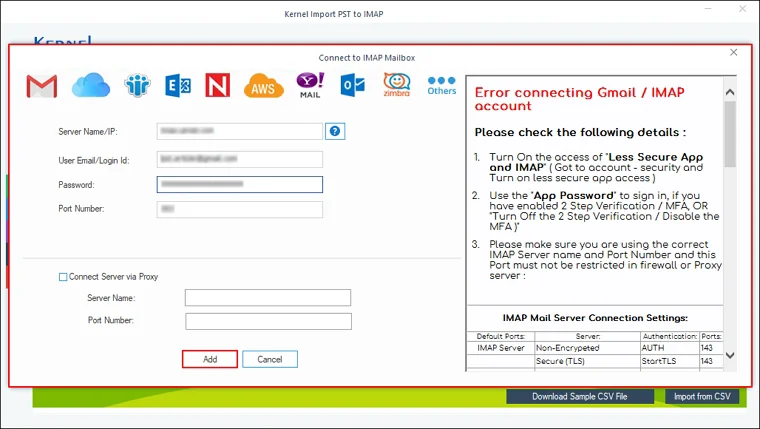
Step 6: In the Connect to IMAP Mailbox window, enter IMAP account credentials such as Server Name/IP, User Email/Login Id, Password, and Port Number. Also, you can Connect Server via Proxy by entering Server Name and Port Number.
After entering credentials, click Add.
Step 7: Select Destination Account and click on Set Filter and Migrate option.

Step 8: The software will start and show the live Enumerating folders process.
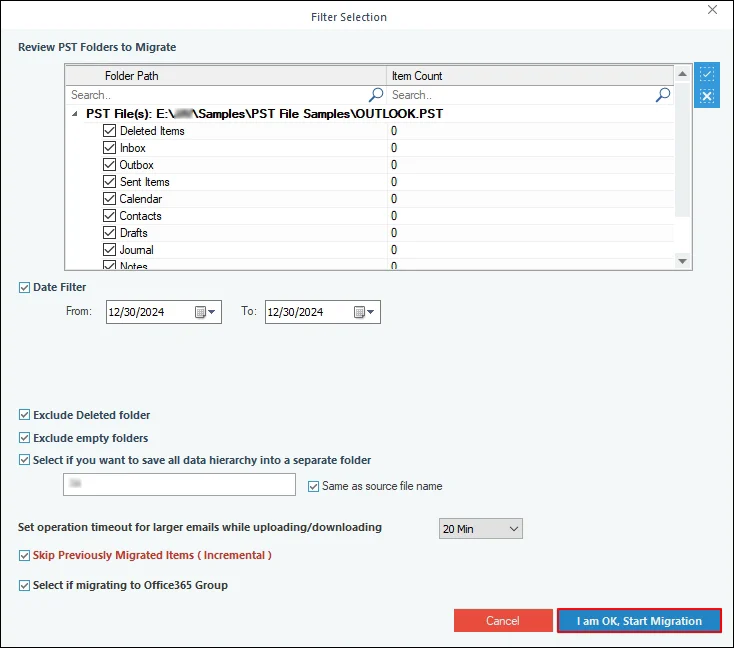
Step 9: In the Filter Selection window, select the necessary filters from:
- Review PST Folders to Migrate: Select specific folders or data from selected PST files.
- Date Filter: Select From and To date to restore specific data according to date.
- Exclude deleted folder: Skip restoring deleted folders in IMAP accounts.
- Exclude empty folders: Select this option to exclude empty folders from the restoring process.
- Select if you want to save all data hierarchy into a separate folder: Restore data in a selective folder in the destination IMAP account.
- Same as source file name: Check this option to restore data in destination as source name.
- Set operation timeout for larger emails while uploading/downloading: If data takes longer than the selected time, the software will skip that data from being imported into the IMAP account.
- Skip Previously Migrated Items (Incremental): It will restore incremental data in the destination IMAP account.
- Select if migrating to Office365 Group: Restore PST data in Office 365 Group.
After applying all the essential filters, click I am OK, Start Migration.
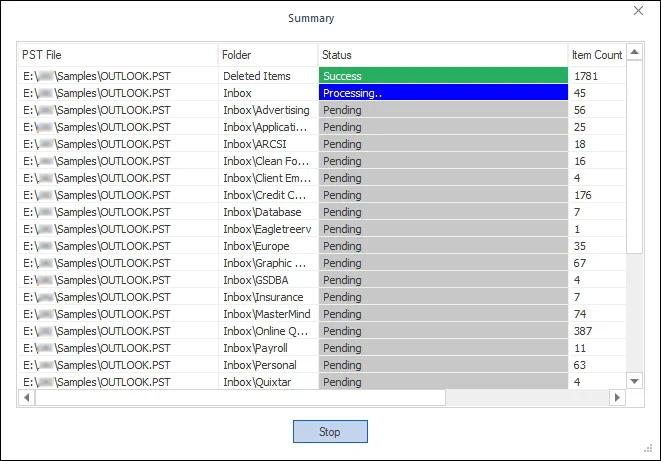
Step 10: The software will start and show the live restore process.
Step 11: Once the restore process is completed, the software will pop up “Process completed. Please save the report to CSV” message and click OK.
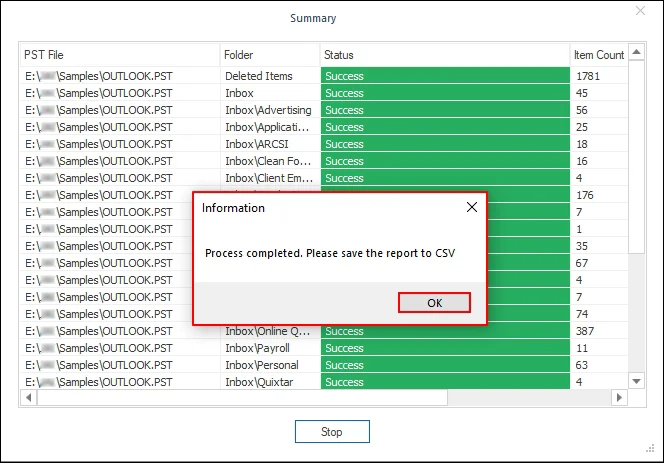
Step 12: Click the Save report to CSV option to generate and download a detailed restore report.
Step 13: Select the destination folder to Save the restore report.
Step 14: Click OK to close the restore process.