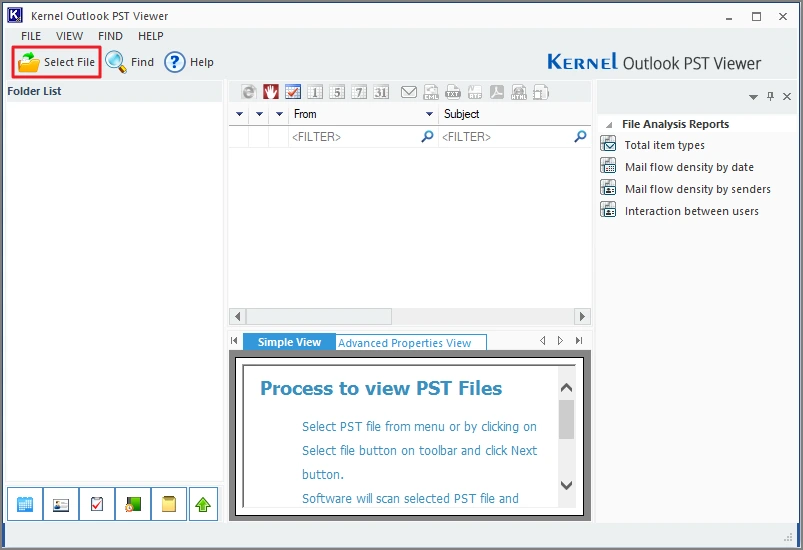
Step 1: Open the tool and click on the Select File option to add PST file(s).
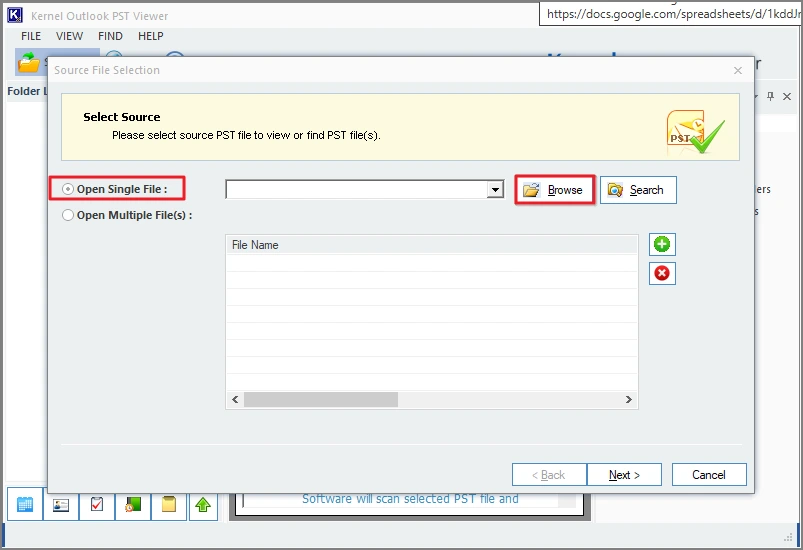
Step 2: In the Select Source window, you can choose to import a single or multiple PST file(s). To view only one PST file, select the option Open Single File. Then, click the Browse button and select the file. Click Next to proceed.
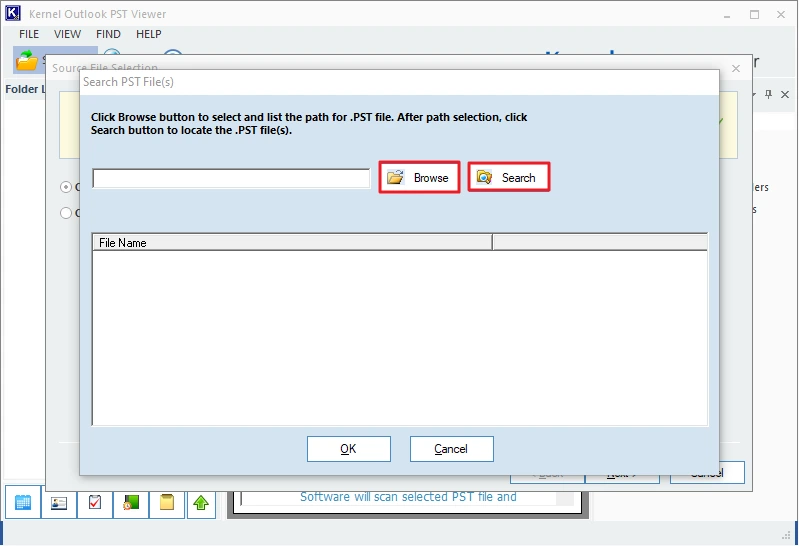
Step 3: The Outlook PST viewer tool has a built-in feature to search PST file. To search a PST file, click on the Search button in the Select Source window (previous step). Then, click Browse and select a drive or folder. Click Search to find and list all the PST file(s).
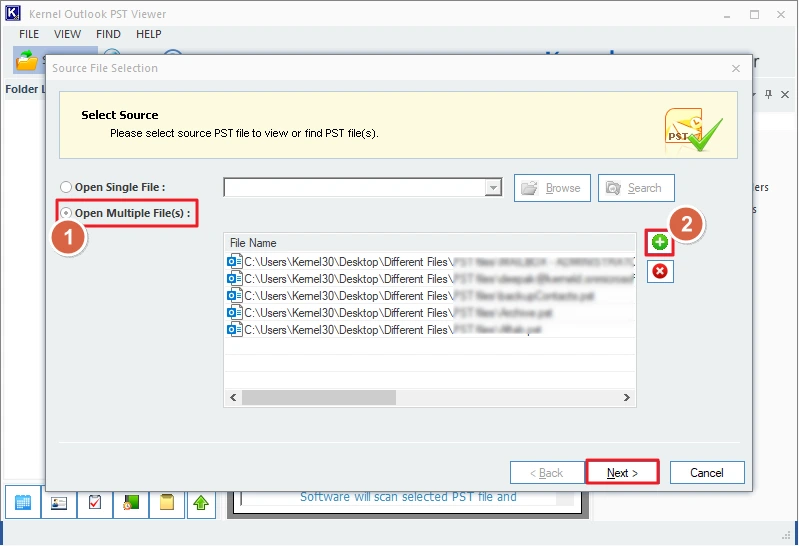
Step 4: To view multiple PST files simultaneously, select the option Open Multiple File(s) in the Select Source window. Click on the + (plus) icon to browse and select all the PST file(s). After adding all the PST files, click Next to proceed.
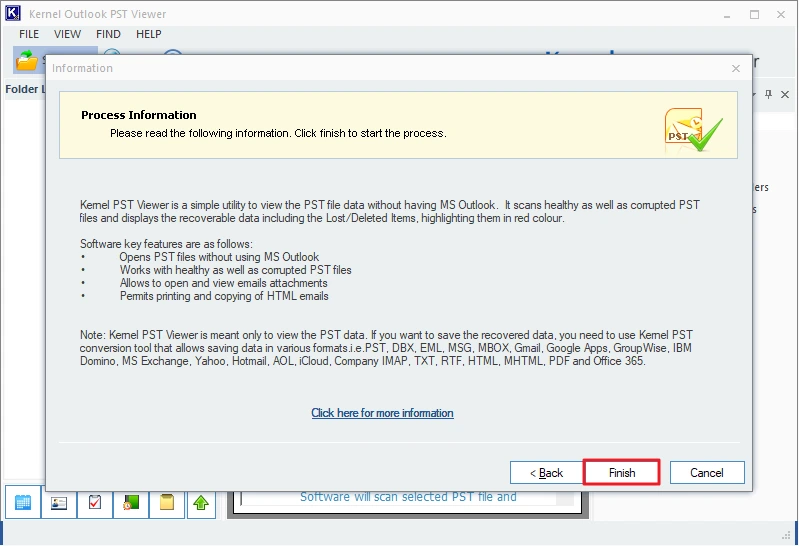
Step 5: The Process Information window provides you with some key knowledge about the Kernel PST Viewer. Click Finish to start scanning the PST file.
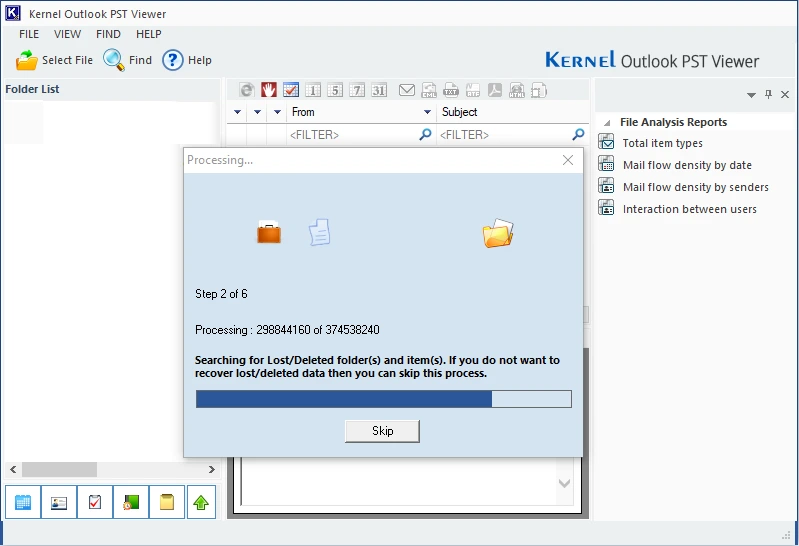
Step 6: The offline PST viewer will begin scanning the added PST file. The tool can even find the lost/deleted data from the mailbox and allows to recover them. Deleted data will be visible in red color fonts. If required, the user may click the Skip button to skip the file scanning.
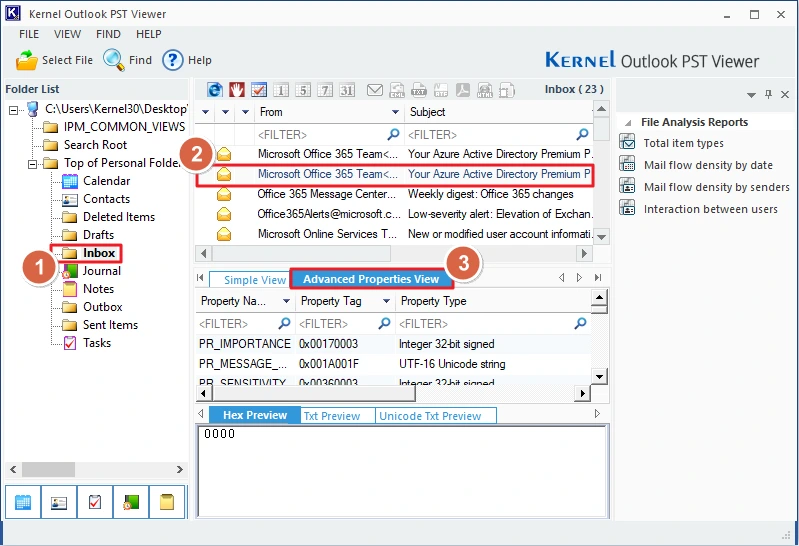
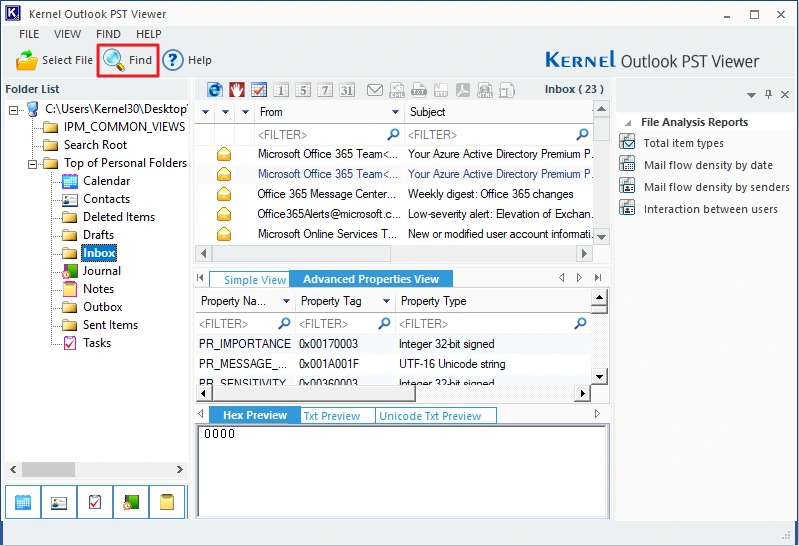
Step 7: The contents of the PST file will be listed in an easy-to-access & hierarchical manner for easy navigation. To preview any data item, select the folder then click on the email. The tool provides two view modes to preview data – Simple View and Advanced Properties View.

Step 8: By default, the tool displays the data in Simple View. To view advanced properties of any email or other data item like hex data, Unicode data, etc., select the Advanced Properties View option.
Step 9: The tool also provides dedicated buttons to access Calendar, Contacts, Notes, Journals, and Tasks. Click on the button to view quickly.
Step 10: To view a specific email, click on the Find button.
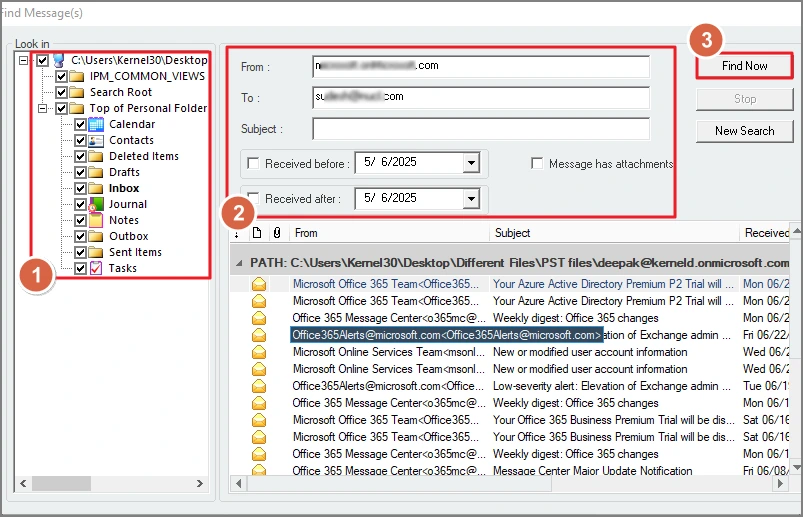
Step 11: Select the folders to search for the email. Then, provide information like From, To, date received, message attachments, etc. Finally, click on the Find Now button, and the tool will search for emails and list every email it finds.
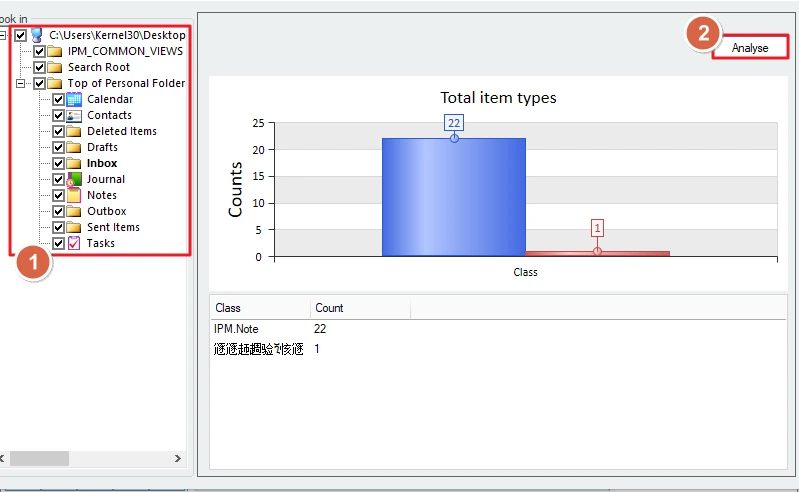
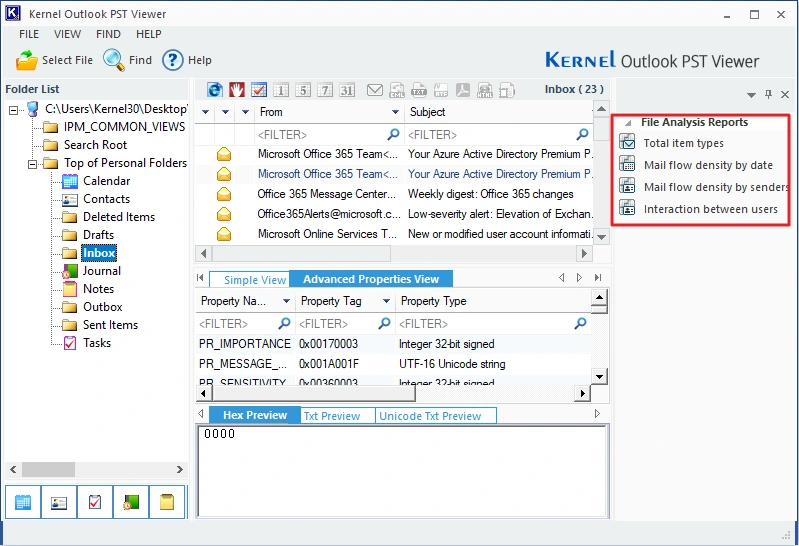
Step 12: The File Analysis Reports help with useful insights about your email communication. You get multiple options like Total item types, Mail flow density by date, Mail flow density by sender, and Interaction between users.
Step 13: To create and view any report, select it. Then select the folders and click the Analyse button.