Check out the step-by-step guide to backup entire Slack data, including direct messages, channels, MPDM, attachments, stickers, emojis, and many more, to the local and network drives of the system.
Step 1: Download and install the Kernel Slack Chat Export tool.
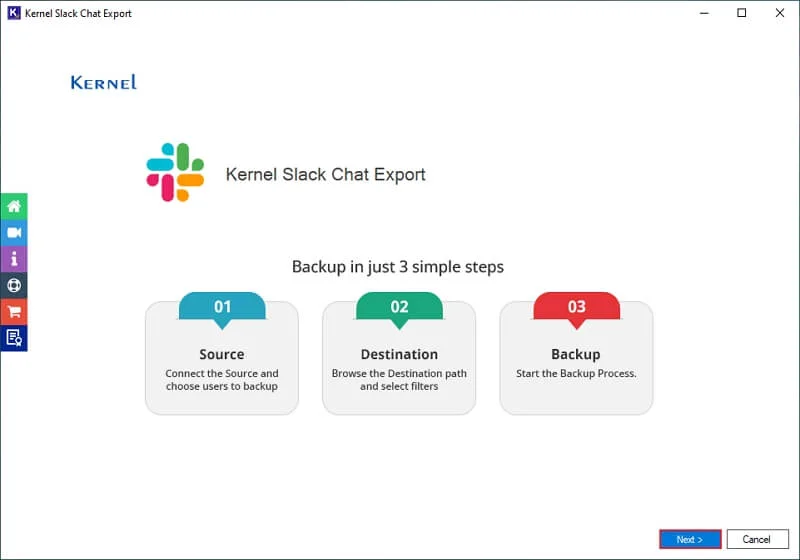
Step 2: Launch the software and click Next on the software’s home screen.
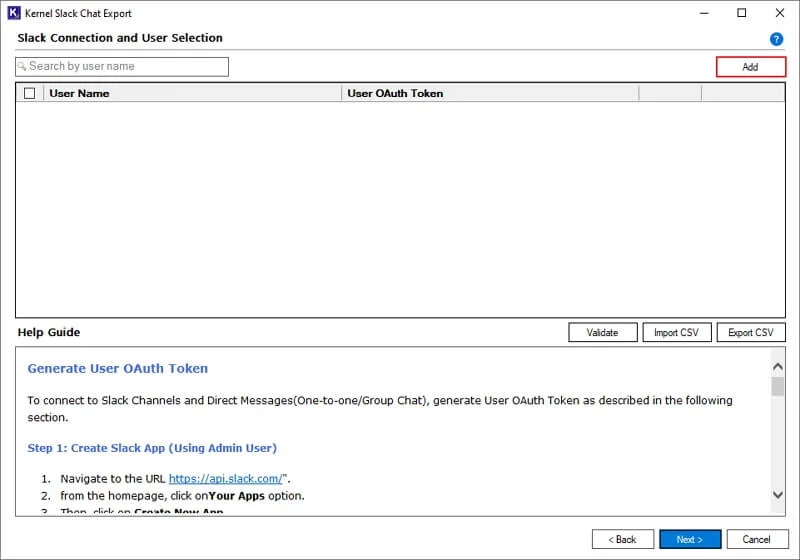
Step 3: Click on Add in the Slack Connection and User Selection window.
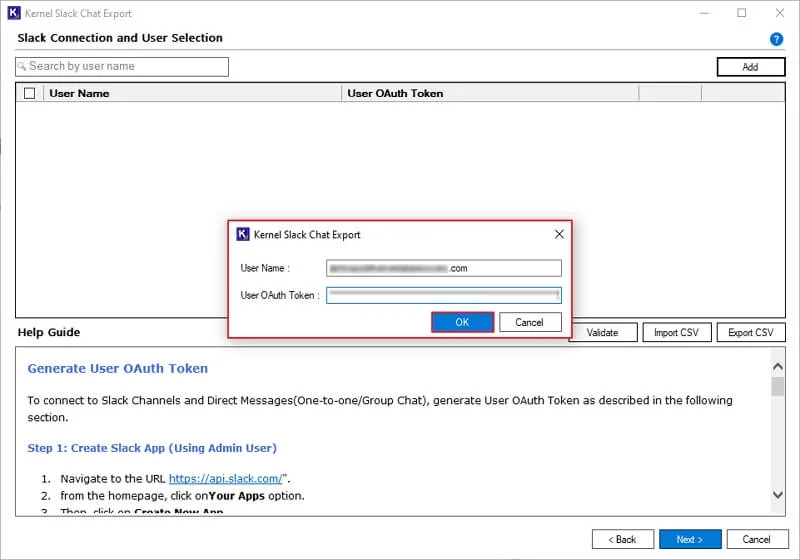
Step 4: Enter User Name and User OAuth Token in the following window. Click OK.
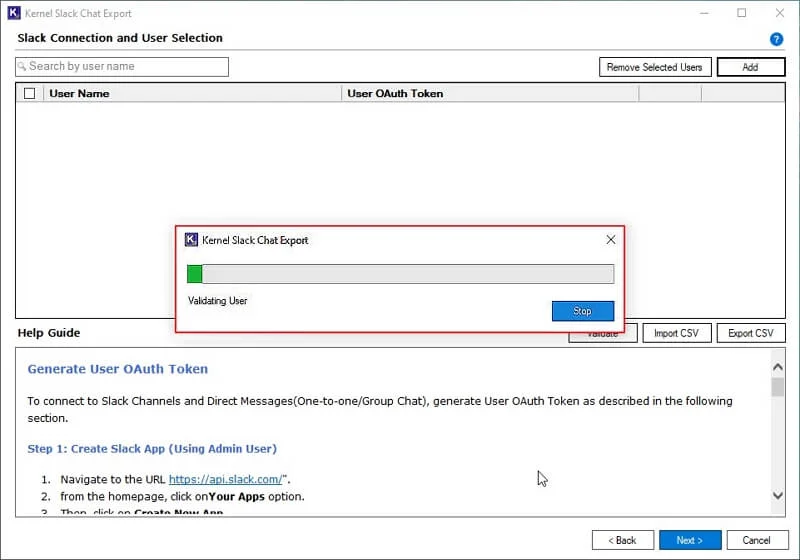
Step 5: The software will start Validating User.
(a) Add bulk Slack users by following below mentioned pointers:
- Export CSV: Export a sample CSV file to your local computer.
- Enter details: Input the necessary details in that CSV file.
- Import CSV: Upload the CSV file into the software.
After that, the software will automatically add all the Slack users.
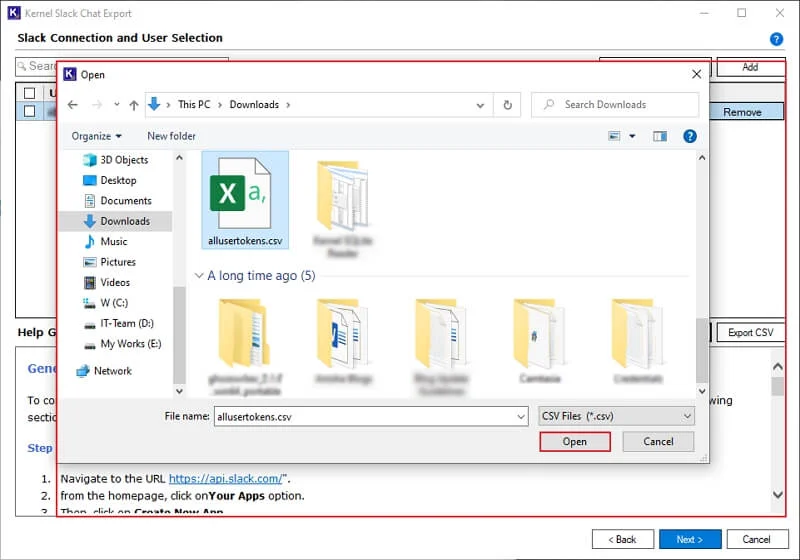
(b) Select the CSV file from the local computer and click Open.
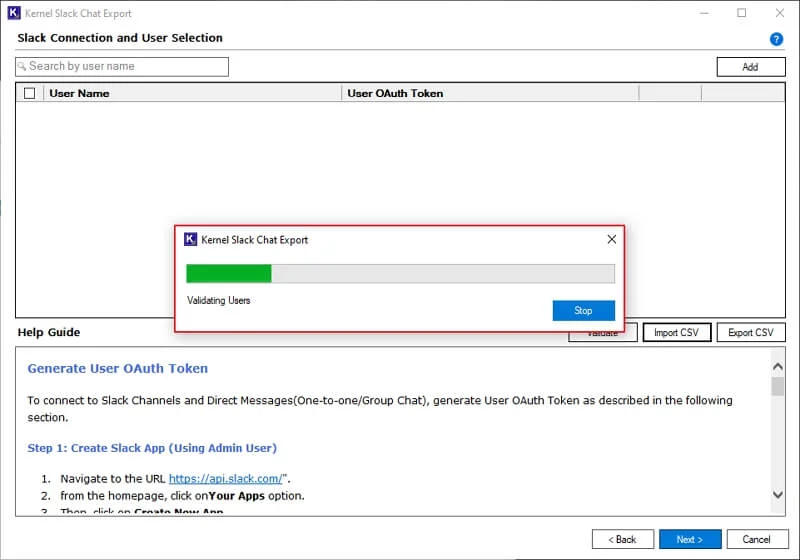
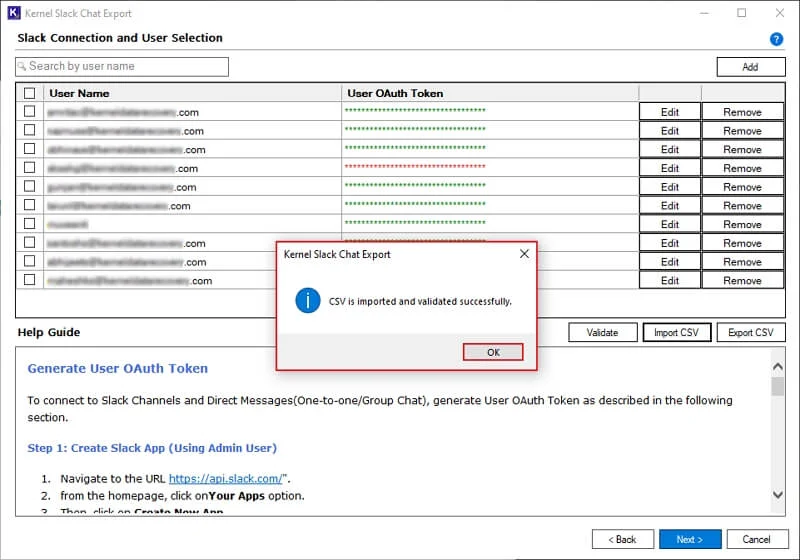
(c) The software will start Validating Users from CSV files.
(d) Once CSV is uploaded, you will get “CSV is imported and validated successfully” message. After that, click OK.
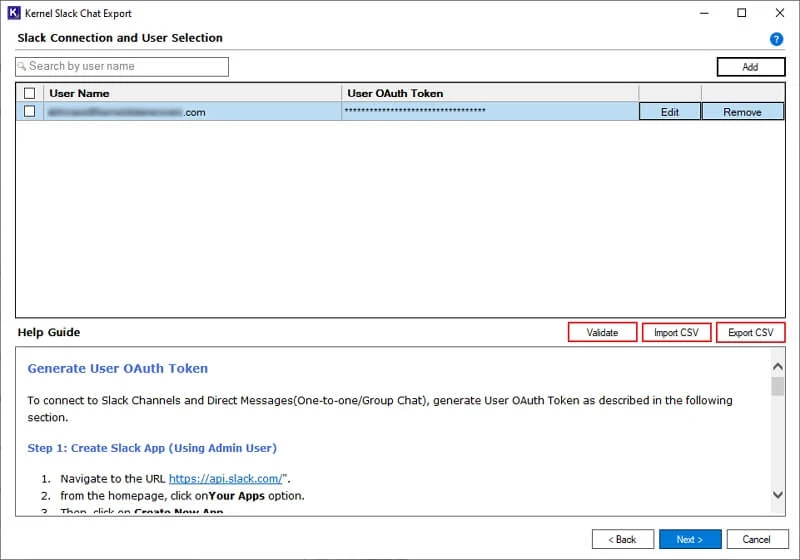
Step 6: The software will show all the User Names with User OAuth tokens. Use the Search bar to find a specific Slack user among multiple ones. Use the check box to select specific users, and you can also Remove Selected Users to take a backup of selected users.

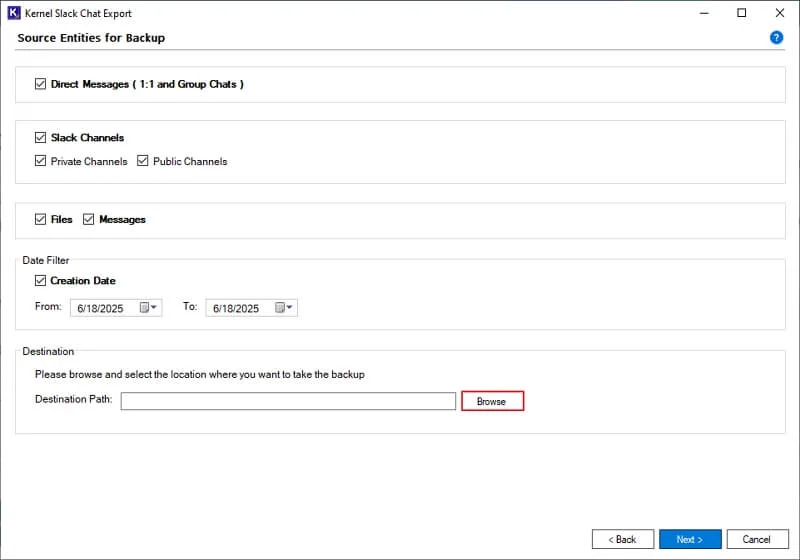
Step 7: In the Source Entities for Backup, select options from:
- Direct Messages (1:1 and Group Chat): To backup all the Direct messages and Group Chat.
- Slack Channels: Backup all the Slack Channels of the selected users.
- Public and Private Channels: Save all your organization's public and private channels.
- Files and Messages: Select from Files and Messages to backup from Slack Direct Messages and Channels accordingly.
- Date Filter: Select From and To dates to backup Slack data according to the date range.
- Browse Destination Path: Browse and select a preferred location in your local drive to save backed-up data.
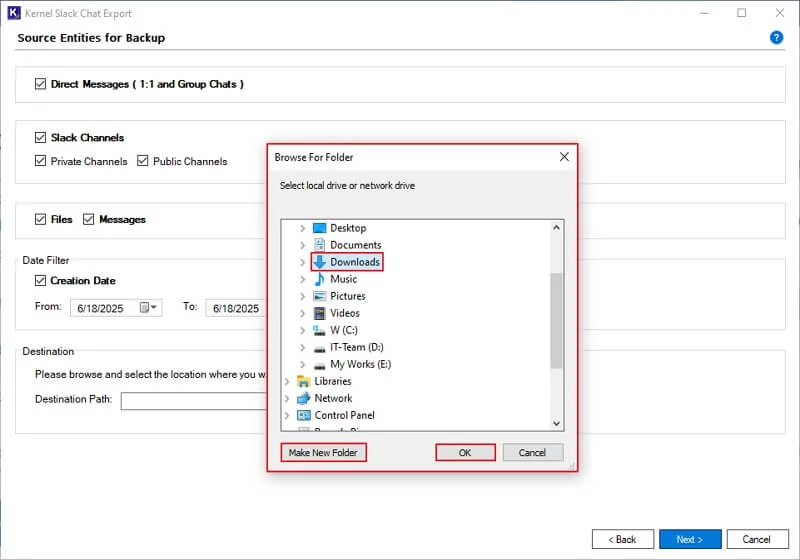
Step 8: In the Browse For Folder window, select a preferred folder or drive to save data and click OK. Additionally, you can click on Make New Folder to create a new folder in the selected drive.
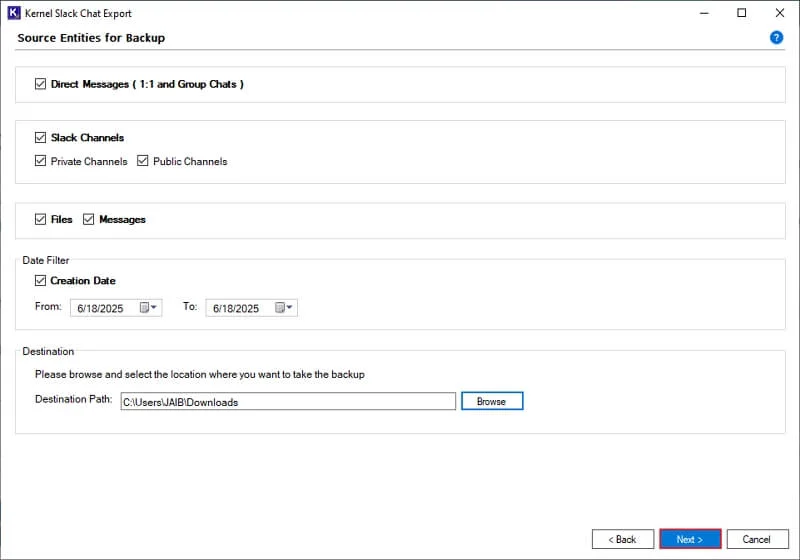
Step 9: Again, in the Source Entities for Backup window, click Next.
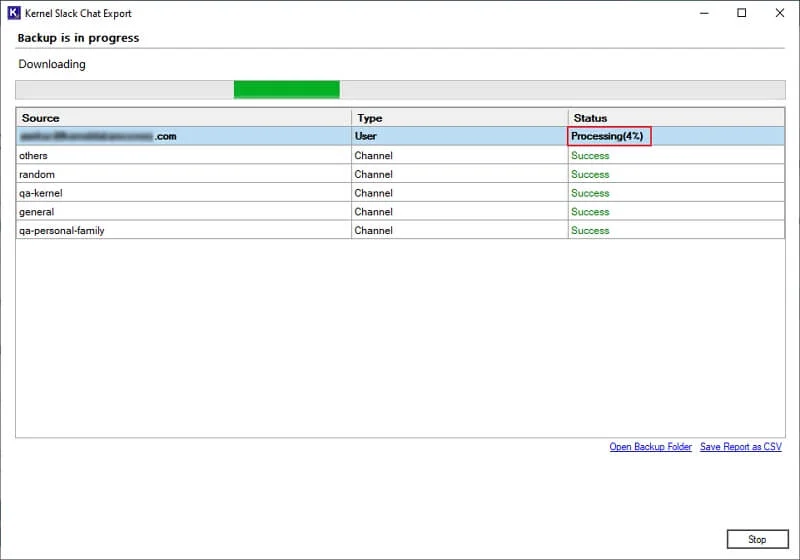
Step 10: The software will start backing up Slack data and show live backup status.
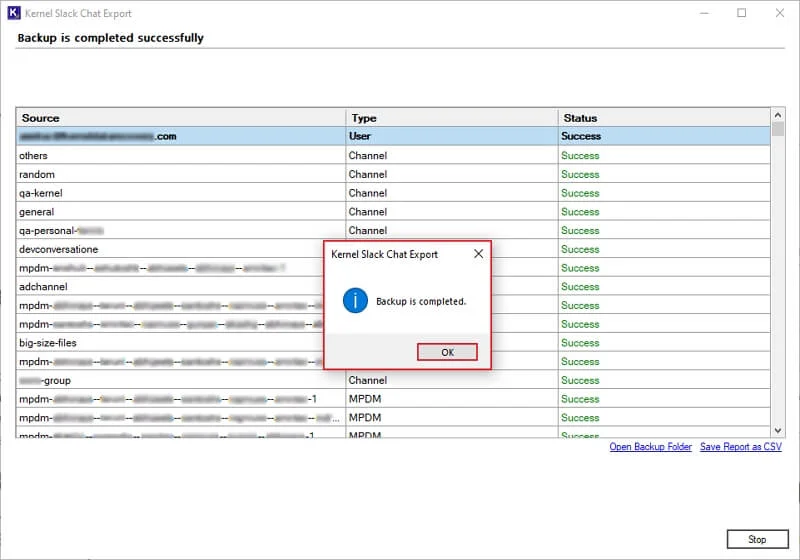
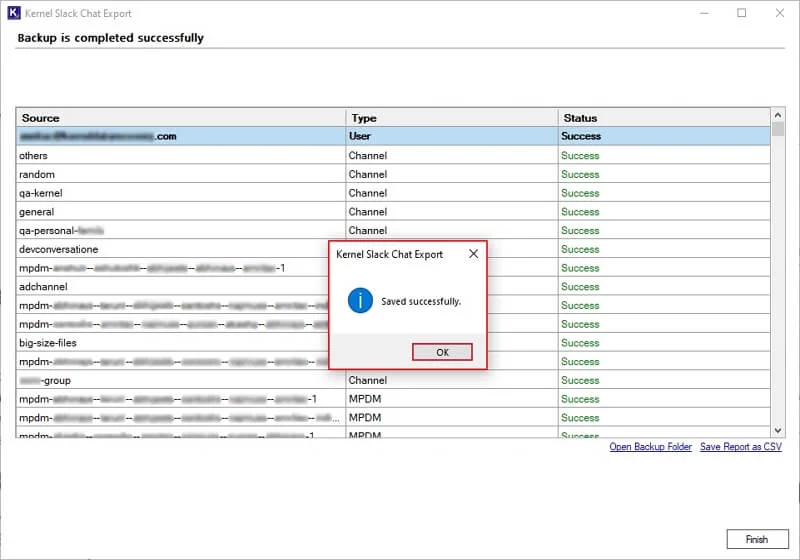
Step 11: After finishing backup process, the software will pop up “Backup is completed” message and click OK.
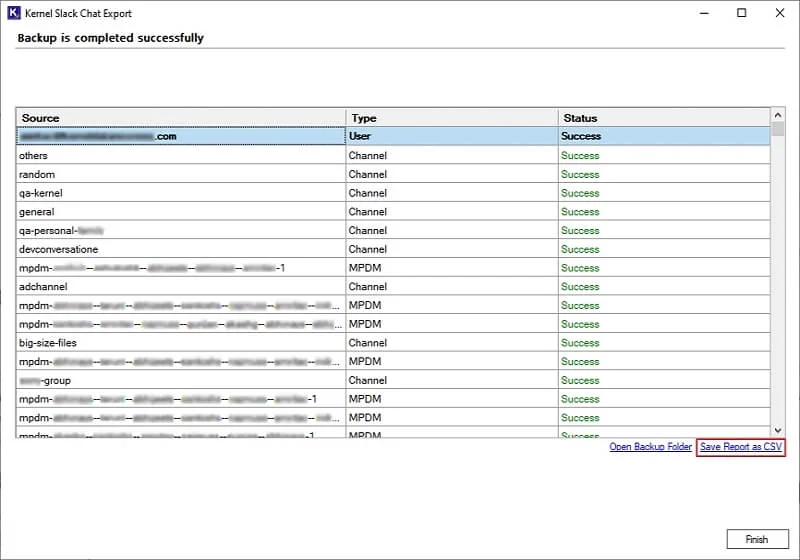
Step 12: Click on Save Report as CSV to download a detailed backup report to your local computer.
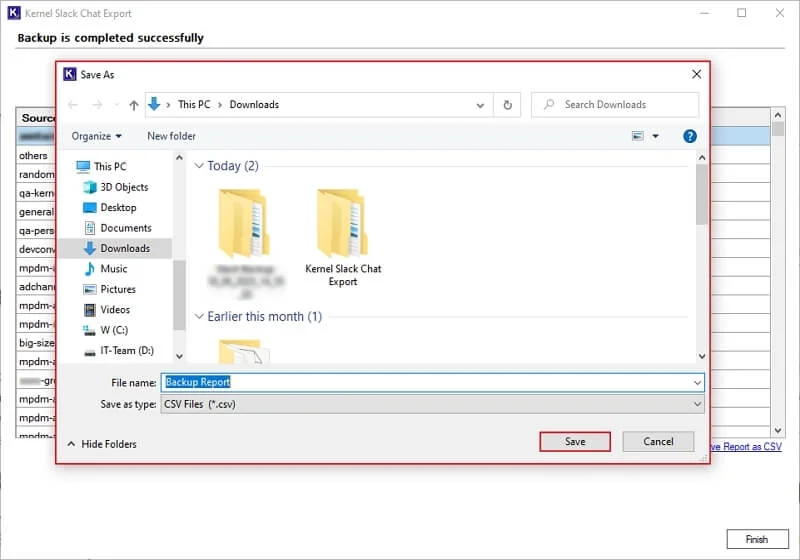
Step 13: Select the Saving location in Save As window, give a CSV file name, and click Save.
Step 14: The software will pop up a "Saved successfully” message after exporting the CSV file.
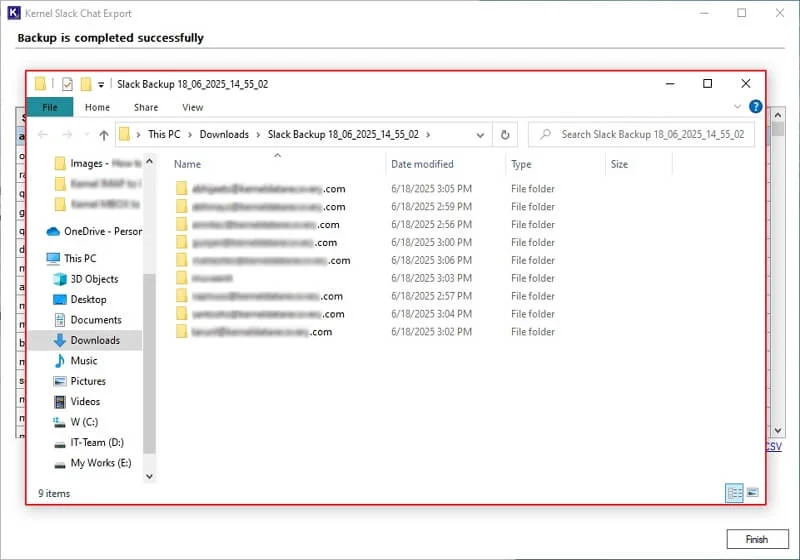
Step 15: Now, click on Open Backup Folder to directly access the backup folder.

Step 16: You will be redirected to all the Slack data backup folders.