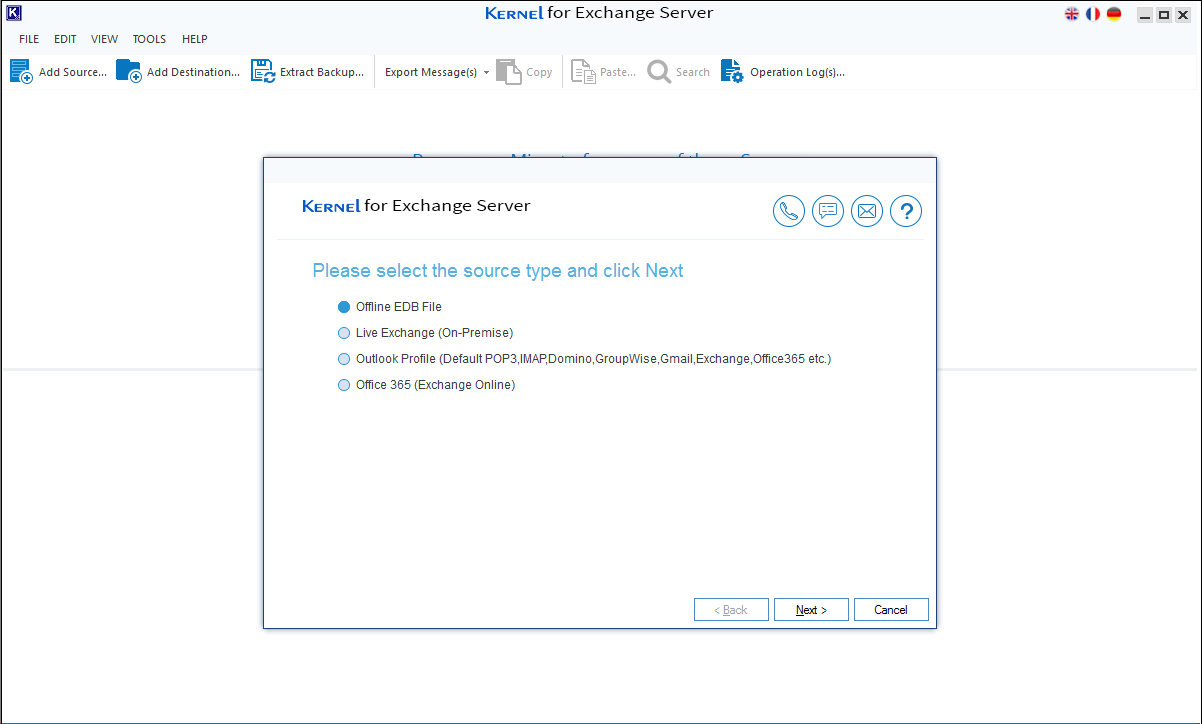

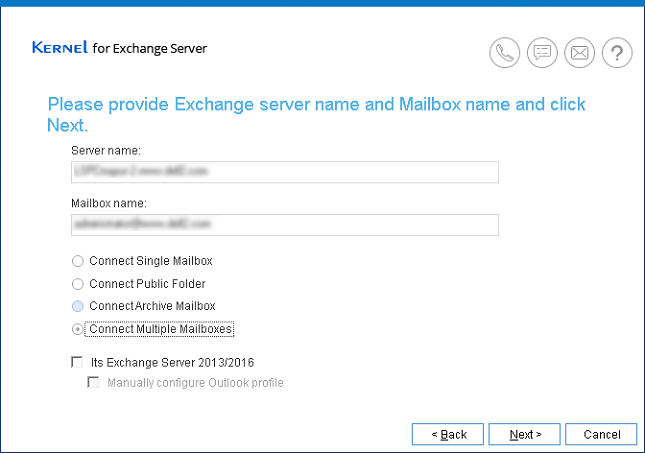


Here’s how to migrate EDB to Office 365 with the software using modern authentication:
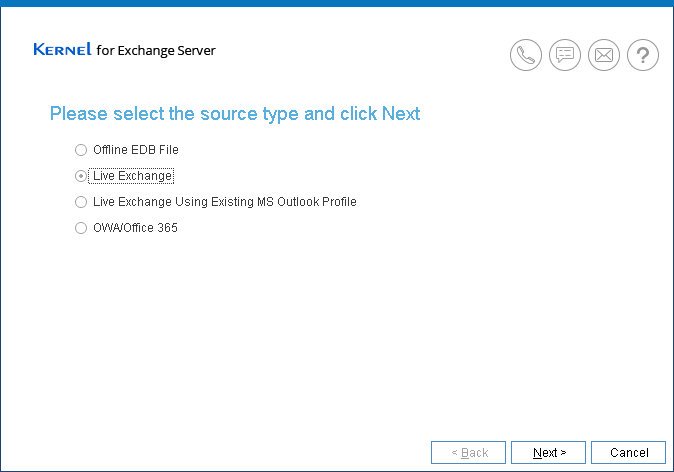
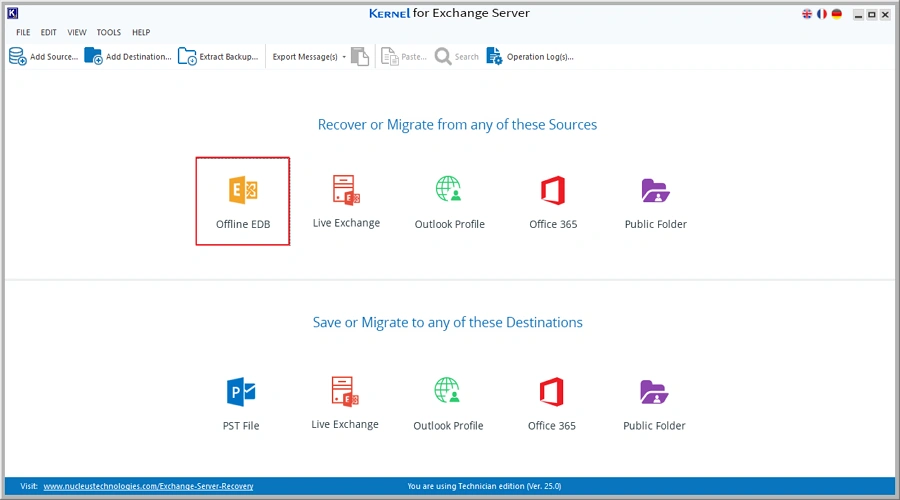
Step 1: Launch the Kernel for Exchange Server tool and click on the Offline EDB option.
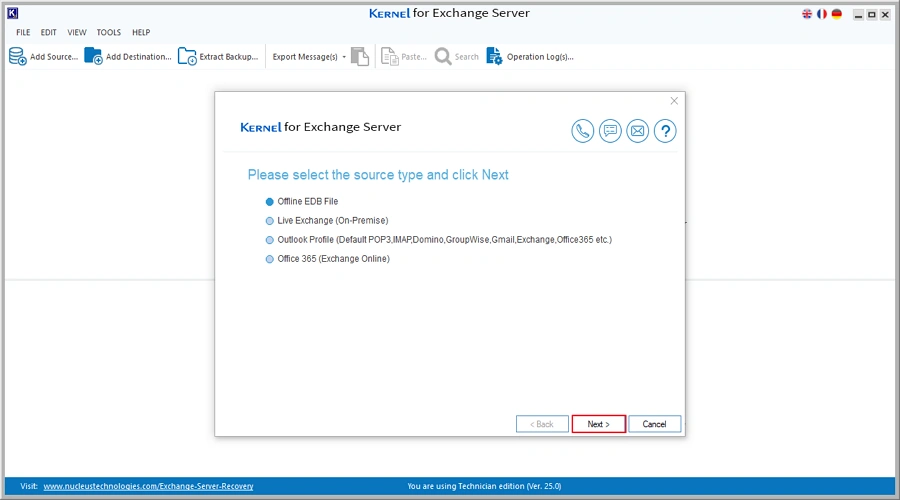
Step 2: Select Offline EDB File tab and click Next.
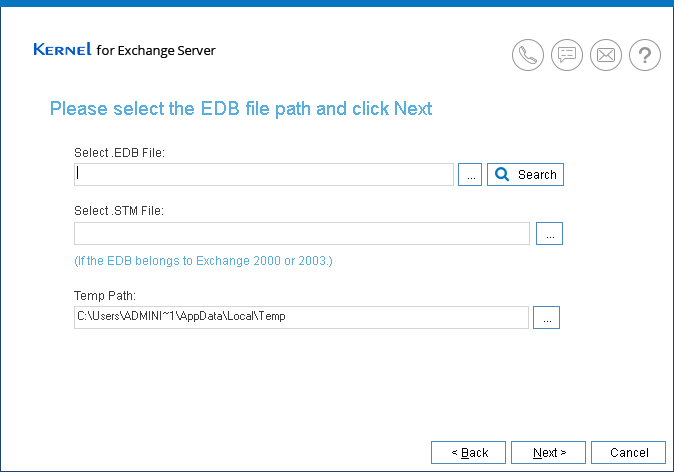
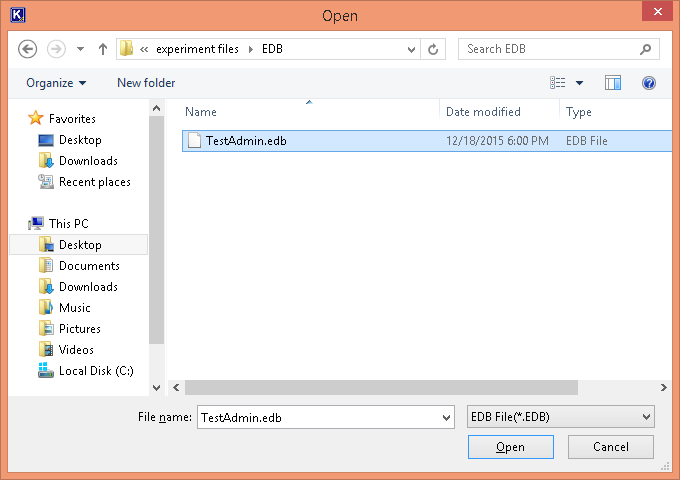
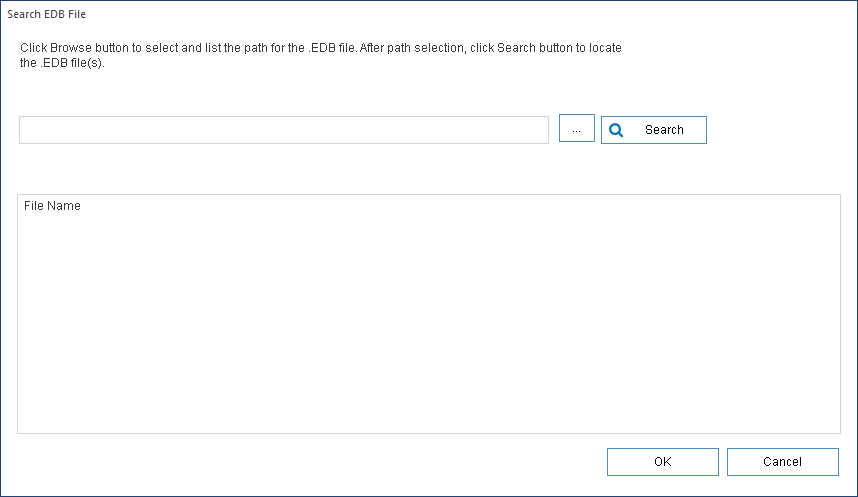
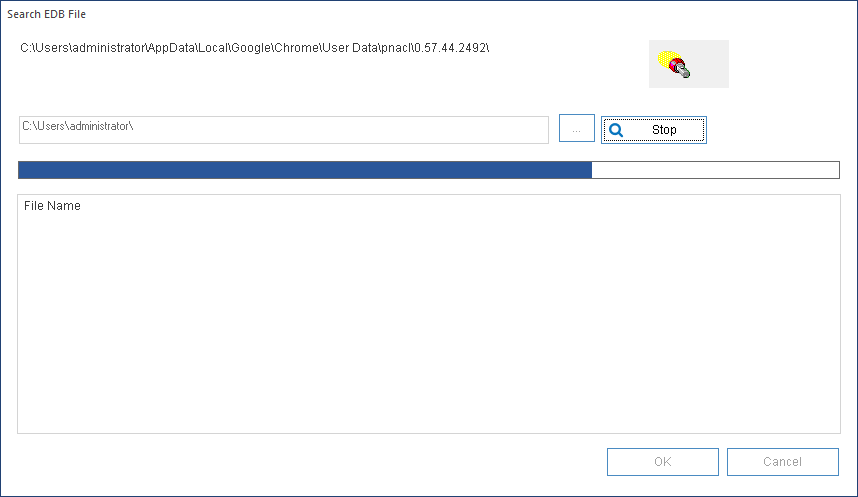
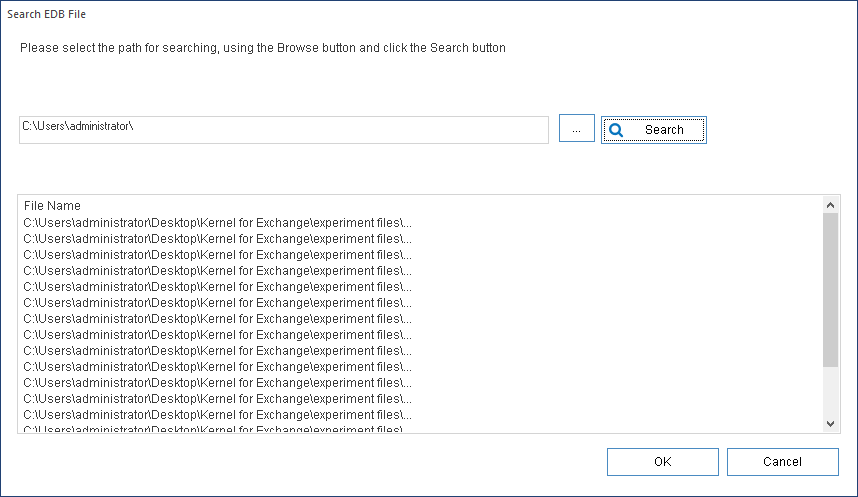
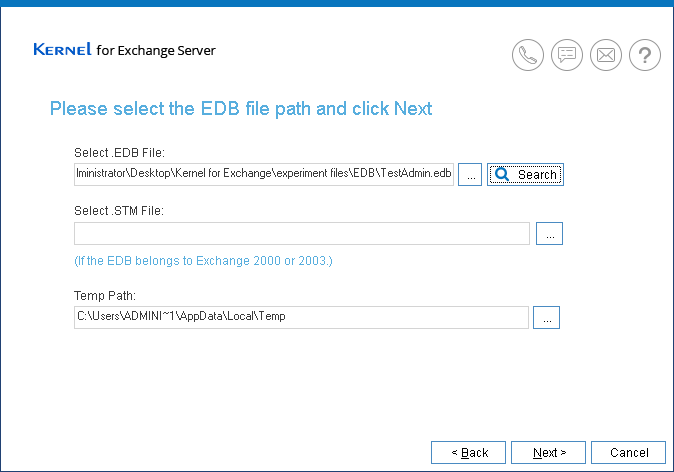
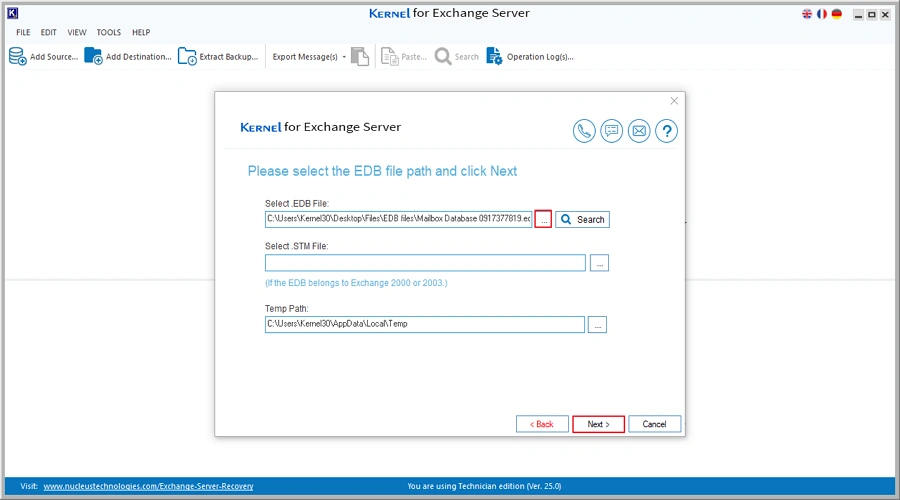
Step 3: Click the three-dot button to browse and select the EDB file from your system. You can also use the Search option to find all the EDB files in any selected drive. After adding the EDB file, click Next.
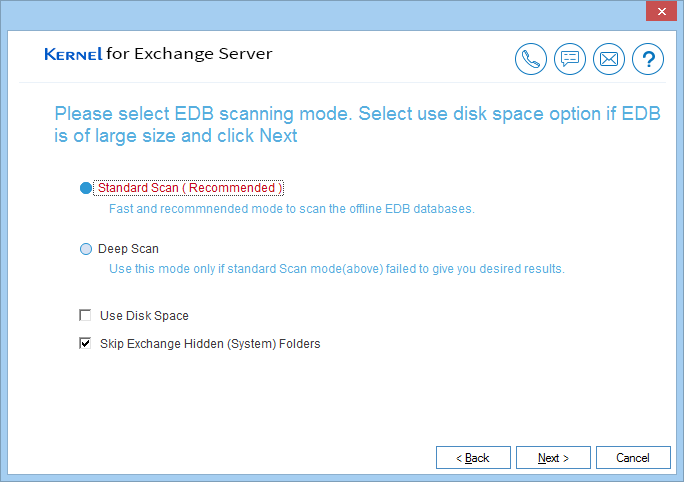
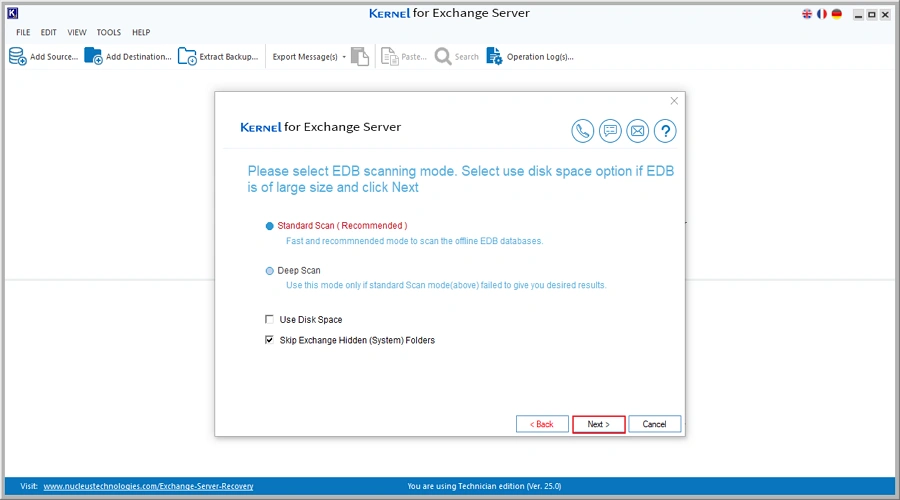
Step 4: You have two modes for EDB file scanning. Choose the option according to your requirement and click Next.
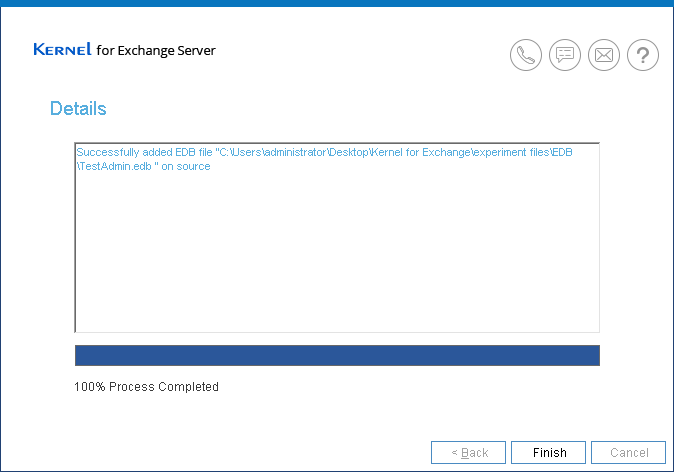
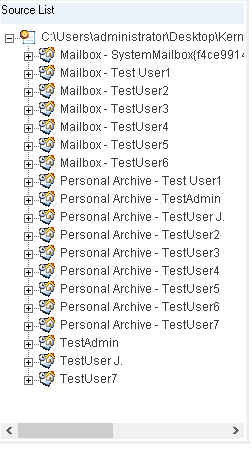
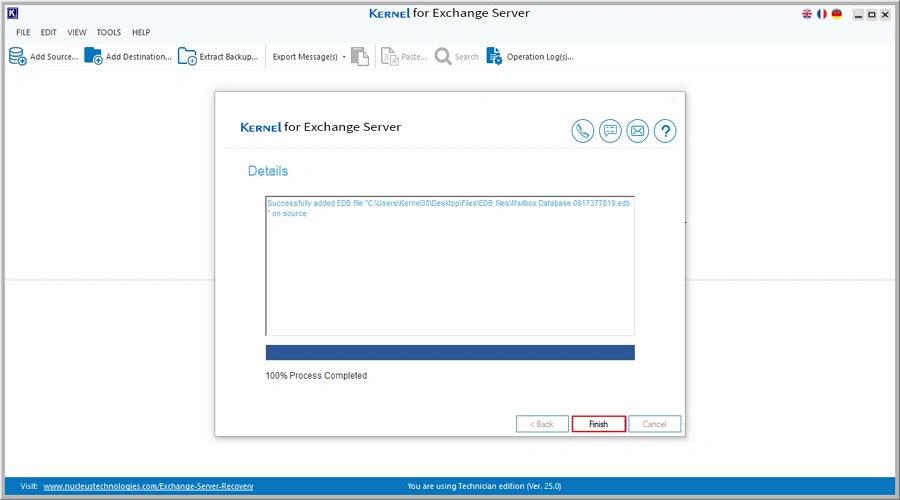
Step 5: The software will begin scanning the EDB file. When scanning is complete, click Finish to view the mailboxes inside the file.
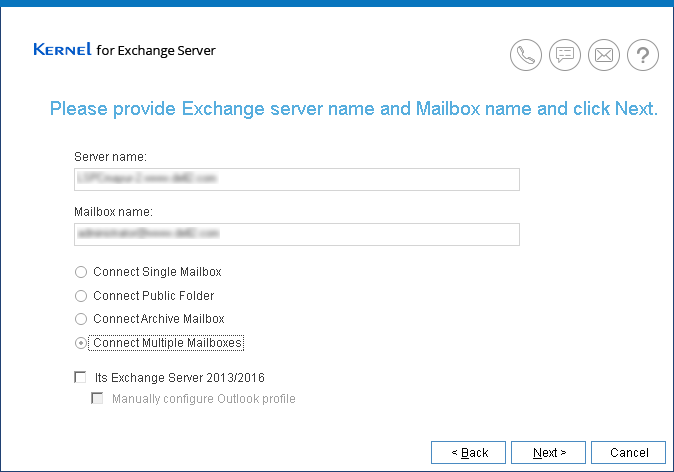
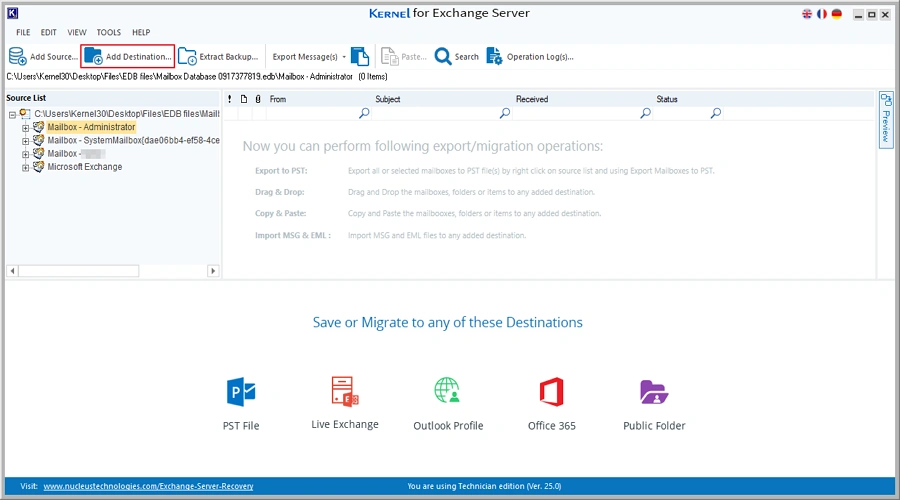
Step 6: After adding the EDB file, click Add Destination button to add the target Office 365 account.
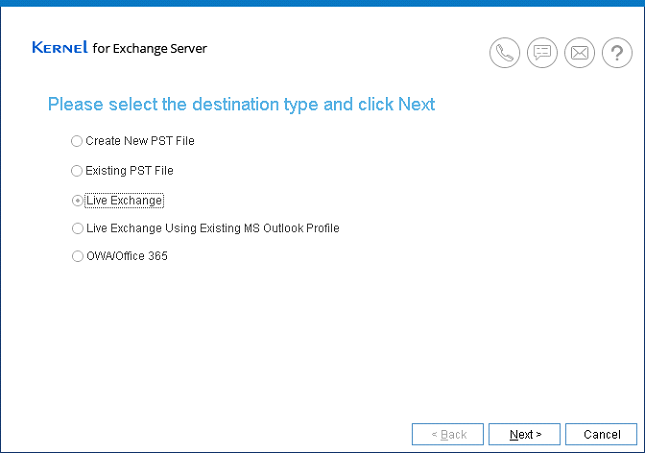
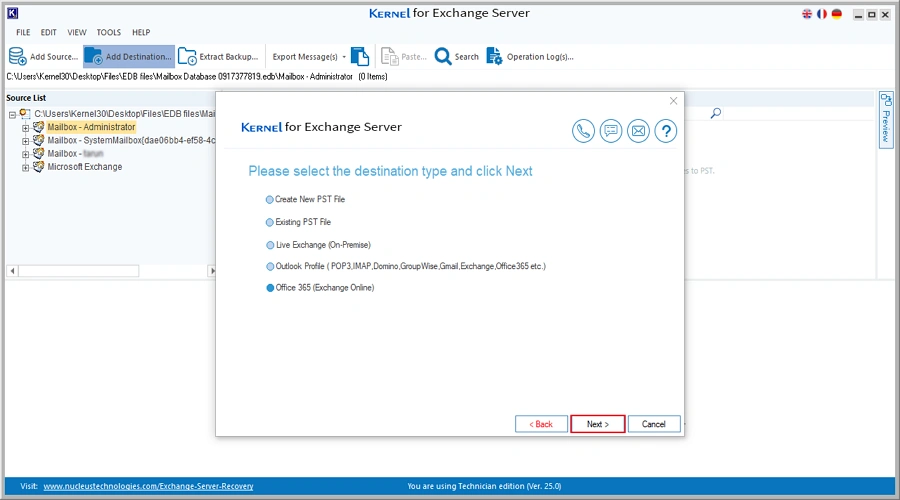
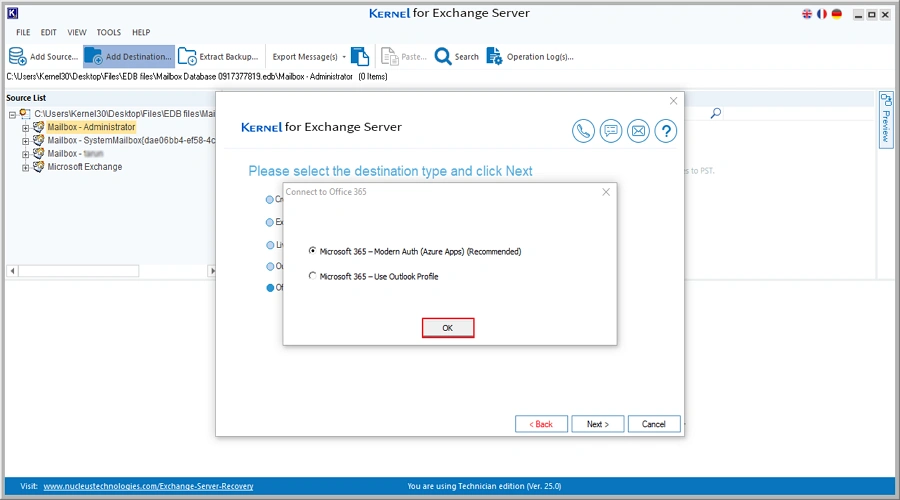
Step 7: Choose Office 365 (Exchange Online) as the destination and click Next.
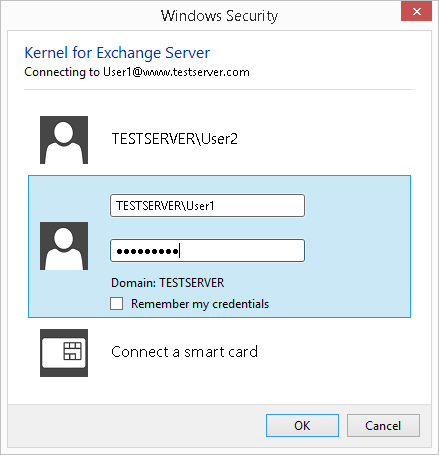
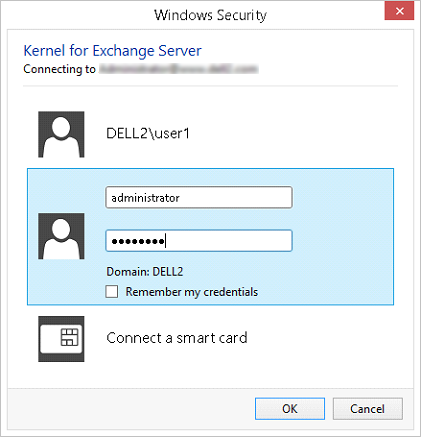
Step 8: You have two options to connect to an Office 365 account, using Modern Auth and Outlook Profile. The Modern Auth method is the recommended option. Select it and click OK.
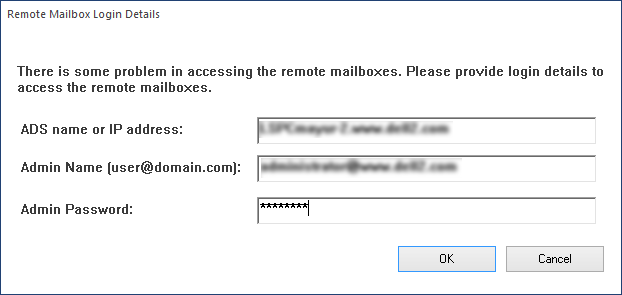
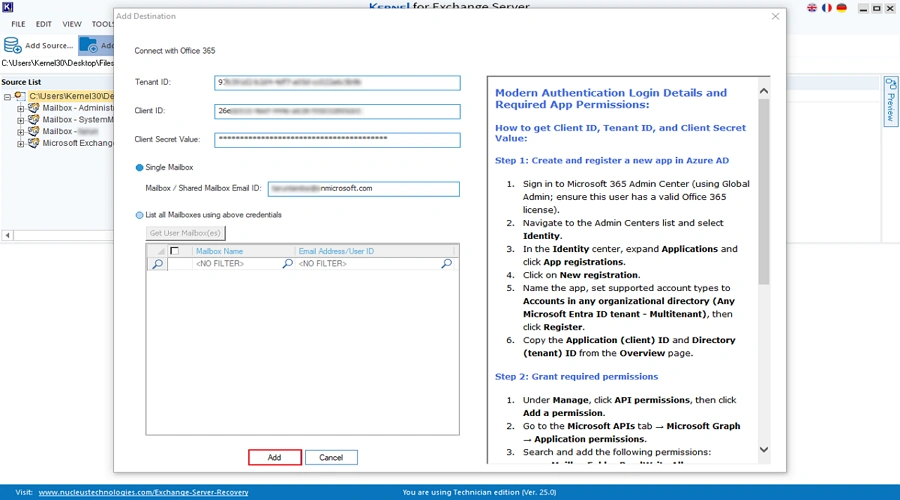
Step 9: Provide the credentials for the target Office 365 account. You can send data to a single mailbox or multiple mailboxes:
Option 1 (Single Mailbox)
Select the Single Mailbox option, enter the user’s email address, and click Add.
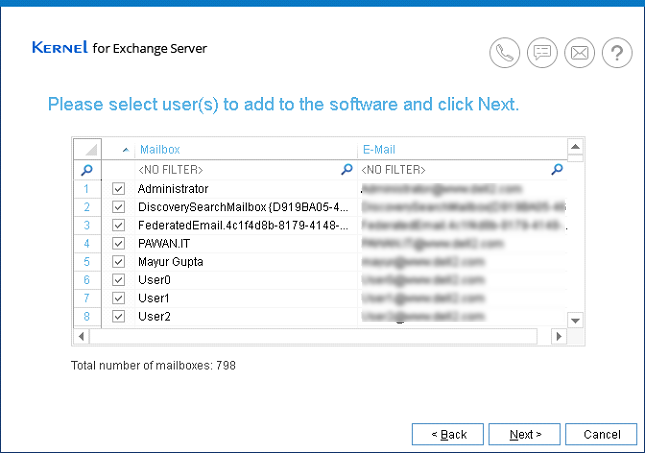
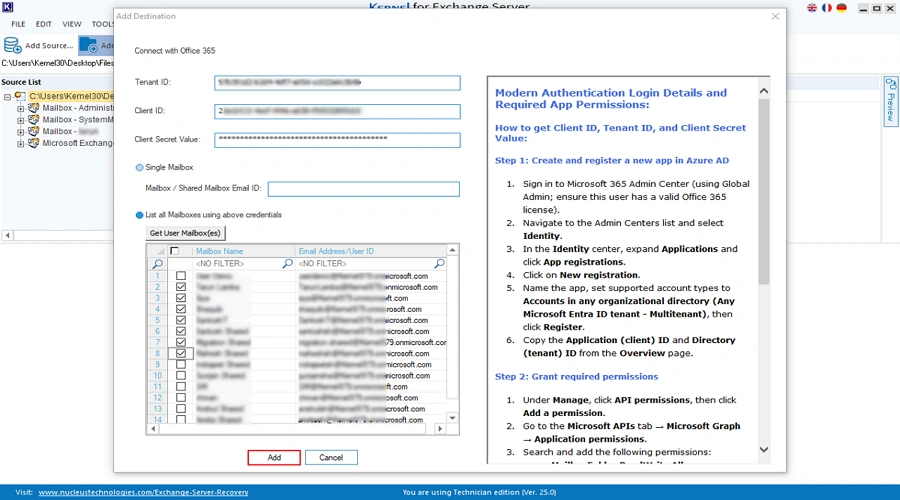
Option 2 (Multiple Mailboxes)
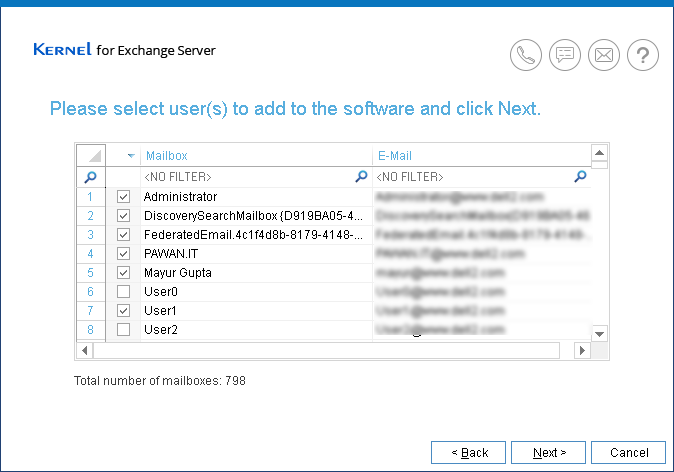
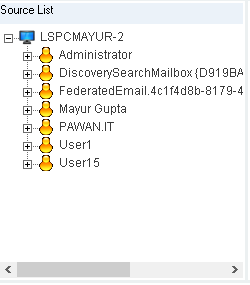
Select List all Mailboxes using the above credentials options and click on Get User Mailboxes. Then select all or required mailboxes and click Add.
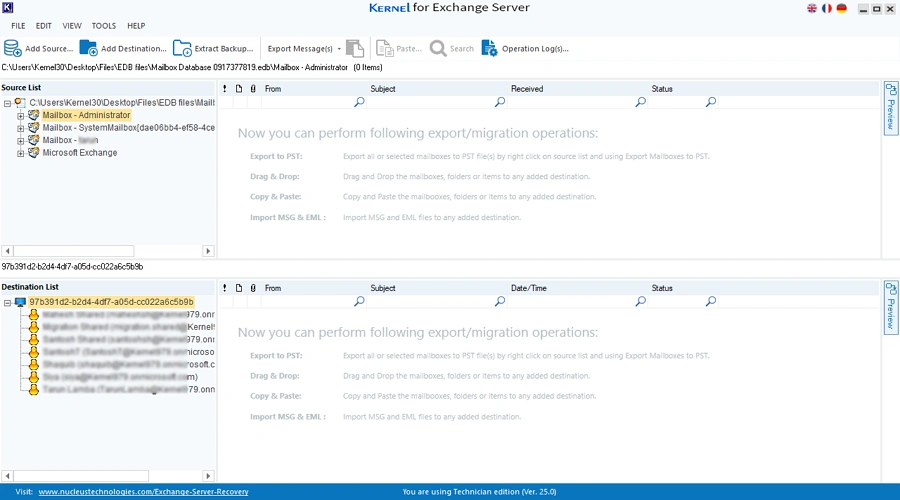
Step 10: Both the source EDB file and the destination Office 365 account were added successfully.
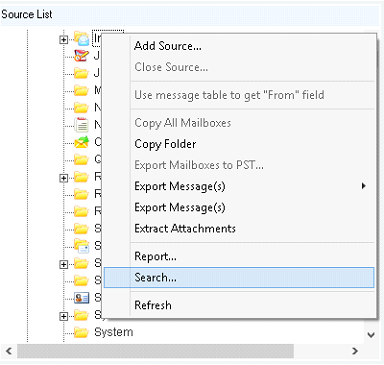
Step 11: Select the added EDB file, right-click and select Copy All Mailboxes option. This option allows you to copy all the mailboxes inside the EDB file and move them all to Office 365 in one go. If you want, you can select and copy just a single mailbox.

Step 12: Go to the destination section. Select the Office 365 account, right-click and select Paste All Mailboxes.
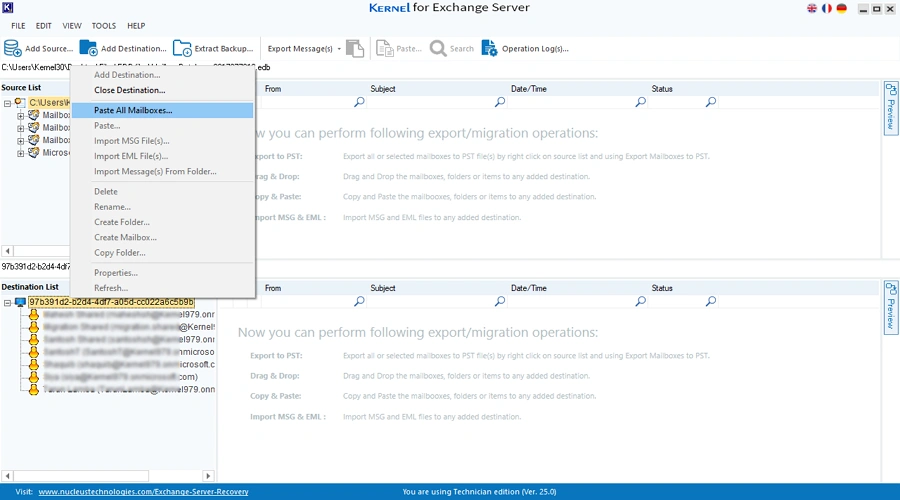
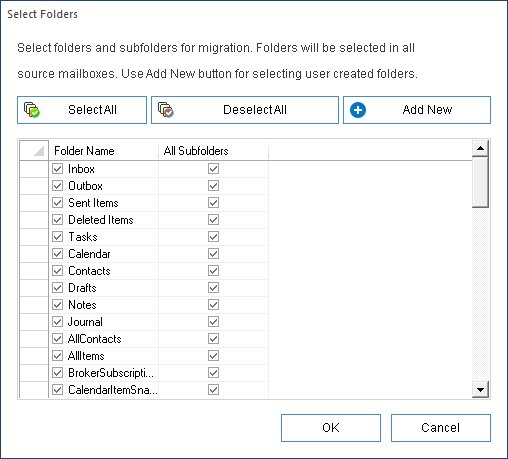
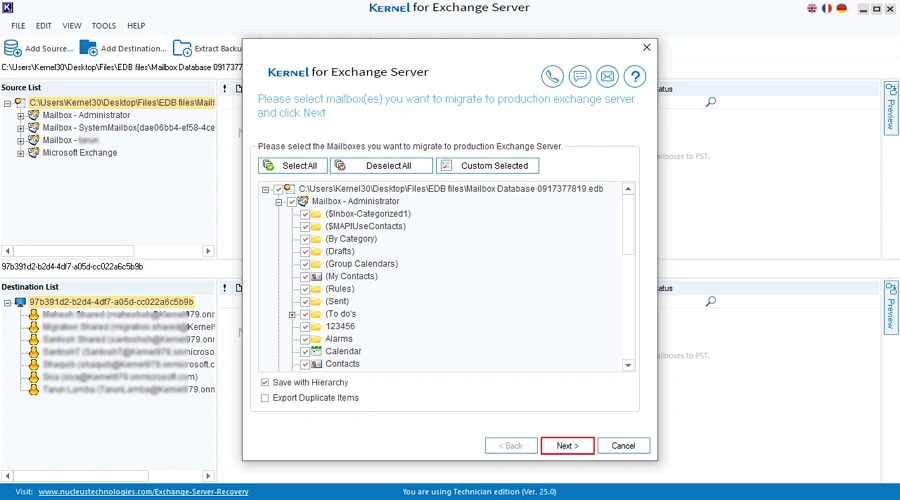
Step 13: A new window will open. Here, you can review and exclude any mailboxes or folders from the migration, if required.
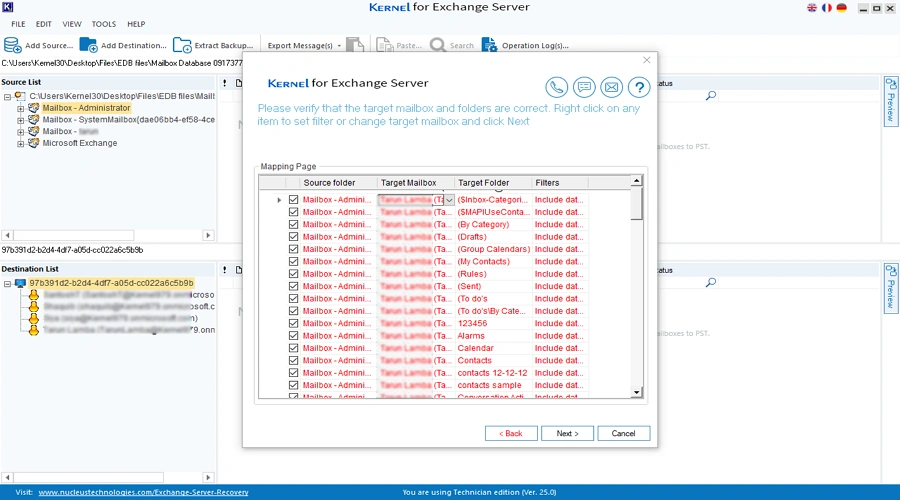
Step 14: Map the source EDB mailbox to the destination Office 365 mailbox. After mapping the mailboxes, click Next
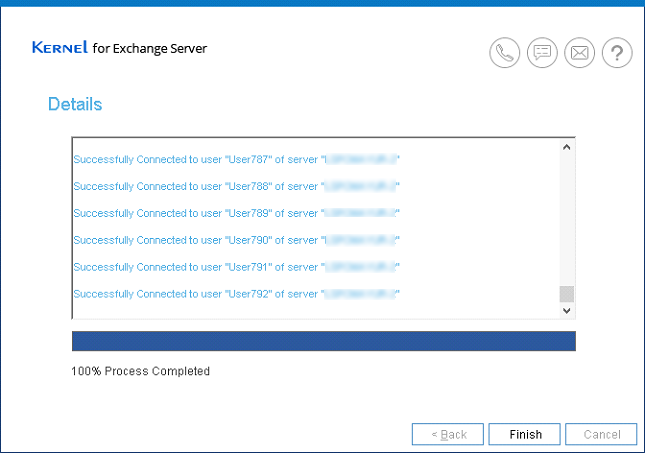
Step 15: EDB to Office 365 migration will start.
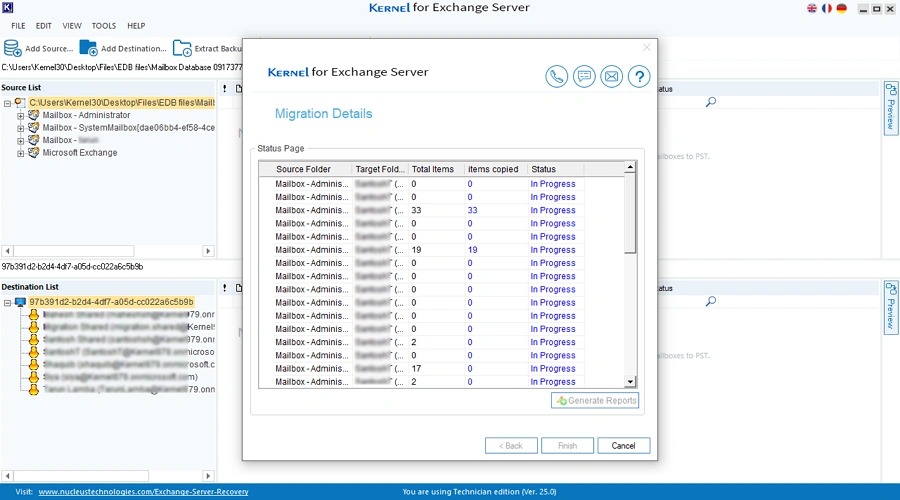
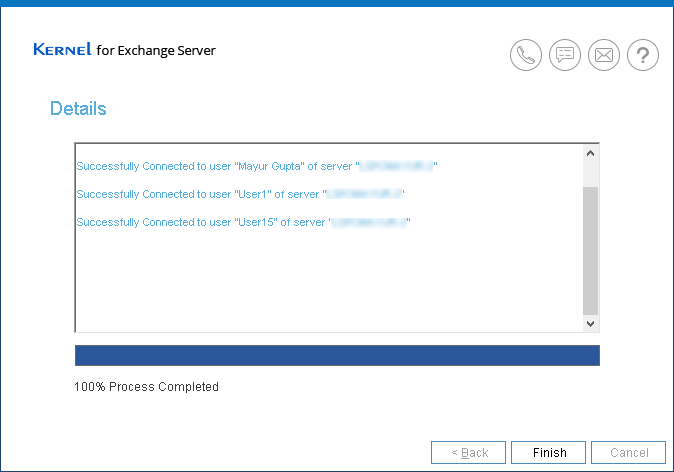
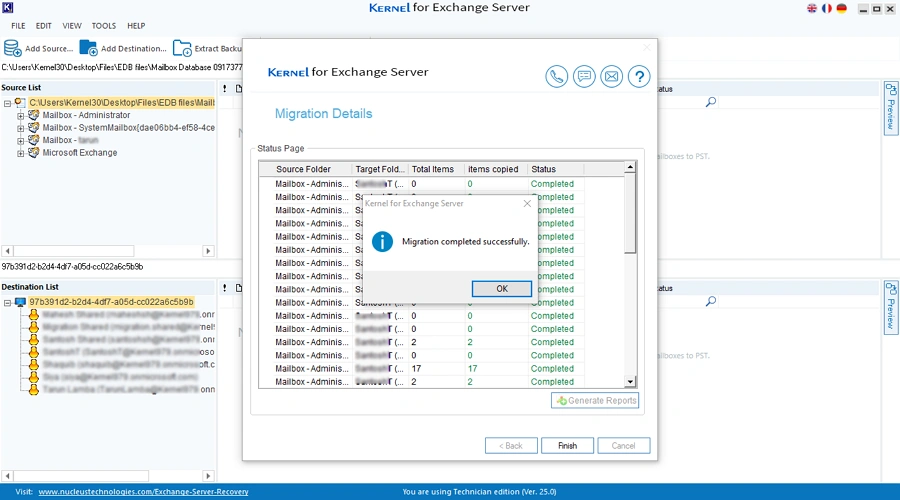
Step 16: The tool will give a success message when the data transfer is complete.
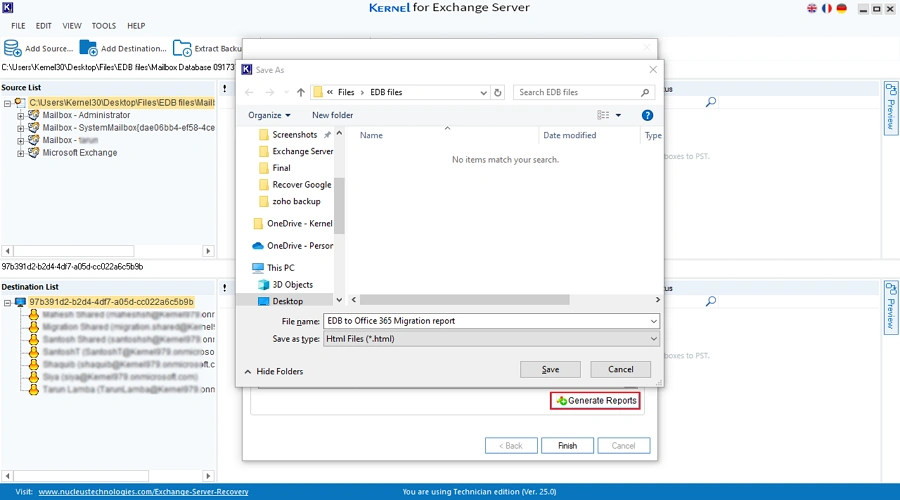
Step 17: To save a detailed report of the migration, click the Generate Reports option and specify the location & name for the report, then click Save.