Read time 4 minutes
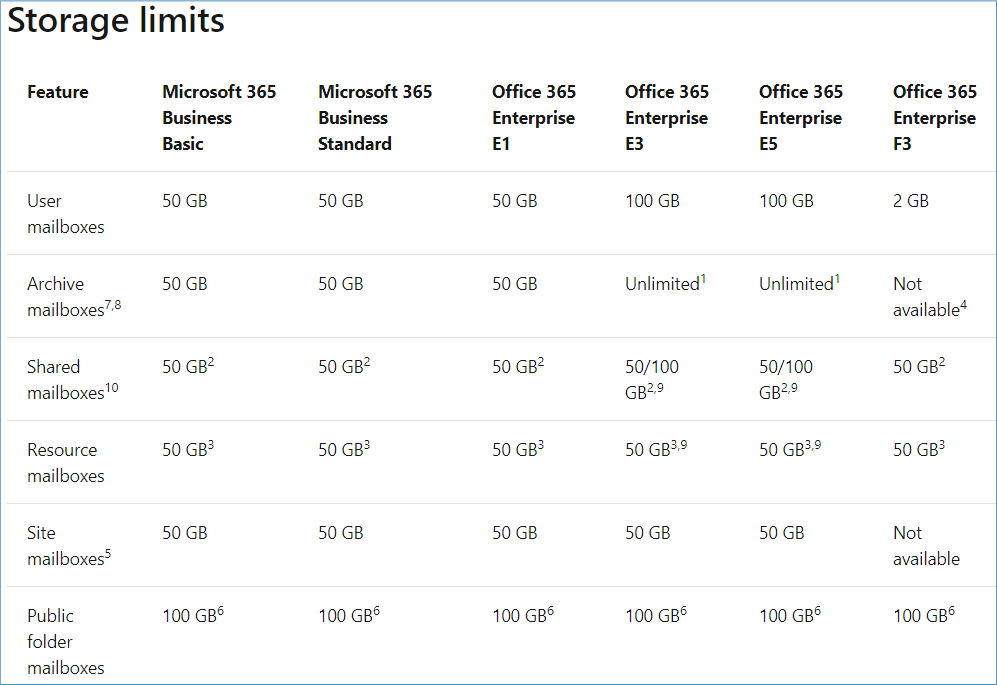
Microsoft has designed its Office 365 subscription plans to accommodate the needs of each business regardless of its employee strength or software requirements. Office 365 understands the need of storage so, there are various plans for Office 365 where the size of the mailbox is different. The Enterprise plans have more space than the Business plans so, you should check the following table showing the maximum storage limit for various mailboxes in each plan.
When the mailbox size exceeds 50 GB, the organization has only two options left – either upgrade the Office 365 subscription or delete data from the mailbox. But, deleting data is not always an option for many because it stores all your essential information. Organizations don’t want to delete and lose their data. Also, not every user wants to invest in upgrading the plan due to higher costs.

So, what are the options to increase Office 365 mailbox size to 100 GB without upgrading the license? Well, here we have an ultimate solution that allows you to increase Office 365 mailbox size from 50 GB to 100 GB.
In case of mailbox size limits, what happens?
Mailbox storage quotas consist of three limits namely warning limits, send limit, and send/receive limit. So, analyzing the possibilities of every situation is necessary as any of the mentioned limits applied to you.
- Whenever a mailbox reaches any of these limits, the user is notified via a notification message. Warning limit users to free up space as they are about to reach storage limits.
- If the space is not freed up, the user loses the ability to send emails. Once the send limit is reached, the user is unable to send any emails until non-critical emails are deleted.
- On reaching the send/receive limit, the mailbox freezes, and no emails can be sent or received. In this scenario, senders receive a non-delivery report.
As we discussed above, what happens when a user’s mailboxes get full? Now, let’s know the essential methods to increase mailbox size from 50 GB to 100 GB.
Method 1: Change your Office 365 subscription plan
The most straightforward approach to double the storage space of user mailboxes is to change the subscription plan from Business to Enterprise. If you check the storage limits table, you can see that Business Basic and Business Standard have 50 GB of storage. If you upgrade the plan to Enterprise E1, E3, and E5, the storage limit will automatically increase to 100 GB.
To increase the mailbox size in Office 365 over 100 GB, follow the steps given below:
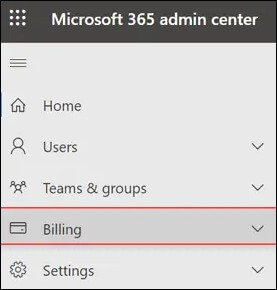
- Open the Microsoft 365 Admin Center.
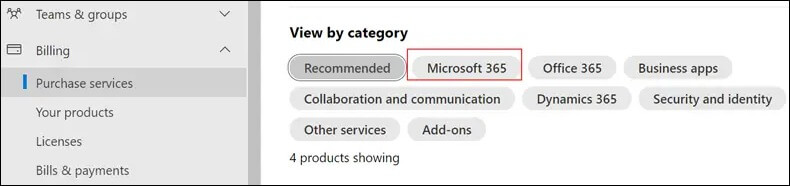
- Select the Billing option.
- Go to Purchase Services and select Microsoft 365.
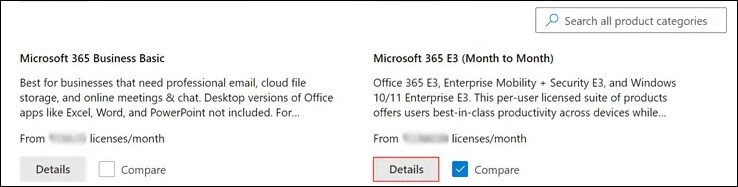
- Choose your Microsoft 365 Enterprise plan and tap on Details.
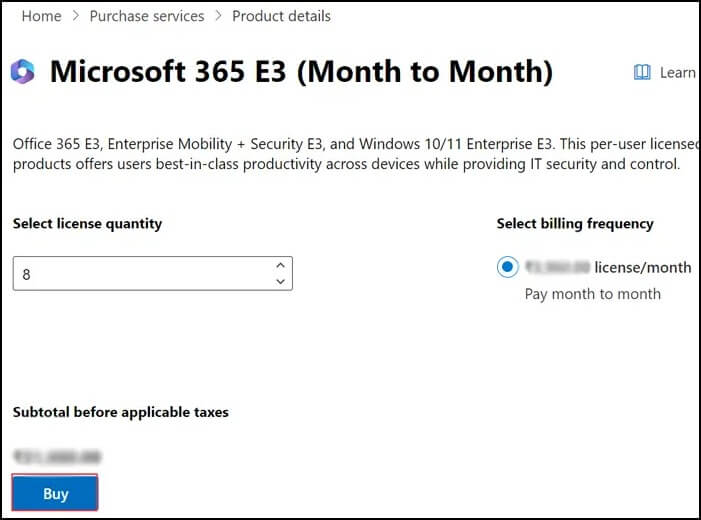
- Select the license quantity, click on the Buy option, and finish the transaction.
Method 2: Increase Office 365 mailbox size using PowerShell
One way to increase the mailbox size limit is by using Exchange PowerShell cmdlets. But, for that, you need to run PowerShell as administrator and connect to Exchange Online (Office 365) with Windows PowerShell. After connecting Exchange Online to Power Shell, now run the “Set-Mailbox” command to increase mailbox sizes.
After you have upgraded your subscription plan, if the user mailbox limit is set to 50, you must increase it manually. Some organizations allow the administrator to change the mailbox size manually. Use the following steps-
- First, connect to Exchange Online and run PowerShell. Use the below command to increase single user mailbox size.
Set-Mailbox <UserID> -ProhibitSendQuota <Value> -ProhibitSendReceiveQuota <Value> -IssueWarningQuota <Value>
Here the parameters <UserID> represents the user’s mailbox or email address, <Value> represents the sizes in GB, MB, or KB.
So, to set the mailbox size limit to 100 GB, you can set the send limit to 99 GB. - Now, use the following command to check the size of the mailbox.
Get-Mailbox <UserID> | Select *quota
That’s how you can extend the limit for single user mailbox in Exchange Online. If you want to increase the mailbox size for multiple users, then follow the below steps.
- To increase the size of multiple user mailboxes, connect to Exchange Online and use the below command in Windows PowerShell.
Get-Mailbox | Set-Mailbox -ProhibitSendQuota <Value> -ProhibitSendReceiveQuota <Value> -IssueWarningQuota <Value>
- You can also apply additional filters to the Get-Mailbox cmdlet. Below is an example that shows how you can filter on the cmdlets.
Get-User | where {$_. Department -eq “Sales”} | Get-Mailbox | Set-Mailbox -ProhibitSendQuota <Value> -ProhibitSendReceiveQuota <Value> -IssueWarningQuota <Value>
In this example, three cmdlets are used to filter the commands of an organization’s sales department. The “Where” parameters define the department where the changes will be implemented, “ProhibitSendQuota” parameter defines the set quota limit for a user mailbox, and the “IssueWarningQuota” defines when a user will receive the exceed mailbox size limit warning.
And, here also you can set the send limit at 99 GB.
When the mailbox size limit exceeds for Office 365 users, they start receiving a “mailbox size limit exceeded” warning. In such circumstances, using the above PowerShell commands can be very helpful to expand the size limit of your Office 365 mailboxes quickly.
Method 3: Enable in-place archive
Enable the in-place archive feature in Office 365 to expand the mailbox size by 50 GB per user account. It permits users to store old emails in the archive and continue to send and receive new messages.
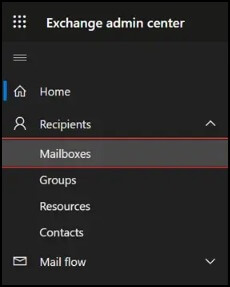
- Access Exchange Admin Center.
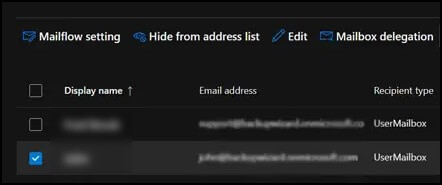
- From the left side dashboard, tap on Recipients > Mailboxes.
- Select a user to enable the in-place archive.
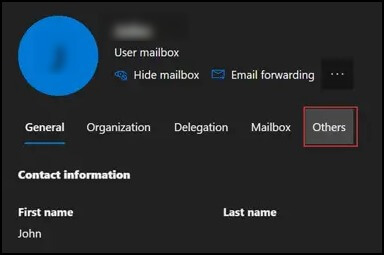
- Tap on Username for more details and choose Others.
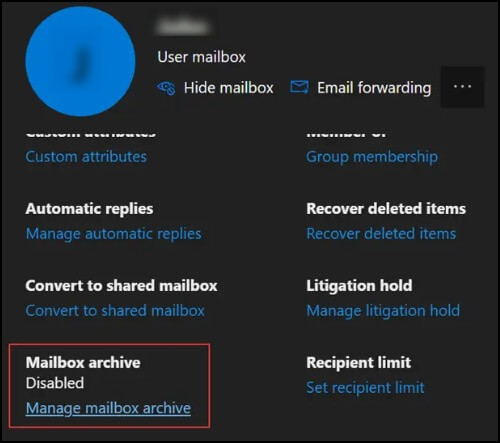
- Click on the Manage Mailbox Archive option.
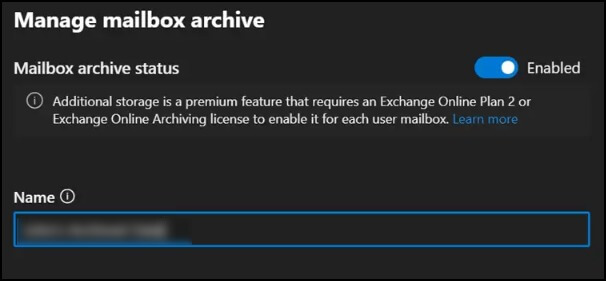
- Enable the mailbox archive, put in the archive folder name, and click on Save.
However, if you’re unable to increase the mailbox size, then you’ll have to delete the existing data. This can be done after backing up the existing data safely. And if you want to backup mailbox data, then there is a brilliant solution for that – Kernel Export Office 365 to PST. It will help you to export your mailbox data into PST format. After that, you can import that into another Outlook account to retrieve your files.
Conclusion
Increasing mailbox size limits in Office 365 is a game-changer for businesses that rely heavily on email communication. PowerShell cmdlets make the process seamless, but it is also a good practice to consider a free Office 365 backup of your mailbox data beforehand.
However, increasing the size of mailbox is much more expensive for some organizations. Instead of buying a new Office 365 account, you can opt for Kernel Export Office 365 to PST to export your data into PST form to free up your Office 365 mailbox.