Read time 7 minutes
Despite the ever-growing demand for cloud-based platforms, there is no denying that data is prone to human errors like accidental or intentional deletion; sadly, it affects both the cloud data and its synchronized local copy. The data deleted from one place will also get deleted from the other. Such is the case of Microsoft OneDrive. So, data deletion and subsequent data loss is a major concerns for all OneDrive users.
But there is good news for the users this deleted data can be restored using the inbuilt options in the OneDrive application. The blog highlights those native ways to recover deleted files from OneDrive, including the permanently purged ones.
What causes data loss in OneDrive?
There are a few common causes behind data loss in the OneDrive platform-
- Malicious activities- Any malware attack or malicious activity directly impacts any platform’s data. With the growing cloud services, these activities have also increased.
- Accidental/intentional deletion- Any user, whether a beginner or technically sound, can make mistakes. Even a tiny mistake can make the files inaccessible or corrupt.
- Incompatible software- Users tend to opt for unrealizable platforms, which can hamper your data directly.
Methods to recover permanently deleted files from OneDrive?
A big question that must be troubling you is whether it is possible to recover deleted files from OneDrive permanently. It is a relief that it is a possibility. However, the method of recovering data will depend on the retention period. If you are recovering files within 30 days, they will get restored directly from the Recycle Bin. After the retention period, you can restore files from the Second stage Recycle Bin, System Recycle Bin, and previous version of OneDrive.
OneDrive web portal includes a common Recycle Bin that stores the deleted files from the OneDrive storage. The data in the Recycle Bin is available for 30 days in the Microsoft personal account. But it is available for 93 days in the Business/School account. Administrators or users can check the data availability in the Recycle Bin and restore from there.
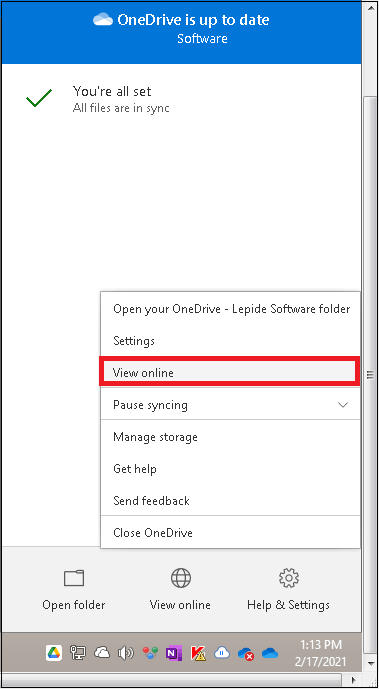
- Click on the synchronized OneDrive folder on your system and click the “View online” option or go to “Help & Settings > View online” or directly visit the website at https://onedrive.live.com/ and sign in with the login credentials.
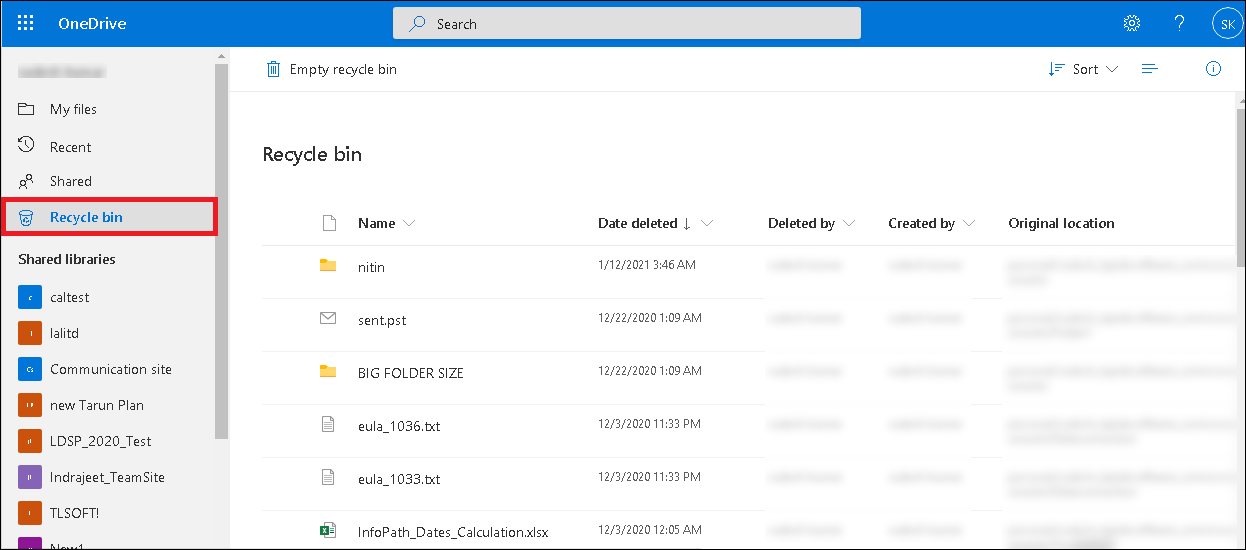
- On the left panel, click on the “Recycle Bin” option. The deleted items will be displayed on the right panel.
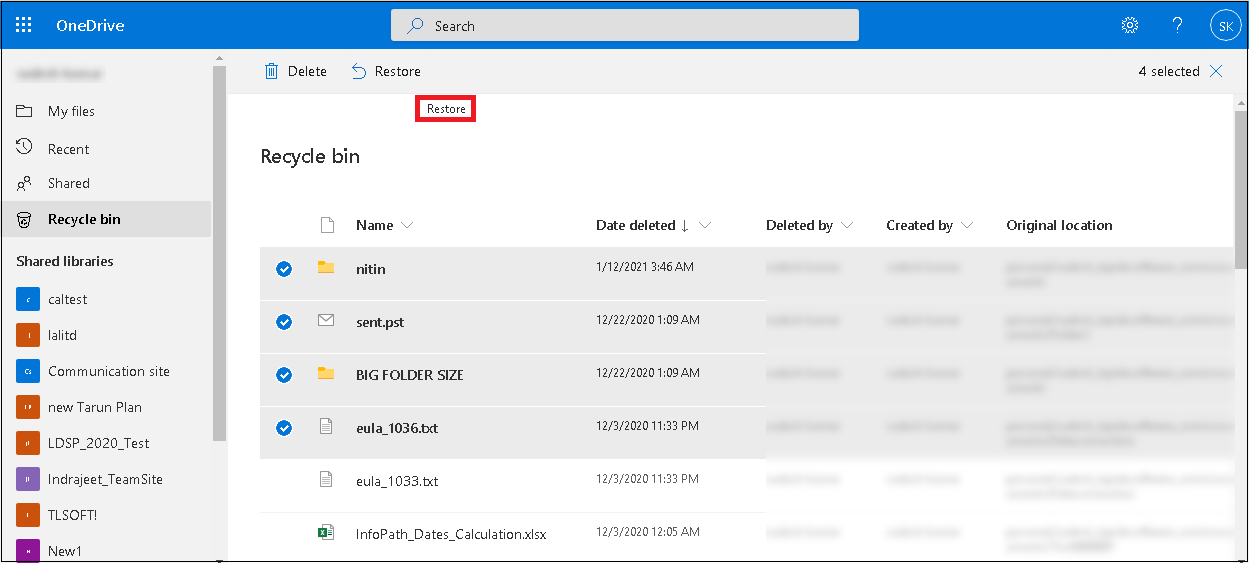
- Now select those items which you want to restore and click the “Restore” option. The items will be restored to their original location.
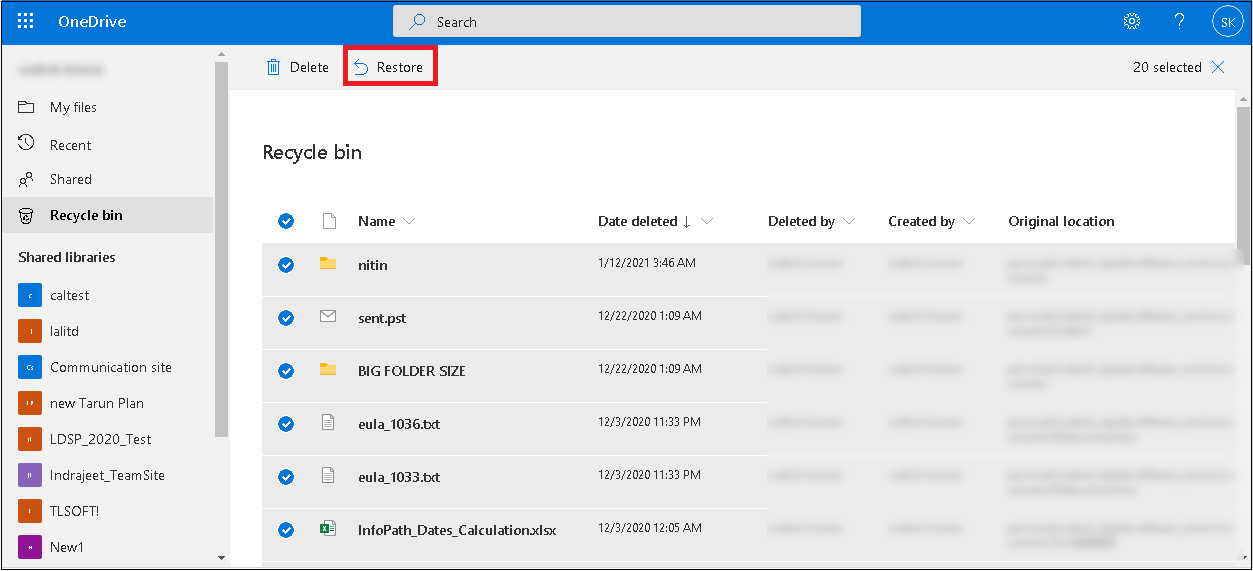
- If you want to restore all the Recycle Bin items, select the check box against the Name section. It will select all the items and then click the “Restore” option to restore them to their respective original locations.
Suppose the data retention period of 30 days or 93 days depending upon the account type is over or the user has emptied the Recycle Bin. In that case, users can also restore the data using the Second-stage Recycle Bin, also known as the Site Collection Recycle Bin, integrated with the OneDrive portal.
- As an administrator, sign in to the OneDrive website and click on the Recycle Bin option.
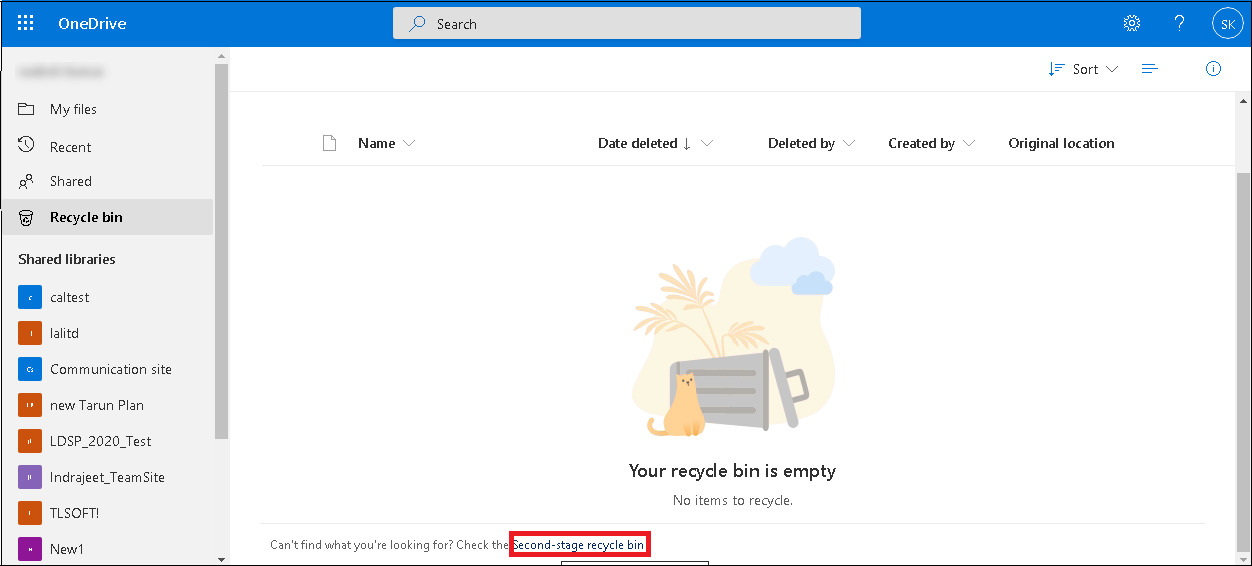
- If the items are unavailable to restore here, click on the Second-stage Recycle Bin link at the bottom of the page.
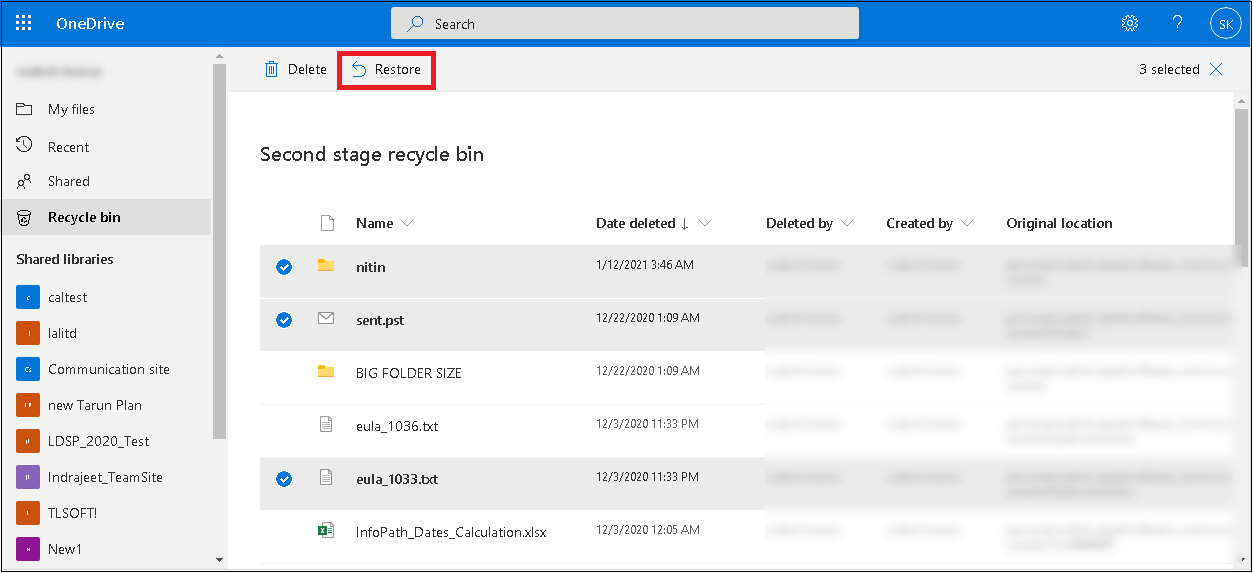
- Now select desired items or all and click Restore to restore them.
Note: The files or items in the Second stage Recycle Bin will automatically get purged or deleted after the total data retention period of 93 days.
As the cloud OneDrive application can be synchronized with the local system creating a OneDrive folder on the local system, any data deleted from this local folder can be retrieved from the Recycle Bin of the system. So, check the simple process to recover files from the Recycle Bin.
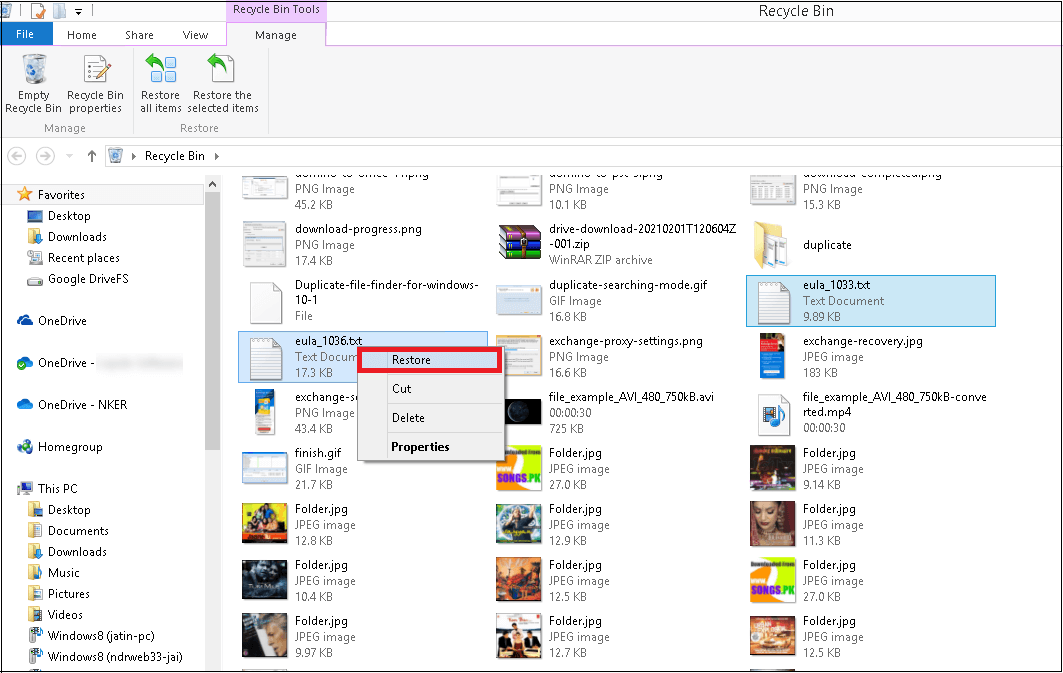
Go to the Recycle Bin of your system and open it. Select those items deleted from your OneDrive folder on your system, right-click and select the “Restore” option from the drop-down list to restore the times to the original location.
Note: The data is not recoverable if deleted from the Recycle Bin or purged using Shift and Del keys together.
If the data retention periods are over for OneDrive and the version history is ON, Microsoft 365 subscribers can restore their OneDrive to the selected version. Check out the procedure.
- Sign in to your OneDrive account online as an administrator.
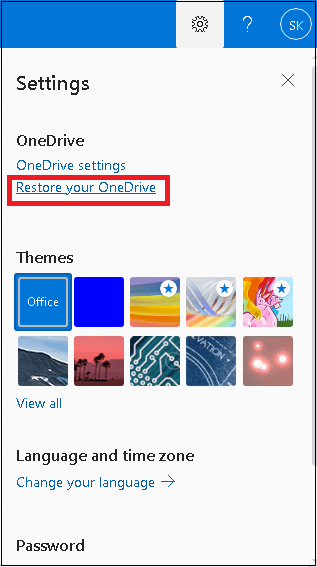
- Click on the “Gear” icon and select the “Restore your OneDrive” option.
- Click the arrow against the “Select date” option to open the drop-down list, select the desired date range, or add a custom date as per your need.
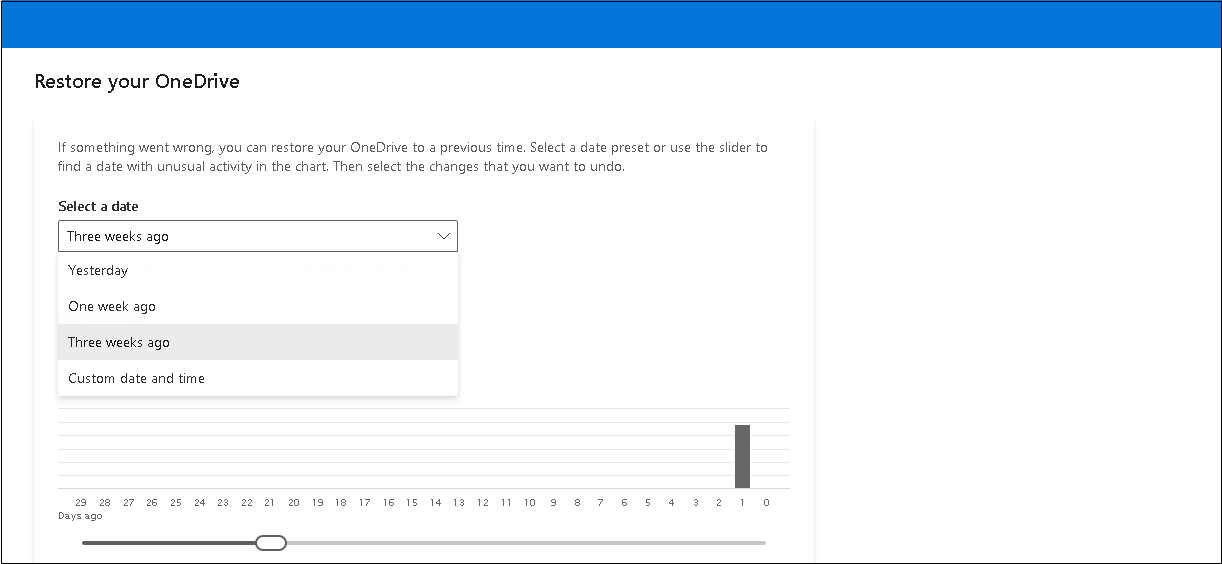
- After selecting the date range, click the “Restore” option to restore the selected date range version of your OneDrive.
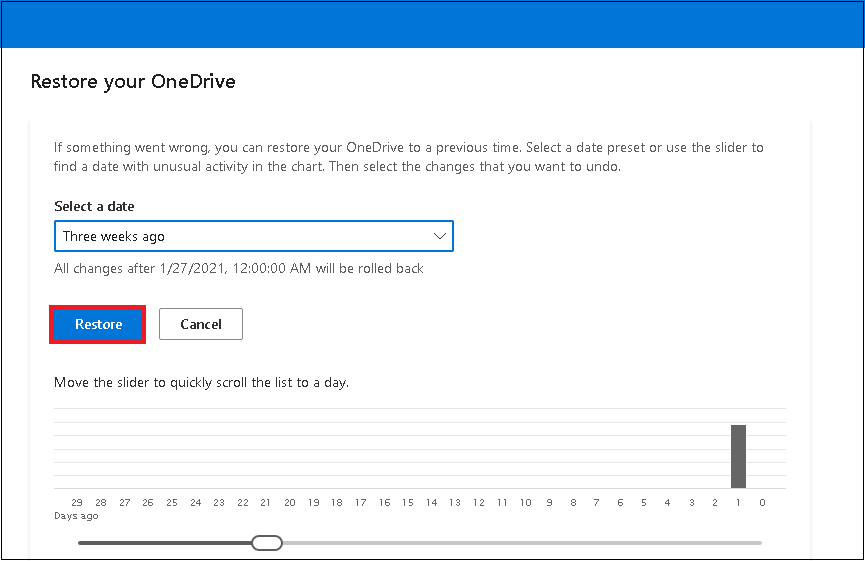
Note: Restoring the previous version will not restore Albums.
Backup OneDrive data using automated software
Considering the vulnerability data, it is recommended to backup OneDrive data. Though there are some manual methods to backup OneDrive data, they do not support selective backup or provide advanced features. So, a professional OneDrive backup tool like the Kernel OneDrive Migration tool is the best option for OneDrive users. With its advanced filters, it offers selective backup of OneDrive data. Moreover, this tool can be used for migration involving OneDrive for business.
Conclusion
The deletion of files from the OneDrive cloud and local storage platforms is a matter of concern for any organization if there is critical data. With some default data retention policies and recycle bins, the restoration of data is possible in OneDrive. We have explained these processes here. Also, we have recommended a tool for quick and easy OneDrive backup.


