Read time: 10 minutes
When it comes to safeguarding your data, you cannot ignore the importance of backup. Be it personal files or office emails, you can breathe calmly knowing you have a healthy backup file ready to save you from any data disaster.
Zoho Mail is gaining popularity day by day through its unique design and seamless performance. For an uninterrupted workflow, it’s necessary to regularly backup Zoho Mail account, either on Zoho’s cloud server or to your local PC. Luckily, the process of backing up your emails in Zoho Mail is easy to follow. Moving forward in this blog, you will learn all the working methods to help you secure your complete mailbox, including emails, contacts, calendar entries, folders (with original hierarchy), along with other crucial components.
Need to Backup Zoho Mail
Check out the top reasons for Zoho Mail backup.
- Allows easy email recovery in case of accidental email deletion by users.
- Helps to maintain email records to meet business compliance and regulations needs.
- Provides you with a way to access Zoho emails anytime, anywhere, without internet.
- Allows you to quickly share specific mailbox data with others.
- Archive mailbox by exporting Zoho Mail emails to a zip file containing multiple EML files.
- Clean up storage space to increase free space for future conversations.
- Helps to recover data in case of a virus attack or a cyber threat.
Top Free Methods to Backup Zoho Mail
Nothing is better than a free solution to your problem. Thanks to Zoho Mail’s built-in email backup and mailbox import/export features, you can perform a free Zoho Mail backup. Let’s see all the backup methods one by one.
Method 1: Backup Zoho Mail with Import/Export Function
The fastest way to safeguard your emails is by using Zoho Mail application’s Import/Export email feature. This method is available for both an admin user and a normal user. Steps to export Zoho email are:
Step 1: Go to Zoho Mail and login with your Zoho account.
Step 2: Click on the Settings icon and go to the Import/Export section.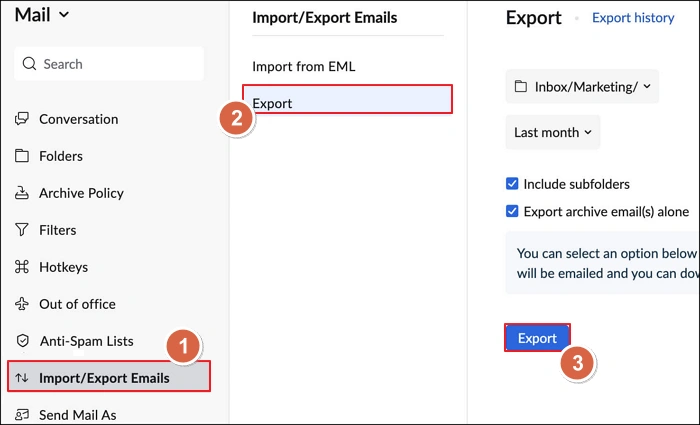
Step 3: Choose the folder from which you want to export emails.
Step 4: Specify the time duration or a custom date range. You can also choose to save all emails in a particular folder.
Step 5: Finally, click Export. Zoho Mail will send you a download link to save all the exported emails as a ZIP file.
Method 2: Enable Email Backup from Admin Portal
If you are the admin or have the admin account credentials, you can enable the data backup for your organization and select all or specific user mailboxes for backup. The steps to do so are:
Step 1: Access the link https://ediscovery.zoho.com and login to your Zoho admin account.
Step 2: Click on the Backup button from the left side navigation pane and enable the Enable Backup option.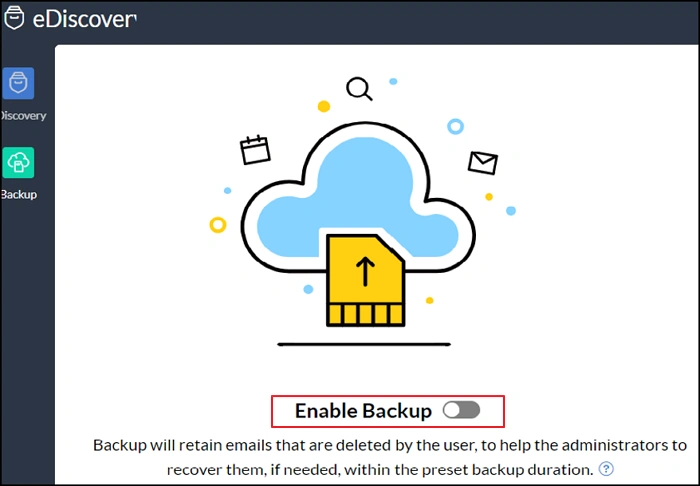
Step 3: Enable Backup policy and define backup duration (default is 365 days). Then, click Next.
Step 4: Choose to include or exclude spam emails from the backup and click Next.
Step 5: Select Users from the left pane menu, then search for users for whom you want to enable the backup. You can also enable backup Zoho Mail for all users, if required.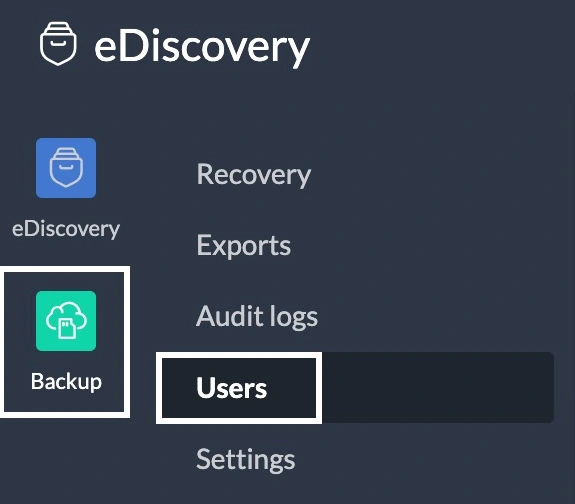
Method 3: Export Emails from eDiscovery
If the email backup option is enabled, you can use the admin portal to export the mailbox to your local system using the eDiscovery portal of Zoho Mail. Follow these steps to do it:
Step 1: In the Zoho Admin Console, select the Backup option from the left pane and choose Export.
Step 2: Then, provide a name for the export and choose to export All accounts, Specific user accounts or Specific shared mailboxes.
Step 3: Filter data by selecting a time range and defining Condition query.
Step 4: Choose Encrypt with password option and give a password if you want to secure the exported file.
Step 5: Finally, choose the output file type, ZIP or PST, and click Export to start Zoho Mail backup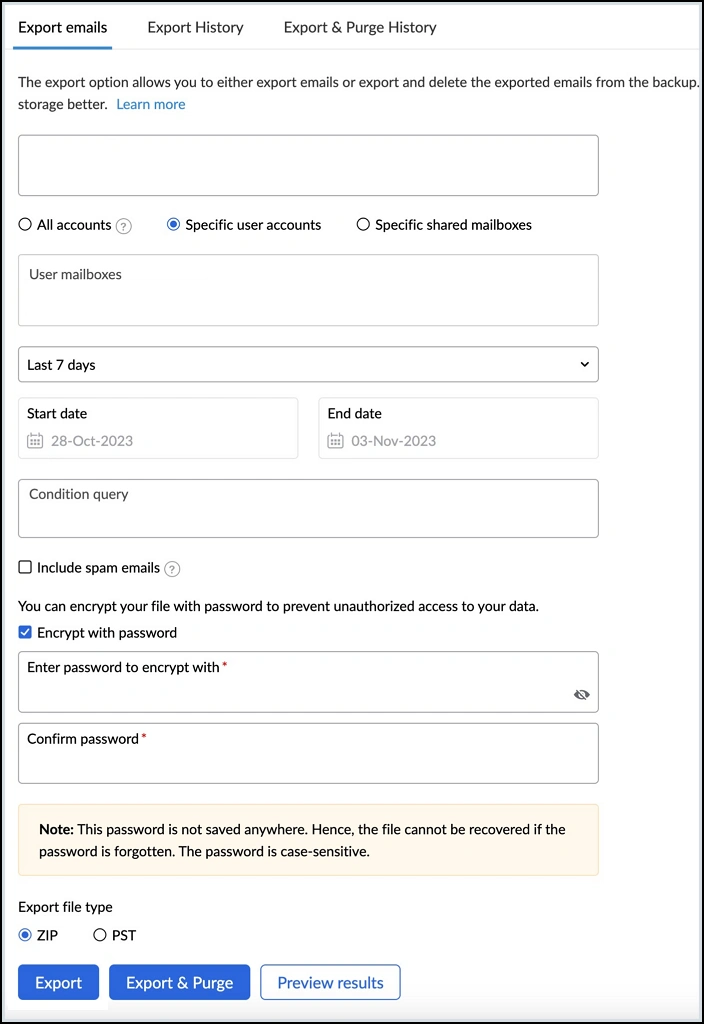
Limitations of the Manual Zoho Mail Backup Methods
Free is great, but it has some drawbacks too. Here are some of the limitations of the manual methods:
- You can only save the emails in two file formats, EML (multiple email files) and Outlook PST.
- If you are exporting data, you have to wait for the download link. The process will not start instantly.
- Lacks granular email filtering options and does not provide a reliable way to export users’ data in bulk.
So, the question arises, how to backup Zoho Mail error-free and without any restrictions? It’s simple, actually. You need to get professional help.
Advanced Zoho Mail Backup Tool to Quickly Backup Data
The Kernel IMAP Backup and Restore tool is developed for users who desire instant and efficient backup of their IMAP accounts to file formats like PST, HTML, RTF, MSG, etc. It supports almost all IMAP server accounts. Along with Zoho, you can easily export mailboxes from Exchange or backup Gmail account data into PST format as well. The tool integrates a user-friendly interface with advanced features for a quick backup. It is the most trusted and purchased IMAP backup tool in the software market.
Zoho mail users can try this outstanding utility to backup their Zoho account emails to Outlook PST or other desired file format after downloading and installing the IMAP Backup tool
The working process of the software to backup Zoho mails is as follows.
Step 1: Launch the Kernel IMAP Backup and Restore tool and select the Backup option.
Step 2: Click on the Add option to add your IMAP account, here Zoho mail account.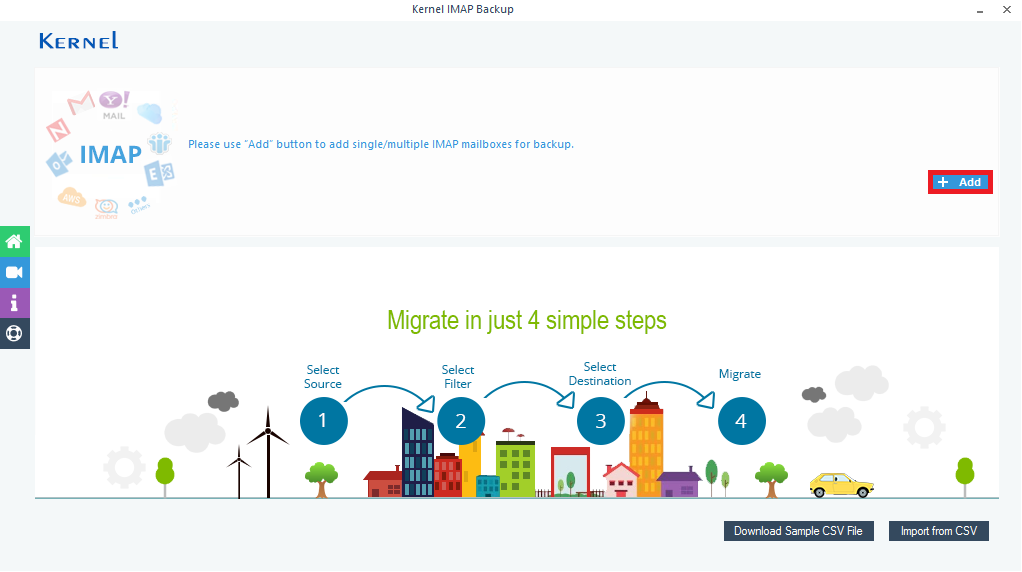
Step 3: On the Connect to IMAP Mailbox page, provide the required details like Server name/IP, user email or login ID, Password of your Zoho Mail account, and click Add.
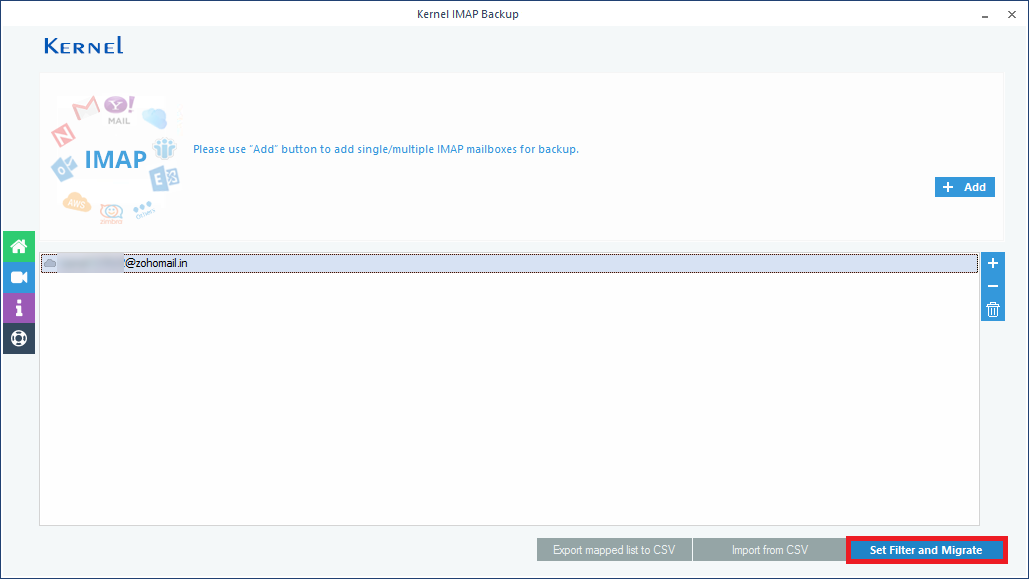
Step 4: The Zoho Mail IMAP account will get added. Users can add more than one account using the plus icon if needed. Click Set Filter and Migrate to continue.
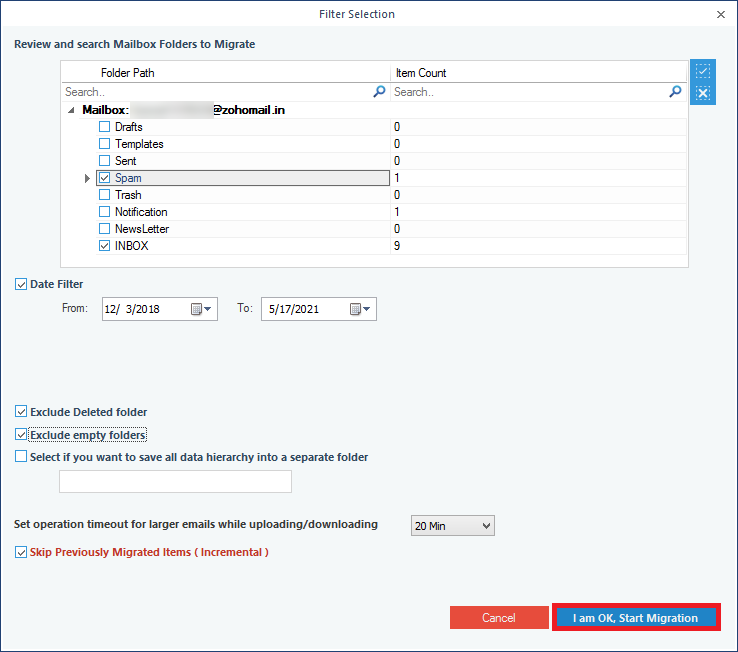
Step 5: Select the desired mailbox folders by selecting checkboxes against them, add a date filter if required, select checkboxes to exclude deleted and empty folders, save selected data to a separate folder, and use other options as per your need.
Then click on the I am OK, Start Migration option.
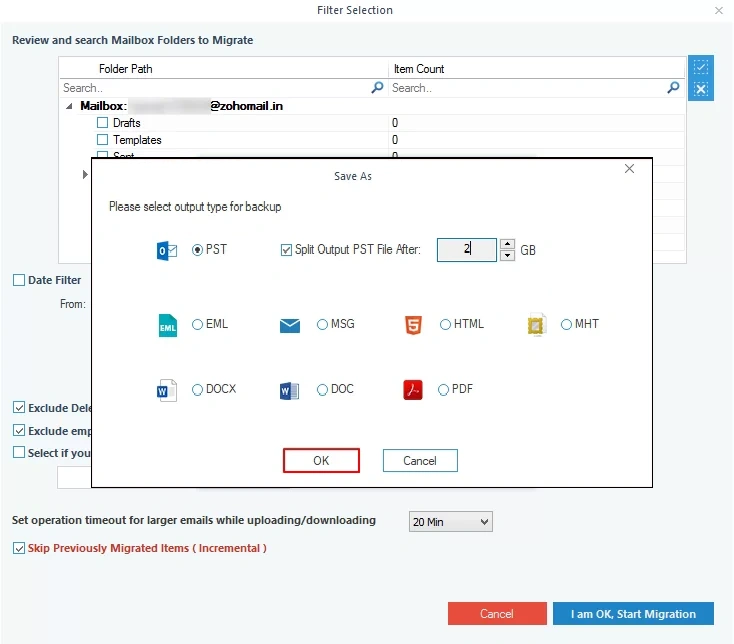
Step 6: Select PST file (or any file format you desire) as the output type for backup. If you choose PST, you also get the option to split the mailbox into multiple small PST files. After making your selection, click OK.
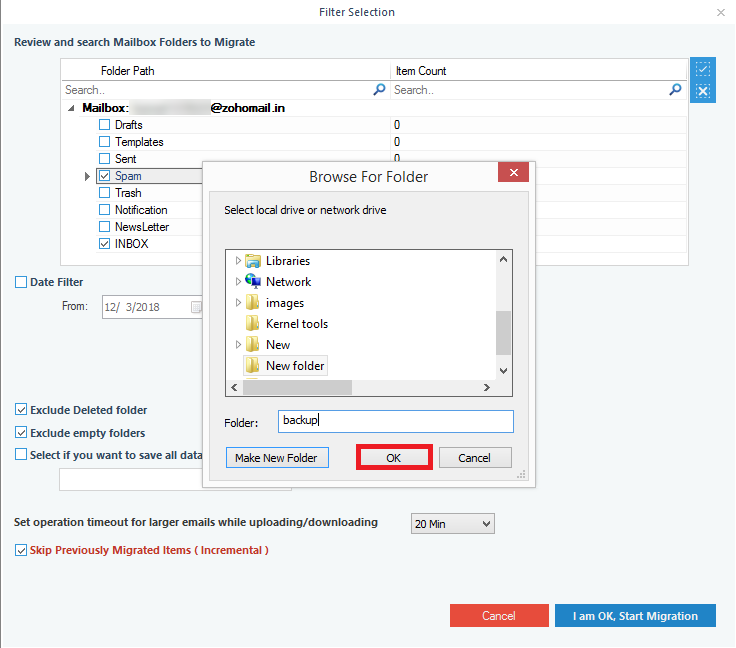
Step 7: Select an existing folder on the system or add a new folder by selecting the Make New Folder option, and click OK.
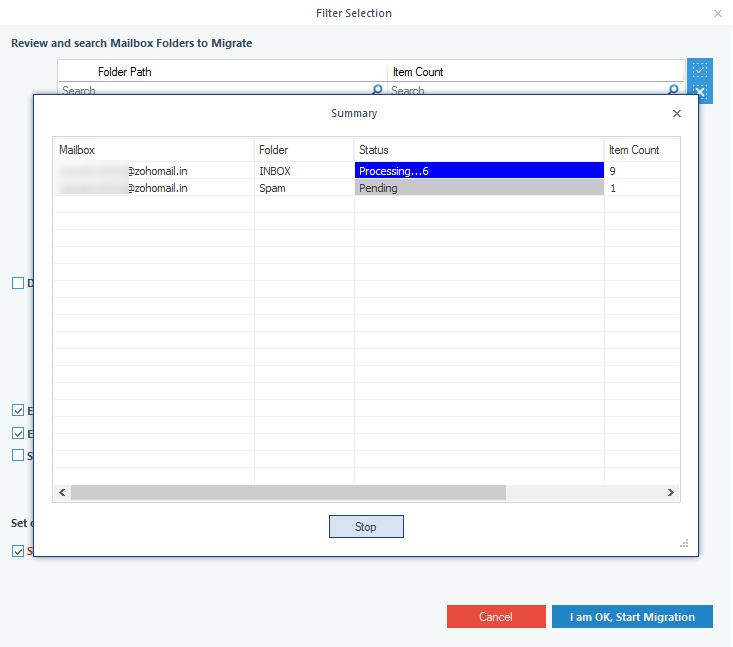
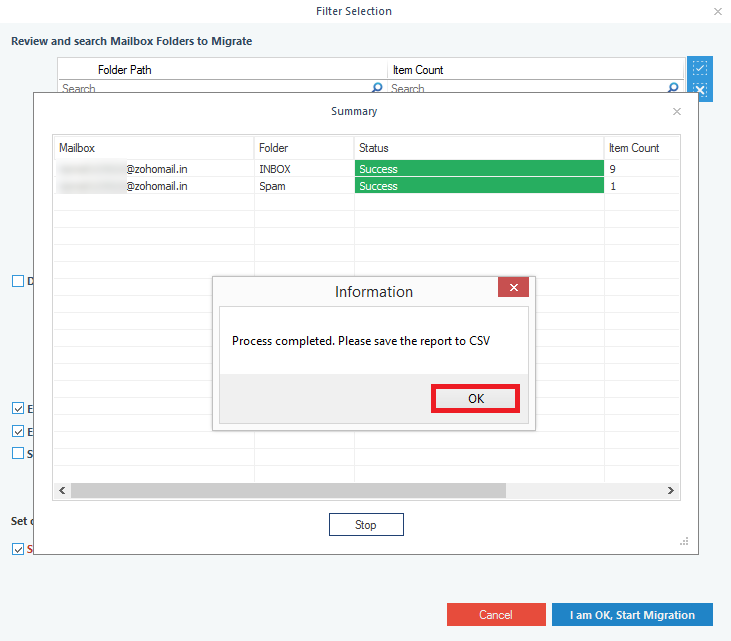
Step 8: The backup of Zoho Mail data gets started, and the live progress of the backup can be seen.
Step 9: The backup of the Zoho account mailbox will be completed soon with the confirmation dialogue box. Click OK.
Step 10: To check the migration logs or summary, click on the Migration Log option and click the Save to CSV option (to save the migration report in the CSV file format at the desired path location).
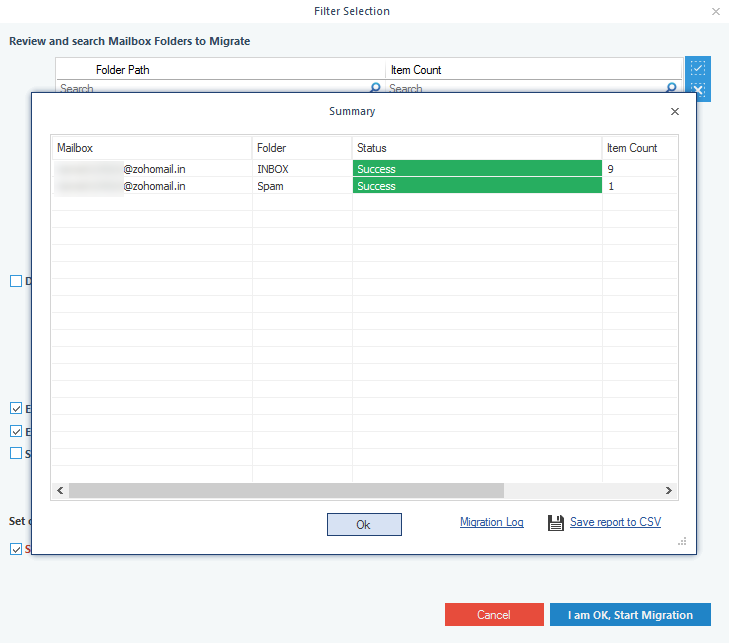
Hence, the Zoho Mail content is successfully backed up in the Outlook PST file format and can be exported or viewed in the Outlook email application anytime.
Advantages of using the IMAP Backup tool
- Backup of all IMAP Server email accounts
- Backup multiple IMAP accounts and mailboxes
- Multiple output file types – PST, MSG, RTF, PDF, DOCX, etc.
- Filtering of IMAP data with folder selection, date filters, and more options
- Quick creation of a new folder from the interface for saving backup files
- Migration logs and report saving to CSV file format
- Compatibility with all Windows OS versions
- Free version to try and test the tool’s capabilities
Conclusion
Always have an updated backup of your emails. Use any method listed above and backup Zoho Mail to cloud or your local system. To avoid excluding any email from backup, avoid any form of communication during the backup process. For a fast, accurate, and restriction-free Zoho email backup, try the Kernel IMAP Backup and Restore tool. It’s a complete backup solution that also allows you to restore emails to your original email platform.