Read time 6 minutes
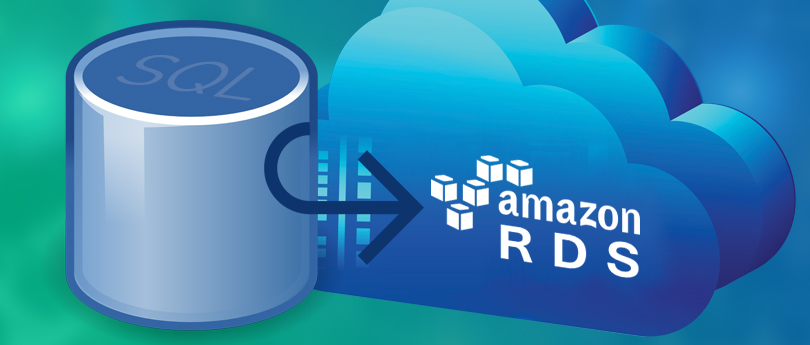
Microsoft SQL Server is the most widely used database management system to store and maintain data, information. With the advancement of online storage platforms, we have cloud storage servers for SQL data like Azure SQL and Amazon RDS. The most popular alternative to on-premises SQL Server is Azure SQL to which many SQL users are already migrating from their on-premises environments. Mostly these migrations are performed using manual ways or using migration tools.
Talking about the manual ways of migration, a combination of two manual utilities can help to move SQL database to Azure SQL cloud. We are going to explain this manual way for migration in detail.
Move SQL database to Azure SQL
Data Migration Assistant is an in-built tool provided by Microsoft to help in migrating on-premises SQL Server database to the Azure SQL Server destination. It assesses database compatibility issues and feature parity in the target.
Pre-Assessment
Let us move ahead with this pre-assessment via Data Migration Assistant tool.
Download the Data Migration Assistant utility on your system first, and then install it. Now, start this tool, go to New +>>Assessment project type. In Source server type, add a project name and choose SQL Server. In Target server type, choose Azure SQL Server Database as your database server type and finally click Create.
Two reports – Check database compatibility and Check feature parity are by default selected, click Next to move further. Then provide your source server details and database name to connect it. Finally start the assessment by clicking Start Assessment. The assessments includes set of recommendations helping to plan the migration projects, compatibility issues which could block the migration in between along with suggestions to deal with it. Once assessed and resolved all the issues (if there), we can move ahead with the actual migration.
Now, the migration of on-premises SQL database to Azure SQL Server goes through 3 stages.
- Migrating on-premises SQL Server schema to Azure SQL Server database
- Registering Resource Provider on Microsoft Azure SQL Server
- Creating Migration Project and Performing Migration
Migrating on-premises SQL server schema to Azure server database
Please carry out the following set of instructions to migrate SQL Server schema to Azure database.
- Start the Data Migration Assistant tool. Click on New (+) icon.
- Under the Project type section, select Migration option.
- Provide a Project name; choose SQL Server as Source server type, Azure SQL database as Target server type and schema only under Migration scope. Click Create.
- Next, you need to provide details for connecting the source and click on Connect. Then choose your SQL Server database and click on Next.
- Now provide details for connecting the target server and click on Connect. Then select the target database name and click on Next.
- Next choose from the Schema objects which you want to migrate and click on Generate SQL Script option.
- The script will get generated which you can review for any error. If satisfied, click on Deploy schema option.
- The schema has migrated to the target database now.
Registering the resource provider on Microsoft Azure server
Users can use the Azure portal interface to register resource provider (Microsoft.DataMigration) to the target server.
- Login to your Microsoft Azure Server portal. Search Subscriptions in the search box and then click on it.
- On the Subscriptions page, select the subscription and then click on Resource provider from its right panel.
- Search Migration in the search box, select Microsoft.DataMigration resource provider and then click on Register option.
- The registration will get started and complete in a short time.
Creating migration project and performing migration
Before creating a migration project, you need to create an instance in the Azure portal. For that, search
Azure Database Migration Service and click on it. Then click Create on the Azure Database Migration Service page.

Next provide details like Service Name, Subscription, resource group, Location, Pricing tier, etc. Then click on Create to start the service.
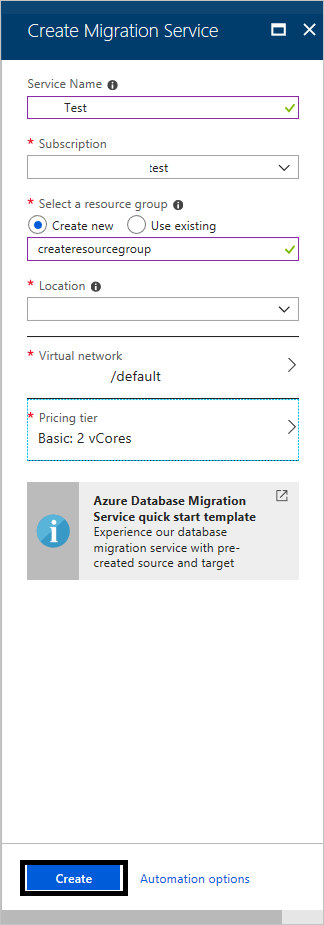
Once it is created, search for it in the Azure portal and open it. Then select the instance that you have just created.
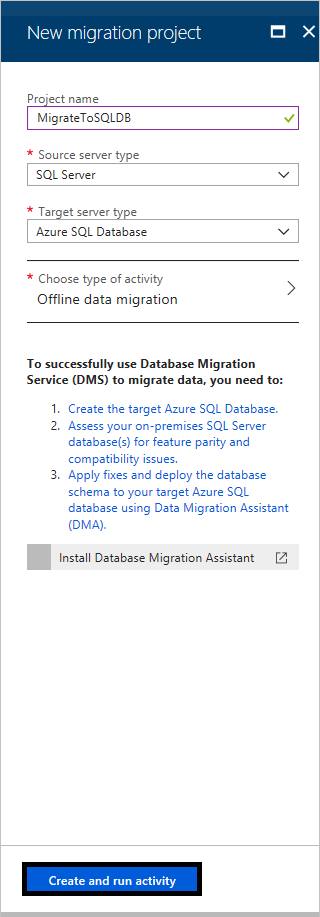
- Once the instance is selected, click on New Migration Project on its right panel.
- Next, provide some entries like project name (could be any), Source server type (SQL Server), Target server type (Azure SQL Database) and type of activity (Offline data migration). Click on Create and run activity.
- Then specify Migration source details like Source SQL Server instance name, User name, password, select Connection properties and click on Save.
- Similarly specify these details for the target server and click on Save.
- Now, map the databases of the sources and target.
- On the Select tables screen, expand, review and select the tables for migration. Click on Save.
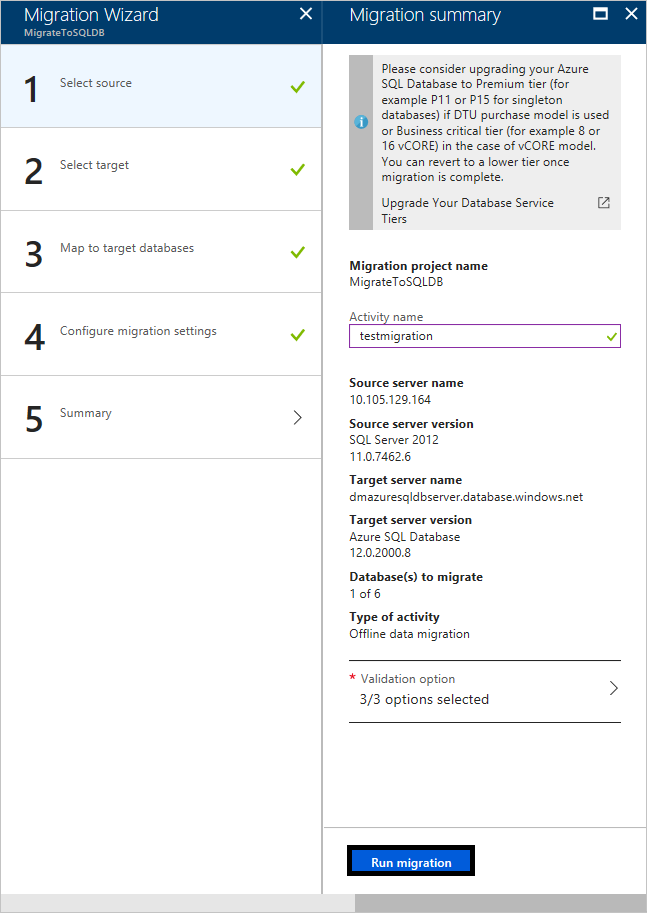
- Next, the Migration summary screen will appear. Provide a name for migration under Activity name, select Validate my databases and choose from the options. Click on Save.
- Review all the details in the migration summary. If all well, click on Run migration to start the migration process.
- You can monitor the migration anytime on the migration activity screen and can also download the migration report once the migration is completed.
This was the whole procedure to move SQL database to cloud (Azure SQL) manually with the help of utilities provided by Microsoft – Data Migration Assistant and Microsoft Data Migration Service.
Drawbacks – After we explained the whole manual process above for the migration, we should also mention some drawbacks. The above method seems quite technical, lengthy to perform and have chances of manual errors which might lead to incomplete or flawed migration.
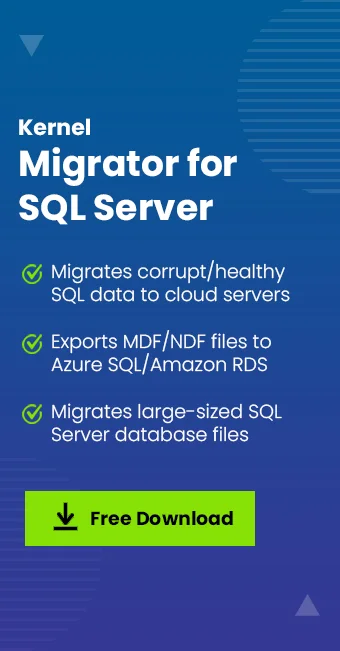
Alternative for manual SQL database to cloud migration – Kernel Migrator for SQL server
If you do not feel comfortable with the manual ways to migrate your on-premises SQL Server data to Azure SQL Server, then choose the most efficient automated tool – the Kernel Migrator for SQL Server. It can transfer or migrate your MDF or LDF files data directly to Azure SQL.
The tool also allows users to move SQL Server to Amazon RDS destination. It provides previews of SQL database objects before the migration. So, this professional way to move SQL database to cloud is far easy and efficient than the manual one.
Bottom line
The blog provides all the details related to manual migration of SQL Server to Azure SQL along with mentioning its drawbacks. To ease the migration, it mentions the use of a trusted SQL Migration tool as well.