Read time 7 minutes
When business organizations want to move their data to the cloud platform, their first impression is that the cloud is only supposed to save files and documents. But it is not entirely true. You can keep your database files in cloud-based applications.
Microsoft SQL Server is the best on-premises database management tool which organizations use to save their business data. When they wish to migrate the on-site resources to the cloud, they hesitate to migrate the SQL data to the cloud. But there is Azure Database Migration Service which you can use and migrate the SQL data to Azure cloud server.
In the present article, we will go through the step-by-step migration of on-premises SQL Server database to the online Azure database. There are following steps which you need to perform the migration sequentially –
- Use Data Migration Assistant to evaluate the on-premises data
- Use Data Migration Assistant to migrate a sample schema
- Create an Azure Database Migration Service instance
- Create a new migration project with Azure Database Migration Service
- Start the migration
- Check the migration progress
- Perform the migration cutover
Use data migration assistant to evaluate the on-premises data
Before starting the migration, first evaluate the on-premises data of your SQL server. There is a separate utility tool called Data Migration assistant which does the analysis for you and checks for any possible error or bottleneck.
Here are its steps –
- Run the tool and click the New (+) option, and then select the Assessment option.
- Provide a project name, choose SQL server as source server and Azure server as the destination server. Then click the Create button.
- In the Select sources option, connect your SQL Server.
- In the Add sources option, add the database which you want to migrate, and then click the Start Assessment option.
The Data Migration Assistant tool will run an assessment check and provide a complete report. The report will provide information about compatibility issues, and other migration-related details.
Use data migration assistant to migrate a sample schema
After running the assessment and getting the satisfactory results, you can go for creating migration project for a small specimen of the database schema. To migrate the database schema, follow the upcoming steps –
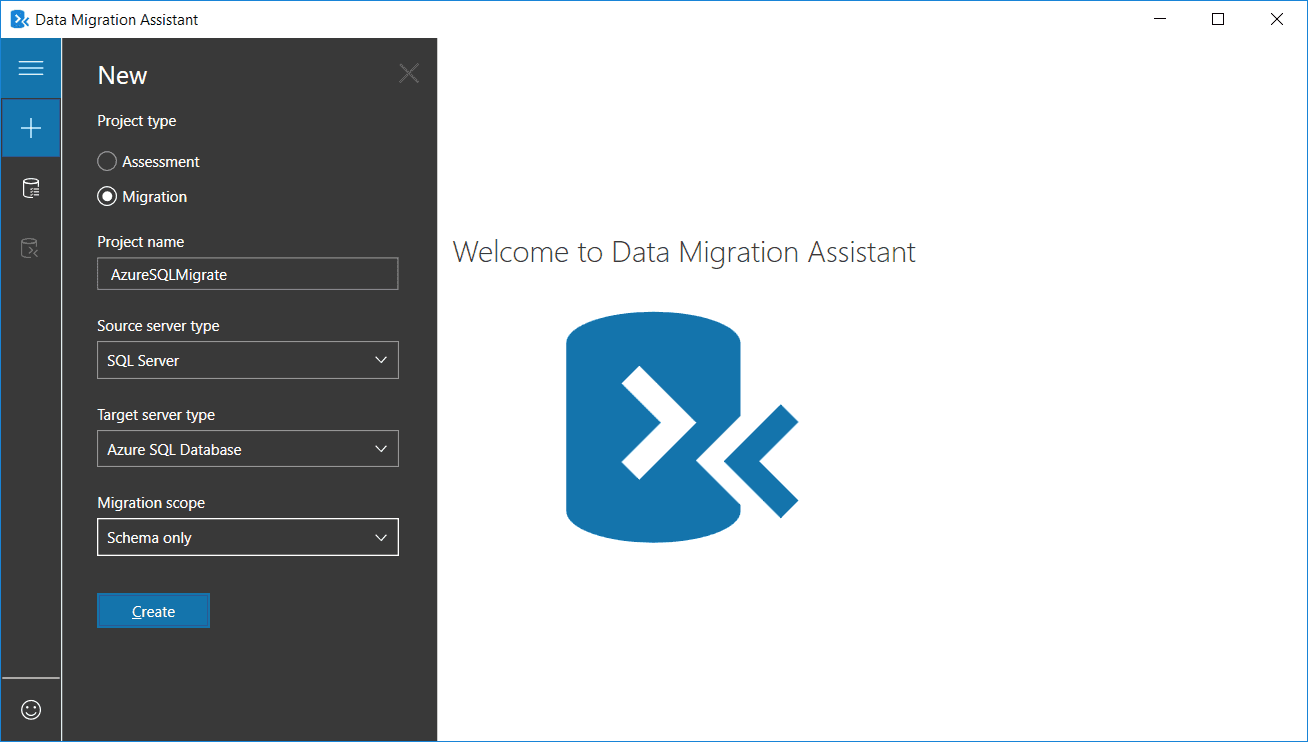
- Run the Data Migration Assistant tool, select the New (+) icon, and choose a new Migration option under the Project type.
- Select the SQL Server as the source server and Azure Server as the destination server.
- Select the Schema only option under the Migration scope.
- Finally, go to Create option to create a project. Here, connect to your SQL server and select the database.
- Select the Azure Server for the destination server and connect it.
- Choose the schema objects from your database.
- To create the SQL scripts, select Generate SQL scripts option.
- At last, deploy the schema to the Azure SQL database.
NOTE – By default, all the objects are selected.
Create Azure database migration service instance
You need to create an instance of the Azure Database Migration Service to create a migration project. Here are the required steps –
- First, you need to register a Microsoft.DataMigration resource provider by taking its subscription.
- After registering the resource provider, you can go to the Azure and create a resource under the Azure Database Migration Service.
- Specify a meaningful name to the migration service, its subscription, and resource group.
- Select the location where you want to create the migration service.
- Either create or select an existing virtual network.
- Select the pricing tier and create the migration service.
Create a new migration project with Azure database migration service
When you have successfully created a new migration service, you can create a migration project at the Azure Portal.
- Select Azure Database Migration Services under the services, then select the migration service which you had created in the previous step.
- Select the + New Migration Project option.
- Select the SQL server as the source server and Azure SQL Server as the destination server.
- For the type of activity, select Online Data Migration.
- Create and run activity option allows the create and run the migration.
- Specify the source and target database details, and review the summary.
Start the migration
When you click the Run migration, and the migration activity starts.
Monitor the migration
There is a separate migration activity screen where you can click the Refresh button and see the Status of the migration. You can click on any specific database to get the status of Incremental data sync and Full data load operations.
Perform the migration cutover
After the completion of the initial Full load, you can perform migration cutover.
- Select Start Cutover and stop all the incoming transactions to the database.
- Select Confirm; select Apply.
A quicker way for SQL to Azure SQL migration
Kernel Migrator for SQL Server is a simple SQL Migration tool to migrate offline MDF and NDF file from your SQL Server to the Microsoft Azure cloud server. Let’s see the easy steps to complete the migration –
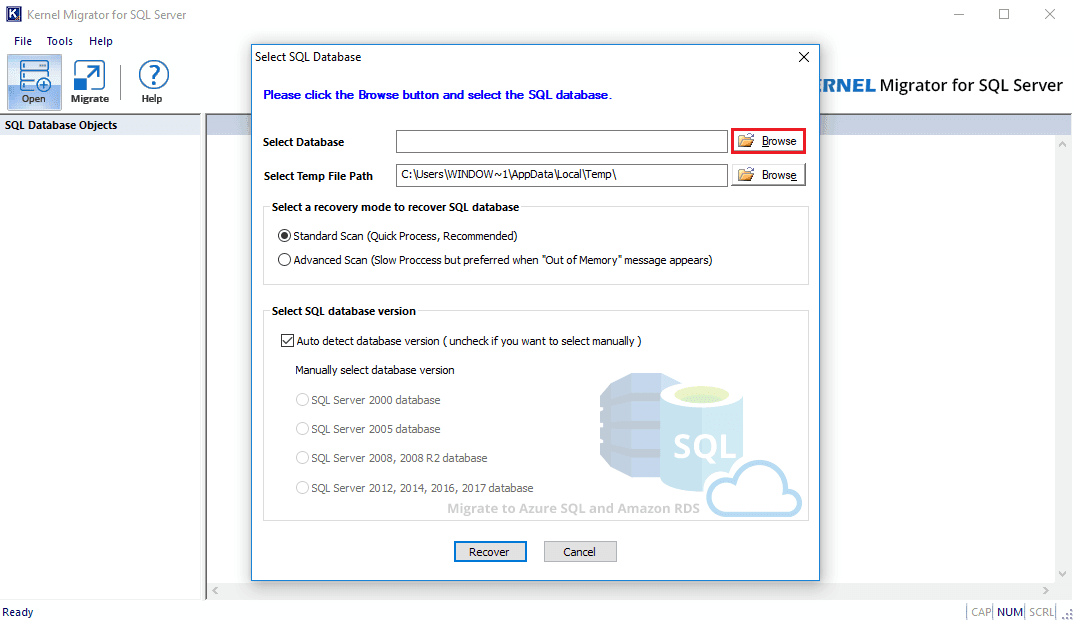
- Start the software, and the Select SQL Database will pop up. Click the Browse button.
- After browsing the database, the second step requires selecting the scan mode and clicking the Recover button.
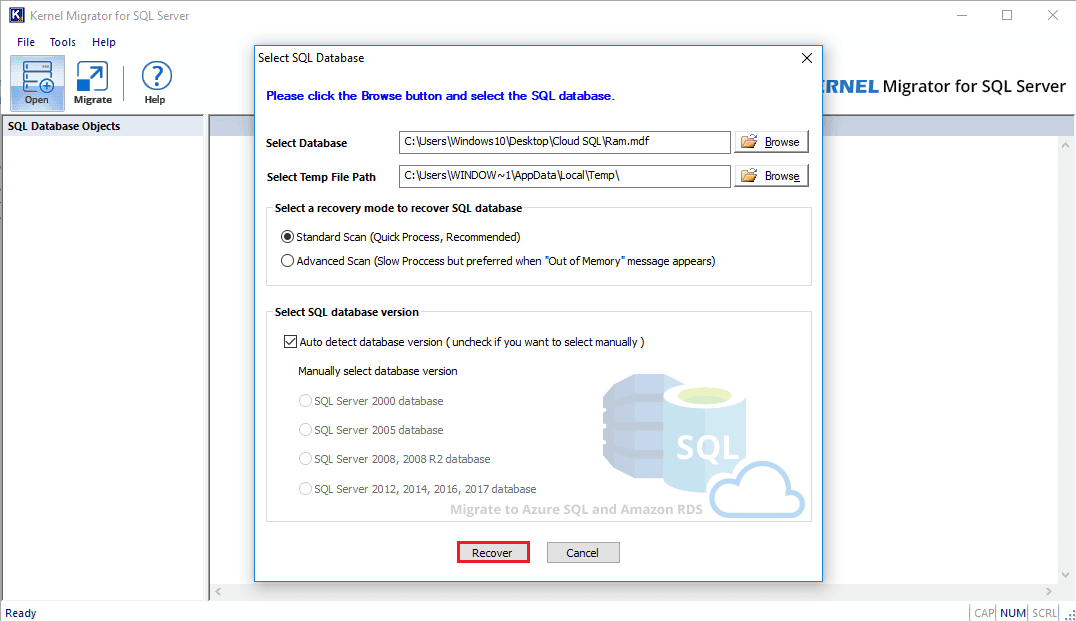
NOTE – The Recover option works to remove the corruption from the database file. It does not affect the normal file. - After retrieving the database, the database objects are displayed in a tree structure. Here, you can get a clear preview of the objects. Select the required objects and click the Migrate button.
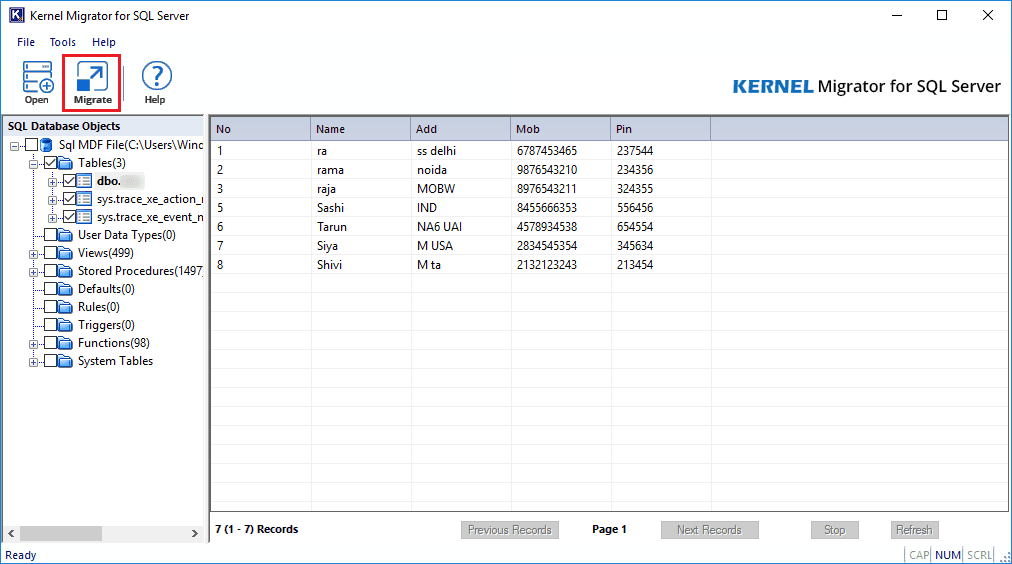
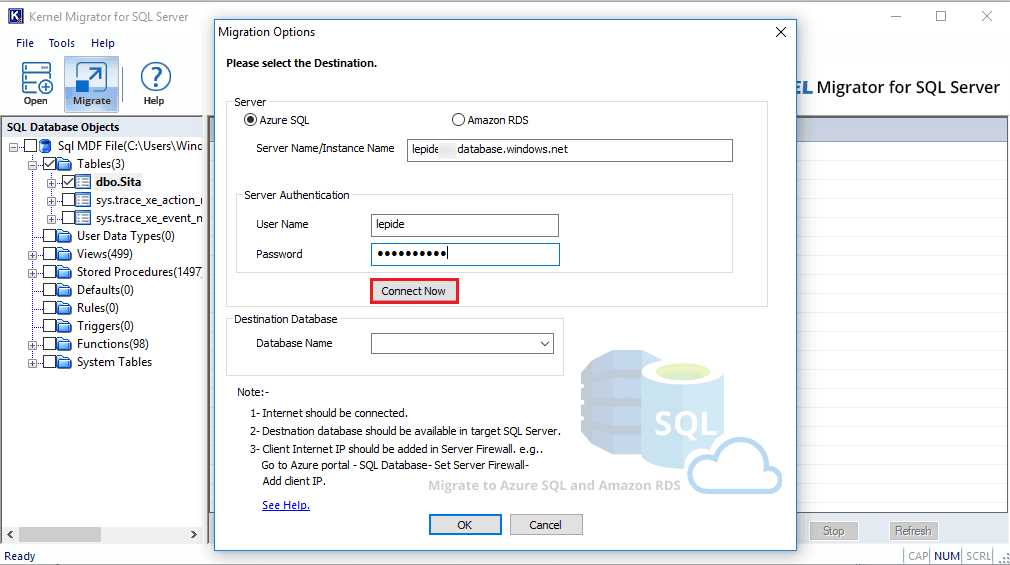
- Select the first option of Azure SQL. Then input the server name and its complete credentials. Then click the Connect Now button.
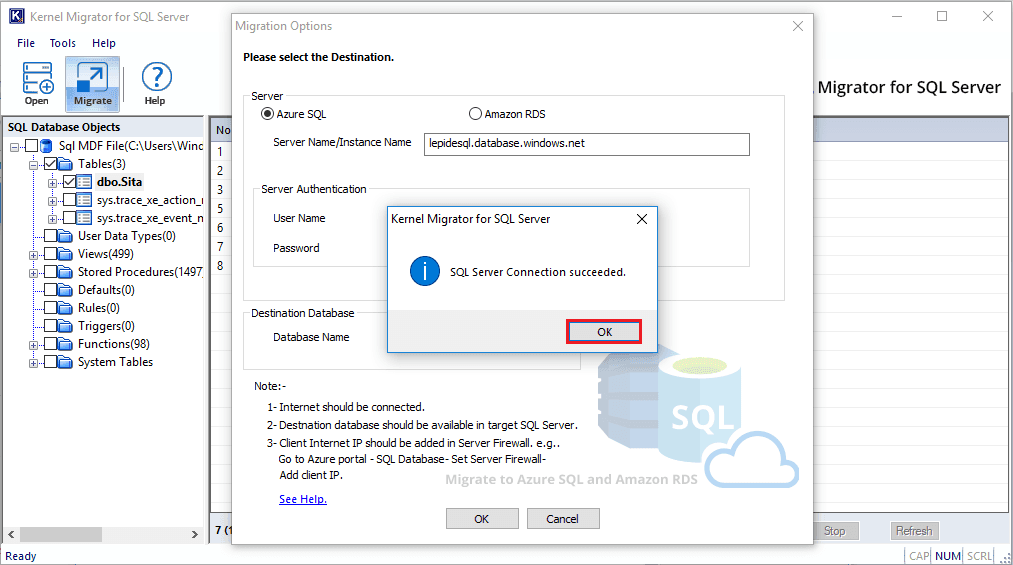
- After a successful connection, the tool will provide a successful message. Click OK.
- Now, select the destination database from the drop-down list.
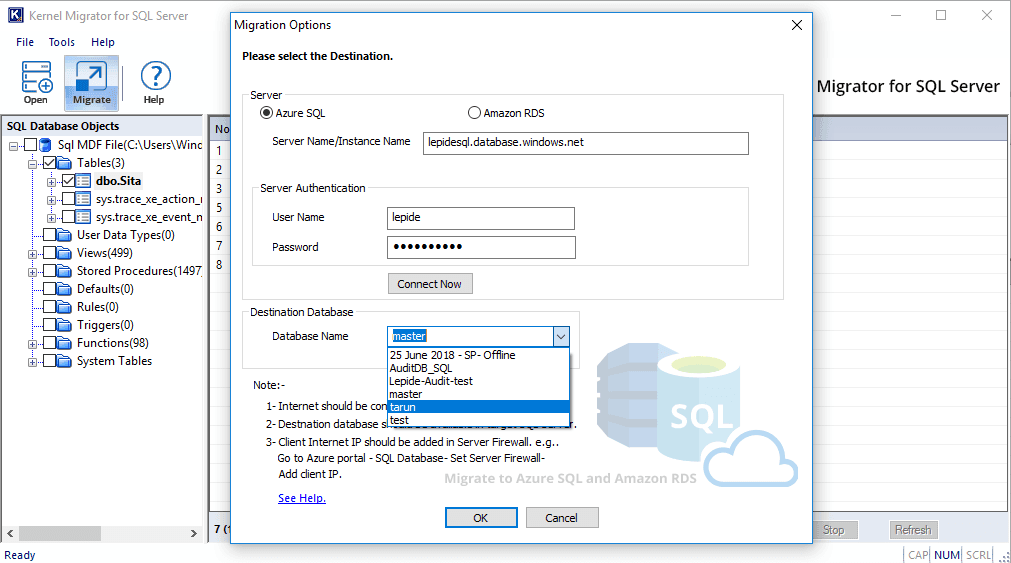
- After selecting the database, click the OK button.
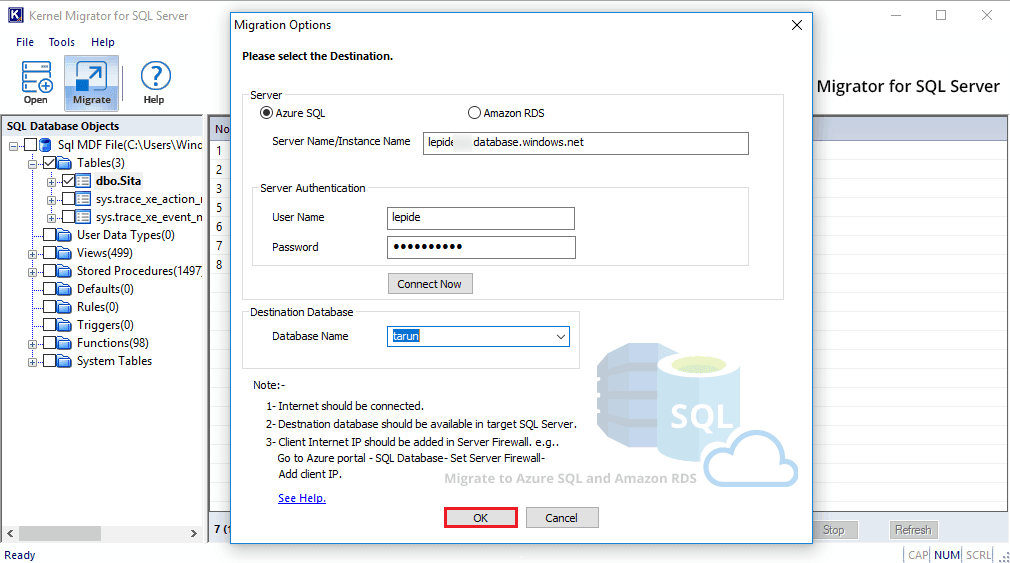
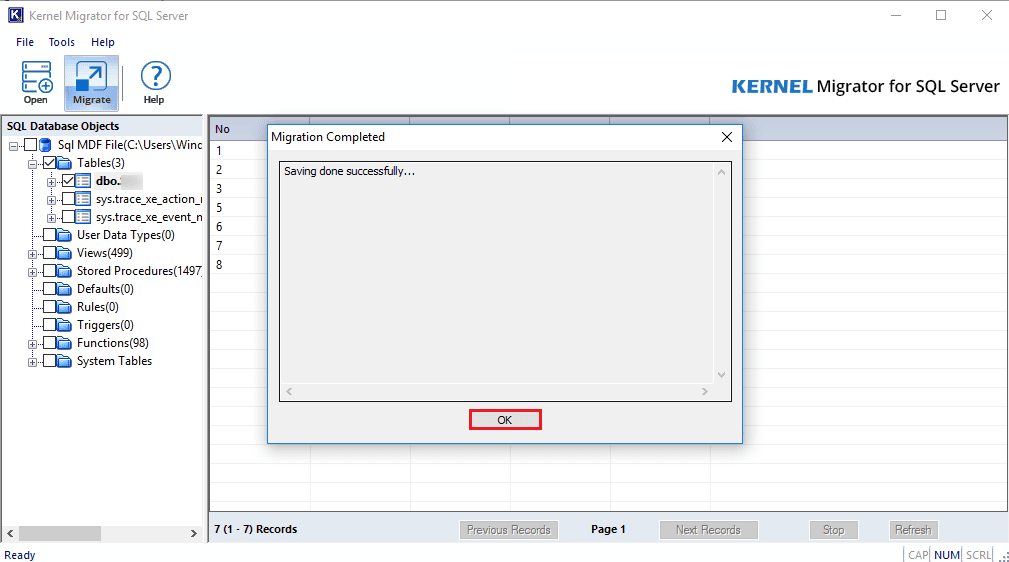
- The tool has successfully migrated the database, and it gives a successful message. Click OK.
Final words
Both the manual and the automated methods are suitable for SQL database to Azure SQL migration. However, while using the Kernel Migrator of SQL Server, you can perform the migration within minutes.

