Read time 6 minutes
The popularity of AWS is increasing day-by-day as many businesses, and large enterprises are adopting Amazon Web Services (AWS). This popularity has also encouraged many businesses to move to Amazon WorkMail from their existing platforms, including Office 365 (Exchange Online).
Well, you can easily migrate to Amazon WorkMail from any platform, such as Microsoft Exchange, Office 365, and G Suite. So, let’s have a look at the process of migrating Office 365 to Amazon WorkMail.
- Create or Enable Users in Amazon WorkMail
The first step in migrating Office 365 users to Amazon WorkMail is to add the users in Amazon WorkMail to provision the mailbox. When you create new users to Amazon WorkMail, it will automatically create mailboxes for them. Then users can access their emails by signing to Amazon WorkMail web application on a mobile device, Outlook for Mac, or Microsoft Outlook. To know more about creating new users, click here.
- Migrate to Amazon WorkMail
After creating new users to Amazon WorkMail, you can try a professional tool to migrate to Amazon WorkMail. However, there will some essential steps that you need to perform before the migration. First, you’ll have to assign Amazon WorkMail user as the migration administrator, which can be done in the following ways:
- Add the new user who is assigned as migration admin to Amazon WorkMail console. You can create the user migration admin in the Active Directory as well, and then enable this user for Amazon WorkMail.
- Now, go to Organization settings in the Amazon WorkMail Console and select Edit under Migration settings. After that, specify the users that you’ve assigned as migration admin in the migration admin field.
- Finish the Migration to Amazon WorkMail
Migrating Office 365 to Amazon WorkMail will not be finished until you verify the DNS Records and configure your mobile and desktop clients. So, to finish the migration process completely, follow the below steps:
- Check and verify that all the DNS Records are up-to-date, and they direct to Amazon WorkMail. To know more about DNS records, check Adding a Domain.
Note: It will take time to update the DNS Records. During this process, if any new items appear in the source mailbox, then perform the migration process again to migrate new items once the DNS records are updated.
- Now, you’ll have to configure your desktop or mobile clients to Amazon WorkMail.
You can easily connect Microsoft Outlook to Amazon WorkMail from your desktop control panel.
- Check and verify that all the DNS Records are up-to-date, and they direct to Amazon WorkMail. To know more about DNS records, check Adding a Domain.
Connecting Microsoft Outlook to Amazon WorkMail
- In your Windows desktop, go to Control Panel and select Mail (32-bit).
- The Mail Setup –Outlook dialog box will appear on the screen, click Show Profiles, and then select Add.
- In the New Profile field, add WorkMail as the profile name and click OK.
- Now, in the Add Account dialog box – fill the details of your Amazon WorkMail account and click Next.
Note: If you’re asked to configure server settings, then select Don’t ask me about this website again and click Allow.
- Once your account is set up, you’ll see a confirmation message on the screen, click Finish to end the process.
To know more about how to connect Outlook with Amazon WorkMail, click here.
The process of migration is very complicated that normal users cannot perform without technical expertise. So, a better alternative to avoid the hassle of going through the above method is to use Kernel Office 365 to Amazon WorkMail tool.
This software is specially designed for the users who want to migrate Office 365 mailboxes to Amazon WorkMail. Using this utility, you can migrate single as well as multiple mailboxes to Amazon WorkMail.
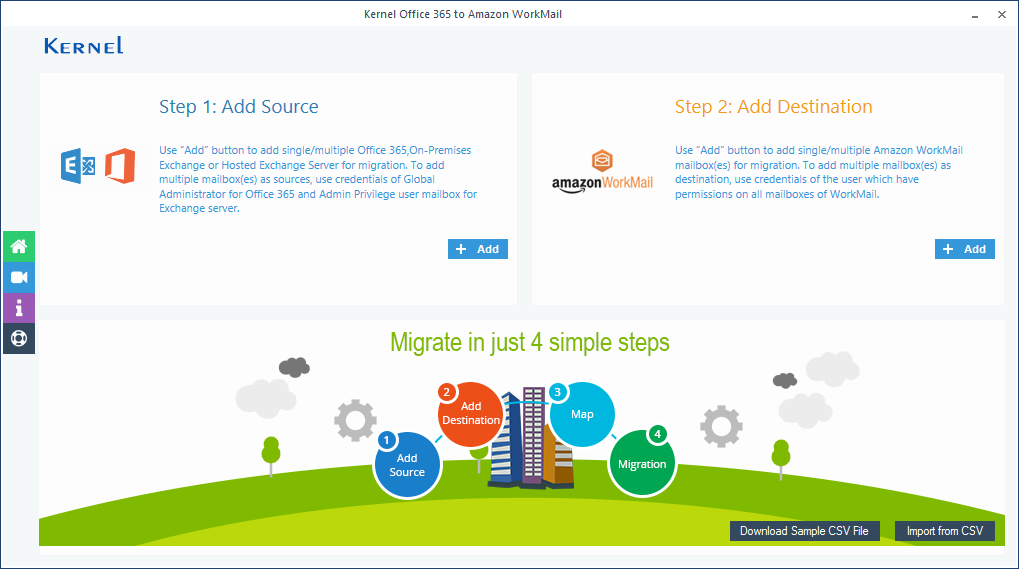
Kernel Office 365 to Amazon WorkMail
To better understand this tool, let’s have a look at its working process, which describes how a normal user can easily migrate Office 365 mailboxes to Amazon WorkMail.
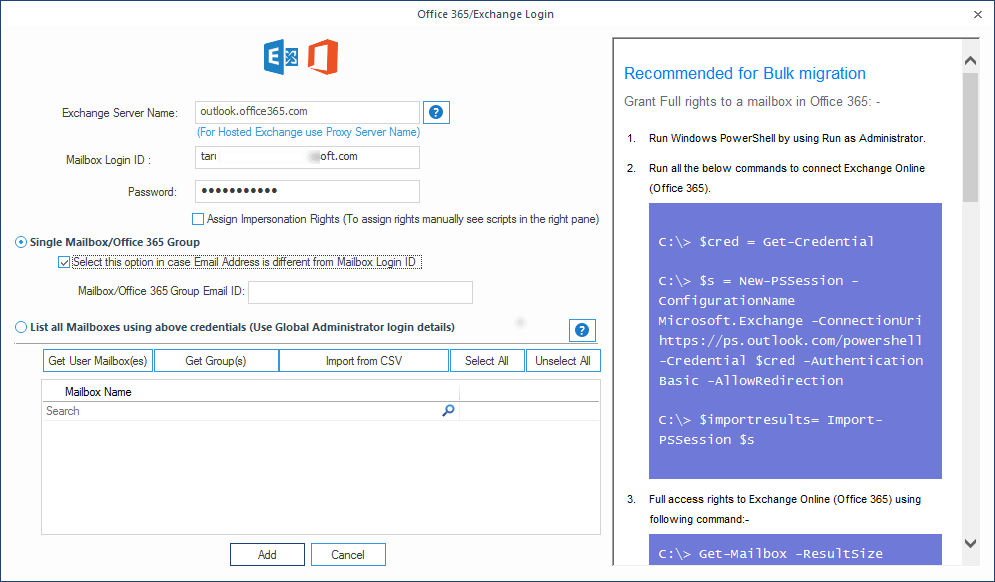
- Launch the application on your desktop and click the Add button in the Add Source section to add Office 365 account.
- In the Office 365/Exchange Login window, enter the credentials of Office 365 account and select Single Mailbox/Office 365 Group, and then click the Add button.
- Office 365 mailbox will be added for migration. Now, add Amazon WorkMail account by clicking Add button in the Add Destination section.
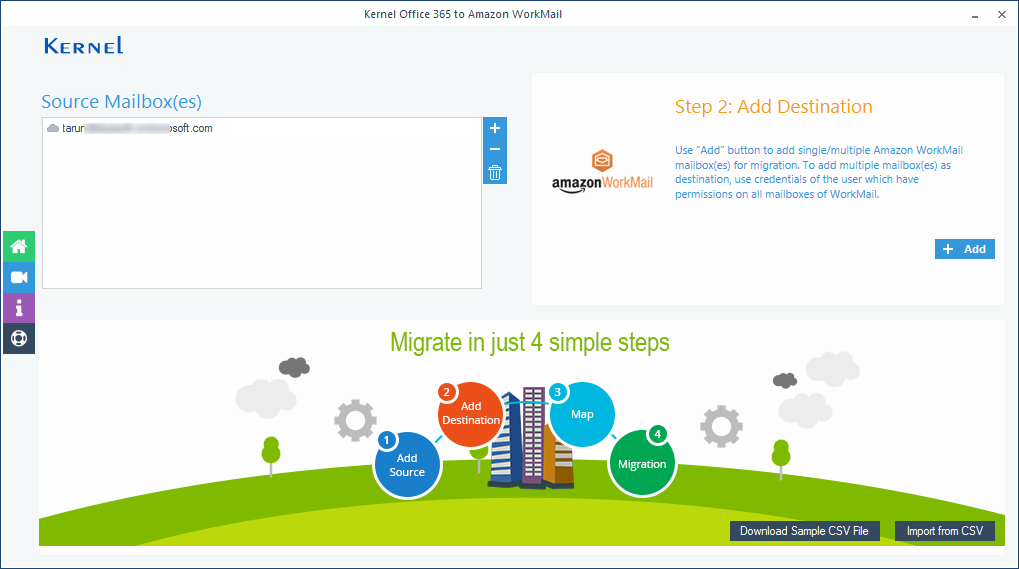
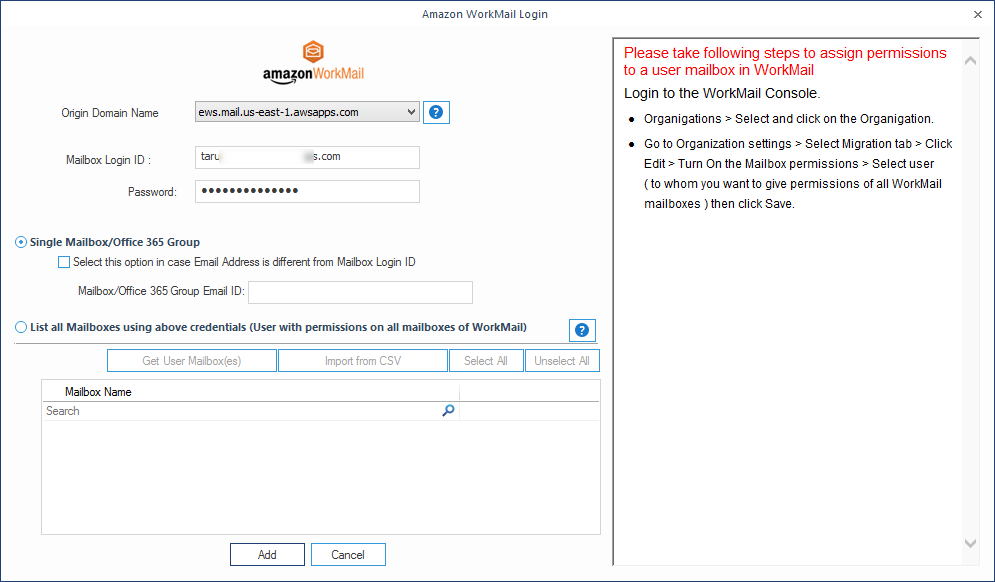
- Enter the credentials for Amazon WorkMail account and click Add.
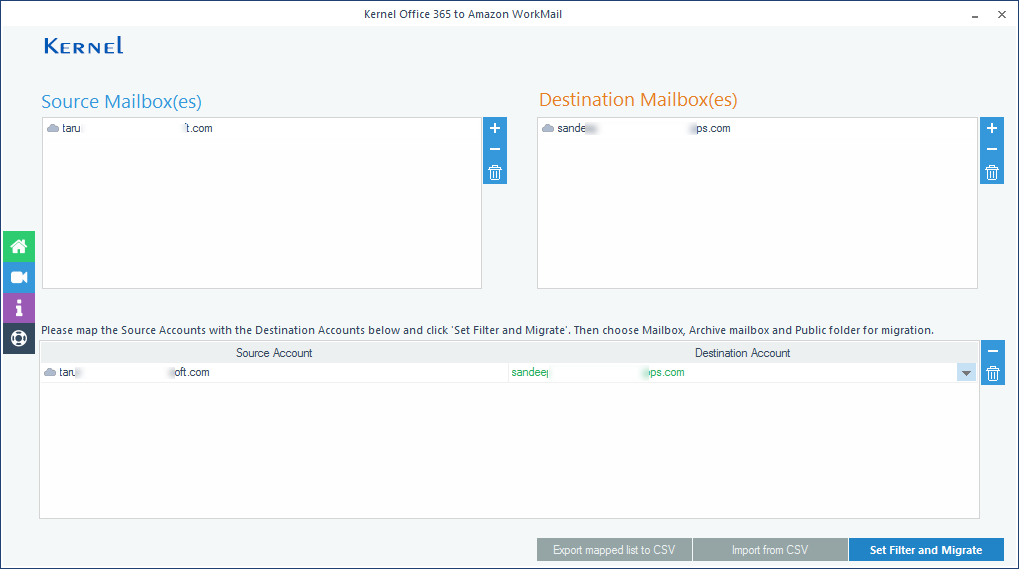
- Once both the source and destination are added to the tool, map the source mailbox to destination mailbox and click Set Filter and Migrate.
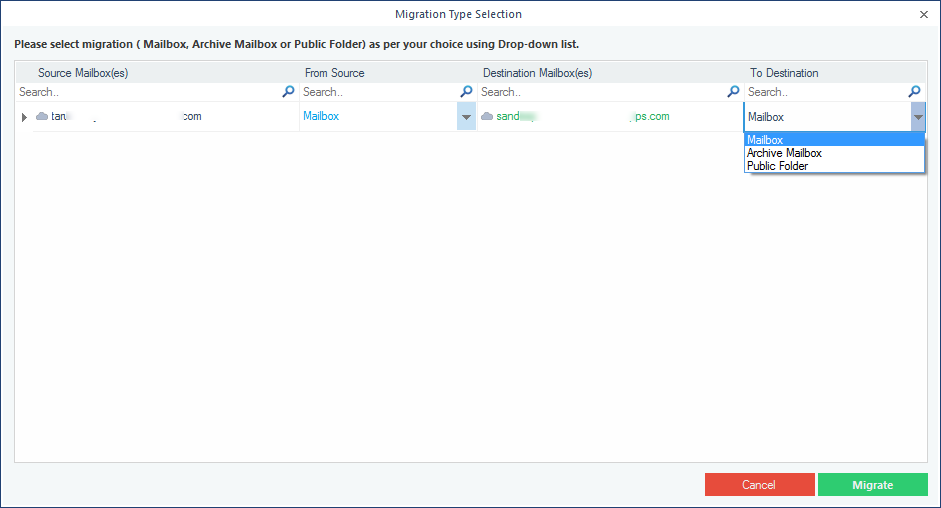
- In the next step, select the type of mailbox that you want to migrate to Amazon WorkMail and click Migrate.
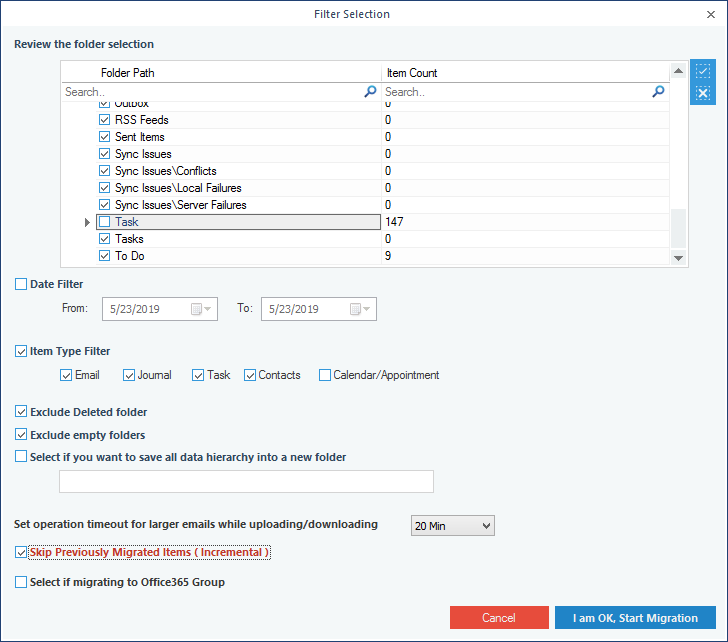
- Apply the specific filters to the mailboxes, such as Date, Item type, Include/Exclude folder, etc. in the filter section, and then click I am OK Start Migration.
- The tool will start migrating Office 365 mailboxes. Once it is complete, a notification will appear on your screen confirming the same, click OK to finish the process.
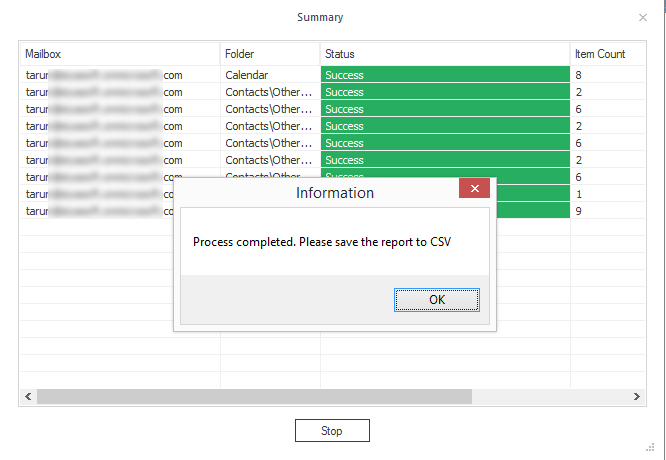
Note: If you want to save the migration report to CSV, then click Save Report to CSV.
Wrap up
Every business needs to migrate Office 365 to Amazon WorkMail if they are moving towards the AWS platform. This can be done using a professional tool like Kernel Office 365 to Amazon WorkMail. From the above process, it is pretty clear that migrating Office 365 to Amazon WorkMail with Kernel Office 365 to Amazon WorkMail is very easy.