Read time 5 minutes
If you are looking for a way to streamline your email accounts along with your email privacy, Alias is the feature for you. With Alias, you will be able to create additional email addresses that link to your primary Microsoft 365 account. This allows you to receive multiple emails without the need to pay for extra inboxes. By creating up to 400 aliases per single email account, you will have access to your primary mailbox items such as inbox, contact list, account settings.
But make no mistake – Alias is not the same as forwarding, which sends all your mail to another address. Instead, Alias sends emails to your primary inbox without revealing your email address.
In this post, we will show you how to send email from Alias in Microsoft 365 with ease.
Enable send email from alias in Office 365
Before enabling this option in Microsoft 365, you must know that this feature works only for Exchange Online mailboxes. If you are an Exchange On-premises user, you can’t gain the advantage of this feature. There are two options available to enable the send as alias option in Office 365 that are listed below:
- Using Exchange Online Admin Center
- Using PowerShell
Using the Exchange Admin Center
You can enable this option in Microsoft 365 using the Exchange Online admin center by simply following the below steps:
- First, sign in to Exchange Admin Center with your global administrator credentials.
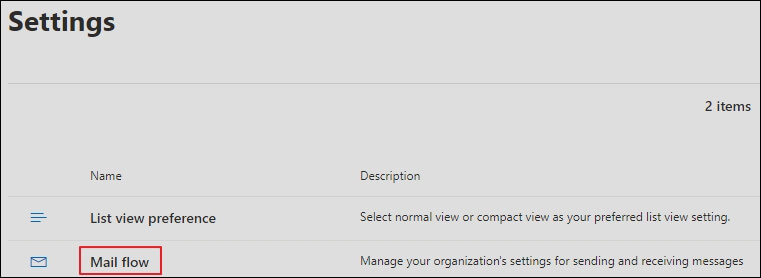
- From the left menu, click on Settings -> Mail flow.
- Now, select the checkbox next to Turn on sending from aliases option on the Mail flow settings.
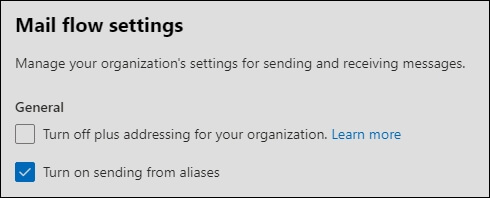
- Finally, click Save.
Using PowerShell
If you want to use PowerShell for enabling the send as an alias option in Office 365, ensure that you have the latest Exchange Online PowerShell module. You need to follow the below steps to enable this option using PowerShell:
- Open PowerShell as administrator and connect it to the Exchange Online using the below command:
Connect-ExchangeOnline
- Enable send mail as an alias using the below Set-OrganizationConfig cmdlet.
Set-OrganizationConfig -SendFromAliasEnabled $True
- You might need to wait for a while as the above command takes some time to save changes in the database.
- If you want to verify that the specific option has been enabled successfully, you need to run the below command:
Get-OrganizationConfig | ft Name, SendFromAliasEnabled
If the result shows the status True, it means that the option has been enabled successfully.
Check aliases in Office 365
If you need to know about the mail accounts linked as an alias in your account, you must follow the below steps:
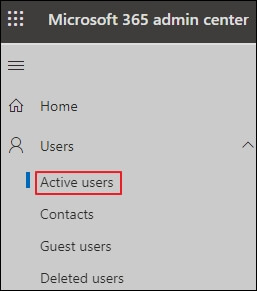
- First, sign in to Microsoft 365 Admin Center with your global administrator credentials.
- Click on Users -> Active Users.
- Select username to check all the email accounts linked as an alias in your account.
- It will display the user information, such as username, mail address. Under Aliases in Account page, you can see all your mail accounts that are linked as an alias.
Send email from an alias in Office 365
After enabling this option, you can now send emails from the alias in Office 365. To perform the same, follow the below steps:
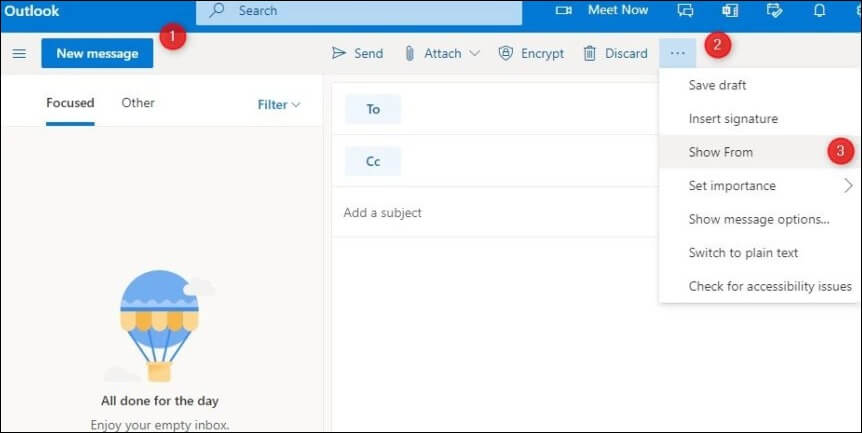
Step 1: Add From field
- In Outlook Online, click on the New message option.
- Click on the three dots -> Show From
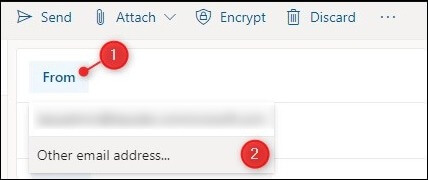
Step 2: Add your Alias address
To send mail as an alias, you need to add an alias address in your Office 365 account by following the below steps:
- Click on From option in Outlook Online.
- Select the Other email address option to change the default email address.
Step 3: Send as Alias
- Enter your alias address in the From field and click on the send option at last.
Conclusion
Overall, utilizing the email alias feature in Microsoft 365 can provide added privacy and convenience for users. However, it is important to keep in mind the potential for data loss and to backup your mailbox regularly. Kernel Office 365 Backup and Restore is a reliable and efficient tool that can assist in securing your Office 365 mailboxes and groups. This tool can backup your private Office 365 mailboxes, archive mailboxes, and Microsoft 365 groups
With this Office 365 cloud backup solution, you can rest assured that your data is secure and protected. The benefits of utilizing an email alias combined with reliable backup software make managing your email correspondence in Microsoft 365 a much more streamlined and secure process.