Read time: 8 minutes
The “Unknown or invalid JPEG marker type is found” error is the most unpleasant thing to a user when trying to process image files in the Adobe Photoshop application. It does not allow your JPG or JPEG image files to get opened in the Adobe Photoshop application for any type of processing like editing, enhancements, etc.
This issue is common among Adobe Photoshop users and sometimes appears with different error messages like:
“Could not perform the action due to an invalid Photoshop document.”
“Cannot complete the action because the file-extension cannot break down the file.”
“Could not complete your request because the file-format module cannot parse the file.”
We have collected some potential causes and the related solutions or fixes to make your JPEG files work again in the application.
Note: If you have the error on your screen right now, start with the 60 seconds fixes.
Common Causes of “Unknown or Invalid JPEG Marker Type is Found” Error
- Incorrect or misspelled file extension
- The image file format is different than that of the source file
- Hardware and device issues
- Hidden file name extensions feature is enabled
- Image files are damaged or corrupted
- Antivirus quarantine
- Bad SD card sector
- RAM error during save
60 Second Solutions That Work Most of The Time
Fix A. Open in Paint and Resave
- Right-click JPEG image >Open With >Paint.
- File >Save As >JPEG >provide new name (try opening resaved file in Photoshop).
Fix B. Open in Web Browser
- Open file into Chrome/Edge/Firefox.
- If it opens, right-click on it >Save image as >provide new name.
Fix C. Modify file extension
- Change file extension from .jpg to .png and try opening it in Photoshop.
- If it fails, try changing extension to .jpeg.
- If it opens, click File >Save As >JPEG with new name.
If these fixes don’t work, then move to the below mentioned solutions.
How to Fix “An Unknown or Invalid JPEG Marker Type is Found”?
Here are some workarounds that you can try to fix invalid JPEG marker type found error.
Method 1. Convert image to different format
If renaming and modifying doesn’t help, then you can try to change the image format to another. Here is how you can do it:
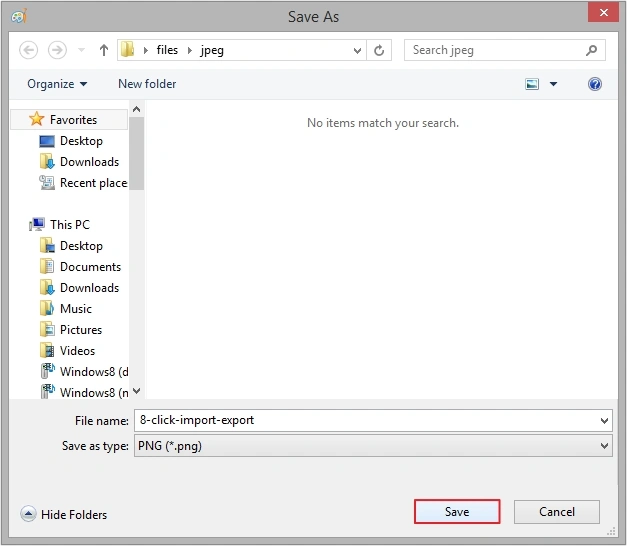
- Open image in Paint, then click File >Save as >select required output format.
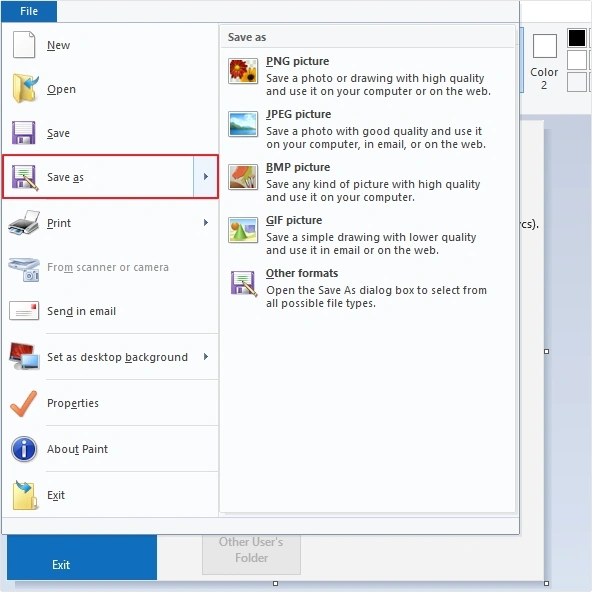
- Provide destination and click Save.
Method 2. Perform hardware troubleshooting
It is important to check for hardware issues and perform hardware troubleshooting as the error may occur due to the malfunctioning of hardware and other devices. Check out this process to run the hardware troubleshooting on your system.
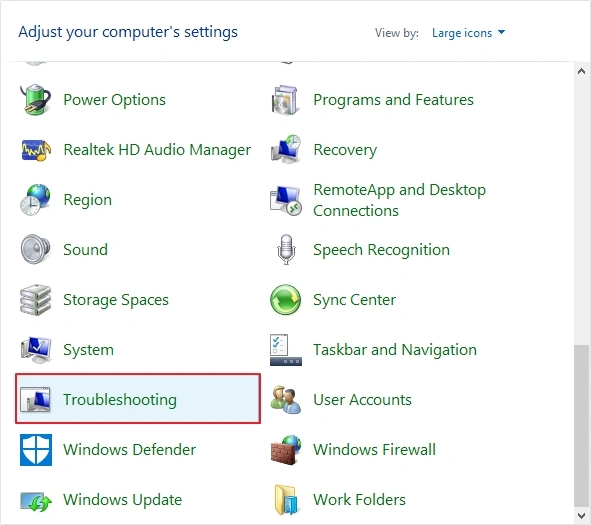
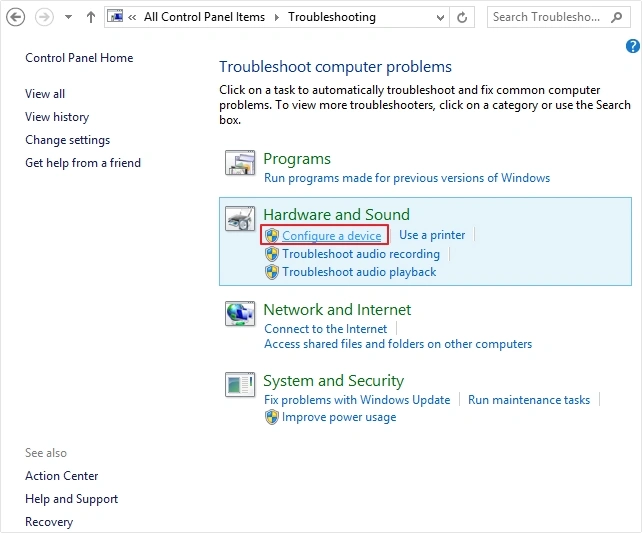
- Go to Control Panel, then click Troubleshooting.
- On the Troubleshoot Computer Problems page, click on the Configure a device option under the Hardware and Sound section.
- On the next page, click on Next to continue.
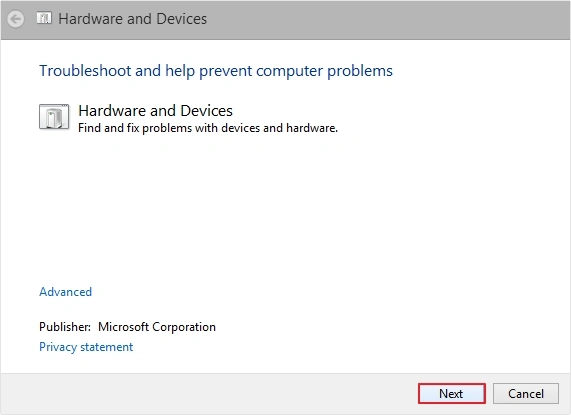
- Follow the instructions to troubleshoot and find the existing issues with the hardware and devices.
- If issues are found, perform the suggested solutions to fix this.
Method 3. Open the file in another photo app
Users can go on opening their JPG or JPEG image file in another Photo App like Picasa or Windows Photo Viewer or another and then save it with a different name to a different location. This practice can fix the “Invalid JPEG marker type is found” issue as the file is now new and ready to open in the Adobe Photoshop application. Try to open it in Photoshop to confirm.
If these methods also can’t fix unknown JPEG marker type is found error, then it means your JPEG file is corrupted or damaged.
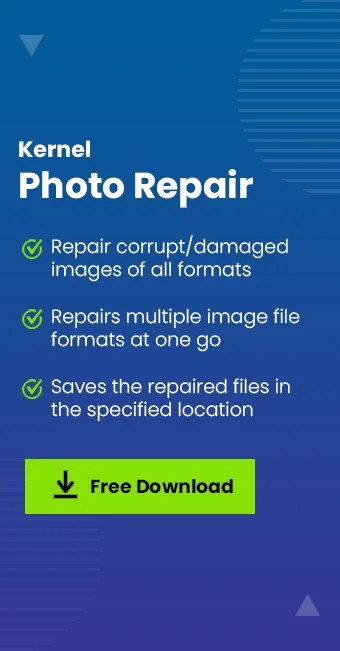
Professional Assistance: Dedicated JPEG Repair Tool
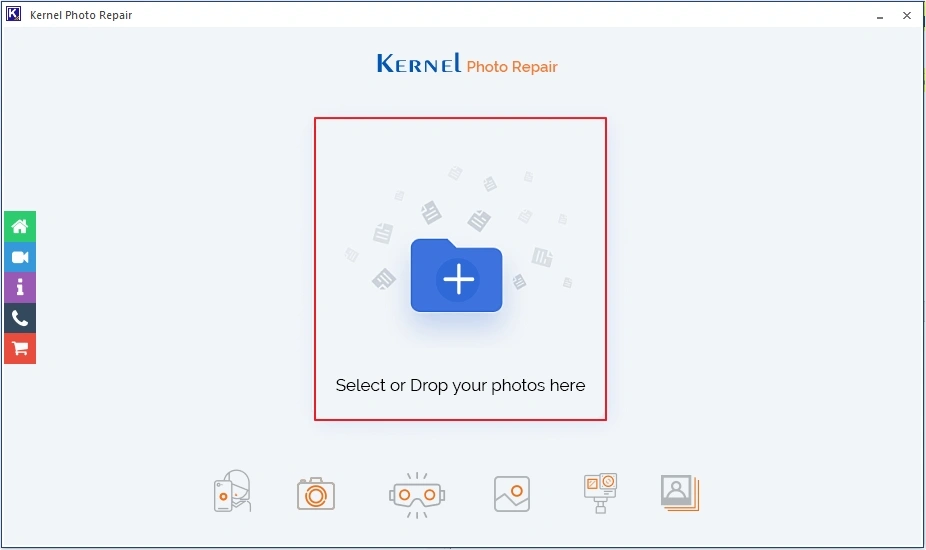
If the manual solutions are not able to fix the “An unknown or invalid JPEG marker type is found” error, then we recommend an advanced and quick Photo Repair Tool. The Kernel Photo Repair tool, also known as the best JPEG repair tool for Windows systems. It can repair all image file formats and make it healthy again for use in minutes. It allows repairing multiple images in a single operation for fast results. You can try out the free trial version to test tool’s functionality before purchasing
Fix Unknown JPEG Marker Type is Found Error with This Tool:
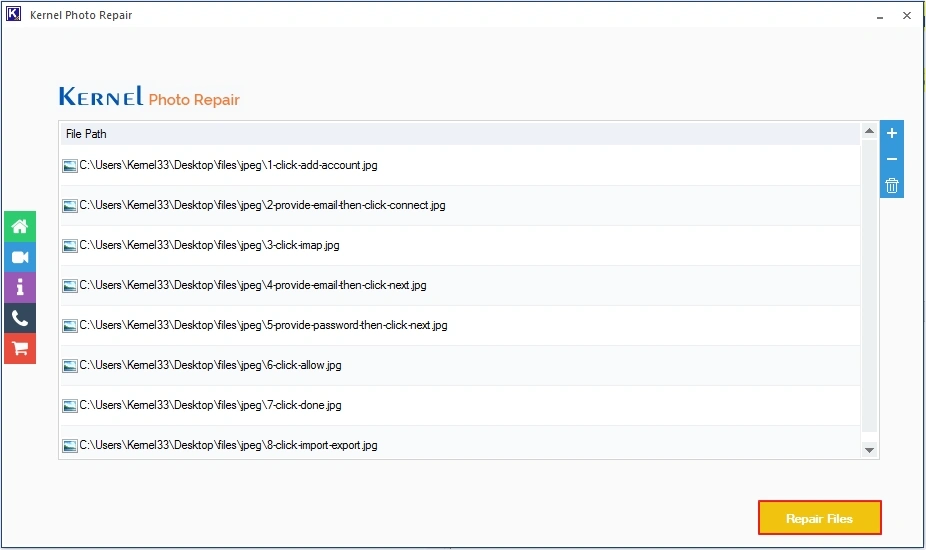
- Launch the Kernel Photo Repair Click the plus icon to add your JPEG files from the system drive location for repair.
- Click the Repair Files option to initiate the repair process.
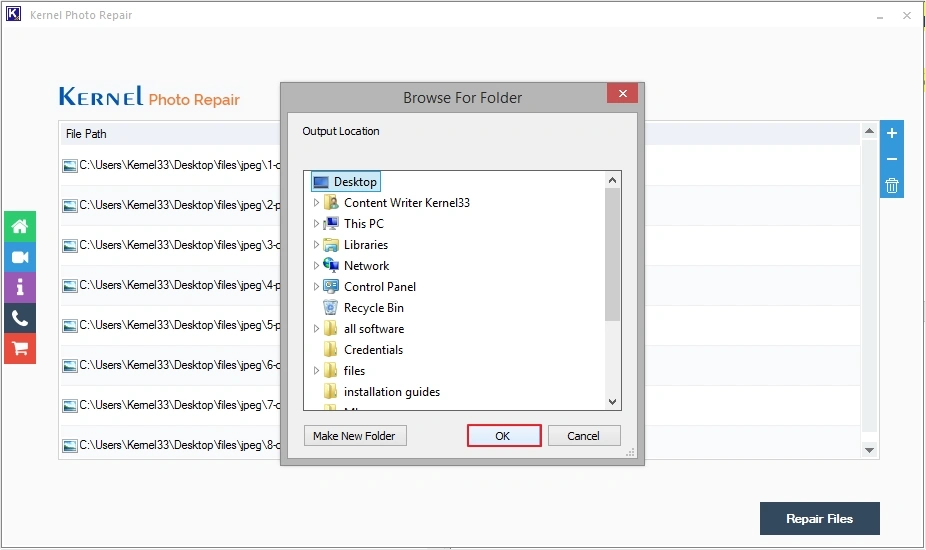
- Provide the saving path location to save the repaired files and then click on OK.
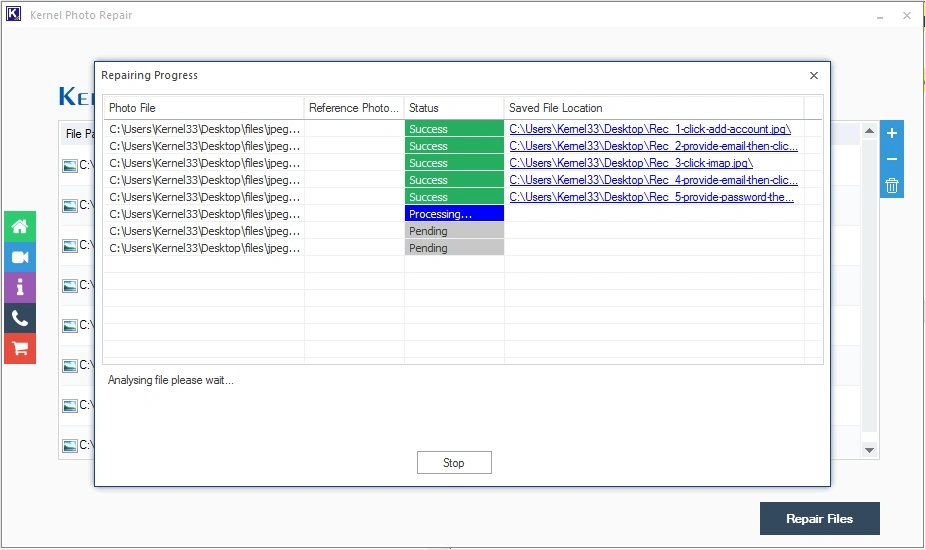
- Let the files be repaired. View the live repair process.
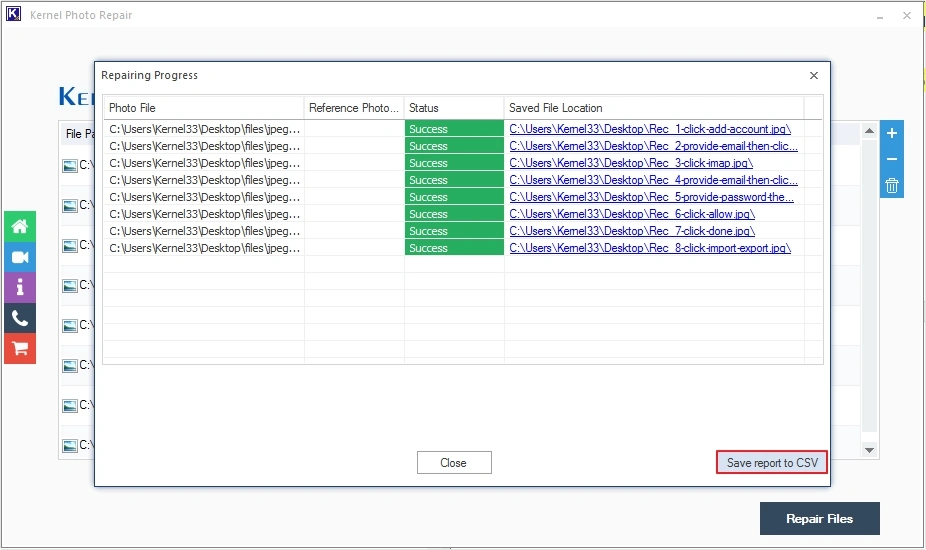
- The files will be repaired soon. Click on Save to CSV option to save the repair report in the CSV file format.
- Now, locate and use the repaired files in the Photoshop application.
Note: You can also drag the image files from the system folder location and drop them to the plus icon to add them directly.
Note: You can create a new folder at any system drive location by clicking on the Make New Folder option and save the repaired files there.
Prevention: Stop it From Happening Again
- Always transfer images as Zip file.
- Replace your SD card every 3 years.
- Always have two to three backup copies.
- If download fails, delete the file and redownload it.
- Send photos as document on WhatsApp to avoid recompression.
Wrapping Up The JPEG Error with Easy Fixes
Many Photoshop users face common errors while processing the JPEG image files. An unknown or invalid JPEG marker type is found error sounds fatal, but it’s usually just a header problem. Most of the time, it’s just a wrong extension which causes this error, which can be fixed by just changing the extension. But if the issue persists, then it might be due to corruption. Repair corrupt JPEG files using the expert tool discussed and get back your JPEG files in healthy state.
Frequently Asked Questions
A. To fix invalid JPEG marker found on Mac, simply open the image with Preview or another image viewer, then use File >Export >select another format.
A. Like other formats, JPEG has its own special bytes called JPEG markers that give relevant information about the image.
A. There are a lot of top-quality tools available in the market but the best JPEG repair software for Windows system is Kernel Photo Repair.