Read time:8 minutes
Migrating user mailboxes is a routine task for the Exchange admin. They often create and run these migrations. To shorten the time needed to setup a new migration, Exchange Server provides a few options. One such option is creating a batch migration of Exchange mailboxes using CSV file. Users can create a CSV file with headers like mailbox name, type, target database, baditemlimit, etc.
By uploading a single file, admins can save a lot of manual effort. Be it a server update, creating a test environment, or shifting mailboxes after a company merger, the CSV file is helpful in all scenarios. I myself use it when I am doing different Exchange migrations, like:
- IMAP Migration
- Staged Migration
- Offboarding remote move migration
- Onboarding remote move migration
How to create a CSV file for bulk Exchange mailbox migration
You can use the Exchange Admin Center (EAC) to instantly generate a CSV file for your migration needs with these steps:
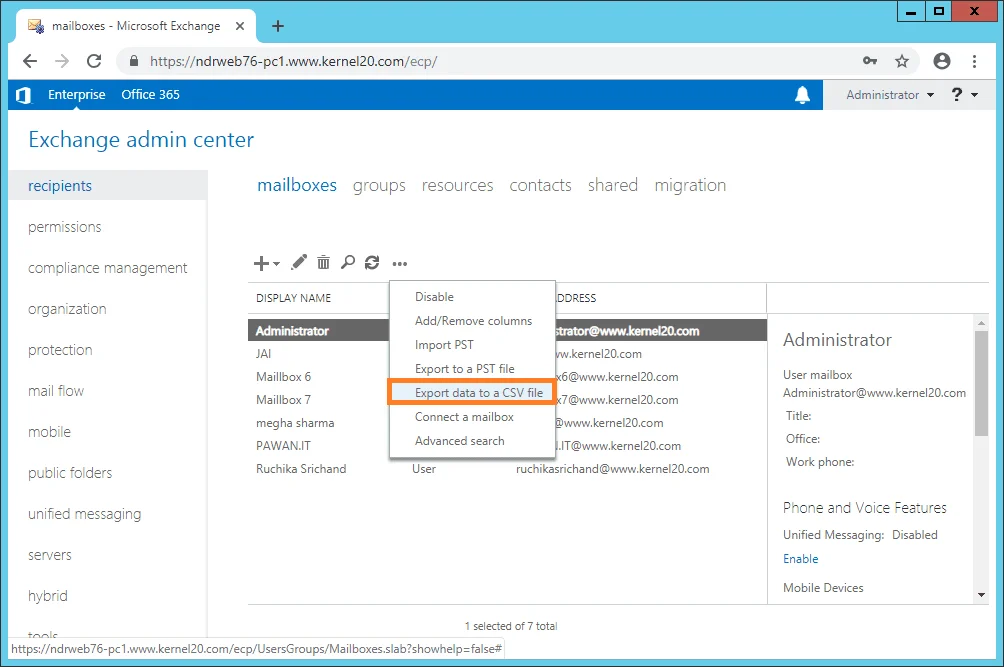
- Open Exchange admin center (EAC). Navigate to recipients > mailboxes, click more (…) and select Export data to a CSV file.
- Select the data (given as column names) for the export and click export to continue.
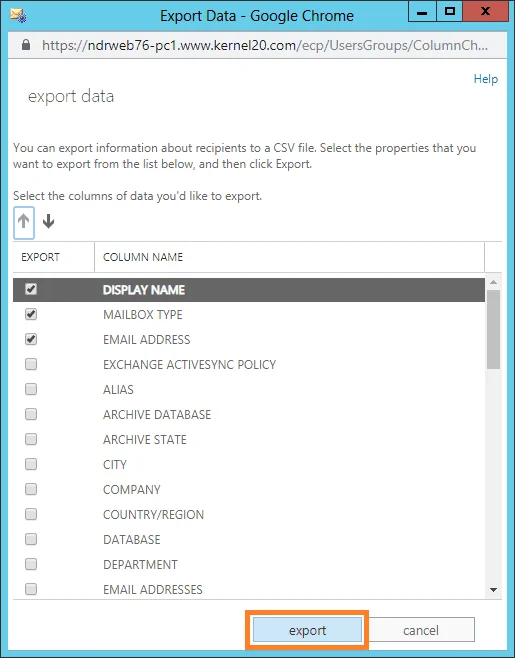
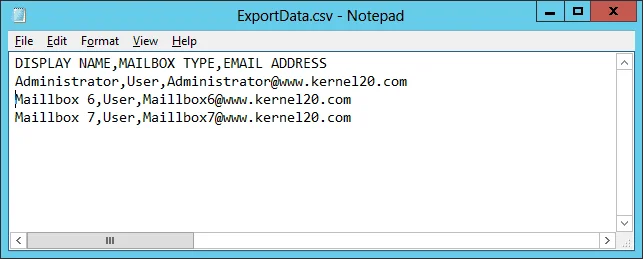
- A CSV file with all the mailboxes details is created and is saved in the Downloads location of the system. You can add or remove any mailbox from the list. The CSV file in notepad will be seen like this.
Avoid these common mistakes when saving the CSV file
- Header Mismatch: Don’t change the EMAIL ADDRESS to just EMAIL. Do not change a single character in the header name.
- Hidden Character: Some users open the CSV file in Excel and save it in CSV format with UTF-8 encoding. This can add a hidden character at the end of the CSV file and cause Exchange Server to fail to read the CSV file.
- Extra Space: Make sure there are no trailing spaces between or after any value. A single space can make the CSV file unreliable to add users to the migration batch.
How to create a batch migration in Exchange Server using the CSV file
You can use the CSV file while setting up the Exchange Server mailbox migration batch, either using the EAC or the EMS.
Using CSV with EAC
Follow these steps to configure the bulk Exchange mailbox migration through EAC:
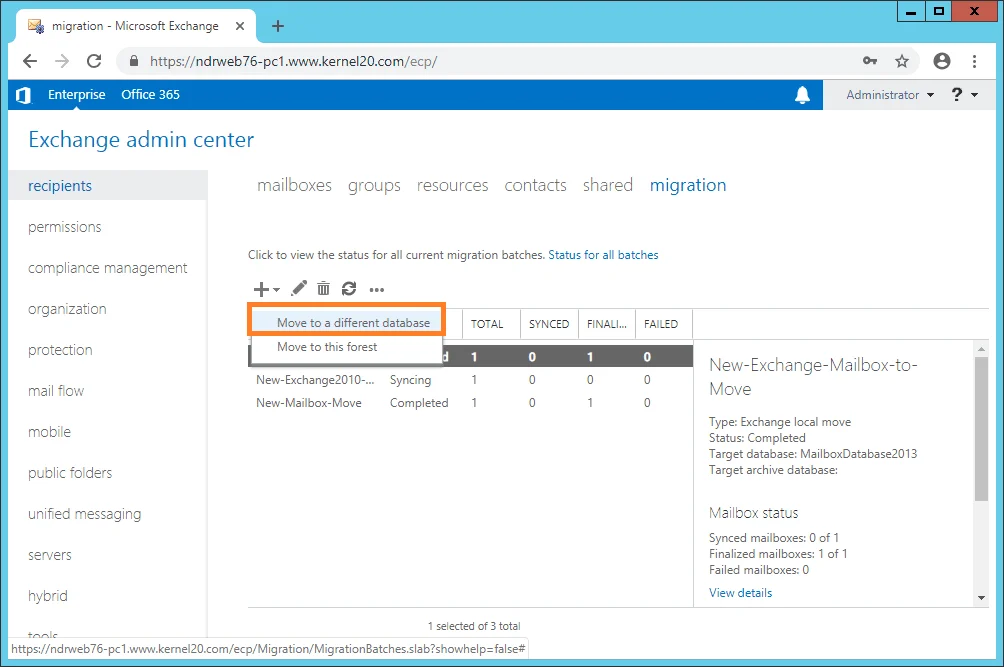
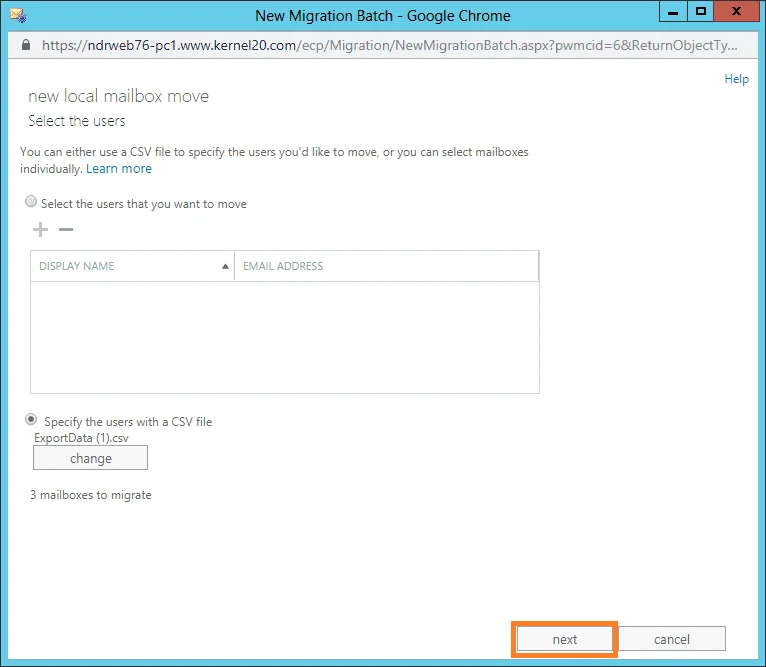
- Login into EAC, go to the migration tab, click + and select Move to a different database.
- In the new local mailbox move page, select Specify the users with a CSV file radio button. Click Choose File to add the CSV file you downloaded in the previous section.
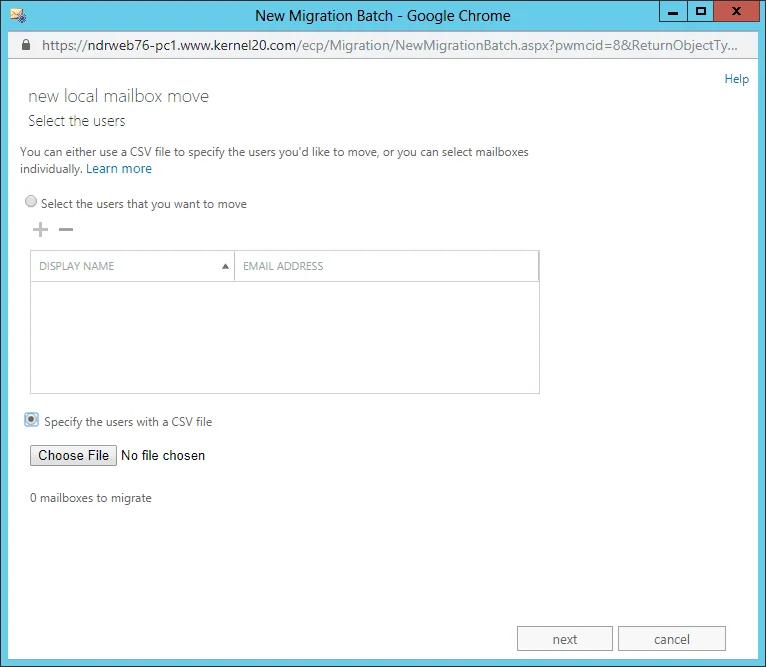
Note: If you come across an error asking to add email address column, modify the CSV file as shown and try adding it again.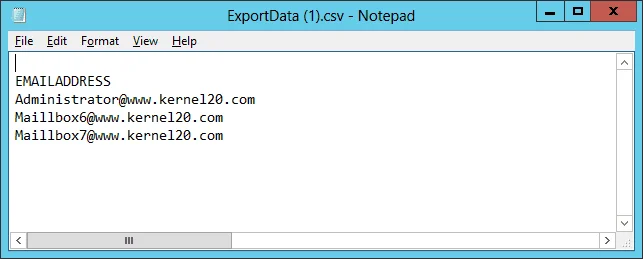
- Now, the CSV file is added, click on next to progress.
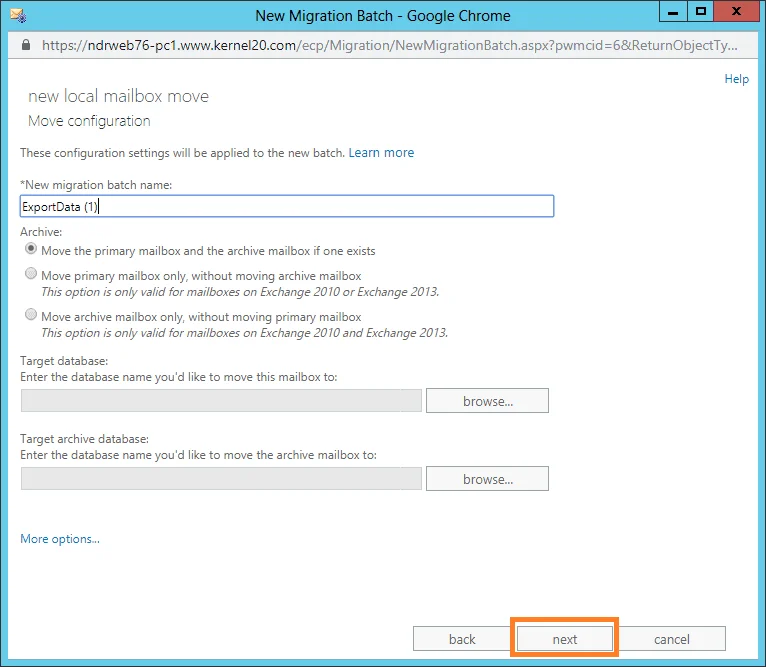
- Enter New migration batch name, select the required options, add the Target database and click next.
- In Start the batch page, select the mailbox for receiving the migration report. Select the migration options and click new.

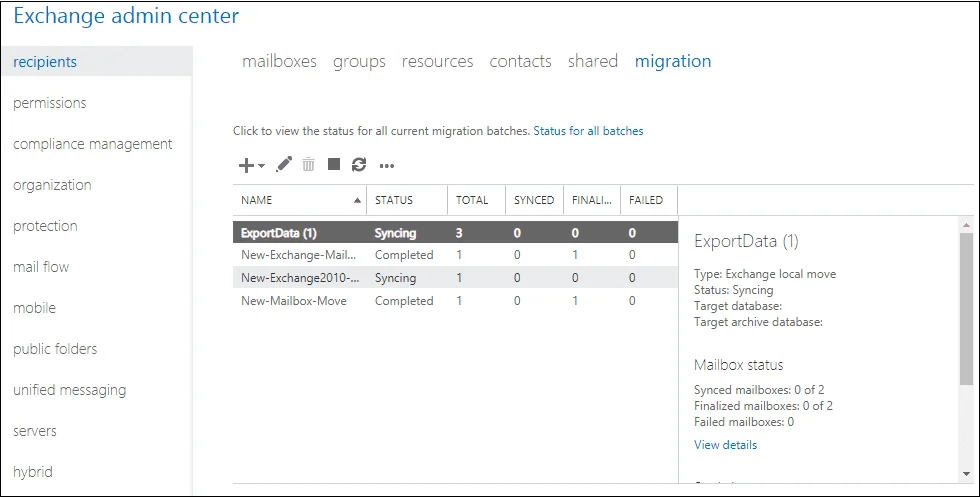
- The mailbox synchronization gets started. After some time, the migration gets completed, displaying the Completed status.
Using CSV with EMS
Even if you are using the EMS to create the migration batch, you can use the CSV file. A sample command that uses CSV file for bulk migration is:
New-MigrationBatch -Local -AutoStart -AutoComplete -Name “New-Mig-Batch-Name” -CSVData ([System.IO.File]::ReadAllBytes(“Complete-CSV-File-Path”)) -TargetDatabases “Database-Name” -BadItemLimit 10
Pro-Tip for bulk Exchange mailbox migration
Try these hacks to avoid any issues during the mailbox transfer:
- Assign Permissions: Make sure you have the following permissions: Organization Management, Server Management, Recipient Management, and View-Only Management. You need these permissions to avoid errors while creating batch migration using CSV file.
- Keep the Migration Batch Small: When you move 500 or more mailboxes, the Exchange Server will put most of them in a queue. This will increase the migration time. To avoid it, create migration batches of 100-200 users.
- Increase EWS Throttling: Exchange Servers set a pre-defined throttling limit on operation like migration. You can temporarily increase the throttling limit to minimize the time need to move multiple user mailboxes.
- Check Storage Space: If you are moving mailboxes of size 100 GB, make sure that the target database has 2 times the space available. In addition to mailbox data, logs are also generated during data move, and if storage is filled up by 90%, the server may stop the transfer.
- Repair Corrupted Items: During the migration, if the number of damaged items is more than the bad item limit allowed, the migration will fail. So, if you know you have corrupted data, repair the EDB files before you begin the migration.
How are Admins moving mailboxes between Exchange Server Tenants in 2026
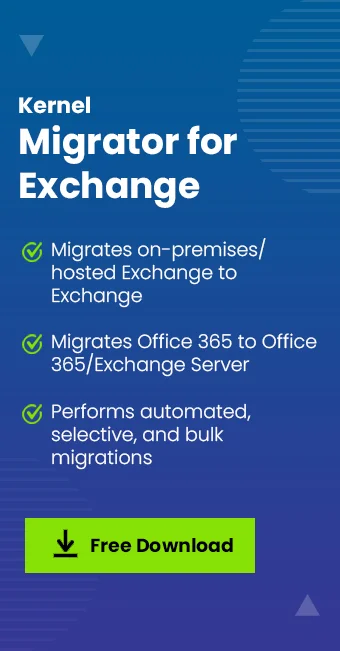
Manual methods are good for small-scale migration, but as the number of mailboxes increases, the migration becomes messy. Therefore, now admins prefer to rely on an automated Kernel Migrator for Exchange software. It helps to automate the complete migration and allows you to quickly create migration batches to avoid long migration queues.
Furthermore, the tool comes with a pre-migration analysis feature that helps to plan the migration efficiently and eliminate the risk of failures. This Exchange mailbox migration tool also provides the option to use CSV file for bulk mailbox migration to Office 365 or any version of On-Premises Exchange Server.
Conclusion
In large-scale migration, admins often create a batch migration of Exchange mailboxes using CSV file. This helps to avoid manually adding thousands of users individually. After creating the CSV, you can either use the EAC or the EMS to create and run the migration.
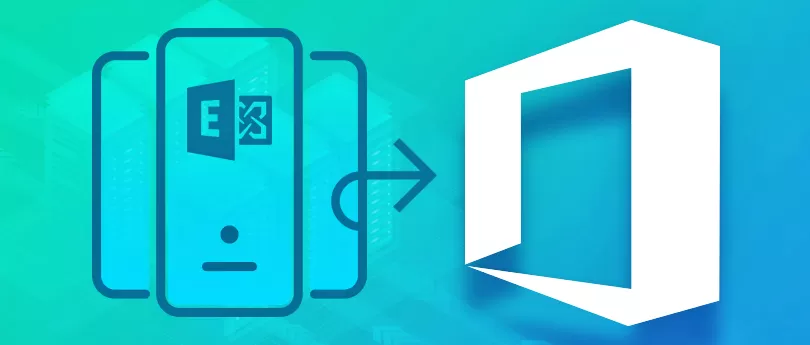
If you often have to move large mailboxes between Exchange Servers (On-Premises & Online), I recommend using the professional Exchange migration tool. It’s an all-in-one tool that allows migration and backup of Exchange On-Premises, Hosted Exchange, and Office 365.
Frequently Asked Questions
Ans. Yes, as per Microsoft’s official documentation, the maximum number of mailboxes you can add in a single CSV file is 2000. However, it is recommended to only create a migration job with 100 – 200 users.
Ans. You can view the migration using both EAC and EMS. In EAC, go to Recipient > Migration and select the batch you want to view. Or run this command in EMS: “Get-MigrationBatch”.
Ans. Yes, in fact, I always do it. After a migration is over, you can safely remove it from the migration list. It will not affect the mailboxes in the target or source database.