Related Posts
Bulk import external contacts to exchange online

Written By
Himanshu Goyal
Updated On
September 20, 2023
Read time 5 minutes
Organizations often have hundreds of business contacts that they want to add to the global address list of Exchange Online. One reason to add existing contacts to Exchange Online is that users will be able to access any of these contacts easily via the shared address book. Also, you can add external contacts as members of distribution groups. External contacts can be imported to Exchange Online in bulk using Exchange Online PowerShell and a CSV file. Let’s see how this process works.
This process consists of three steps, which include creating a CSV file, creating external contacts using PowerShell, and then adding information to the properties of external contacts.
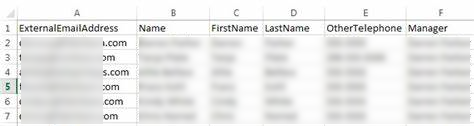
The first step involves creating a CSV file that will contain information about the external contacts that you want to move to Exchange Online.
Note: This text lists the properties of contacts that will be used while importing to Exchange Online. After adding this list, you can enter the details of your external contacts.
After creating a CSV file, you can use Exchange PowerShell cmdlets to import external contacts to Exchange Online.
Note: Once the command is finished, PowerShell will display a list of new contacts that are created.
The imported contacts will be visible in the shared address book in Outlook and Outlook Web app..
Performing the above step will create external contacts, but you’ll have to enter the contact information from the cells in the CSV file. It happens because while creating external contacts, only the required properties are occupied. So, if all the information is not populated in the contacts from CSV, then you’ll have to follow the below steps to do that.
So, following the above steps, you can add new external contacts in Exchange Online. But sometimes the manual process doesn’t work properly, and users often get errors while migrating external contacts to Exchange Online. And, of course, the process seems long and technical and so not suitable for all users. Therefore, they need a solution that provides flawless migration of contacts to Exchange Online.
Kernel Import PST to Office 365 is an effective tool specially designed to migrate Exchange and Office 365 mailboxes from one server to another. It is designed with innovative algorithms that allow users to bulk import contacts to Exchange Online quickly. Apart from contacts, users can also import mailboxes, calendar, tasks, and other items from a CSV or PST file to Exchange Online and Exchange Server.
We learned the native way to move external contacts to Office 365 using a CSV file. The process is quite lengthy and difficult to follow. So, a smart, professional tool to import external contacts has been introduced. This tool can be handy in all types of Office 365 migrations.