Related Posts
Auto-Mount a VHD/VHDX file at startup in windows 10 & 8.1

Written By
Pooja Chaudhary
Updated On
October 05, 2023
Read time 5 minutes
Computers with Windows 10 and Windows 8.1 can be mounted with a virtual hard disk (VHDX or VHD) with a .vhdx or .vhd file extension. The virtual hard disks function like a physical hard drive completely. In normal words, VHD is just a file that is stored on a real disk drive of your computer which is useful in storing any type of data.
The major disadvantage of VHD or VHDX drives is that you need to mount them every time you reboot your Windows PC. Furthermore, the normal users always depend on the local computer administrators to mount a virtual disk file as admins are authorized to do so. Hence the best-suggested way for users of Windows 10 and Windows 8.1 is setting VHD/VHDX files to mount at startup as they are incorporated with the ability to auto-mount VHD/VHDX files whenever you reboot windows.
There are multiple methods that can be used to setup VHD/VHDX files in Windows system to automatically mount virtual hard disk files at the time of Windows startup. We have mentioned the best manual method to make it hassle-free for you.
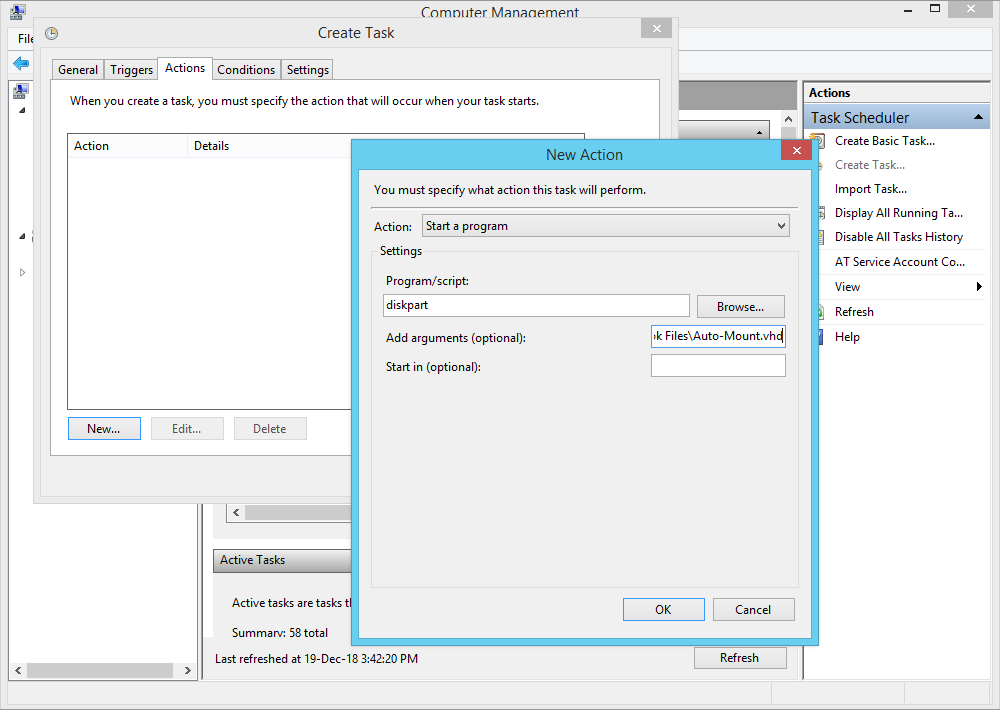
Step 1: Open VHD/VHDX file location and create a text file with the following code:
select vdisk file=”C:\Users\poojac\Documents\Outlook Files\Auto-Mount.vhd”
attach vdisk
select part 1
assign letter=R
exit
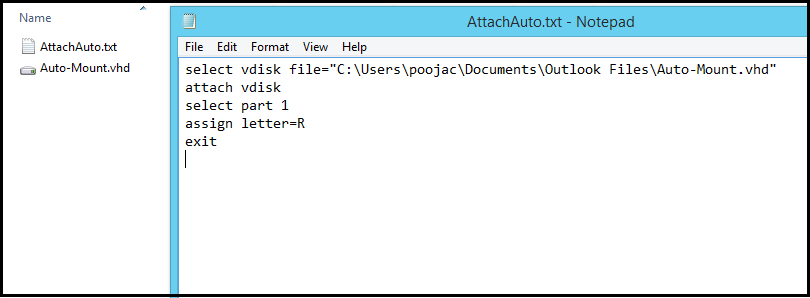
Please note: The script is helpful for mounting the VHD/VHDX file, partition selection and assigning a letter to the specified drive.
Step 2: Press Windows + X keys from your keyboard and select Computer Management.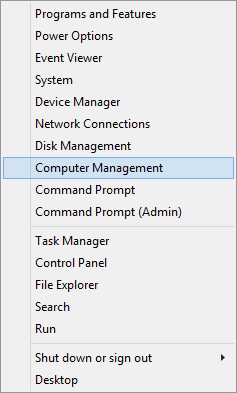
Step 3: Under System Tools, right-click on Task Scheduler and select Create Task
OR
You can simply select Create Task under Actions from the right-pane.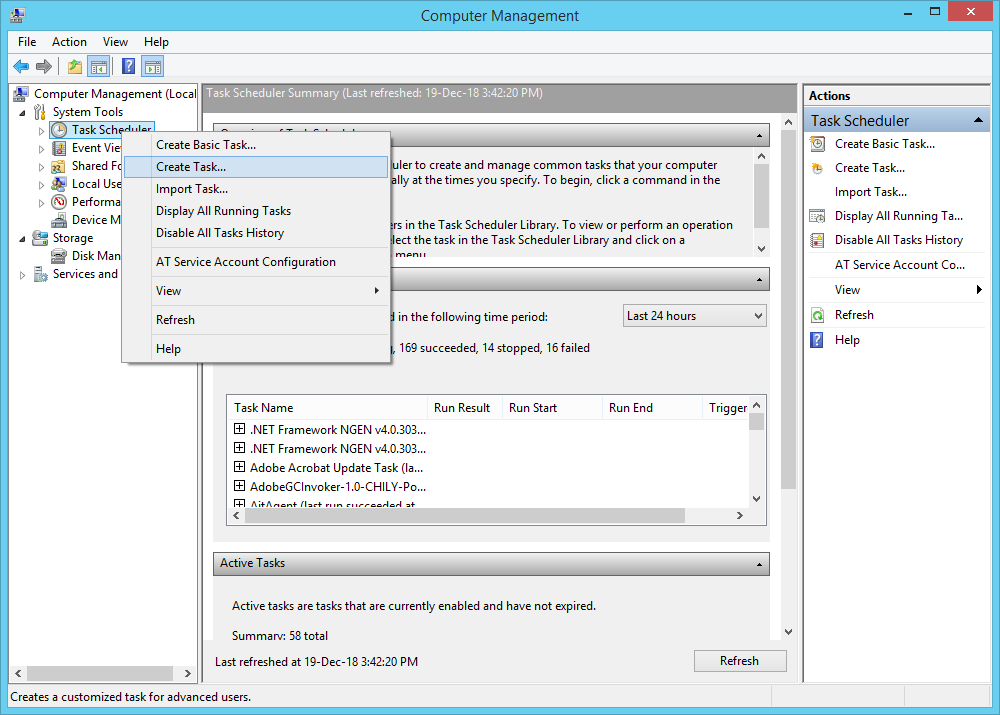
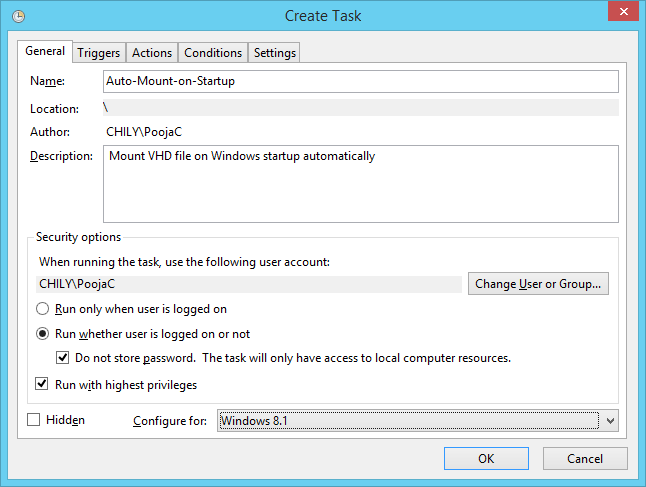
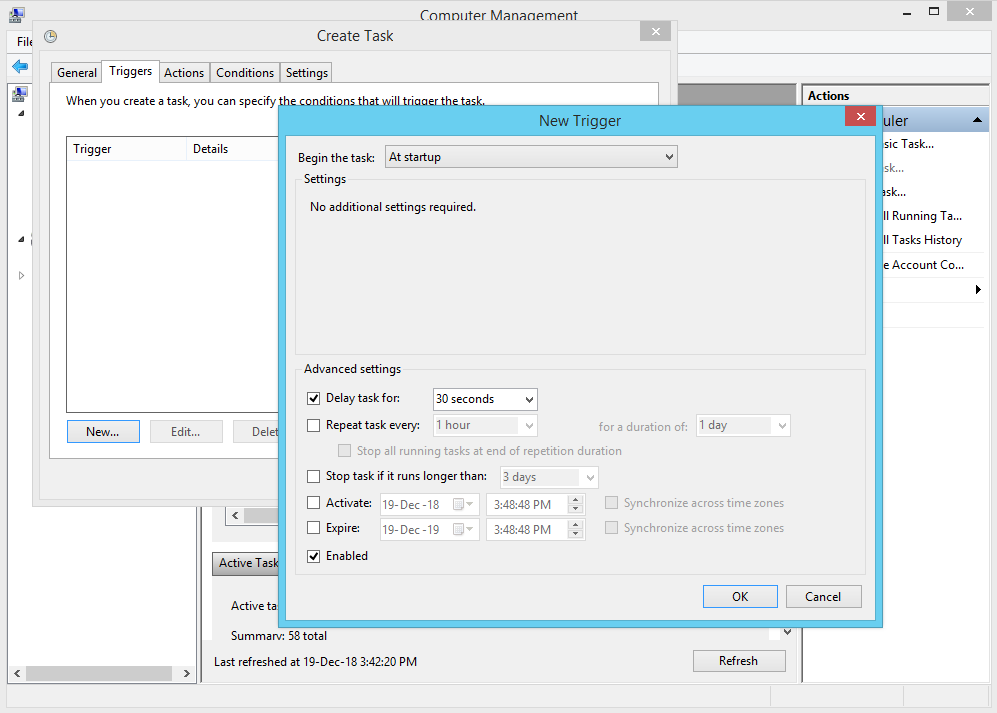
Step 4: Do the following for different tabs in the Create Task window.

Step 5: Exit Computer Management and restart your computer to test the auto-mount method.
The method works successfully for all VHD or VHDX files present on your computer or you have created a new one. But, in case any of this VHD file is corrupted or damaged then you will fail to auto-mount it. Therefore, to get rid of the VHD corruption and damage you can try a professional solution specially designed for recovery of VHD files known as Kernel for VHD Recovery software. The intelligent application works flawlessly to repair and restore complete data of VHD/VHDX files within in no time.