Read time 5 minutes
Due to wide collaboration and easy email management needs, the Shared mailbox became a most favorite alternate for teams and businesses. It allows multiple users (with permissions) to send, receive, and organize email messages from a generic email address. When adding a Shared mailbox account, you may find difficulties if you are new to Outlook or if you just updated your Outlook.
There is no need to worry now! This article contains effective step-by-step methods to add a Shared Mailbox in new Outlook without hassle. Read this to simplify your team’s email management and communication workflow.
Why Do You Need to Add a Shared Mailbox in Outlook?
When working in a team, especially in a business environment, shared mailboxes provide:
- Centralized email communication to access and respond to emails from a single mailbox.
- Collaborative and effective workflows to work together without needing individual access to the primary account.
- Shared Calendars for a team to manage work shifts, meeting appointments, etc.
- Consistency and efficiency to reduce email overload by streamlining responses with no email missing issues.
Effortless Methods to Add a Shared Mailbox in New Outlook [Windows and Mac]
Here is a simple method to add a Shared mailbox in new Outlook for both Windows and Mac users.
A. Step-by-Step Process to Add Shared Mailbox in Outlook for Windows
If you’re a Windows OS user, then follow the procedure below to add a shared mailbox in new Outlook:
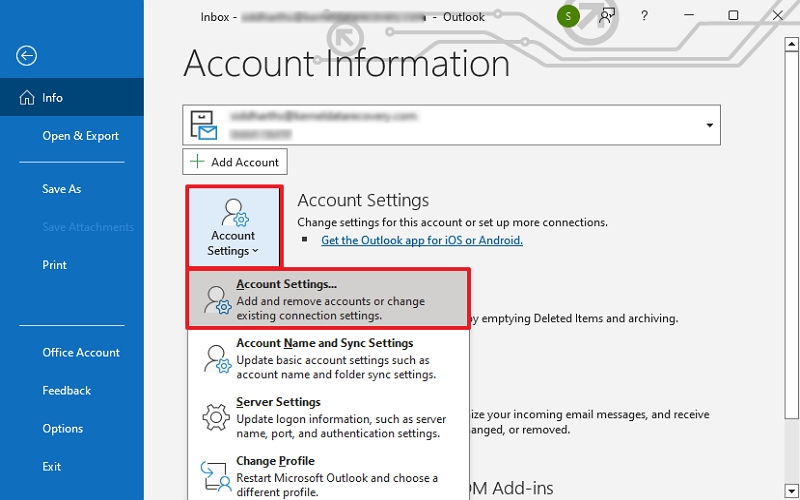
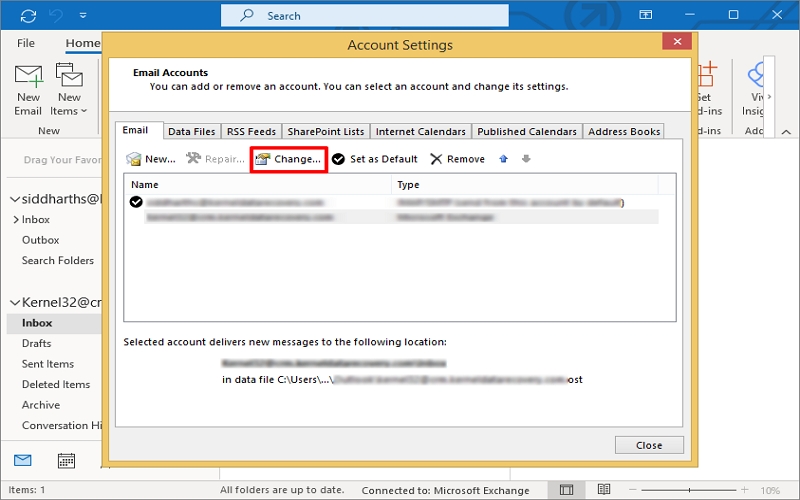
- Open Outlook, click on the File menu, tap Account Settings, then select Account Settings.
- Select your account and click Change. Tap on More Settings.
- Go to the Advanced tab. Click Add, type in the name or email address of the shared mailbox and hit OK.
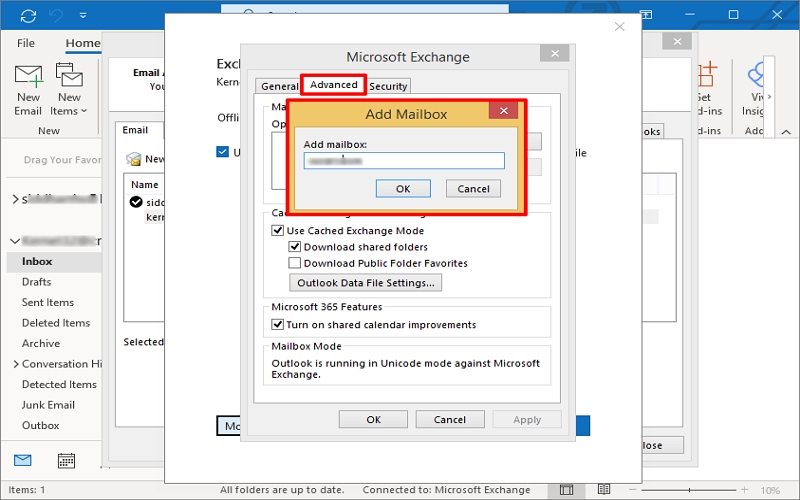
- Once added, click Apply and OK to close the windows.
Restart Outlook, and the shared mailbox will appear in your folder pane.
B. Step-by-Step Process to Add Shared Mailbox in Outlook for Mac
If you’re a Mac OS user, then follow the procedure below to add a shared mailbox in Outlook:
- Open Outlook for Mac, tap on Tools, and click Accounts.
- Choose the account you want to add the shared mailbox to and click Advanced.
- Go to the Delegate and Sharing, tap on Shared with me tab, and click the + button. Search for your Shared mailbox, if found, click Add.
Once added, close it and restart Outlook. The shared mailbox will appear in your account list.
Common Issues When Adding Shared Mailbox to Outlook
Sometimes, you might face a few common issues when trying to add a shared mailbox in new Outlook. However, you can troubleshoot them using the tips below:
- Mailbox Not Showing Up: If you don’t see the shared mailbox after adding it, try restarting Outlook. You can also check the added mailbox at the Advanced tab in Account Settings.
- Permissions Error: Make sure you have the necessary permission (provided by your admin) to access the shared mailbox. If you don’t have access, contact your IT department immediately.
- Outlook is Slow: Sometimes your Outlook may lag; you may face a delayed mailbox loading issue. At this time, make sure that your connection is stable and the cache folder is empty.
How to Manage Performance Issues in Outlook with Large OST Files?
When using a shared mailbox in Outlook, all communication (sent and received emails) gets stored in the same Offline Storage Table (OST) file. As the OST file grows in size, it can cause performance issues in Outlook, such as slow loading times or OST file corruption. These issues may restrict you from using both your email account and shared mailbox.
In such cases, it is advisable to perform OST file repair and create an OST file backup first to avoid important data loss issues. After that, check for any missing emails or other items within. If you find any missing data, use the Kernel OST to PST Converter tool to extract and restore the missing emails and attachments to a PST file.
You can even save your OST data into various formats like EML, MBOX, MSG, PDF, DOC, etc. Moreover, you can also migrate your OST file to multiple cloud platforms and IMAP servers directly.
Conclusion
Now you know the effective and step-by-step methods to add a shared mailbox in new Outlook [Windows and Mac OS]. So, add your shared mailbox in Outlook to simplify communication and improve collaboration within your team now.
However, your OST file may get corrupted, and you may face data loss issues with an oversized OST file. To avoid such problems, create a healthy and accessible OST file backup using the recommended OST converter tool. You can also recover deleted OST emails in a few clicks using our tool. For hands-on experience, get the free trial version today!
FAQs You Should Know!
Ans. Of course, you can add shared mailboxes to any version of Outlook, including Office 365.
Ans. Yes, you need to have permission from the admin of the shared mailbox to add it.