Domino to Exchange Migration
Domino to Exchange migration feature of Kernel for Lotus Notes makes it an apt solution for migrating NSF files of Lotus Notes to Exchange mailbox. The software effectively resolves the down time issue by enabling you to select NSF files from Domino Server and migrate them to Exchange mailbox on Exchange Server. This way, Kernel for Lotus Notes facilitates performing Domino to Exchange migration without interrupting email communication.
How easy and fast it is to migrate Domino mailboxes in Exchange mailbox!
Self-descriptive graphical user interface of the software enables you to migrate NSF files in Exchange mailbox with ease, accuracy and swiftness. To select and migrate NSF files from Domino Server to Exchange, follow the steps below:
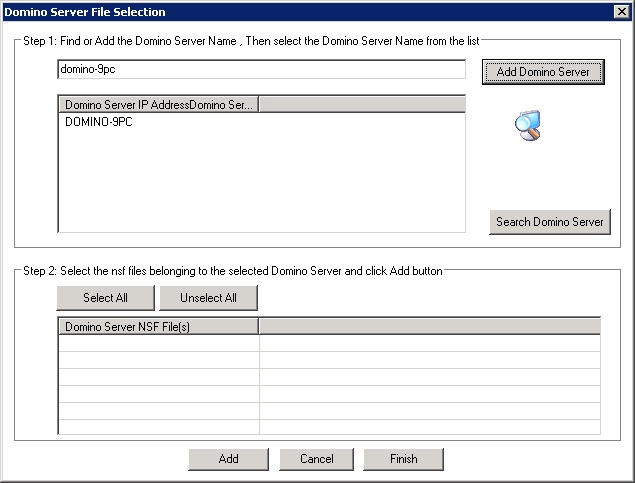
Click the Add Domino File(s) button in the Tool bar of the software. The "Domino Server File Selection" dialog box appears where you have to specify the name or IP address of the Domino Server. Define the Domino Server name or IP address in the field.
Or search for the Domino Server in network with the help of Search Domino Server button. Kernel for Lotus Notes to Outlook software will search for the servers if you click the Search Domino Server button.
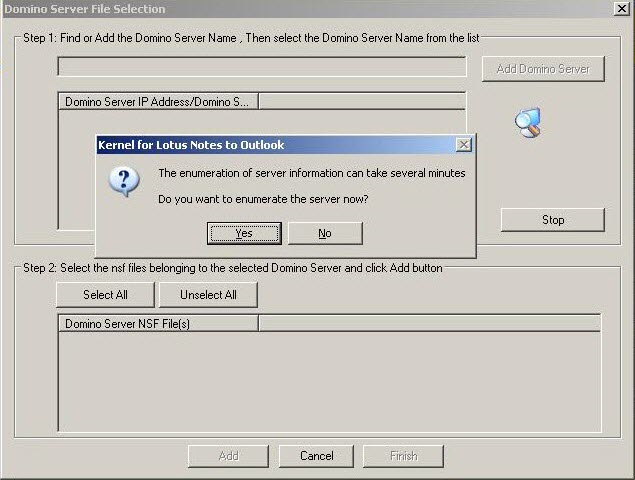
A dialogue box will appear asking for enumerating the server. Click Yes to continue.
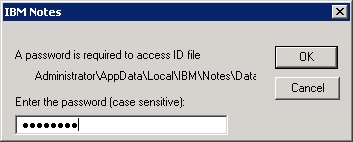
As the Kernel for Lotus Notes to Outlook Software gets connected to the Domino Server, it will ask for the password to obtain access to the server. The screen to enter password would appear irrespective of Mode of Domino server selection. Type the password and click OK.
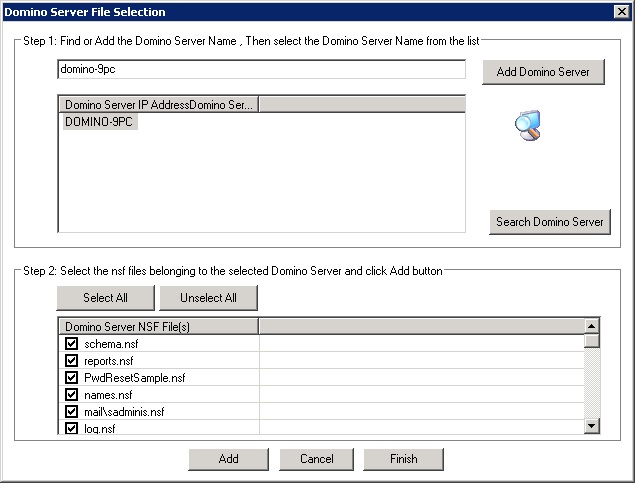
Kernel for Lotus Notes to Outlook software will list the Domino Server name and its respective NSF files. Select NSF files and Click Add button to add these NSF files in Kernel for Lotus Notes to Outlook software for conversion.
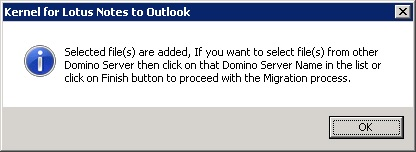
The following message appears. Click OK to move further.
Here, you cannot preview the files by clicking the Preview button. Click the Migrate button to convert the files.

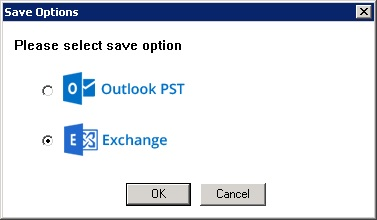
Kernel software will display the save options. Select the Save in Exchange Server option and click the OK button.
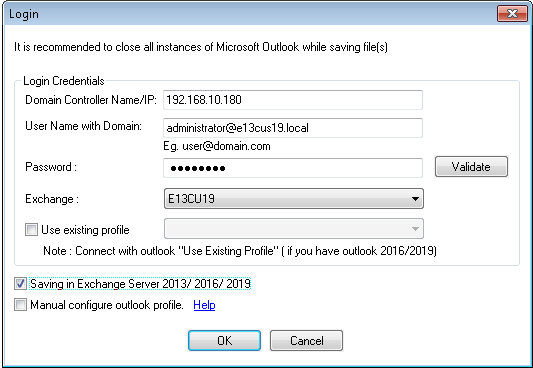
The software asks for Storage location to be entered. Here, enter Exchange Server IP address or Exchange Server name, Exchange User name with Domain and Password. Perform validation. You can select the existing profile as well.
On selecting the Checkbox, user can export all NSF files into the Exchange 2013/2016/2019 mailboxes. Users can also manually configure the Outlook profile. Click OK to move further.
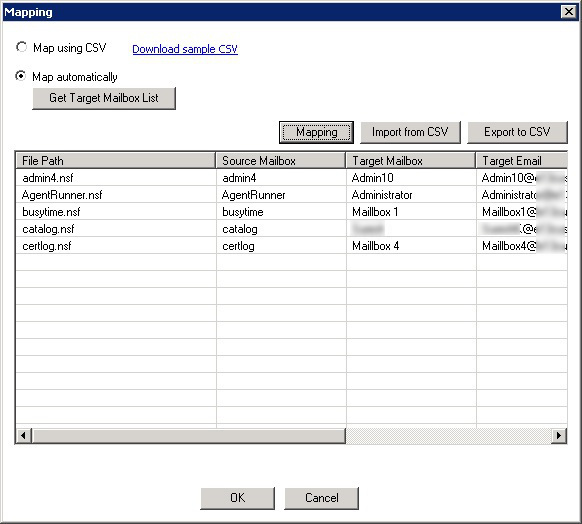
In the Mapping dialogue box, users are allowed to add mapped Source and Destination mailboxes using CSV file with Import from CSV option (as done in earlier conversions). Use Map automatically option, to map Source with Destination mailboxes. Click Get Target Mailbox List to fetch all target mailboxes.
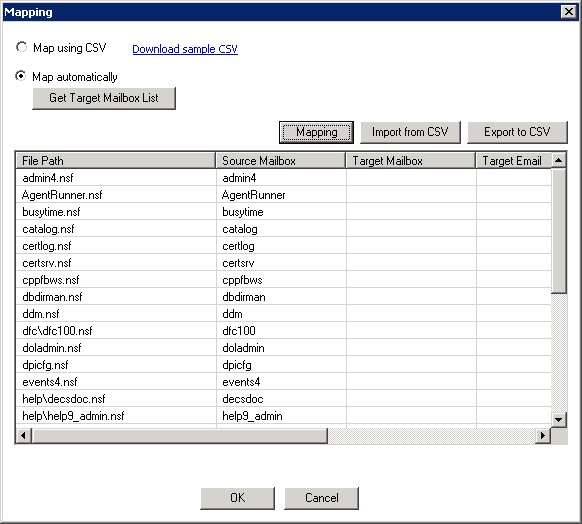
Select the Source mailbox and click Mapping button to add target mailbox against it from the full list. Similarly, do it with all Source mailboxes to add desired target mailbox against it. Once done, click OK.
The following screen is displayed that allows user to enter Date range as filter with other options. Apply as per requirement and then click OK.

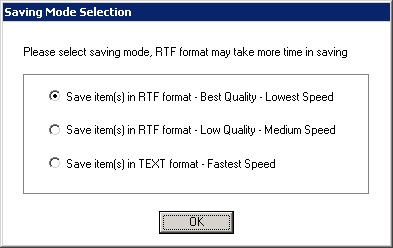
It is recommended to check that Exchange Server is properly working when working with this option. Kernel for Lotus Notes to Outlook Software then displays the Saving Mode Selection Window. Select the desired option and click OK to continue.
Kernel for Lotus Notes to Outlook software will start the Domino Server files to Exchange Server Conversion process. After the complete conversion, following screen is displayed.
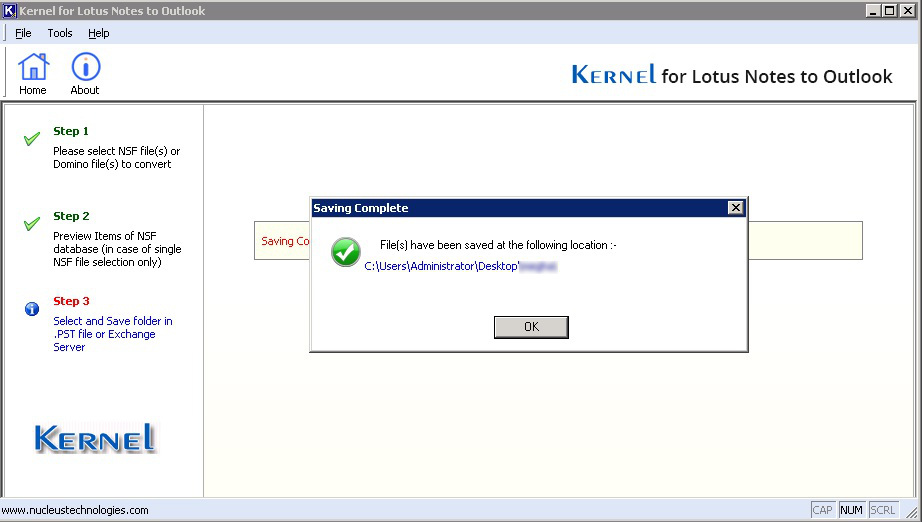
Hence, the software successfully converts Domino Server files to Exchange Server.