Read time 6 minutes
Organizations using Exchange Server know that their data is stored within the Exchange database that helps in storing and managing mailboxes containing emails, contacts, calendars, etc. Exchange contacts are, also known as mail-enabled contacts, save details about people outside an organization. Sometimes, the administrators or organization need to move Exchange mailbox contacts for various reasons, as explained below:
- For upgrading from older versions of Exchange Server to the latest one.
- Moving mailboxes from Exchange on-premises to Microsoft 365.
- To attain better communication and collaboration.
- Combining or consolidating mailboxes for merger or procurement of companies.
- Restore contacts if there’s been a cyber-attack, server crash, or corruption in the mailbox.
- To take backup of Exchange mailbox to meet industry compliances.
Let us proceed to explore more about how Exchange export email addresses to CSV or directly to other versions of Exchange Server.
What are Shared mailboxes in Exchange?
The Exchange Server contains both user mailboxes (private mailboxes of users) and shared mailboxes. A shared mailbox in Exchange Server streamlines sending or receiving messages collectively. It makes it easier to schedule the meetings, manage shifts, create calendar events, and much more. Some examples of shared mailboxes in an organization include a technical support mailbox, customer support mailbox, help desk, complaint mailbox, etc. All these are shared mailboxes where multiple users can receive the emails, rectify queries, and send solutions.
A user cannot directly log in to a shared mailbox unless the administrator provides the following permissions based on the action required by the users.
- Full Access: If a user has Full Access permission on a shared mailbox, then the user can access the emails, reply to them, create contacts, calendar event, and even delete the items.
NOTE: Although the Full Access permission levels provide complete authority to the user, the user must have either “Send As” or “Send on Behalf” permissions also to send the email. - Send As: The user can send an email to the client from the shared mailbox.
- Send on Behalf: with the help of Send on Behalf permission level, the user can send an email on behalf of the shared mailbox.
- User Permissions: Only the internal users of the organization can access a shared mailbox. The users outside of your business cannot access the shared mailbox.
- Licensing: 50 GB is the total limit to store the data in a shared mailbox without the need for a license. After reaching the 50 GB limit, you need to assign a new license to it.
- Multiple users: When multiple users are accessing the shared mailbox simultaneously, there are chances of message availability issues. So, you should restrict the number of user permissions to access the shared mailbox. You can also reduce the total workload of the mailbox by creating more Office 365 groups or public folders.
Export contacts from Exchange mailboxes using Outlook
Here’s a detailed process mentioned that explains how you can easily export contacts Exchange mailboxes:
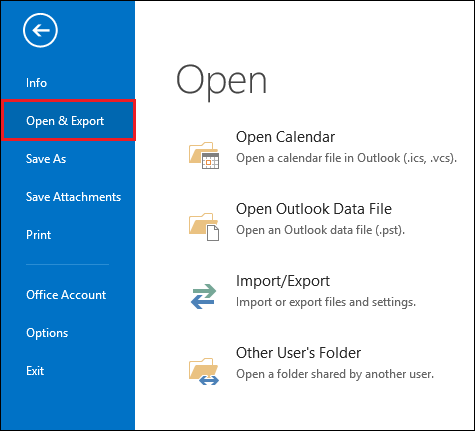
- Start the Outlook application. Go to File, then click Open & Export option.
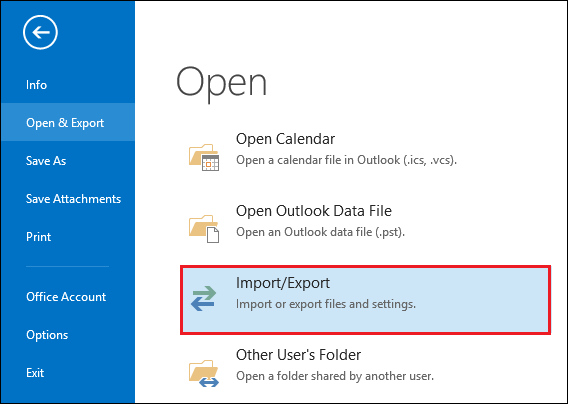
- Select the option Import/Export option.
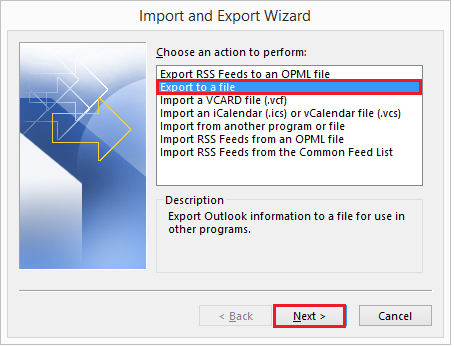
- Select the second option of Export to a File.
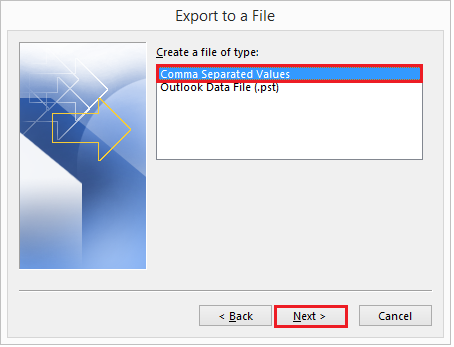
- Select the option Comma Separated Values, then click Next.
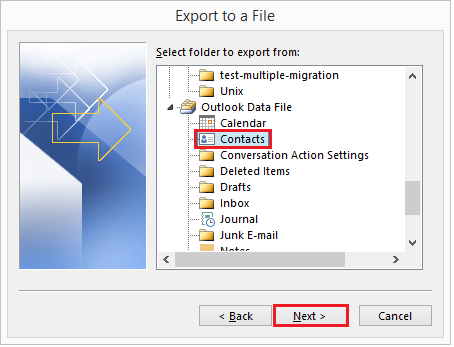
- Select the Contacts folder and click Next.
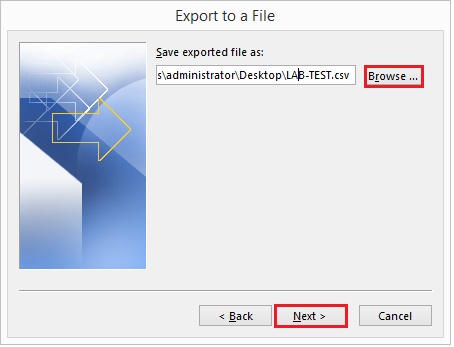
- Browse the destination location and a new name to the CSV file.
- Click the Finish button to finalize the process.
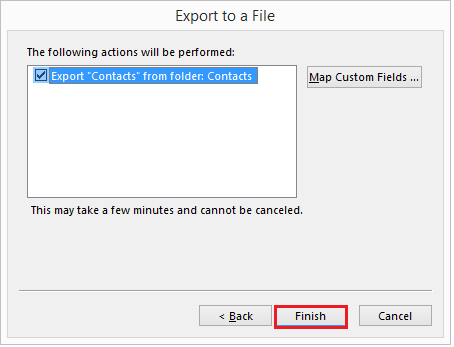
After completing the process, you can access the new CSV file with all your contacts in the shared mailbox.
Exchange PowerShell export contacts to CSV
The other method to export Exchange contacts includes the use of PowerShell scripting. This method is suitable to export from Exchange Server version 2010 and above. Before you begin with export contacts Exchange, make sure you are assigned the Import/Export role and access to the Exchange Management Shell.
However, running PowerShell commands to export contacts from Exchange Server requires the user to have technical skills and experience with the Exchange Management Shell and PowerShell commands. It can also consume a lot of time and requires utmost precision to Exchange PowerShell export contacts to CSV.
Conclusion
If you want to export a large amount of data and multiple mailboxes, then you should take the help of a professional Exchange Server recovery tool. Kernel for Exchange Server is the best tool which can export both healthy and corrupt files. It accesses the complete Exchange database and exports them to the desired destination (PST, on-premises Exchange Server, or Office 365). You can also export EDB file to PST, Office 365, Exchange Online, and Public Folder.