Read time 8 minutes
The method of migration between the cloud platforms from different vendors depends on the type of email server that you are using and what email server that you want to use. But many of these platforms have made it possible to import the mailboxes from other platforms. The cloud platform from Microsoft is called Microsoft 365. In this, a Super Administrator credential can import the G Suite (Google Workspace) mailbox emails with the help of Microsoft 365 Admin Center. As G Suite supports IMAP protocol for its emails, the emails can be migrated manually.
The migration is completed in several stages, in which the mailboxes are prepared and migrated to Office 365. Let’s see these stages of migration one by one:
Stage 1. Verify the domain
Before starting the migration, you should verify to Office 365 that you own the Google Workspace domain. The setup wizard gives you a TXT record that is available to add at the domain host provider. In the Microsoft Office 365 Admin Center, you can use the two options to verify the domain.
- When the DNS host provider is Google, then you can add your TXT record here.
- If you had purchased the domain from a third-party domain registrar, then you can contact them to add the TXT record.
Stage 2. Create users in Office 365
After verifying the domain of Google Workspace accounts, you can continue to create new user accounts in Office 365. You can either create a single user at a time or create multiple users at a time. Each user should have the mail-enabled mailbox that will receive the data from the Google Workspace users, and the user should have the active license of an Office 365 subscription plan.
Stage 3. Create a G suite mailbox list for migration
To start a migration, you require the list that contains the G Suite mailbox details. The easiest way to create such a migration file is through the MS Excel spreadsheet.
- You should know the app password of the G Suite mailboxes.
- In the case of no app password, the administrator can create a temporary password by resetting the password.
- The size of the migration file should be up to 10 MB only.
Here are the steps that you need to follow opening an Excel file –
- Use the format correctly, without any spaces.
- EmailAddress in A1.
- UserName in B1.
- Password in C1.
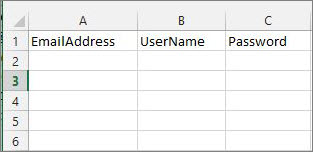
- Input the Email Address, Username, and Password in the cells below these entries. Copy these details from the G Suite Admin Console, where all the accounts are listed.
- After inputting the details of G Suite accounts, save the file in CSV format.
Stage 4. Connect Office 365 with the G Suite
To connect the Office 365 account with G Suite, you can create an endpoint at the Microsoft 365 Admin Center.
- In Office 365 admin center, go to Exchange.

- Go to Admin Center and follow recipients >> migration >> more(…) >> Migration endpoints.

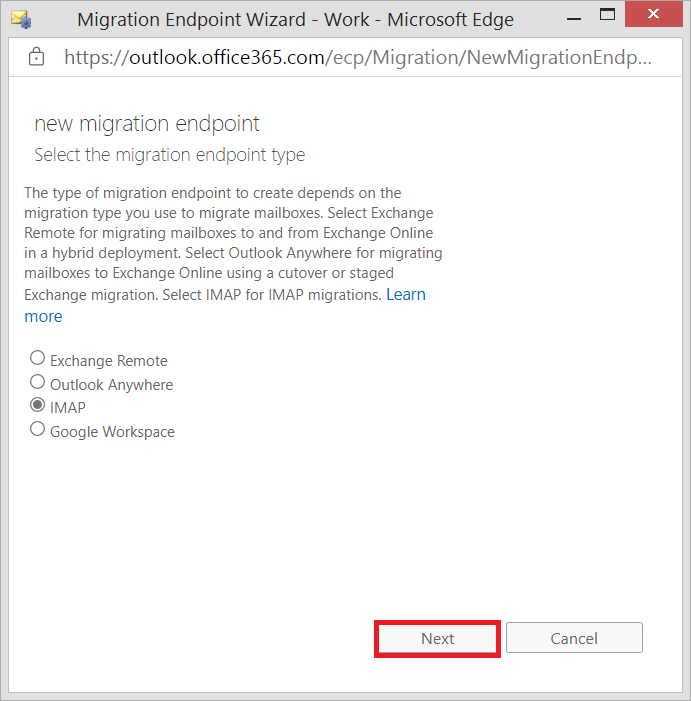
- Click the + (New) icon.
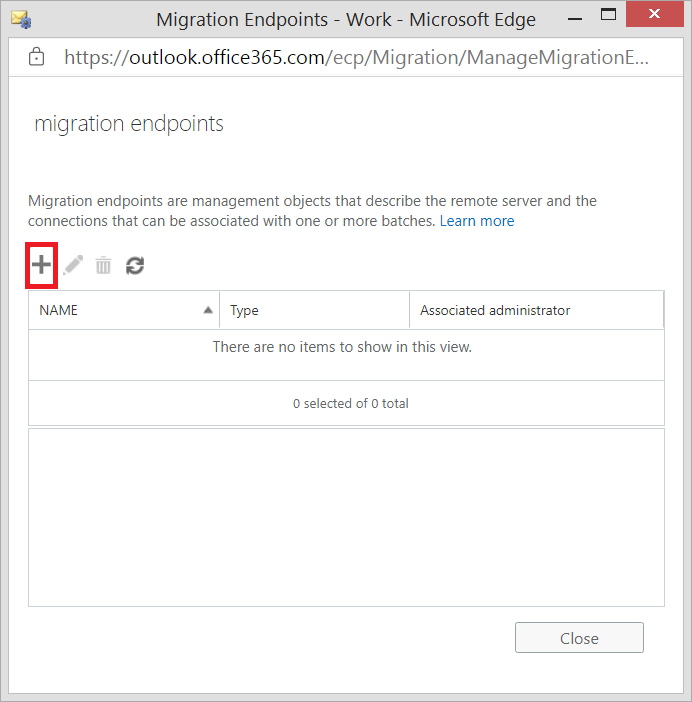
- Select IMAP as the migration endpoint type.
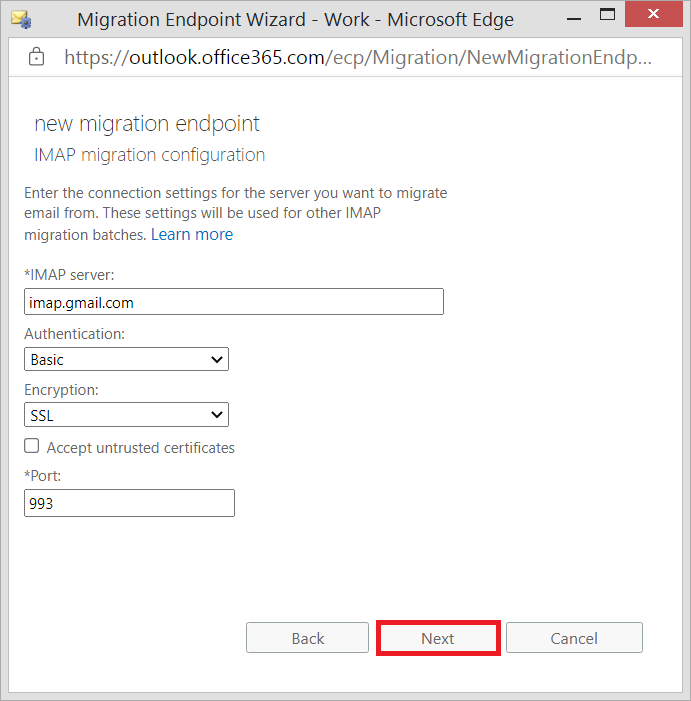
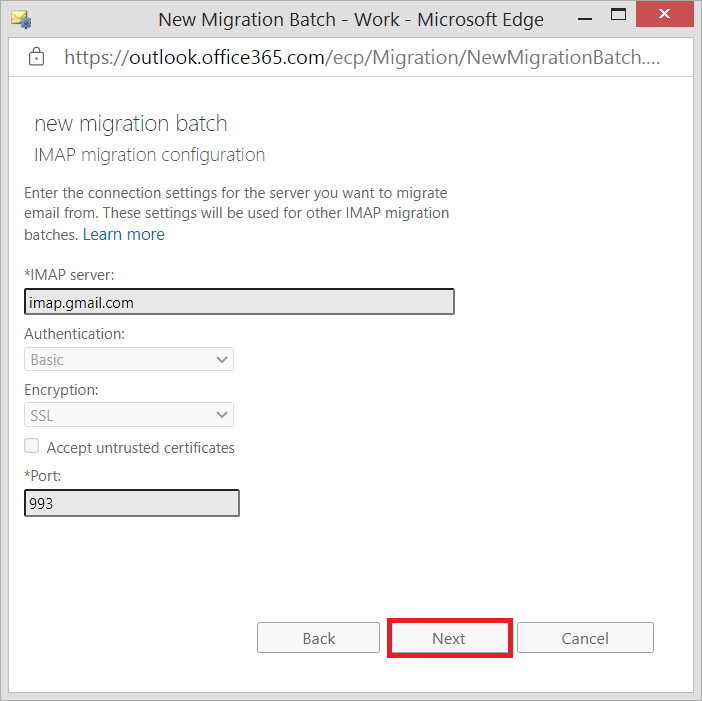
- On the new IMAP migration configuration page, input imap.gmail.com as the IMAP Server and keep the other settings as such.
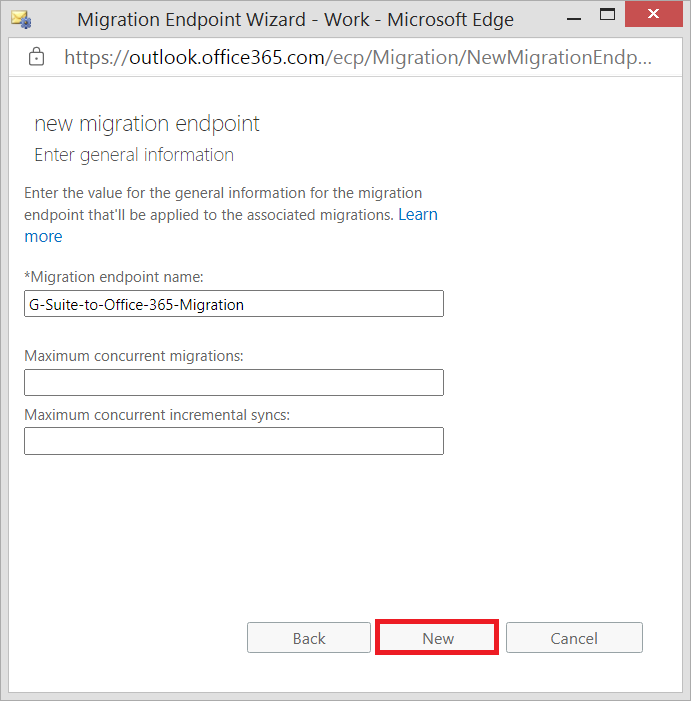
- Enter a new name to the Migration endpoint and leave the rest of the boxes blank. Click new.
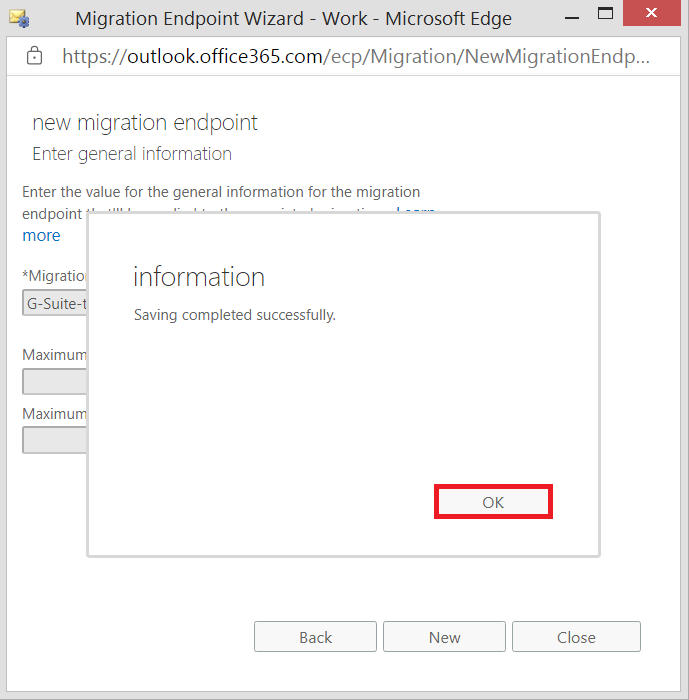
- A new migration endpoint is created. Click OK.
Stage 5. Create the migration batch
The Migration from G Suite to Office 365 is possible through the migration batches that you create in the Admin Center. The batch consists of the migration file that you created for the G Suite mailboxes.
- Go to Exchange in the Office 365 Admin Center.
- Choose recipients, then migration.
- Click New, then select Migrate to Exchange Online.
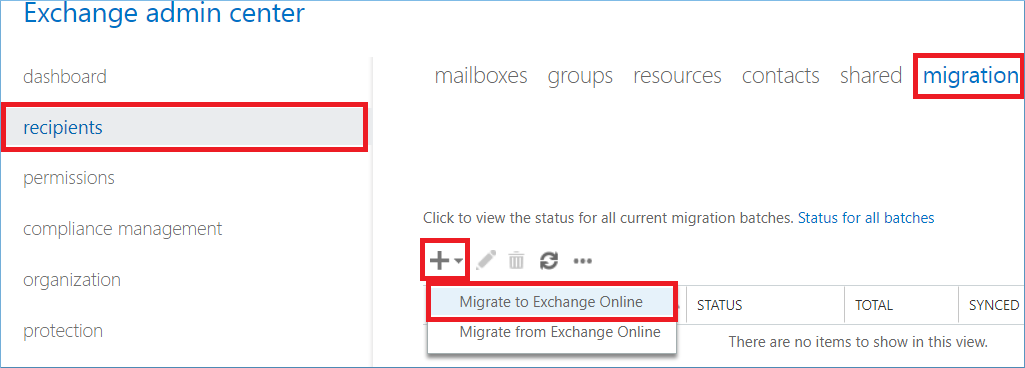
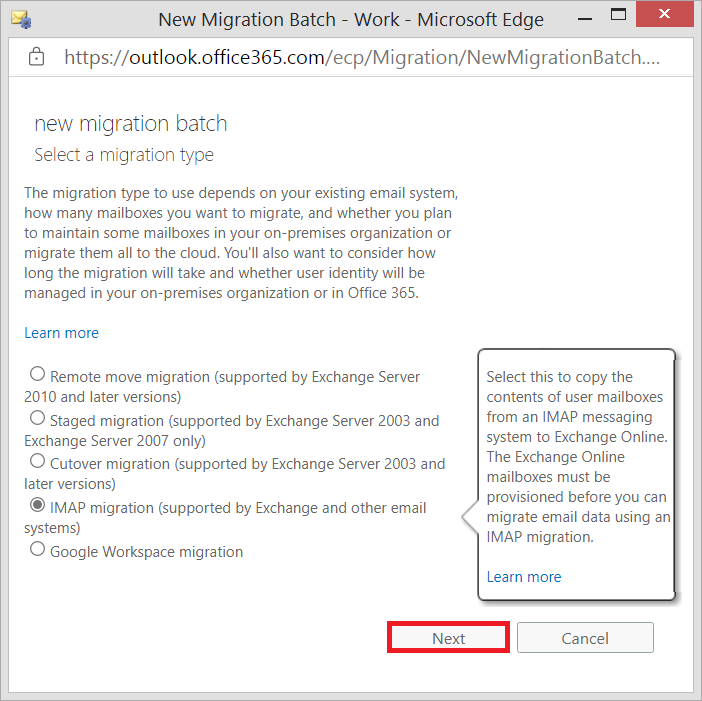
- Select IMAP migration, then click Next.
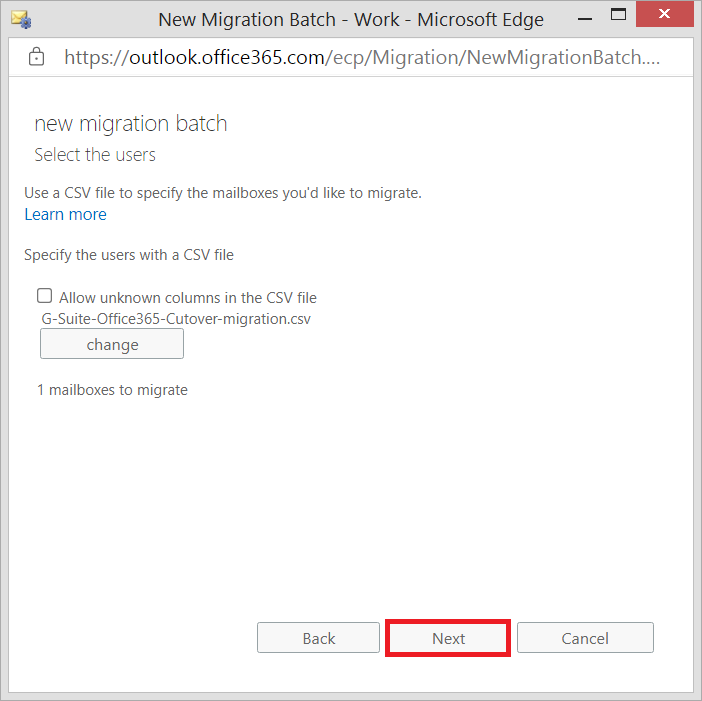
- The new page is Select the users page, where you need to click the Browse button to add the migration file.
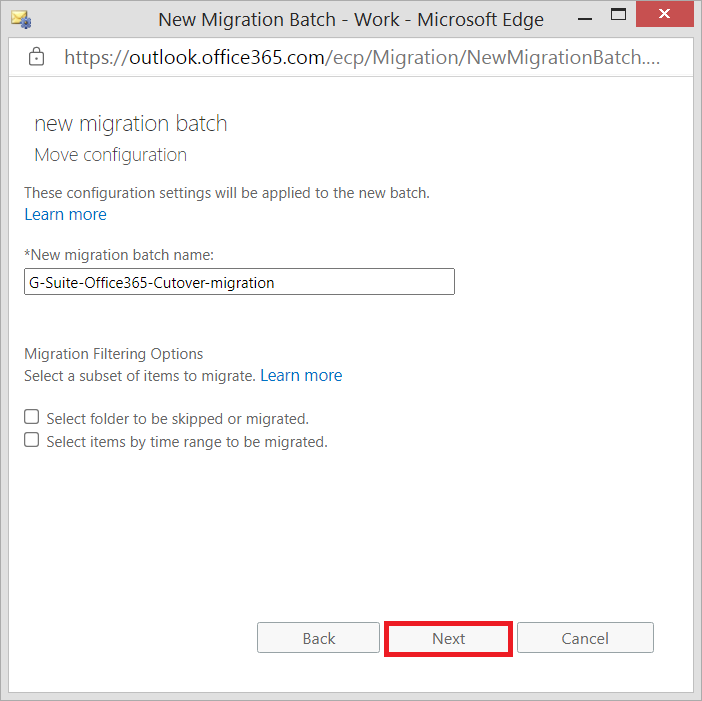
- In the new migration batch page, choose imap.gmail.com and leave the rest of the settings. Then click Next.
- The default name of the migration batch will be the same as the CSV file that you selected. Click Next.
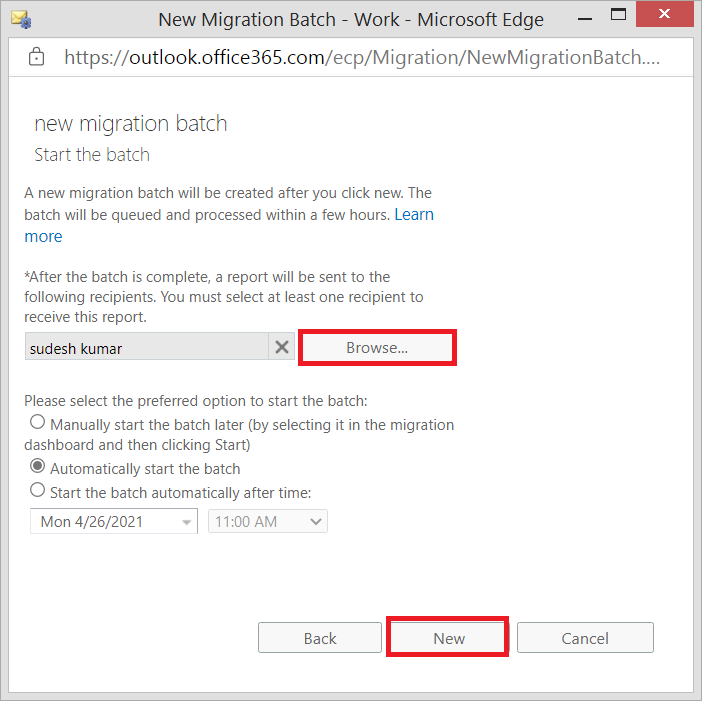
- Choose the account that will receive the notification after the completion of the migration. Also, choose the time that when you want to start the migration. Then click new.
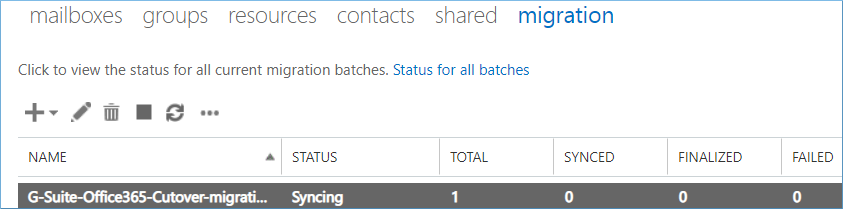
- A new migration batch has started, and its status as syncing.
Conclusion
The manual migration process to migrate Google Workspace to Office 365 is a lengthy process where the user needs to create a proper comma-separate value, migration endpoint at the Office 365 Admin Center, and then create a migration job using the migration endpoint.
This whole endeavor gives a limited result because it can migrate only the emails from Gmail account. It cannot migrate contacts, docs, and other important data. So, whenever you want to move from G Suite to Office 365, then you should use a professional software Kernel G Suite to Office 365 software. It will migrate the complete data from all the applications and you can apply various filters that make the migration a light-weight task.