Read time 6 minutes
Microsoft 365 provides total control to the Administrator to track the email flow. Microsoft maintains the email message body’s sanctity and does not check it, but whole email communication can be tracked easily. There is a dedicated feature called Message Tracking that checks sender/recipient names, message size, subject, send/receive date, time, delivery details, IP address, events information, Message-ID, etc.
The Messaging Tracing feature collects the information from the stored logs of the email flow. The user gets the complete information of the sent/received emails and the purged or deleted message. You can also choose to export Office 365 mailboxes to PST to secure all the essential information.
Message Tracing in Exchange Online (Office 365)
The Message Tracing in Exchange Online has some improvements with the introduction of new, simpler Message Tracing option in the Security & Compliance Center.
Read Also: 6 Office 365 Compliance Features You Should Know
We are going to learn all the details, options, and filters which an Exchange Online user can use to trace the details of emails processed in the mailbox. The complete process of the new Message Tracing in Exchange Online is given below:
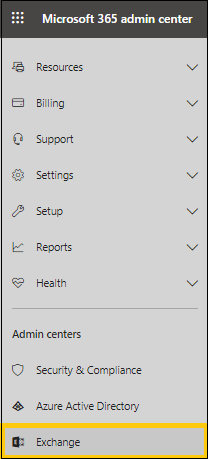
- Login to Exchange Online with global administrator credentials. Navigate to Admin > Admin centers > Exchange.
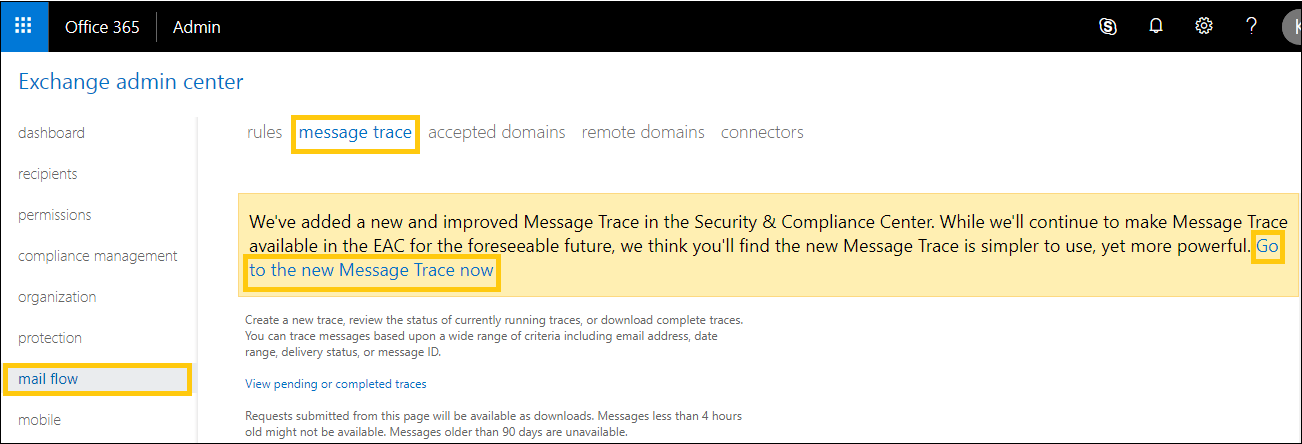
- Now, go to mail flow > message trace. In the opened page, you would find a message in yellow highlight. Read the message information and click Go to the new Message Trace now option.
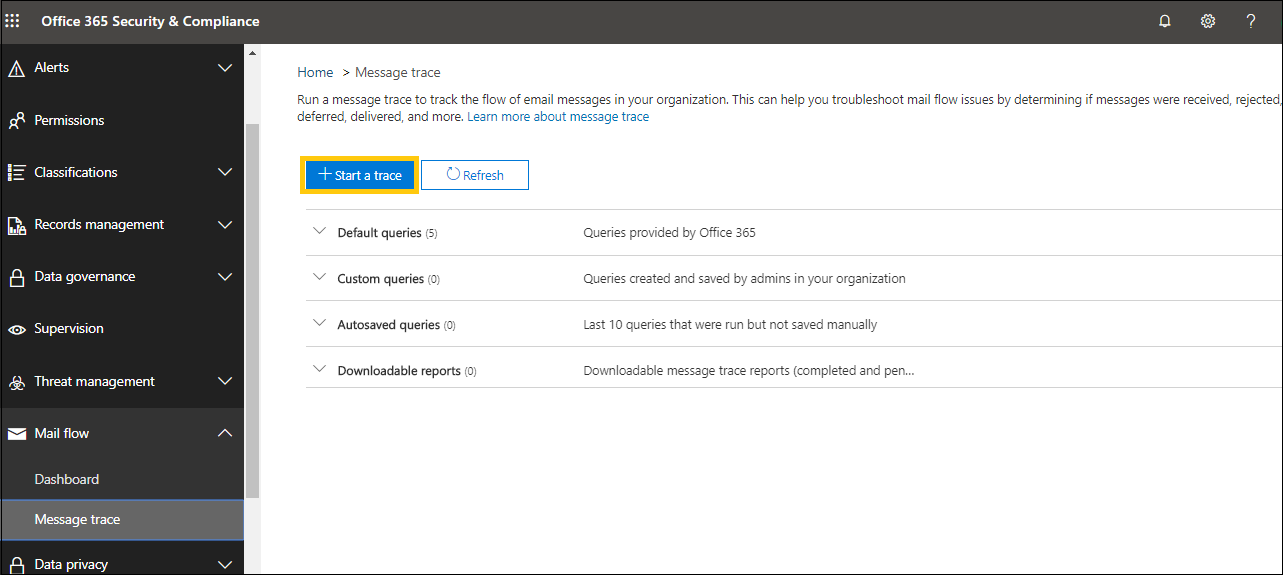
- The Office 365 Security & Compliance page will get opened. Here, select Message trace option under the Mail flow section.

- To run message trace, click + Start a trace option.
- The New message trace page will get opened. You can add filters for sent and received messages by adding sender and receiver email addresses in By these people and To these people respectively.
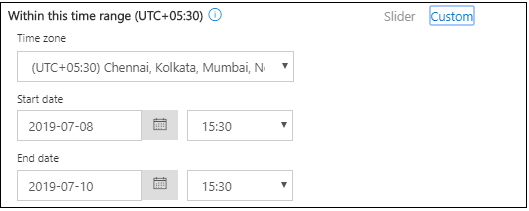
To add a time range, you can slide the bar to define the interval (from hours to days).
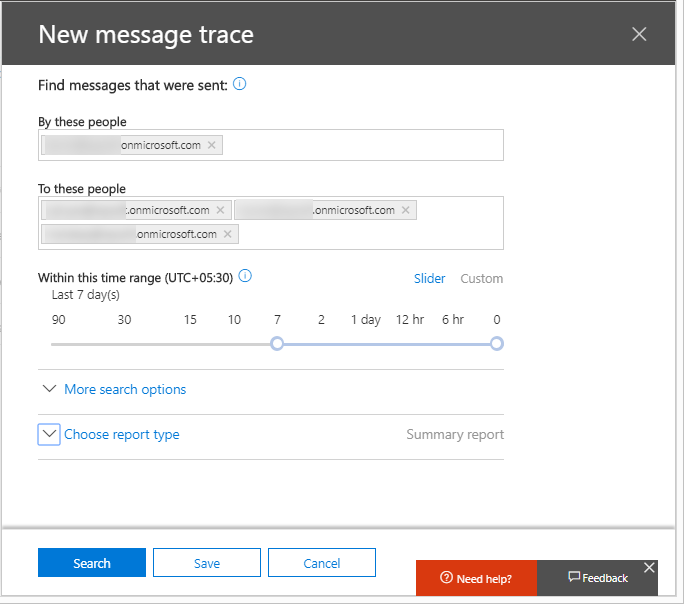
Note: The time duration of less than 10 days is the ideal one for quick results. And you can use Custom option and add Start date and End date, time for tracing the messages.
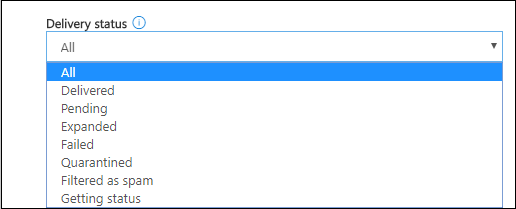
- There are more search options which you can select in More search options drop-down. Here, search is shown according the Delivery status criteria.
- More filter options are there, such as Message ID and Direction which you can utilize for in-depth filtering.

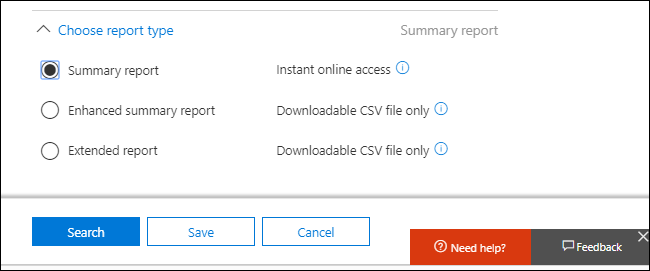
- You can also choose the Report type from the given options for the message trace.
Once all the filters and settings are added, click Search to start the scanning process.
- There are more search options which you can select in More search options drop-down. Here, search is shown according the Delivery status criteria.
- The results are shown along with the details of the email like Date, Sender, Recipient, Subject, Status, etc.
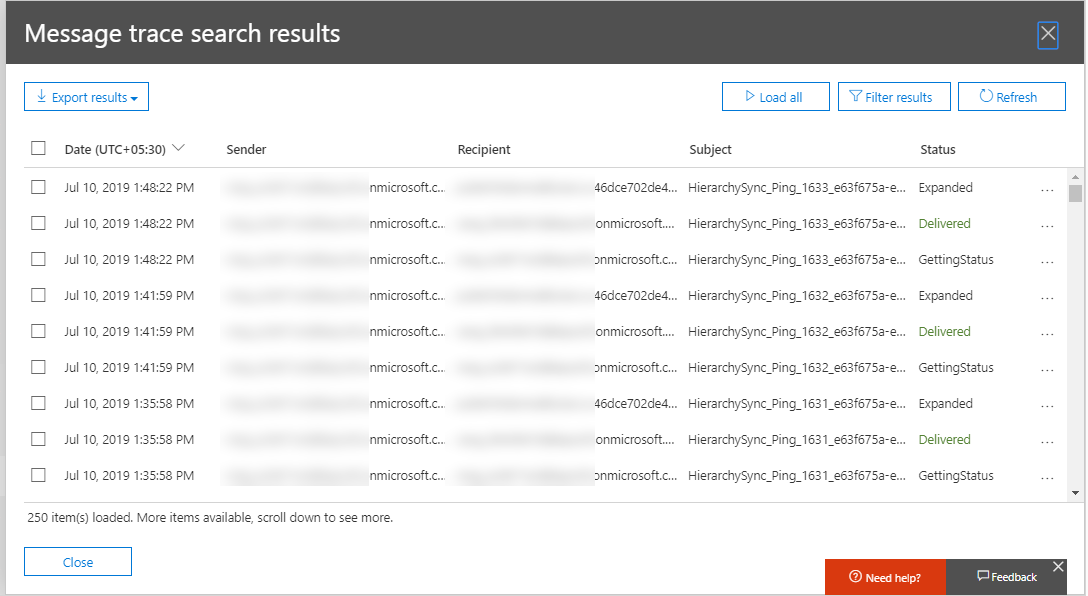
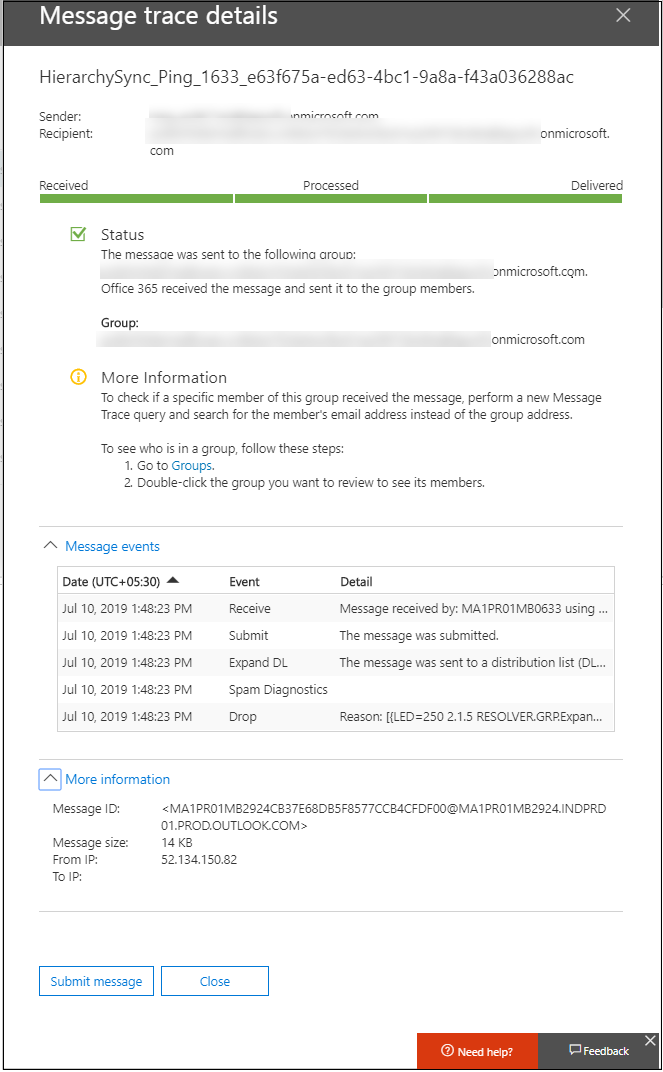
- To get the detailed information about any message, just double-click on it. The information that you will get is Sender/Recipient information, Message status with complete information in words, Message events, Message ID, Message size, etc.
Export Message Tracing Result List
To save message details to the CSV format, select those messages in Message trace search results and select Export selected from the drop-down list of Export results on the top. The message details will get saved in the CSV file in the Downloads folder.
![]()
Saving Message Query
Also, you can save your message query by clicking on Save option.
![]()
It will now show a confirmation message.
![]()
So, I hope users have got some idea about the message tracing in Exchange Online. If you have other requirements such as backup Office 365 mailboxes to PST for safeguarding your data, you can try Kernel Export Office 365 to PST tool. It helps to backup Office 365 data to PST format. It backs up emails, contacts, calendars, tasks, etc. to PST files. Advanced filters and compatibility with all Office 365 plans/Outlook versions are its plus points.
Conclusion
Microsoft 365 gives the best features to commit email communication and track it for business needs. To ensure that your data is safe, you should use method to backup data using the Office 365 Backup tool and save the PST file format’s mailbox data. The tool will maintain the data’s security, and you can use the PST file in an Outlook application.