Read time: 11 minutes
VLC, a powerful open-source media player, offers more than just playing local videos. It’s designed to stream YouTube content with ease. However, some users have encountered the frustrating error message, “VLC is unable to open the YouTube link. Check the log for details.”
In our post, we’ll take a look at the common issues behind this problem and provide effective solutions so that your YouTube videos play smoothly in VLC. From updates to tweaking settings to troubleshooting tips, we will give your expert assistance. Follow us to know more.
Best solutions to fix this issue
Here, we have listed almost all the causes of the specific issue with their solutions. You can refer to it if you are facing the same issue on your system:
Solution 1: Update VLC to its latest version
The VLC not playing issue may appear on your system if you are using older versions of VLC Media Player. You can resolve it by updating your VLC to its latest versions. It is the primary solution that doesn’t require extensive efforts to resolve the issue. Once you have updated your VLC Media Player, check whether the issue has been resolved after relaunching the application.
Solution 2: Disable cookies forwarding setting
Before practicing this solution, you must safeguard your files and keep their backup as it leads to a security breach. Also, ensure that you use the trusted network to prevent loss. If you want to use this method, you need to follow the below steps:
- First, open VLC Media Player and click on the Tools option from the top menu.
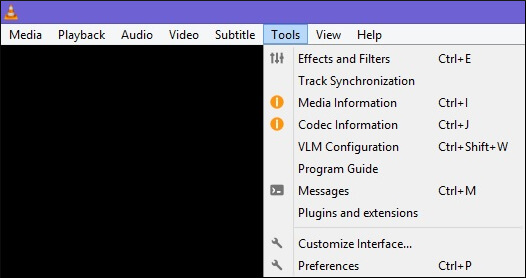
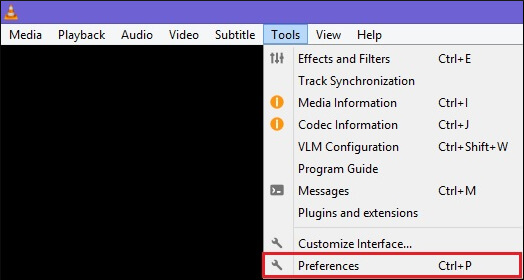
- Next, choose the Preferences option.
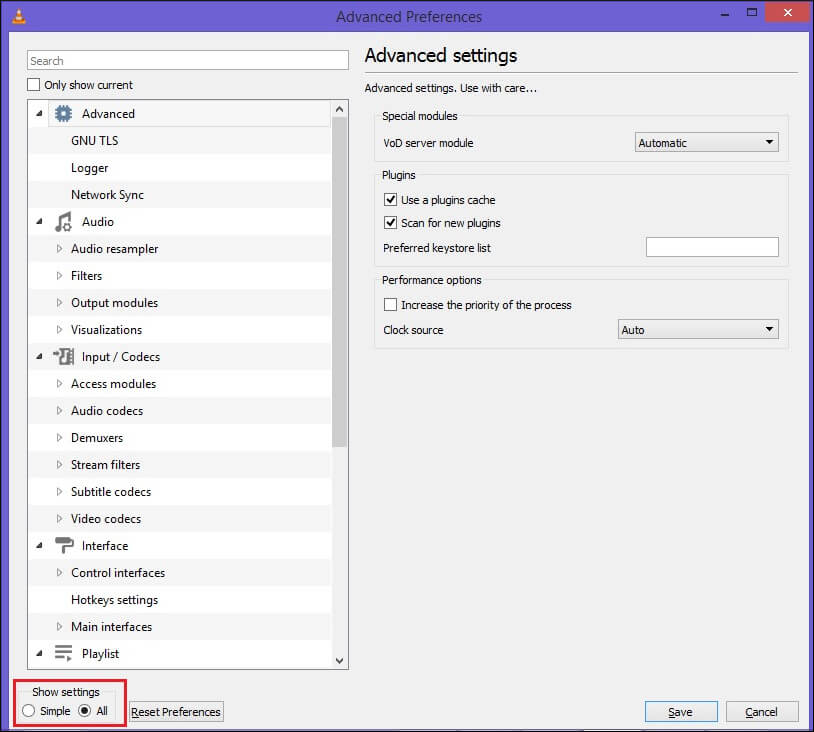
- A new window will now appear on the screen. You need to change the Show Settings option from Simple to All (available at the bottom left corner of the window).
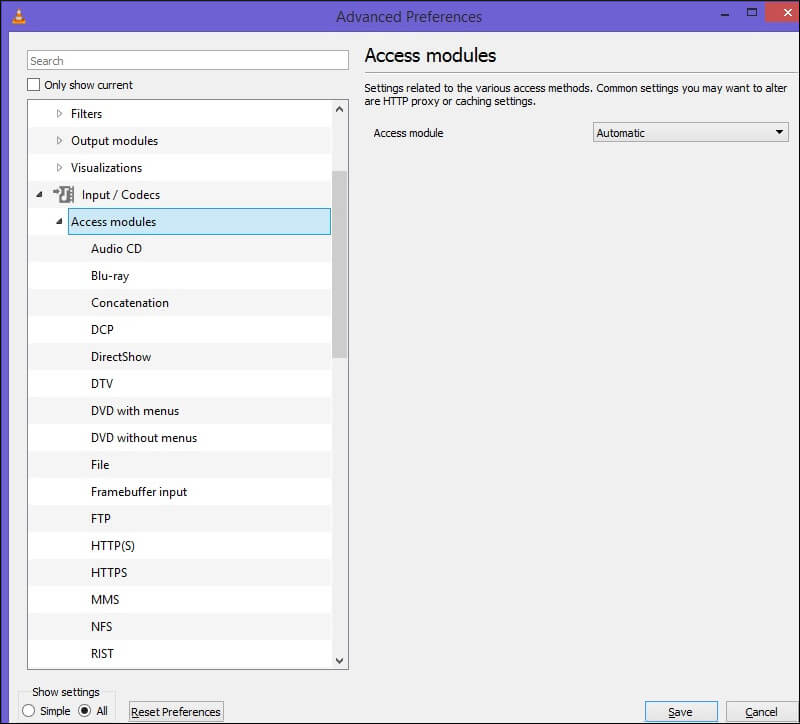
- Double-click on the Access modules option in the Input/ Codecs.
- After that, click on the HTTPS and untick the Cookies forwarding.
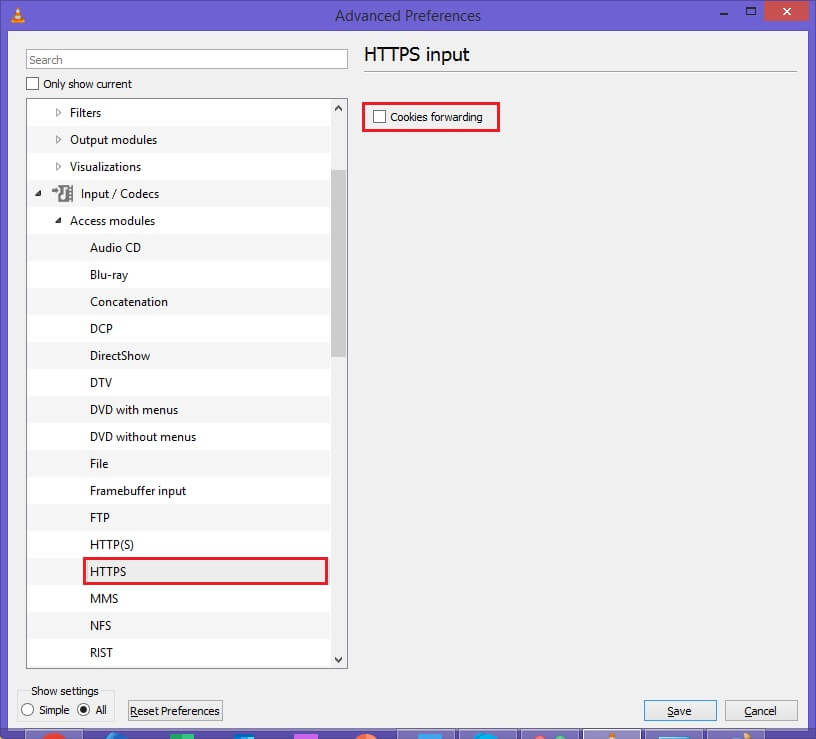
- Finally, click the Save button to save the changes.
- At last, check whether the issue has been resolved or not.
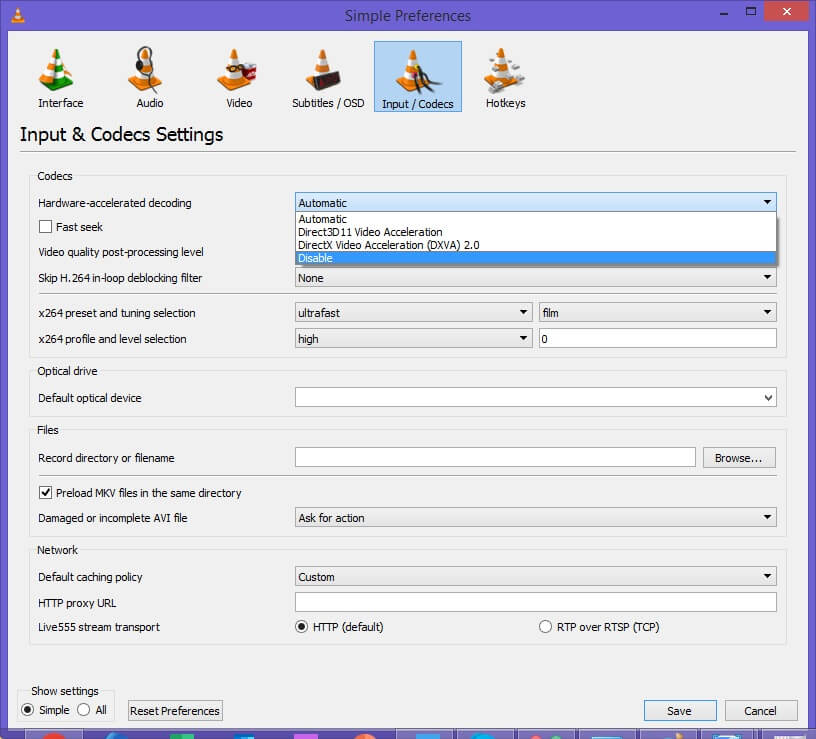
Solution 3: Disable Hardware-accelerated decoding
You might know that VLC Media Player includes a Hardware Acceleration feature to enhance the encoding and decoding process of certain video types. But some users also find some compatibility issues while enabling this feature. It might be the reason behind the specific issue faced in the VLC media player. Therefore, disabling the hardware-accelerated decoding may be a good solution for this. To do this, you must try the following steps:
- First, click on the Tools option from the top menu and select the Preferences option. You can directly open the VLC preference window using the shortcut Ctrl + P.
- After that, click on the Input/ Codecs tab from the top menu.
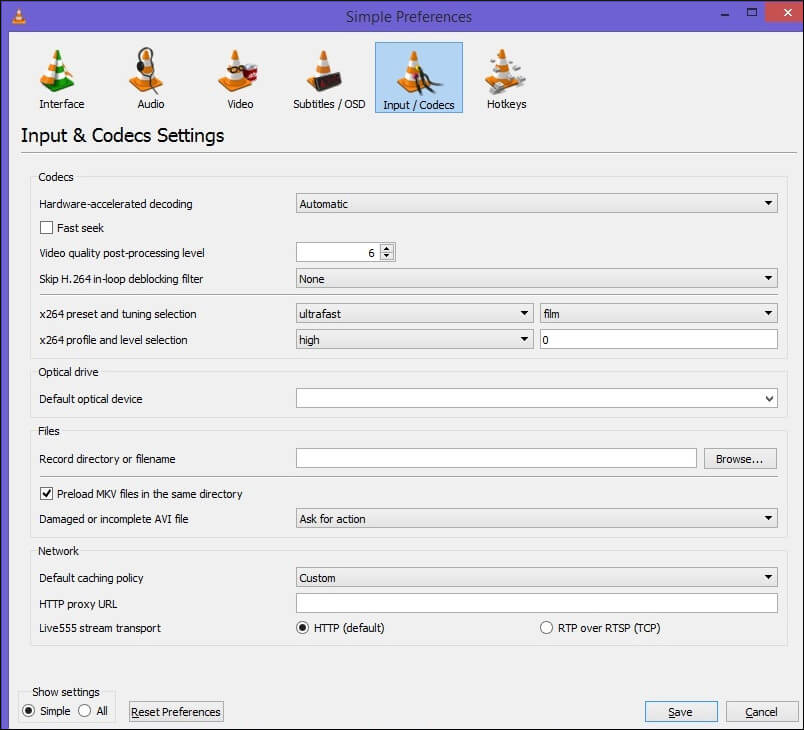
- Now, disable the Hardware-Accelerated Decoding by changing its settings from Automatic to Disable. You can see this option under the Codecs section of the VLC Preference window.
- Once you have done these steps, click the Save button to save the changes.
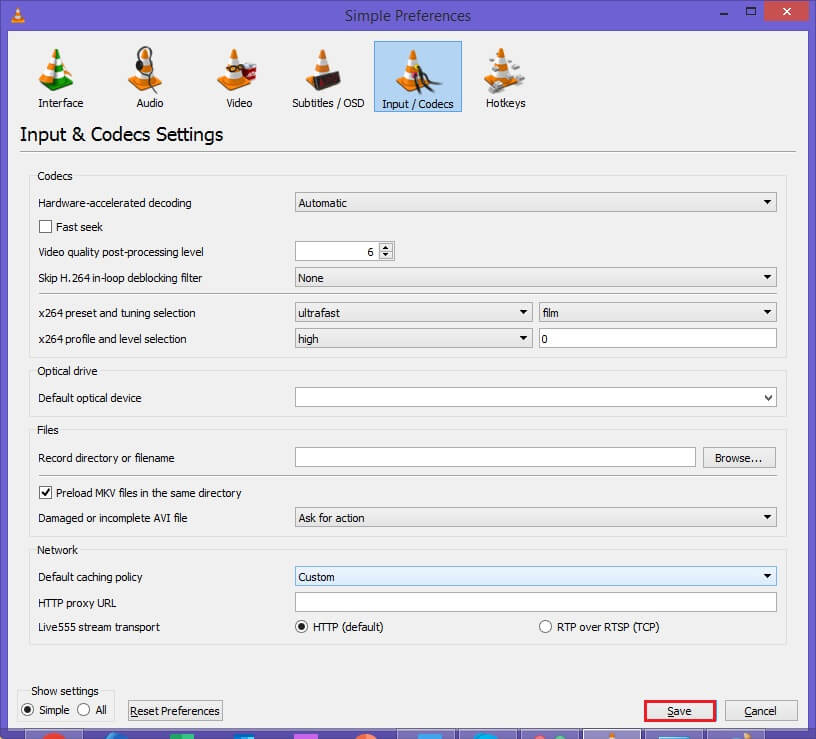
At last, check whether the issue has been resolved after relaunching your VLC media player.
Solution 4: Replace the existing Youtube.lua file
In this solution, you must replace your existing youtube.lua file with the new one. For this, you need to follow the below steps:
- First, download the youtube.lua file from the official VLC download link.
- Open Windows Explorer by pressing Windows + E keys together.
- Next, copy-paste the below address in the website address bar:
- After that, locate your existing .luac file and delete it.
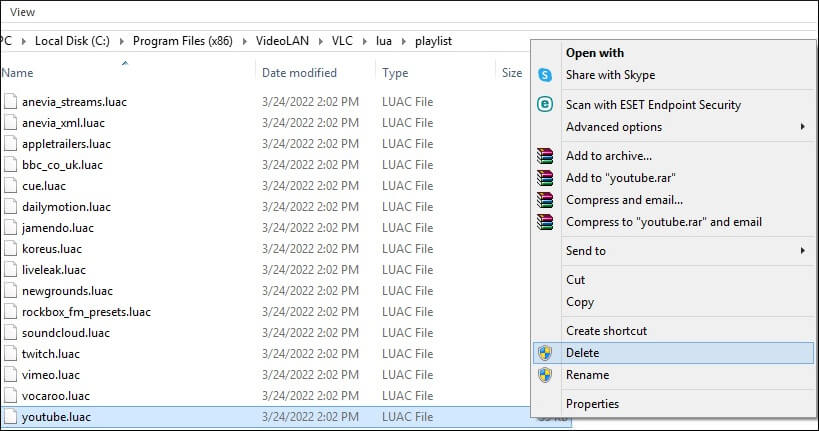
- Now, copy your newly downloaded youtube.lua file from the Download folder of your operating system.
- Paste the specific file in the location listed in step 3.
- Open the Open Media window by pressing Ctrl + N after reopening the VLC media player.
- That’s it. To see if the issue is resolved, enter the YouTube streaming video URL, and hit the play button after relaunching your VLC media player.
Solution 5: Rename existing YouTube.lua file
This solution is somewhat similar to the previous one; the only difference is that the Youtube.lua file will not be replaced in this solution. Here, the .lua file will be renamed to the .luac file. As it doesn’t replace the existing .lua file, downloading a new .lua file is not required in this solution. To make this solution clear for you, we have listed the steps the that are as follows:
- Open Windows Explorer by pressing Windows + E keys together.
- Copy-paste the below address in the website address bar:
- Now, rename youtube.lua file with youtube.luac.
- That’s it. If you want to check whether the issue has been resolved, enter the YouTube streaming video URL, and hit the play button after relaunching your VLC Media Player.
Solution 6: Increase file caching and network caching values
VLC Media Player caches a small amount of content on the system for continuing the playback even after interruptions on the connection. But, if VLC Media Player fails to perform the same and fails in playing online videos or playing in freezing or lagging conditions, this solution seems a great option. In such cases, you need to increase the file caching and network caching values in VLC to resolve the specific issue. If you want to perform this solution, you need to follow the below steps:
- First, open VLC Media Player and click on the Tools option from the top menu.
- Next, choose the Preferences option.
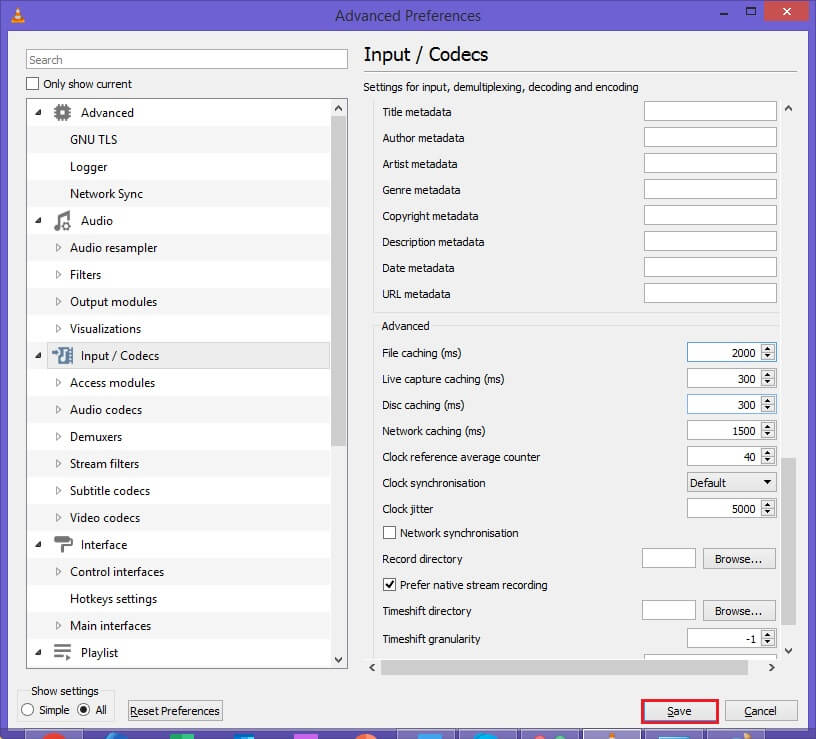
- After that, a preference window will appear on the VLC. Click on the Input/ Codecs tab from the top menu.
- Change the Show Settings option from Simple to All, available at the bottom left corner of the window.
- Now, click on Input/ Codecs listed on the left panel of the window.
- After that, scroll down on the right panel of the window and change the Network caching value to 1500 and the File caching value to 2000. You can find these options under the Advanced section of the Input/ Codecs window.
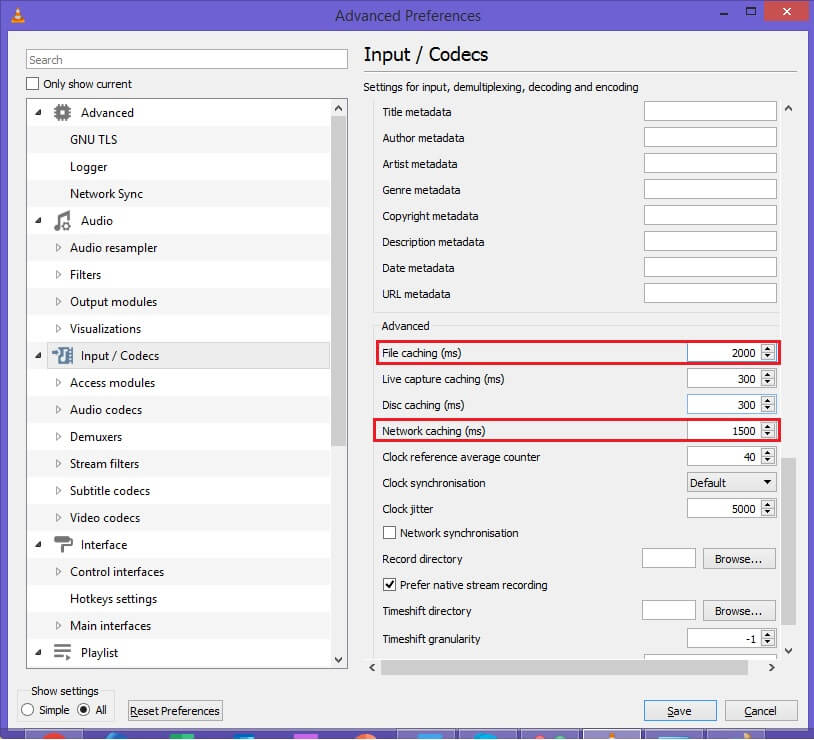
- Click Save to save the changes. That’s it.
Solution 7: Give up YouTube AV1 streaming in VLC
AV1 is an open-source video coding format mainly used for video transmission over the internet. It is a strong competitor of HEVC and was developed as a successor to VP9 by Alliance for Open Media (AOMedia). You must know that most YouTube videos are encoded by AV1. The VLC Media Player also supports 12-bits decoding of AV1 since version 3.0.6. You might face issues in VLC while playing AV1 video with av01 subcodec. Hence, converting the AV1 (av01) video to other formats (like MP4, MKV, MOV) is a great option for resolving the specific issue. For this, you need an advanced video converter tool that must be proficient in video conversion and offers prominent user features.
You can try Kernel Video Converter to perform the same tasks as it supports a wide range of video formats like MP4, MPEG, M4V, MOV, WMV, 3GP, and many more. This tool enables users to convert unlimited video files simultaneously. By using it, you can also convert videos into audio formats. In addition, it offers better performance & accuracy and is supported on all Windows platforms.
Solution 8: Reset the VLC preferences
The preferences files in VLC Media Player are mainly responsible for storing all its important settings. It might be possible that this file has been corrupted due to any reason. It results in the abnormal behavior of the VLC media player. Hence, you must bring it back to its original state by resetting the VLC preferences. To perform this, follow the below steps:
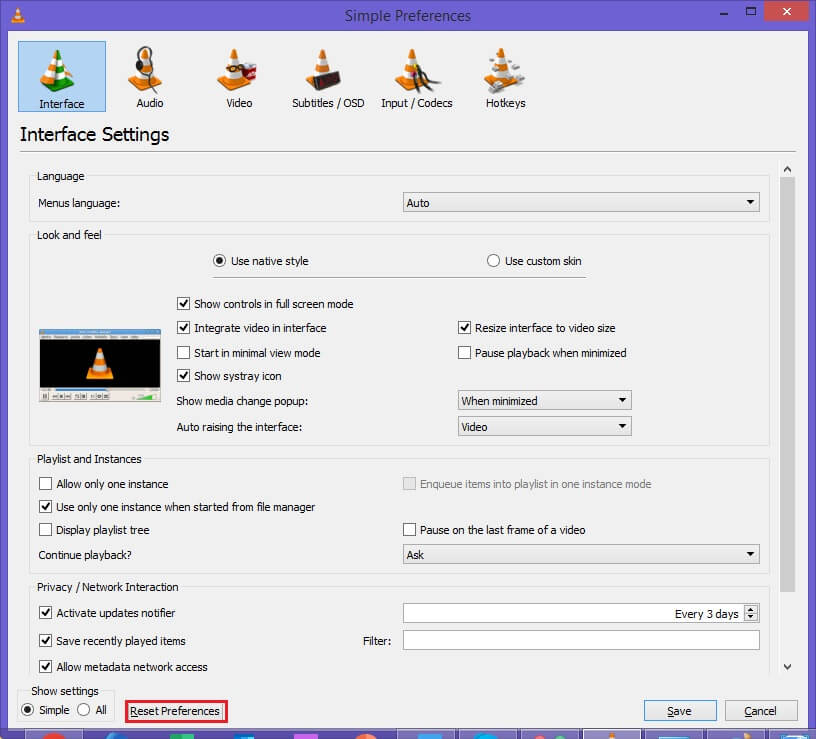
- Open Preference Window by using the shortcut Ctrl + P.
- Click on the Reset Preferences option at the bottom of the window.
- Confirm your selection and then click on the OK button.
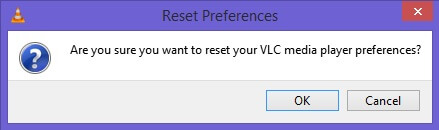
- At last, restart your VLC media player and check whether the issue has been resolved.
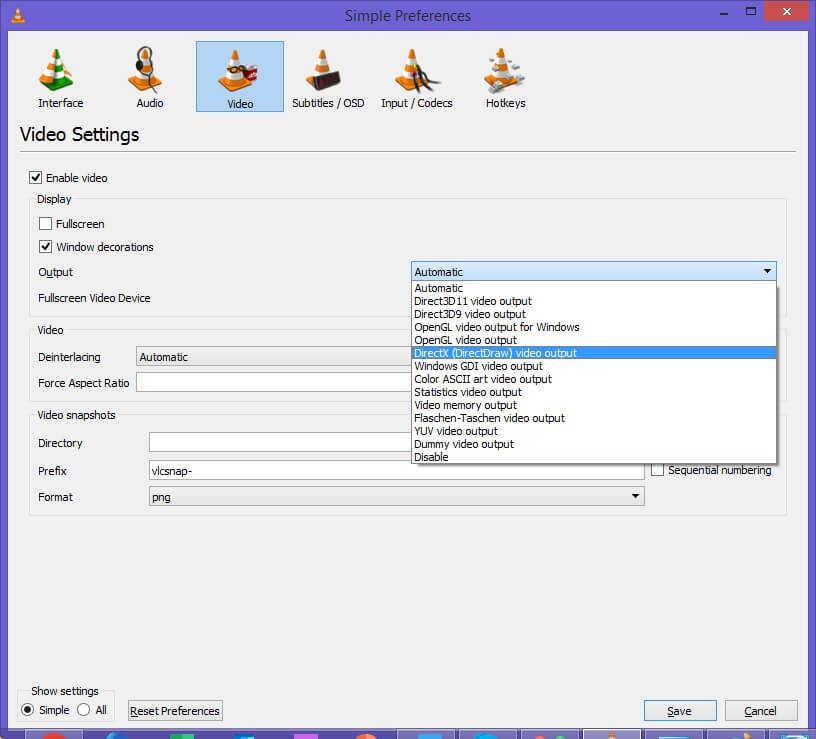
Solution 9: Choose DirectX (Direct Draw) as the default video output mode
By default, VLC Media Player uses the OpenGL video output for Windows for the video output mode. But it might be possible that this output mode failed to play certain types of videos. Hence, you can set the output mode to DirectX to resolve the problem. To do so, you need to follow the below steps:
- Open the Preference window by using the shortcut Ctrl + P.
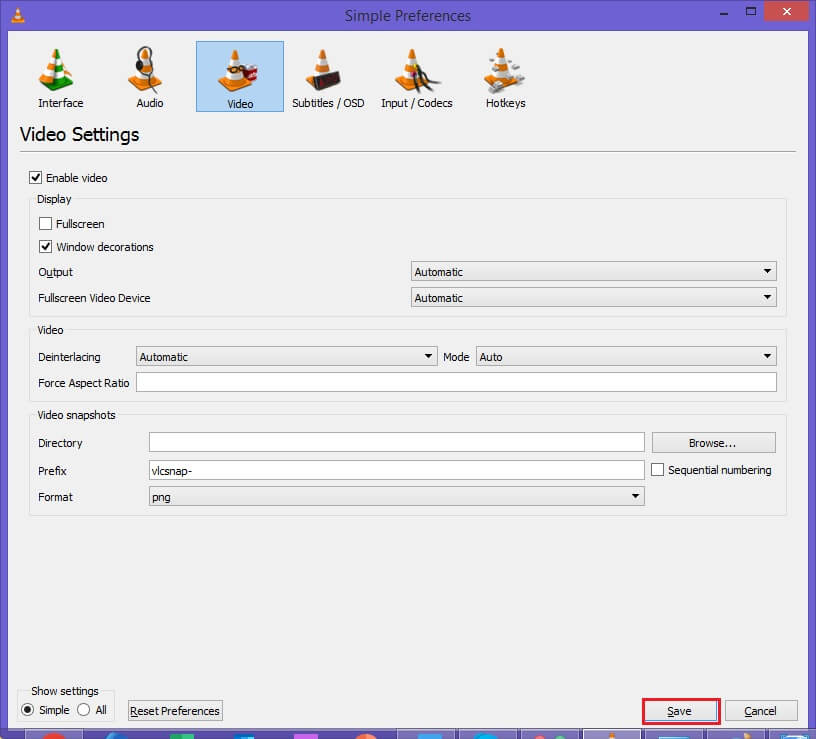
- Click on the Video from the top menu.
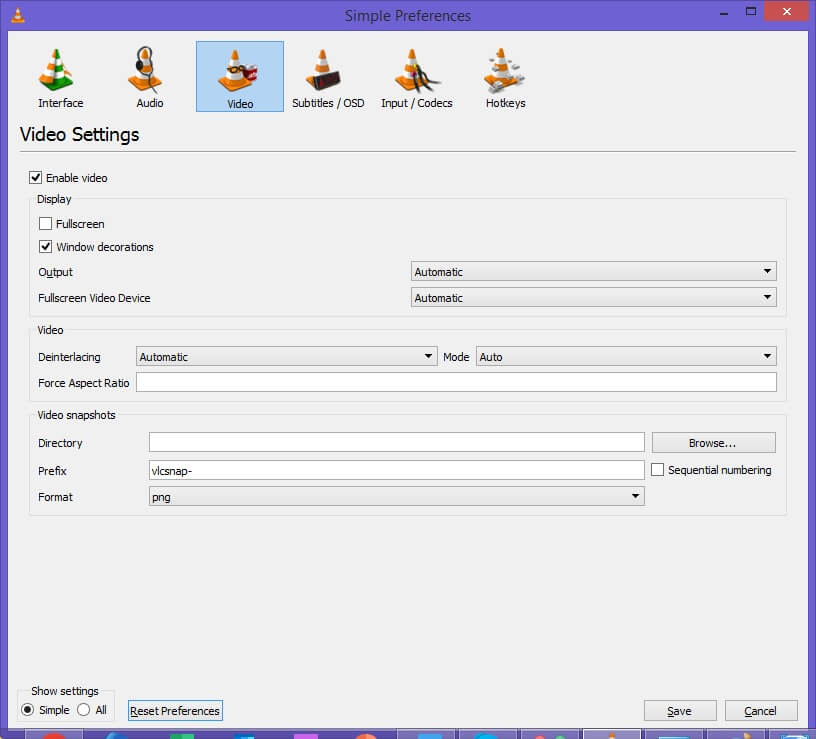
- From the drop-down menu of the Output option, you must select DirectX Video Output Mode.
- At last, click on the Save button to apply the changes.
Wrapping up
With different solutions discussed to fix “YouTube Videos Not Playing in VLC”, there will be a fully effective solution that works for your situation perfectly. But before you try out any of these solutions, make sure your system is fully updated to its latest version.
In case, all solutions fail, our recommended Kernel Video Repair tool has always got your back so, make use of this utility at times of cooperation and other complex issues. With its easy to use interface and user-friendly guide, you can fix all related video issues in no time.
FAQs
Yes, but it only supports AVI files. Due to this, you will have to convert the downloaded file to AVI format so that the media player can repair it.
It is possible to repair the video with Kernel Video Repair software. Using this software, you can fix any errors in the file and remove any header issues. In addition, it offers a powerful repair option for severely damaged files.
Kernel Video Repair, in contrast to VLC, is a tool for repairing old or corrupted videos. While VLC cannot repair most file types, Kernel Video Repair can fix all video formats, including MKVs and MOVs.