Read time: 5 minutes
If you utilize mailboxes in Microsoft 365, it’s crucial to understand that Exchange Online Protection employs various methods to safeguard your email experience. This includes maintaining a Safe Sender list, which ensures users receive emails exclusively from authorized and trusted sources.
Despite marking an email as “Safe” or “Not Junk,” it can still end up in the “Junk” or “Spam” folder. This happens because the Online Exchange Server hosted by Microsoft remains uncertain about the email’s suitability for the Inbox.
Let’s discuss the Whitelist – it consists of approved sender email addresses, allowing them to bypass spam filters without obstruction. Whitelisting an email address can be done through two distinct methods, depending on the desired level of security.
Note- Users can add the email address to the allowed sender list in the Anti-Spam policy, as the emails sent from this address will bypass all security checks, including SPF and DMARC.
Whitelist email address in Office 365 using Mail flow rules
Mail flow rules are considered a more secure option to keep the DMARC check-in in place.
- Go to the Exchange Admin Center and click Mail Flow.
- Select Rules and add a new rule for Bypass Spam Filtering.
- Select the sender under the Apply this rule if drop-down list.
- Enter the email address and click on the Check names button to move your address to the Add field.
- Now click the Ok button and exit the window.
- In the Do the following field, Set the spam confidence level (SCL) to Bypass Spam Filtering should automatically be selected.
- Finally, click the Save button to apply the policy.
Whitelist Email Address in Office 365 using Microsoft 365 Defender
Users can add the sender to the Whitelist in Office 365 by using the Microsoft 365 Defender.
- Go to the Microsoft 365 Defender and click on Policies and Rules.
- Now choose Threat Policies and open the Anti-Spam policies.
- In the flyout window, Scroll down, click on the Edit allowed and blocked senders and domains, and open Manage sender(s).
- Now, to add a new sender, click on Add senders.
- Now click on Done and the save button to apply the changes.
Steps to whitelist an email in Gmail
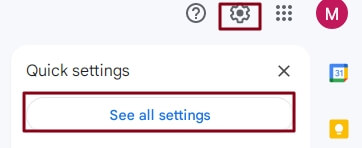
- Go to the Setting icon at the top-right section of the Gmail screen.
- Now go to ‘See all settings’ available at the drop-down list of settings
- Click on the Filters and Blocked Addresses tab present at the top of the screen.
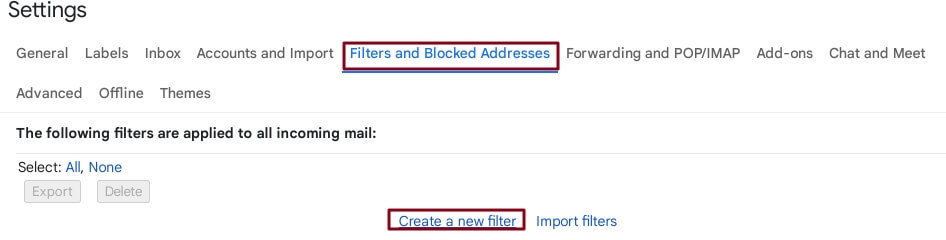
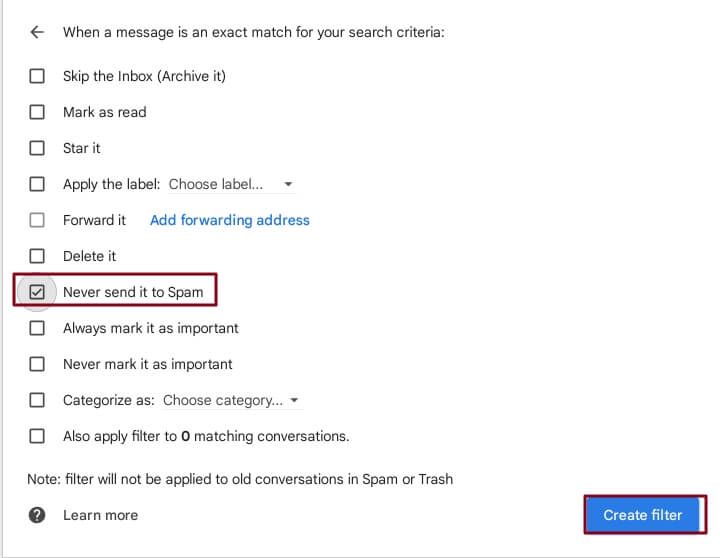
- Next, go to the Create new filter and add the sender email address into the From section.
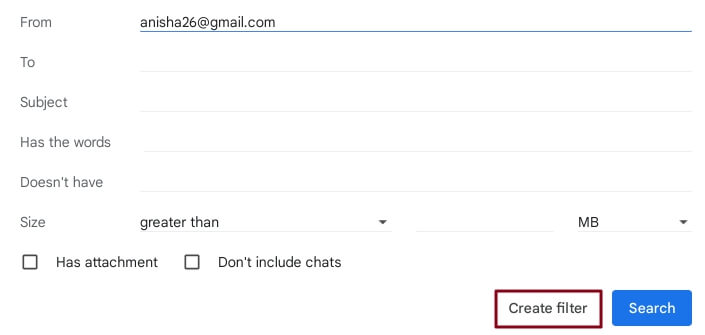
- A new window will appear; here, check the box Never send to Spam and click on the create filter button.
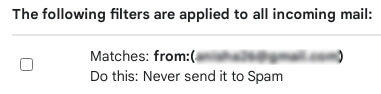
Now you can see the list is ready with a filter.
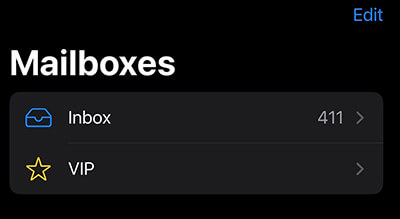
Steps to whitelist an email in Mail/Apple Mail
- Go to the Mail app.
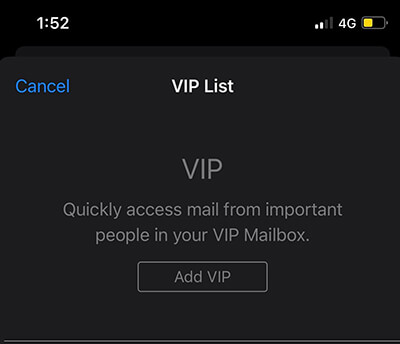
- Now go to VIP.
- Here, add the contacts to Whitelist in the VIP list.
Steps to whitelist email addresses in Yahoo Mail
- Go to Yahoo Mail and select Settings.
- Here, Select Filters and click Add.
- Name the filter and add the sender’s email address.
- Select to send all mail to Inbox.
- Select Save.
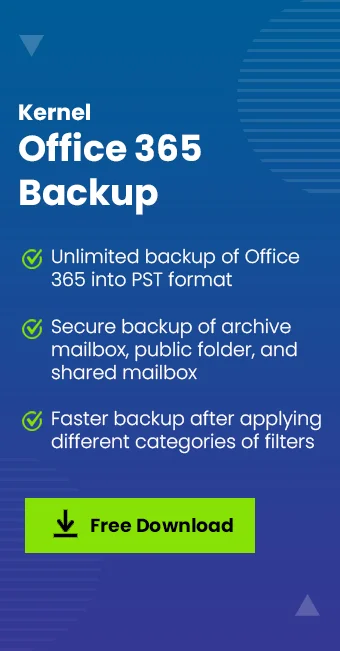
While the above methods can help whitelist desired email addresses, manual solutions may not guarantee results, leading to important messages landing in spam folders unbeknownst to us. To mitigate this risk, consider backing up all mailbox items for added security. We recommend using Kernel Office 365 Backup and Restore, a reliable solution for backing up all mailbox folders, including Inbox, Outbox, Junk, Deleted Items, Sent Items, and more.
Conclusion
Whitelisting email addresses is crucial for maintaining a clutter-free and organized inbox. To ensure the safety of important mailboxes, consider trying the Office 365 Cloud Backup tool, which also includes comprehensive calendar entry backups, covering appointments, meetings, events, venues, categories, and more. We hope you find this blog useful. Please feel free to leave any queries related to the topic in the comments below.