Read time 9 minutes
Sometimes, Database Administrators – DBAs, encounter a problem which usually is not common, though the chances of its sudden appearance are positive – the problem we’re addressing here is Suspect Mode.
In rare situations, database administrators find that the SQL Database has become inaccessible and marked with the word Suspect.
The Suspect Mode is a tricky one because it shows that the recovery process has been initiated but not completed successfully. In such a situation, the administrator is not sure whether the database will be restored and is confused about what actions should be taken.

In this article, we’ll discuss the database suspect mode situation and things like what the consequences will be if you encounter the same and will walk you through some tips to recover SQL Database from suspect mode.
The article shows all the steps to remove the Suspect Mode for the SQL database through DBDC CHECKDB and ALTER DATABASE commands. However, if the database is facing any corruption, then the above command may delete the data. So, you should use the software and recover the whole database from any kind of corruption. After recovering the database, you can save the database back to SQL Server and start using it again.
What happens when SQL server marks the database as suspect?
Before we start, let us see what happens when the SQL Server marks the database as Suspect?
Whenever a database receives the Suspect stamp from the SQL Server, it turns inaccessible and reflects the risk of data loss, straight.
In other fine words, because of the damaged primary file group, the database gets marked as Suspect, as it becomes inaccessible during the startup of SQL Server.
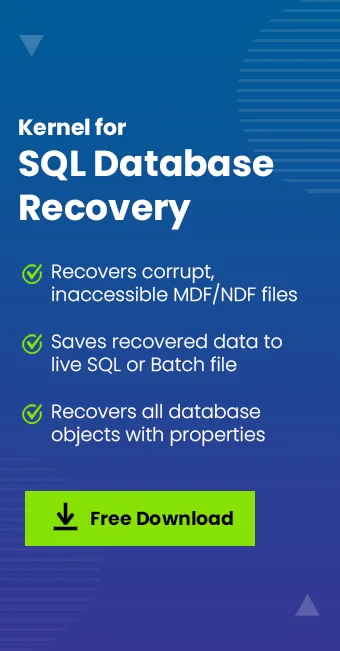
Access the fastest tool Kernel for SQL Database Recovery to recover SQL Database in Suspect Mode. This software can quickly resolve all corruption errors related to SQL Database.
What causes the database to be marked as suspect?
There lay many reasons that can lead to the same scenario, as each time why it happened, the reason behind it may vary.
Below are a few arguments from many that state why the SQL Server marks the database as Suspect:
- Hardware Failure.
- Database server faces improper shutdown.
- Unavailability of log files.
- Lack of disk space.
- Unavailability of database files.
- Log files are corrupt.
- Unavailability of the database resource.
- Incorrect assertion of free data page space upon insertion of a new row.
- Third-party software and applications inflictions to SQL database
- SQL cannot finish a roll forward and roll back operation.
How to recover SQL database from suspect mode
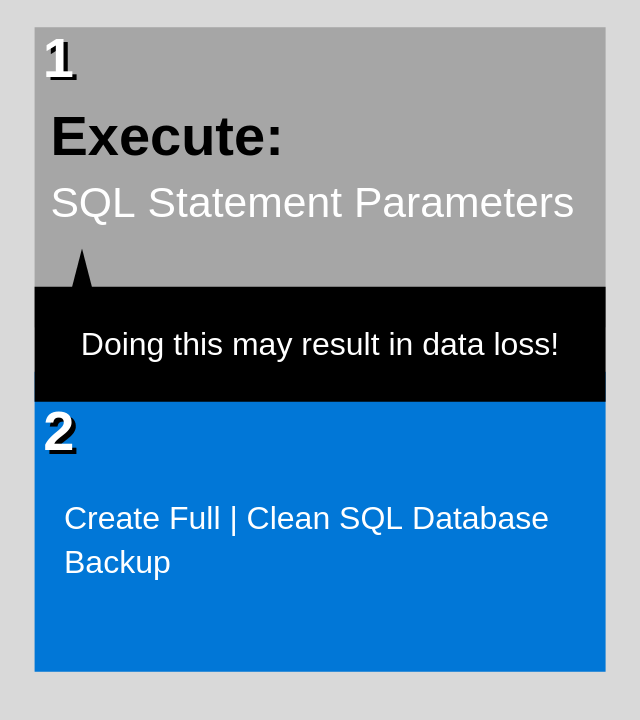
The issue of Suspect Mode can be addressed via different ways – specifically two, the first method requires the use of SQL statement parameters and the second is the direct recommendation to use SQL Database backups.
We will discuss both the methods one by one, starting with SQL statement parameters:
We will start by resetting the database status using which will turn off the suspect flag on the database. First of all go to the SQL Server Management Studio and connect to your SQL database. Then click on New Query option under the menu bar. Then start running the below provided SQL scripts.
- EXEC sp_resetstatus ‘yourDBname’;
Note:
yourDBname is the example database name, change it with a real SQL database name. - ALTER DATABASE yourDBname SET EMERGENCY
Note:
This SQL statement parameter will change the database state and set it to Emergency to provide flexibility to perform tasks on a corrupt/suspect SQL database. - DBCC checkdb (‘yourDBname’)
Note: This statement will initiate a consistency check on the select database to find out changes or loss of data such as rows or columns.Again, change yourDBname with your database name.
Executing DBCC checkdb can produce distinct results, which can decide whether to proceed with SQL statement parameters any further or not.
Below are those outcomes – proceed accordingly to the result you receive on-screen:
- In some cases, executing DBCC checkdb can fix the issue by resetting the database status. To confirm this check your database status. If the status has changed, stop here and don’t proceed with the next step.
- If the database status didn’t change after the above statement execution, try running the command EXEC sp_resetstatus ‘yourDBname’; and database status again, If the change reflects, the issue is gone.
- In case if an inconsistency is detected, proceed to the next step.
- Run CHECK DBCC for similar errors like below:

- ALTER DATABASE yourDBname SET SINGLE USER WITH ROLLBACK IMMEDIATE
Note:
This SQL statement will initiate rollback all running transactions and set the SQL Server database in single user mode for maintenance purpose. - DBCC CheckDB (‘yourDBname’, REPAIR_ALLOW_DATA_LOSS)
- ALTER DATABASE yourDBname SET MULTI_USER
Note:
Upon completion of the SQL server database repair – initiated in step-5, this statement will set the database back to multi-user mode.
Executing the above SQL statement parameter can fix the Suspect issue, execute as per the instructions mentioned above under notes.
If no inconsistency is found in step-3, there is no need for step 4-6 but go through the points given in step-3 and proceed as per the result you receive.
Now, before discussing the second method – primary & the recommended one, let’s shed some light on step-5:
DBCC CheckDB -When exactly to run this SQL statement?
It is strictly recommended not to run this statement if no inconsistency is found in step-3.
If Executed, What the Consequences Will Be?
- The data will be lost for sure if this SQL statement is executed, and afterward, the user – DBA or admin, is left with another job of retrieving the lost data, which is not possible.
- Running this SQL statement affects business and the organization will suffer, as the lost data can’t be recovered back.
- The SQL Server Database cannot revert to the earlier state.
What to do when native or recommended methods fail?
When the issue of database file corruption or damage or suspect mode occurs, in some cases due to the error ferocity, it becomes almost impossible to fix the issue and recover the data.
The chances of the corrupt or damaged database file(s) recovery also turn negative in the absence of a full SQL Server Database backup. In similar scenarios like this, it is best to make use of a professional and advanced tool that is designed to fix these problems, Kernel for SQL Database Recovery fills the space perfectly when none of the native approaches comes handy.
It is a one-stop-shop for all SQL Database file(s) issues, name it, file(s) corruption, or damage or suspect status. It enables you to recover all the database objects and is compatible with both MDF & NDF database file(s). Live recovery to SQL Server, creation of backup of the database after restoration in the script, and wide compatibility with versions of SQL Server are a few highlighted features of the tool from many.
We have made the database file(s) recovery simple with no requirement of technical expertise throughout the process, and to help you better, below is a demonstration of corrupt SQL Server Database file recovery via this efficient tool, go through the steps one-by-one:
Kernel SQL database recovery
Below are the steps of the recovery process:
- Open the installed the tool.
- Click Browse to select and add the corrupt or damaged SQL Server Database file and click Recover.
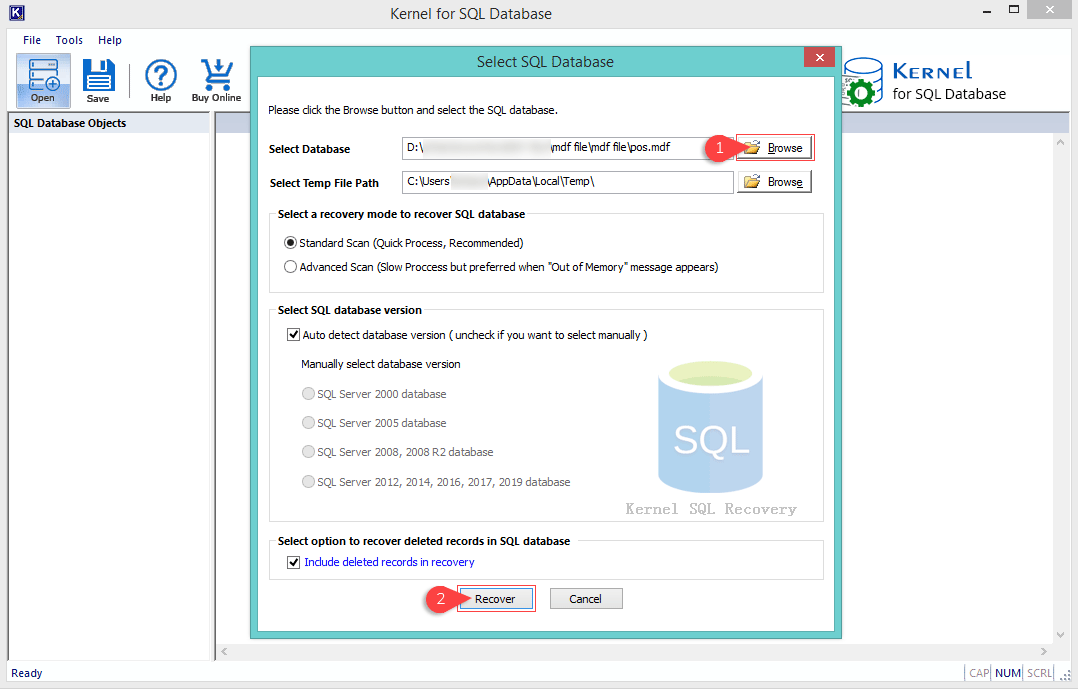
Note:
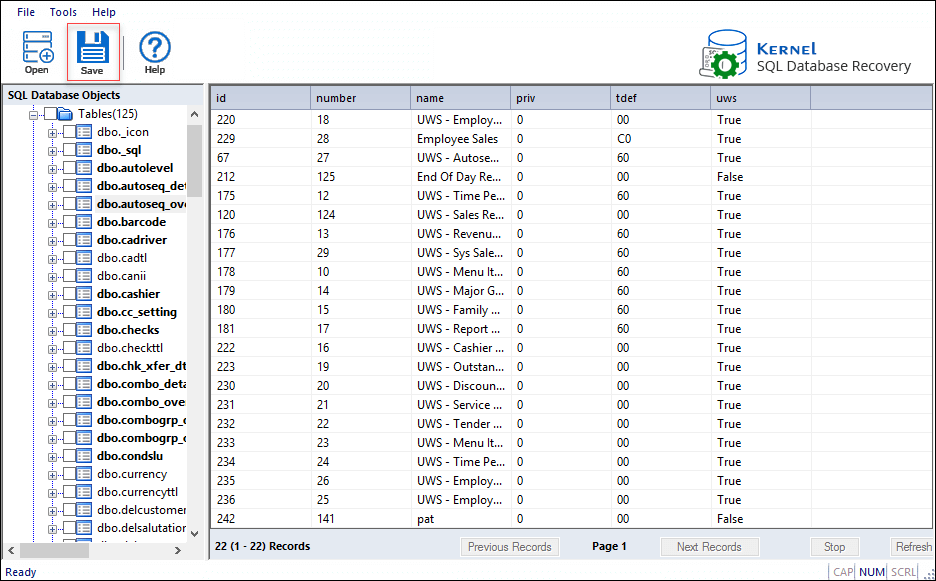
In case, if the database version is not selected, uncheck Auto detect database version option, and select manually. - Once the database file scan competes, data will get retrieved on-screen as below. Select the desired SQL database objects and Click Save,
- Input SQL Server Name and Server Authentication details; click Ok,

Note:
Select Batch File option, to save in batch file at the system drive location. - Wait for the saving process to compete.

Note:
In case, if something went wrong or you want to adjust something, click Stop. - Corrupt or damaged, SQL Database file(s) are recovered successfully, click Ok.

Thus, you’ve successfully repaired the corrupt or damaged or suspect marked SQL Server Database file.
Wrap
Full SQL Server Database backup is what that can help in worst-case scenarios like SQL suspect mode, but when there stands no option left, It is the best solution to all SQL database file(s) errors and issues. It offers minimal options to keep things simple which makes it much user-friendly.