Read time 9 minutes
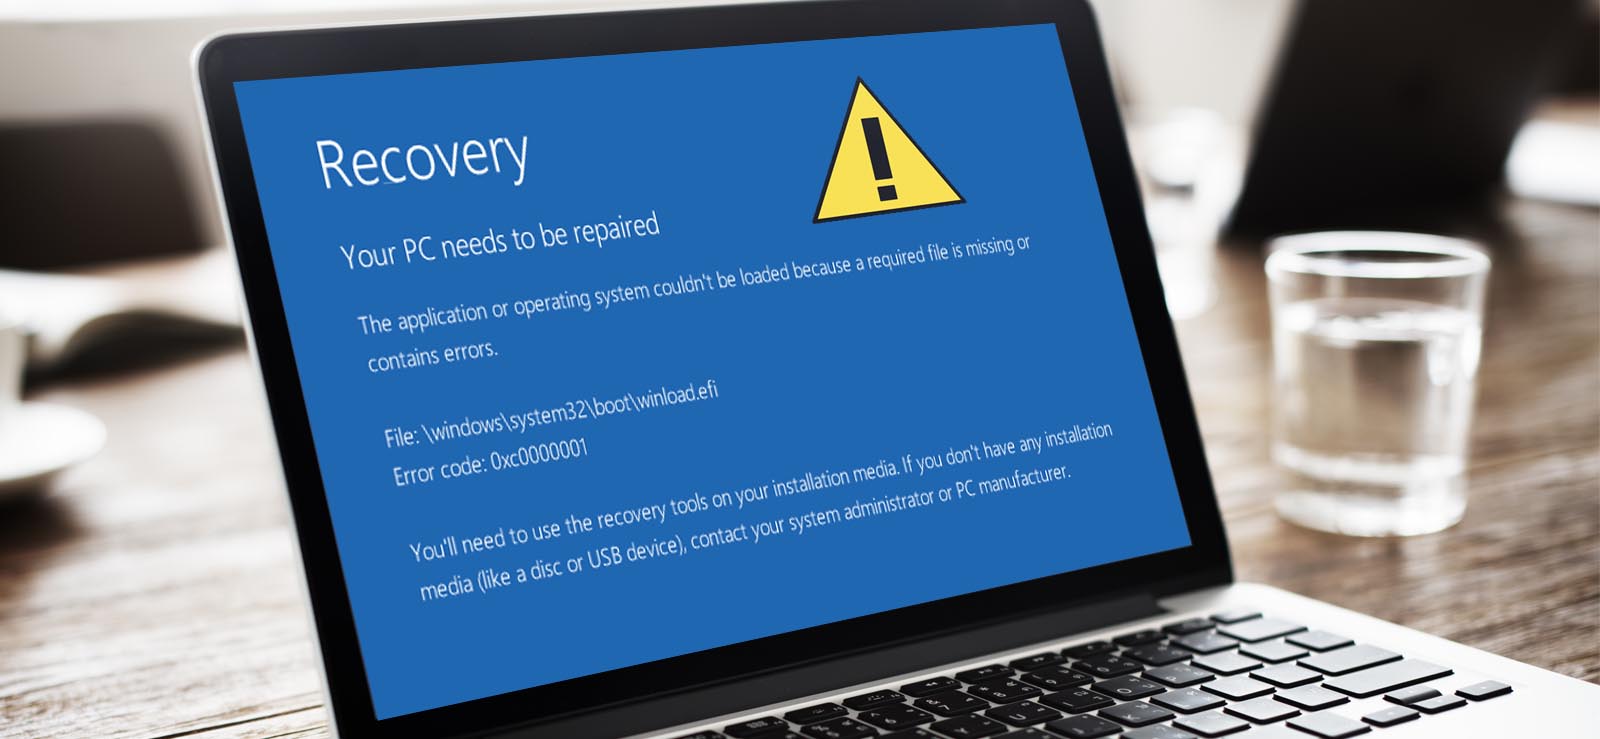
If you are upgrading your Windows platform either with an updated release- Windows 11 being the latest one or with any other previous versions, you might lose some of your valuable data immediately after that update. This scenario, however, is not necessarily true every time you update your Windows machine.
Whenever a new version is updated, the existing system files on the C: drive gets replaced with the new files associated with the updated version. In simple terms, a version upgrade formats the C: drive completely to add new system files that are going to be used by the newly upgraded platform. However, the version update doesn’t affect the data on local storage drives such as D or E. Sometimes due to configurational changes or unexpected situations, some of the documents, pictures, and other important data may get deleted from your local drives. Also, there are cases where users tend to keep some of their important files in C: drive, a version update can delete those files permanently from your system. Keeping your data in C: drive makes it more prone to deletion. Data loss can occur due to a Windows update or corruption in drives, in such scenarios you must know how to restore files from corrupt drives
Now, you are aware about all the possible risks of losing data, it is time to discuss methods to recover lost files after Windows update.
Recover formatted data after windows upgrade – The manual approach
Some of the standard manual approaches to recover data after Windows update are listed below:
- Back up your data before upgrading to any version of Windows.
- Restore Previous Windows version from Backup and Restore.
- Recover Windows data from “Windows.old” Folder.
- Allow access to Windows 10 Administrator accounts.
Back up your data before upgrading to any version of Windows.
If you have already created a backup for your files, then it’s very effortless to restore files even after upgrading your Windows environment. For Windows 7 to any higher version upgrade, here is how you can back up your entire data to the System Restore Point.
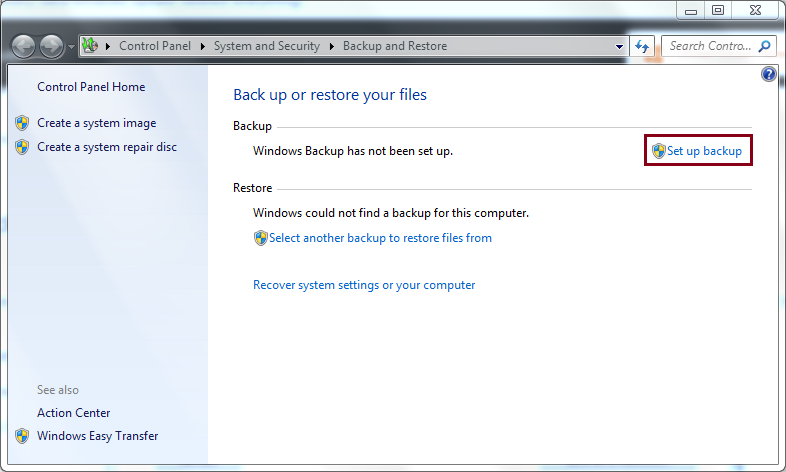
- In Control Panel, reach System and Security > Backup and Restore.
- Click the “Set up backup” to back up your files.
Restore Previous Windows version from Backup and Restore.
If you have created a restore point before the upgrade, then it’s convenient to recover all your files by just going back to the previous version. Sometimes, the backup data gets corrupted due to the presence of bad sectors in Windows drives, this can be eliminated if you know how to fix and repair bad sectors in Windows. You can restore your previous version of windows from the System Restore Point by following these simple steps:
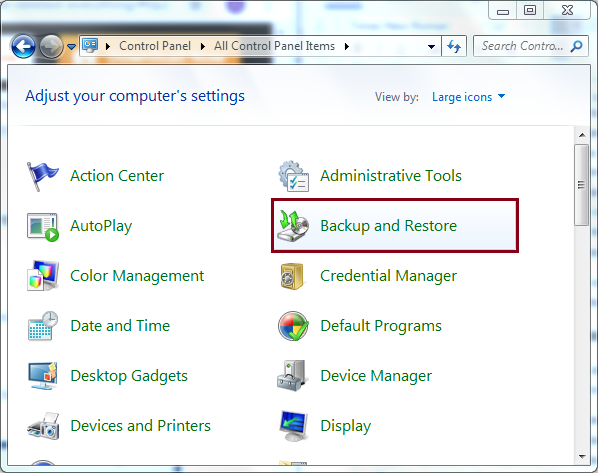
- From the Start menu, go to Control Panel >> Backup and Restore.
- Click on the “Restore My Files” button and choose a convenient directory to restore them.
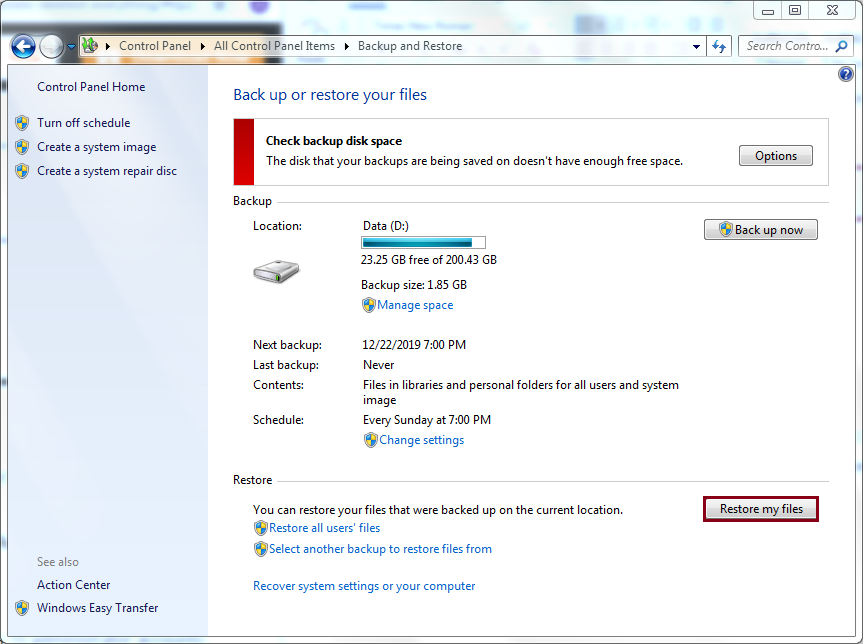
To use this feature, you must set up a back up in advance. Otherwise, there won’t be any backup to restore from.
Recover files from “Windows.old” Folder
If you are upgrading your Windows using the Custom upgrade, the setup will backup a copy of your previous installation in the Windows.old folder. This backup folder exists only for ten days after the upgrade process. Therefore, if you are looking for a backup after upgrading your Windows, make sure to look for your files in Windows.old folder before they’re permanently gone.
To locate the Windows.old folder soon after the upgrade, follow the steps given below:
- Launch Windows Explorer and navigate to the Local Disk C:
- Open the C: drive and look for Windows.old folder.
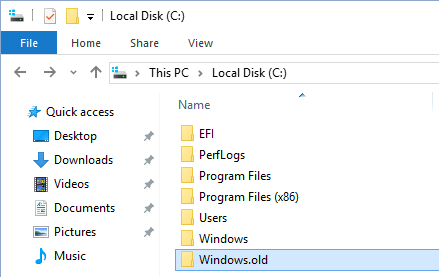
- Open the Windows.old folder and look for the files you wish to restore, select the files and move them to a convenient location in the current Windows installation.
Try to access the Windows.old folder within ten days after the upgrade, after that the folder is automatically deleted from your “Local Disk C:”
Note: If you are doing the clean installation, then the setup will not back up any data from the previous installation.
Allow access to Windows 11 Administrator accounts
If you are upgrading from the existing Windows environment to Windows 11, the setup will ask you to sign-in using a Microsoft account. The data from the previous installation will end up moving to the Administrator account, which is automatically disabled after the new upgrade.
To recover data from the previous installation, you need to enable the built-in local Administrator account. Follow the steps as:
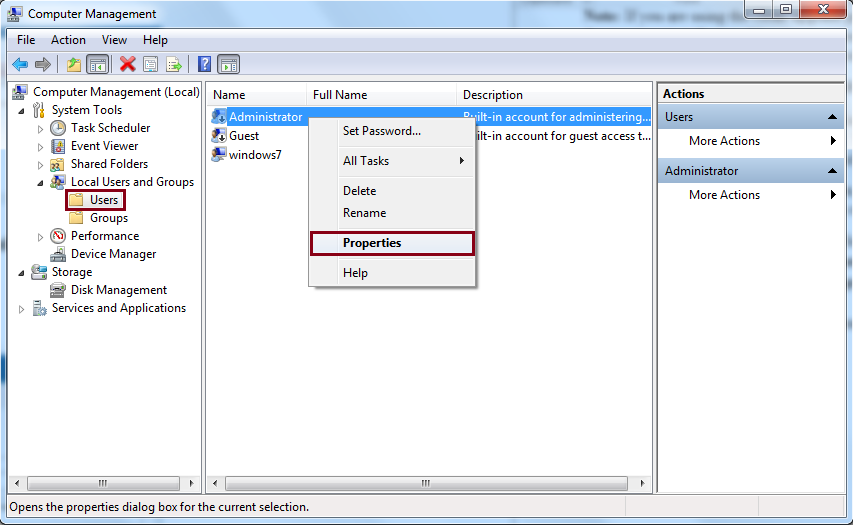
- Go to Start >> Click on the Search box >> Type Computer Management and click on the Computer Management icon.
- Navigate: Computer Management >> Local Users and Groups >> Users.
- Right-click on the Administrator account and select Properties.
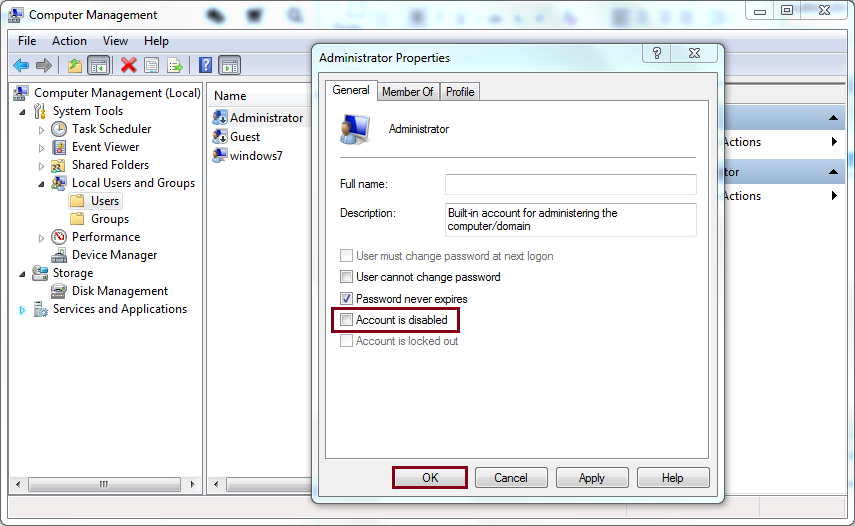
- Uncheck the Account is disabled check box and click OK to save the changes.
- Sign-out of the current Microsoft account and sign-in with the Administrator account.
Now, you will see that all those files that were originally saved to the previous Windows environment are accessible with the Administrator account. Move the required files to the newly upgraded Windows, which is configured using the Microsoft account.
Recover Formatted Data After Windows Upgrade – Automated Approach
The most recommended method to recover lost files after Windows upgrade is to use a reliable third-party tool. A trusted third-party tool like Kernel for Windows Data Recovery software will help you recover lost or permanently deleted data from your system hard drives, even after formatting the entire drive.
It is a reliable tool to recover lost or permanently deleted data from internal as well as external storage devices. The tool supports Windows Vista, 7, 8, 8.1, 10 and Windows 11.
For quick and easy recovery, here is how the tool works:
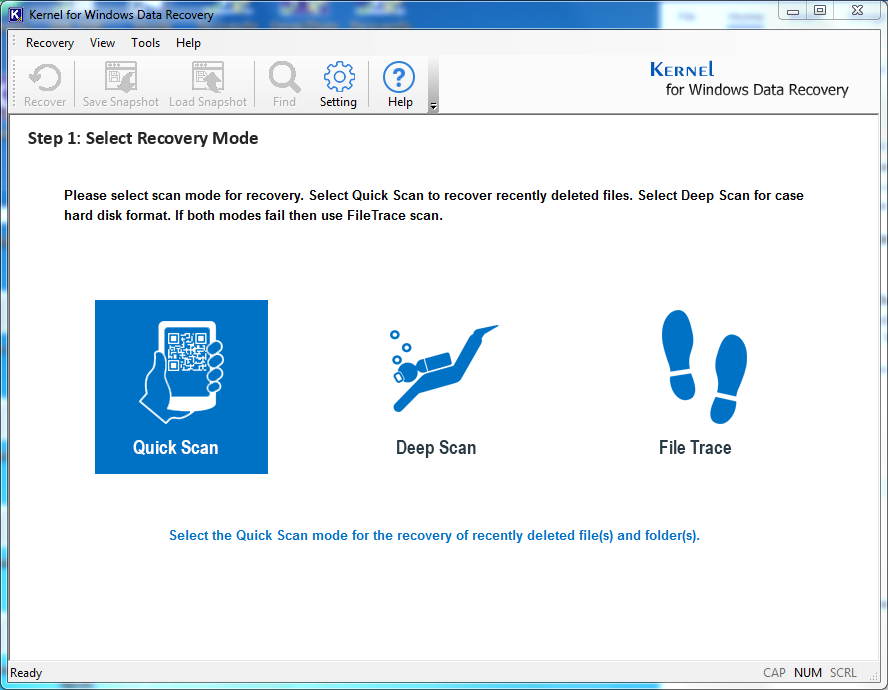
- Launch Kernel for Windows Data Recovery and select an appropriate mode to recover your files.
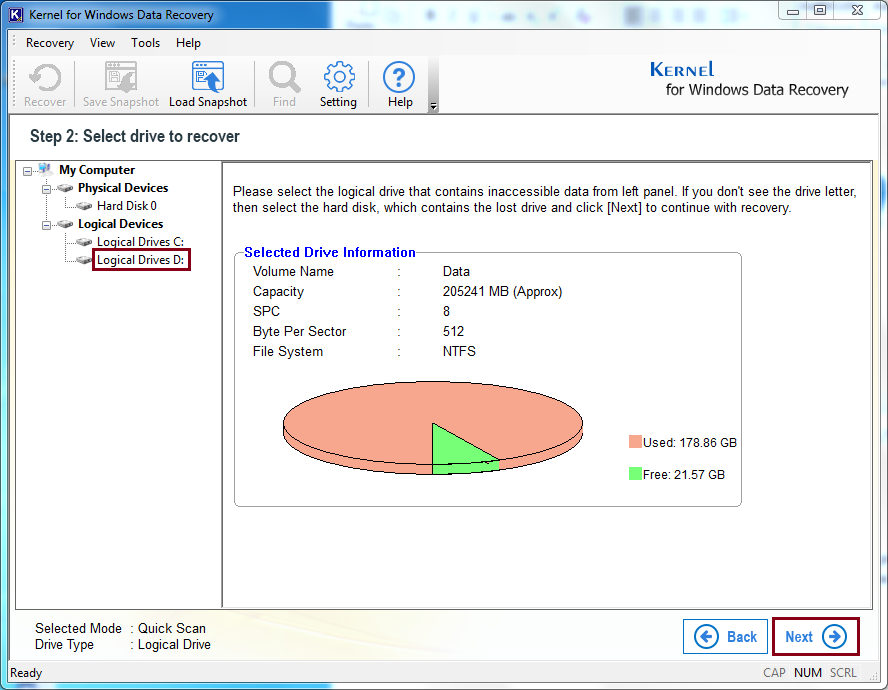
- Select the drive from where the data has been lost due to Windows upgrade and click Next.
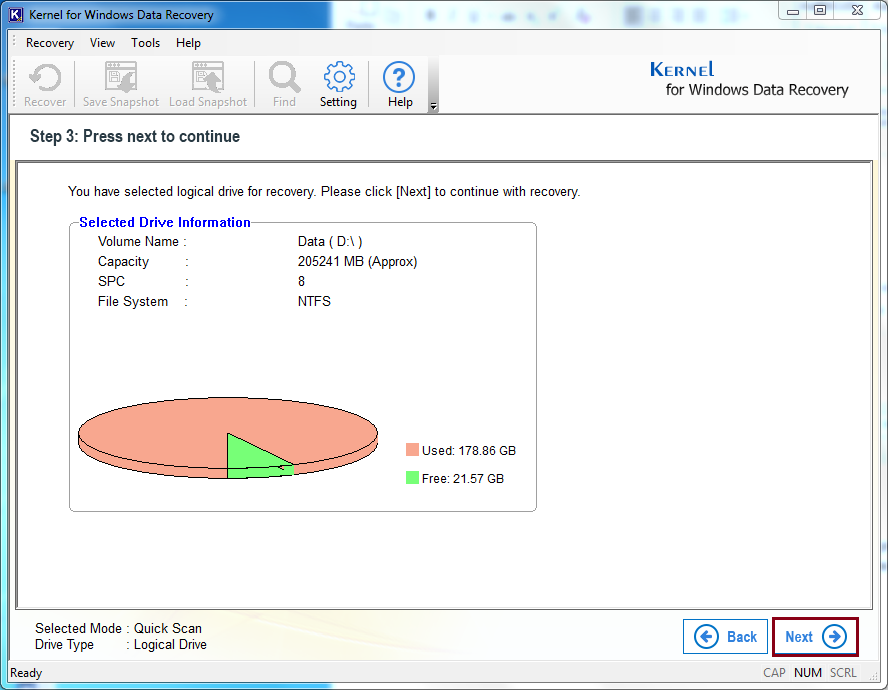
- Click Next to continue.
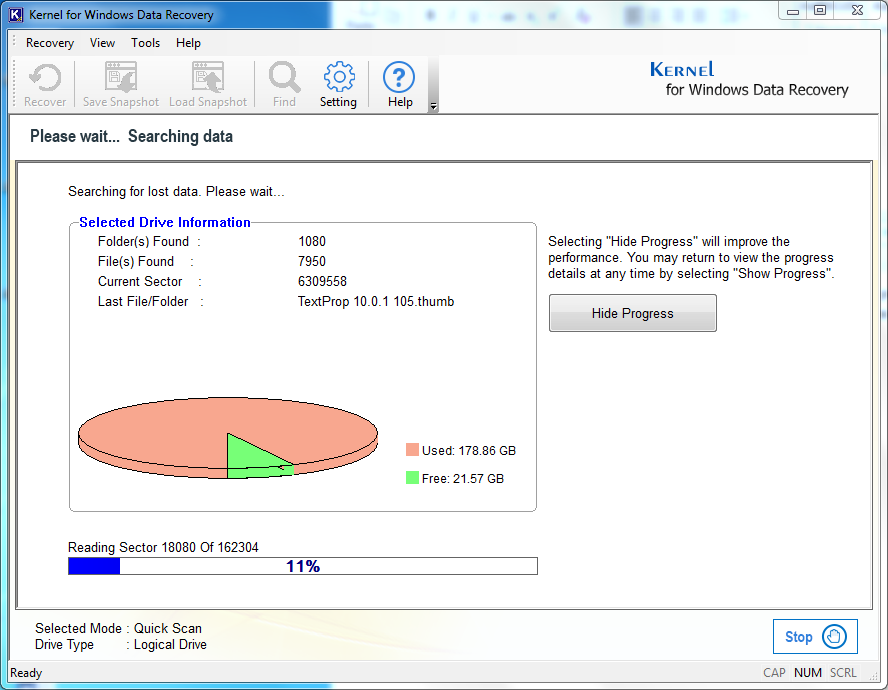
- The tool will start scanning the specified drive for all possible formatted data; wait until the process gets completed.
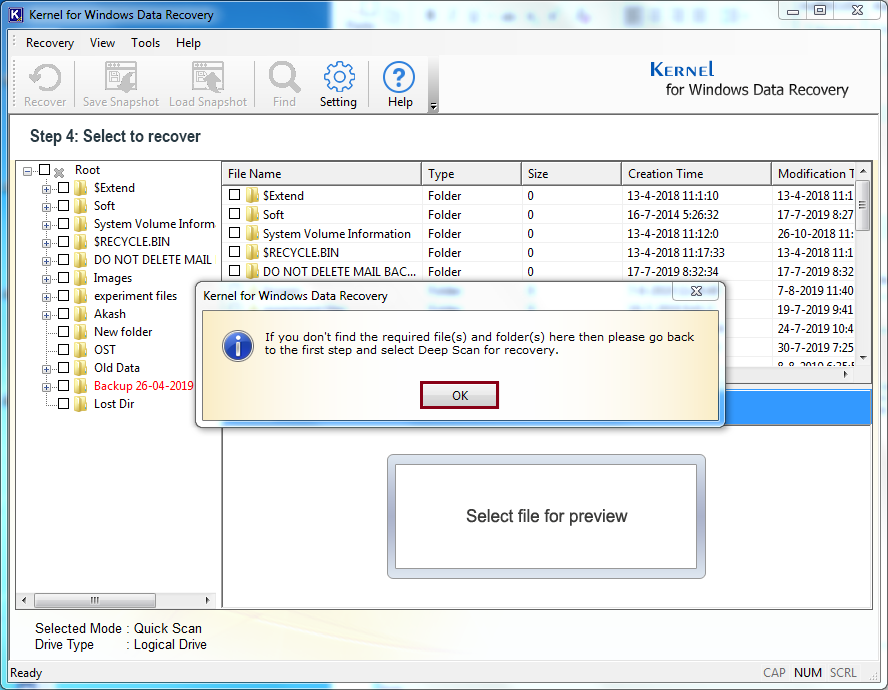
- After the scanning, you will get a preview of all recovered data. Also, a pop-up will immediately flash on your screen, asking, whether you found the files you were looking for. Look for the files in the preview pane, if you found the required files move further, else go back and choose a different mode to scan the drive.
- The recovered folders, along with their sub-folders, are shown in the left-hand side pane. You can preview the data now. Select the data you wish to recover and click on the Recover button.
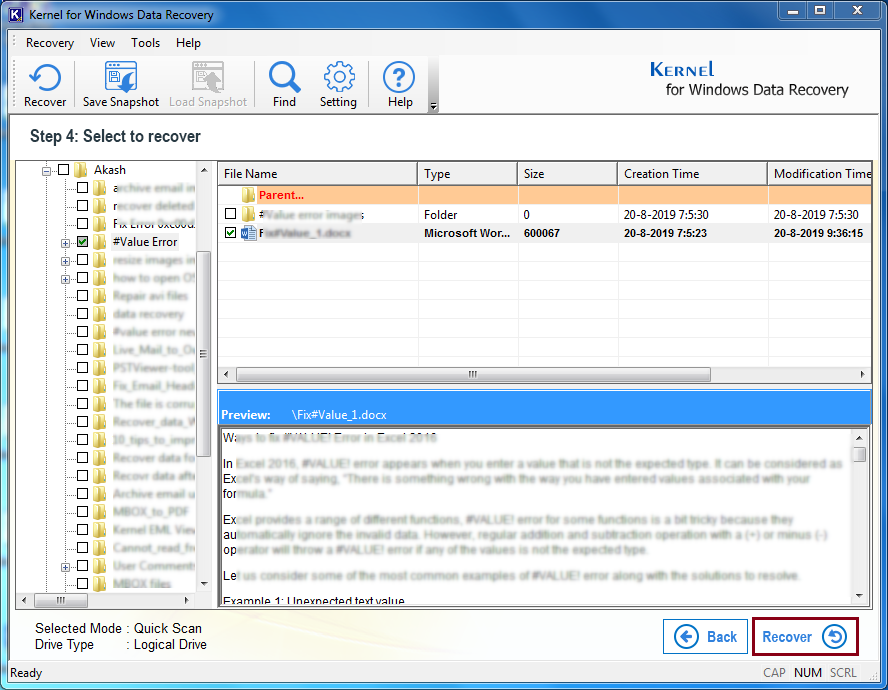
- Provide a destination path to save the recovered file and click on the OK button.

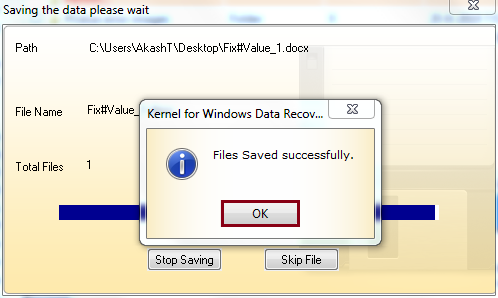
- Your recovered file gets saved. Click OK to finish the process.
Wrapping Up
After committing a Windows Update, losing data is an unwanted situation that any user would not like to face. We have discussed manual and professional methods to recover the data. If the manual process cannot recover all the deleted items, you should use Kernel Windows Data Recovery software to retrieve each deleted item. The software will recover deleted files or items and present them to you in different red color for easy identification.