Read time 10 minutes
“I accidentally formatted my Windows hard disk partition. How do I recover that data?”
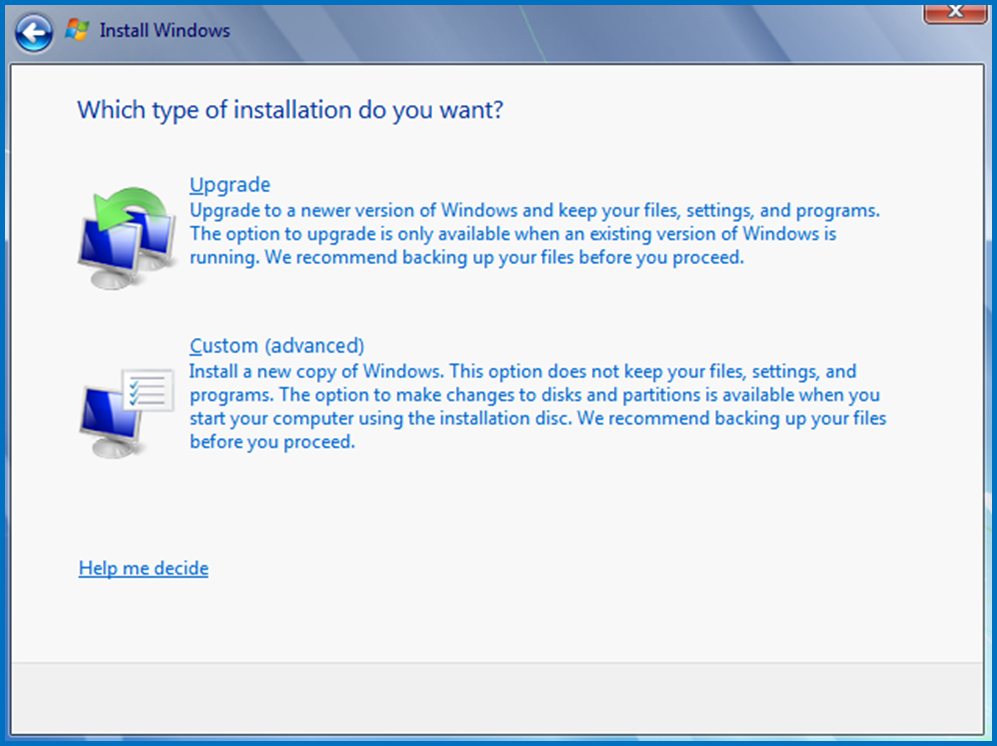
Well, this seems highly improbable but believe it or not, it is a pretty common blunder that people make. This usually happens while upgrading to a newer Windows version. While installing Windows, one can accidentally click on the “Custom” type installation (without reading the description, obviously). This option does not keep your files, settings, and programs.
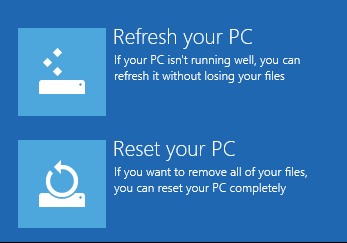
Now, in Windows 10, it is even easier to reinstall Windows or to mess it up for some. Imagine a scenario, due to some reason you want to remove all installed desktop programs while preserving your files. But instead of clicking on the “Refresh your PC” option you accidentally clicked on “Reset your PC,” thereby removing all files.
Apart from these reasons, there are several other factors that might prompt the user to format the partitions willingly. Technical issues and potential threats such as a virus attacks may compel you to format your drives. Most of the times, people panic in these types of situations. To retrieve the data, people often try to go for hit and trial methods and make ill-informed decisions. This can potentially worsen the situation, and you might lose your precious data permanently. Here are the few guidelines which you should follow once you encounter a situation like this:
- Do not use the formatted drive anymore to save new files on it. Using a formatted drive might overwrite the old data making it unrecoverable.
- Start looking for third-party software to recover deleted files or lost data.
How to find lost files after upgrading to Windows 10?
Performing a quick search on Microsoft’s website tells us that there is no tool to recover these lost files after a format. However, they have given a few guidelines which might help the user to get past this issue. This, however, strengthens the belief that there is some data loss after the Windows 10 update, and many users are afraid of this. Some of the quick fixes are mentioned below, so do try these:
- Check whether you are signed in with a temporary profile: Go to Start > Settings
 > Accounts > Sync your settings
  . If you see, You are logged on with a temporary profile. Roaming options are currently unavailable. Just restart your PC and sign in again.
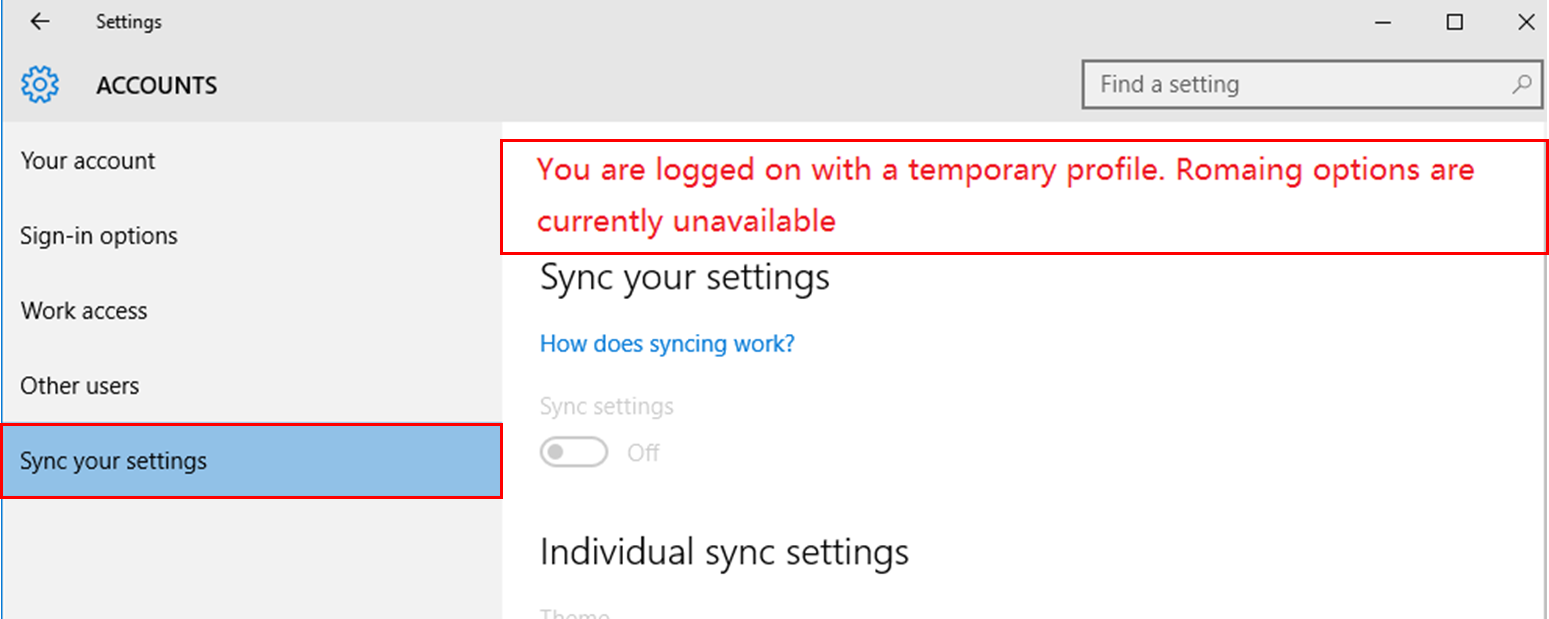
- Search for the lost files: You can also look for the lost files using the search option in the taskbar.
Things to try:- Some files might still be hidden from the view. In the taskbar look for the “View” tab > Click on Options tab > Folder Options > View > Hidden files and folders > Check on Show hidden files, folders, and drives.
- To search for a specific file type, use the asterisk (*); for example, if you are looking for a Word file then search for *.doc or *.docx; for music files look for *.mp3 or *.avi.
- It is possible that after the upgrade some of the files might have been moved. To check the file location, right-click on the file, and click on Open file location.
- Restore files from the backup: This might be the most feasible option if you want to restore your lost files.
- Select Start > Settings > Update and security > Backup
 , and then select Backup and Restore. Choose “Restore my files” and follow the instructions.
 - Sometimes it is also possible to recover a file by creating a new one with the same name and file type (extension). Next, right-click on the new file and select Properties > Previous versions tab > choose the file version to restore.
- Select Start > Settings
- Enable an earlier Windows Administrator account: It might be the case that once you upgraded to a new Windows version, you created a new account. But your files might be in the previous administrator account. All that you must do is to enable and sign in to this account to recover your files.
- Go to the Search Box and type “computer management” and select the first search result.
- In the left pane, select the “Local Users and Groups” and then select the “Users.” If the Administrator icon has a down arrow on it; it means that the account is disabled.
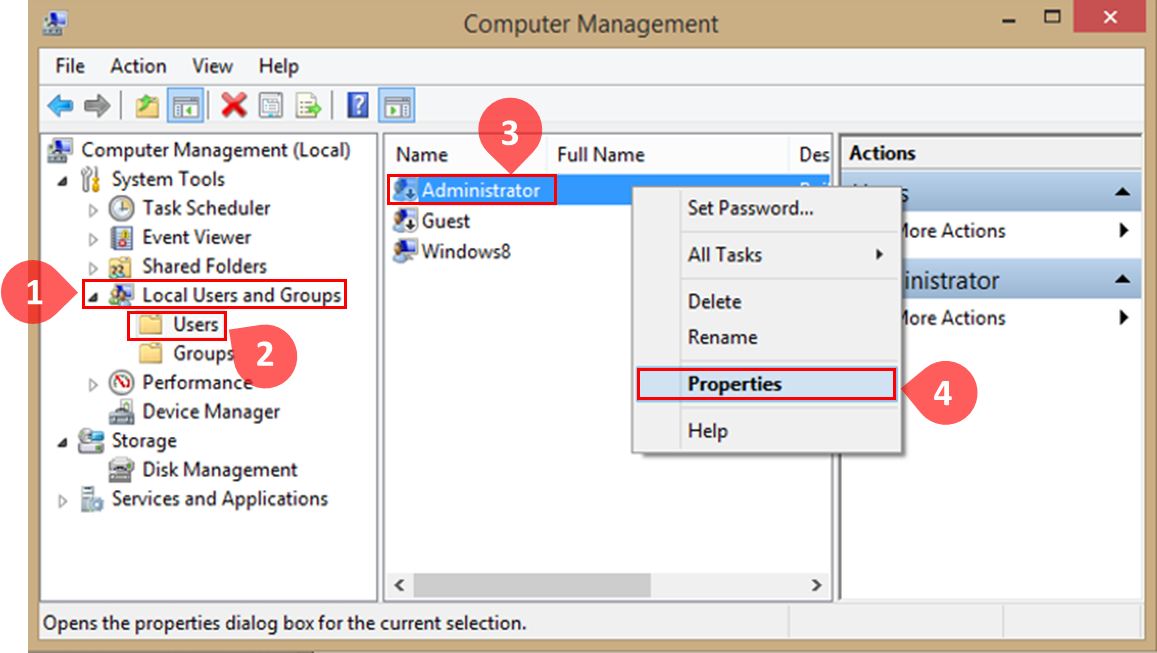
- You can Enable the account by double-clicking on the Administrator account; this will open the “Administrator Properties” dialog box. Next, uncheck the “Account is disabled” checkbox and click Apply to enable the account.
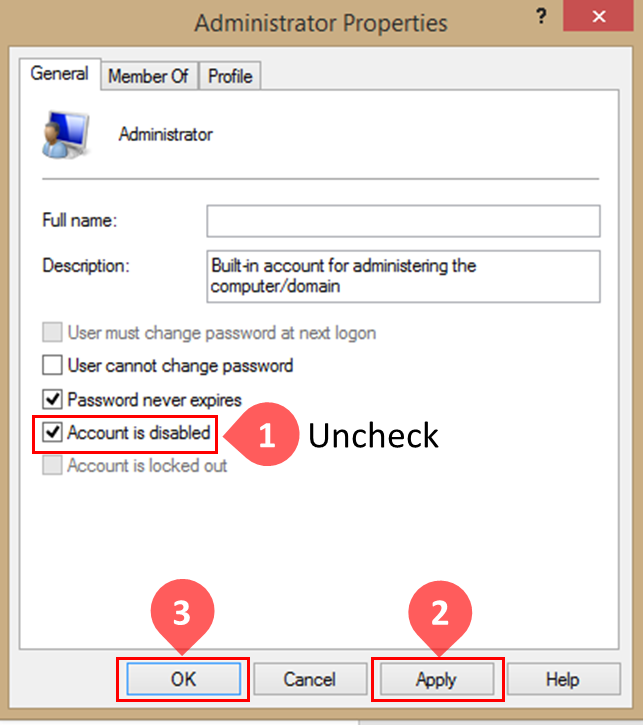
- Sign out. Sign in again using the Administrator account.
Using third-party software for data recovery
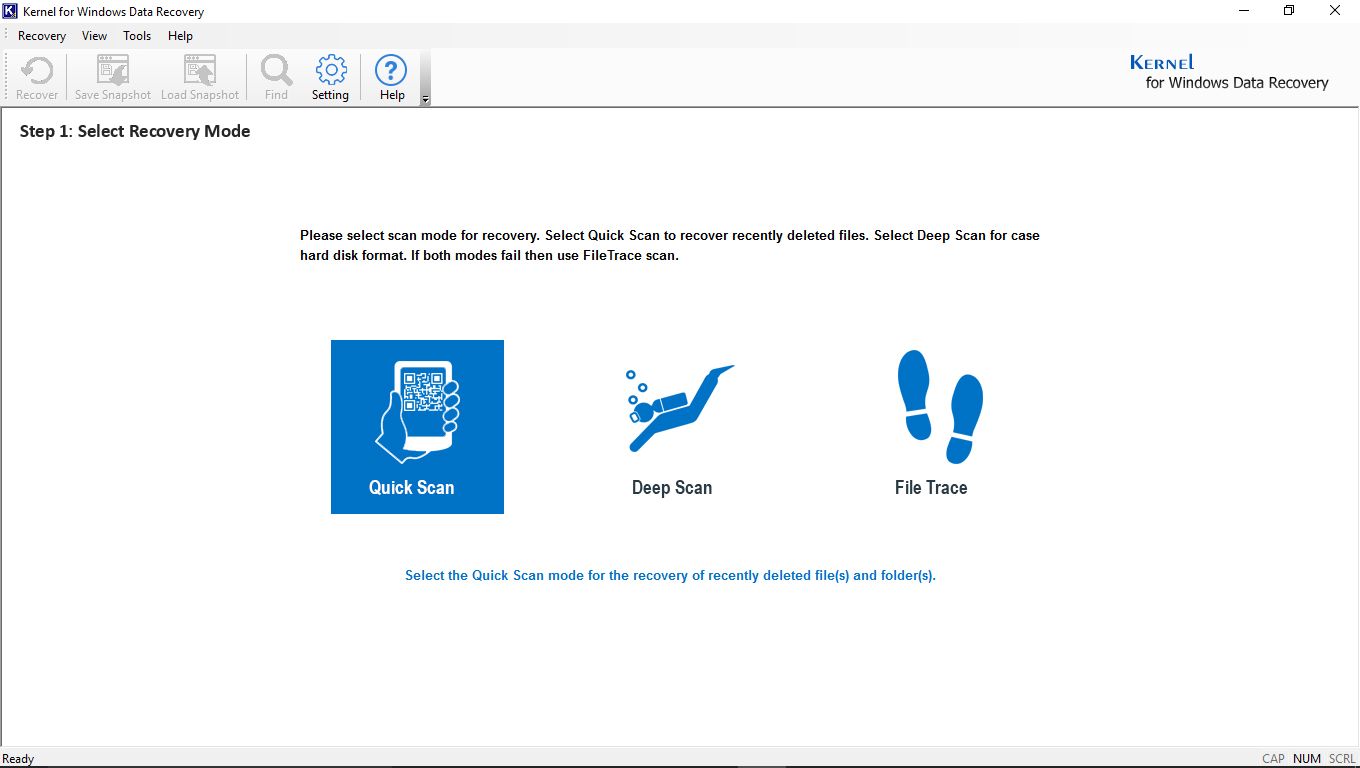
If you are still unable to recover your lost data, then it might be the time to try a professional third-party tool for data recovery. One recommended tool is “Kernel for Windows Data Recovery.” It can repair, recover, and restore Windows data from corrupt partitions after severe corruption. It can even recover your permanently lost files from hard disks and external storage devices. It comes with three scanning options, Quick Scan, Deep Scan, and File Trace. The user can choose from the three options depending upon the level of corruption. This tool is user-friendly and easy to use. The recovery settings are configurable – for example, the user can predefine the number of sectors to be read in a single attempt or predefine the number of retries on bad sectors. The preview feature lets you preview the recovered files and folders before you can save them. Another impressive feature is the File Filters. The user can define any file type (such as .jpeg, .doc, etc.) and the tool will display all the files falling in the specified pattern. The free version lets users recover and preview the Windows data while to save the recovered data, you need to purchase the full version definitely.
Check out the working process of the Kernel Windows Data Recovery tool with the following steps.
- After installing the program, the user will be asked to select from three recovery modes.
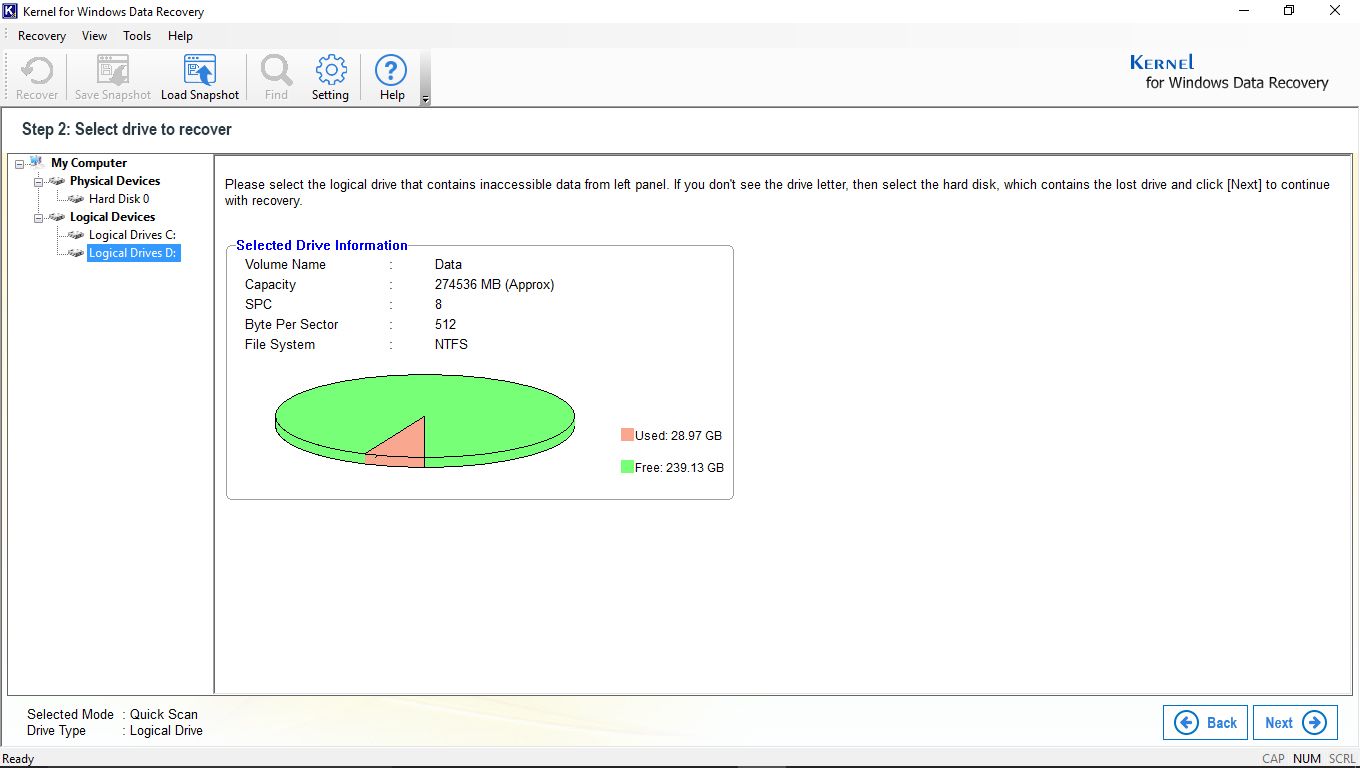
- Next, from the tree view, select the drive/partition you want to recover your data from and hit “Next.”
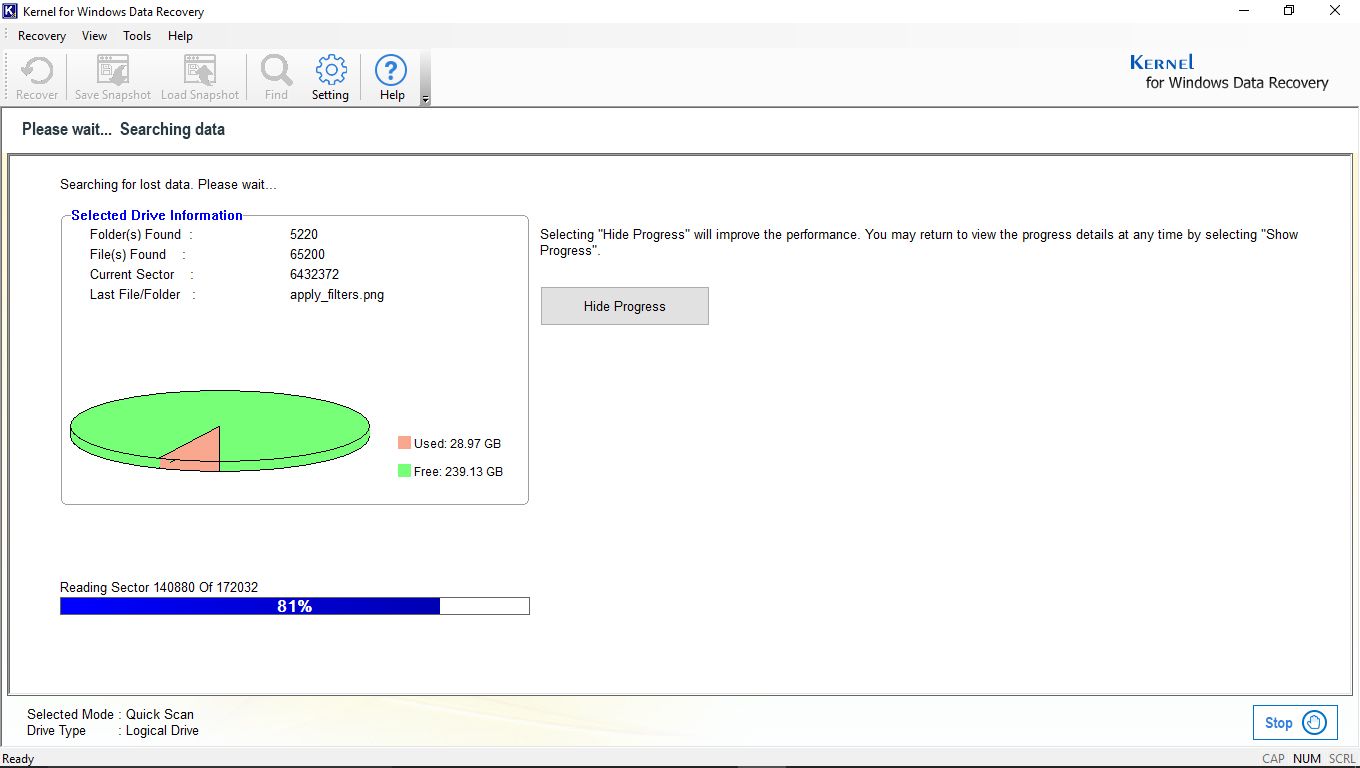
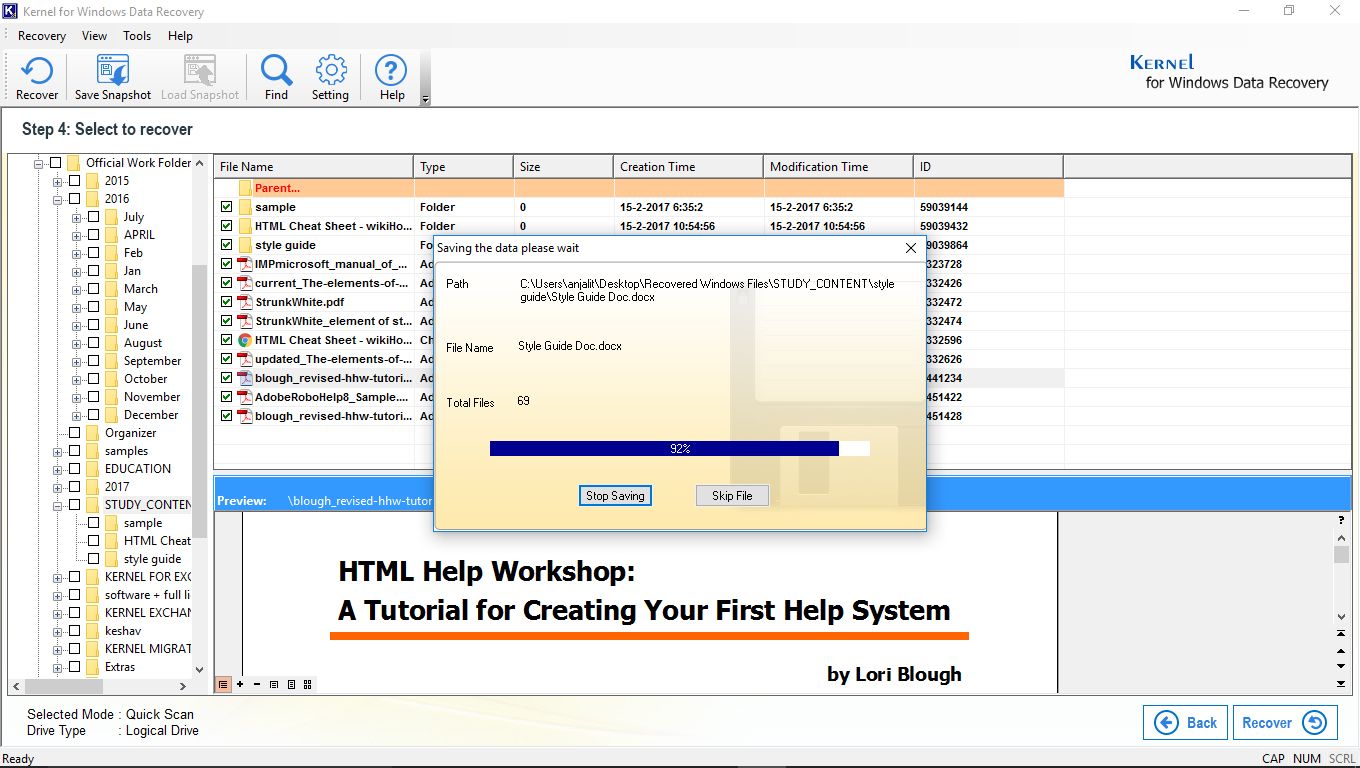
- Next, wait for the search process to finish. The progress bar shows the recovery progress and status.
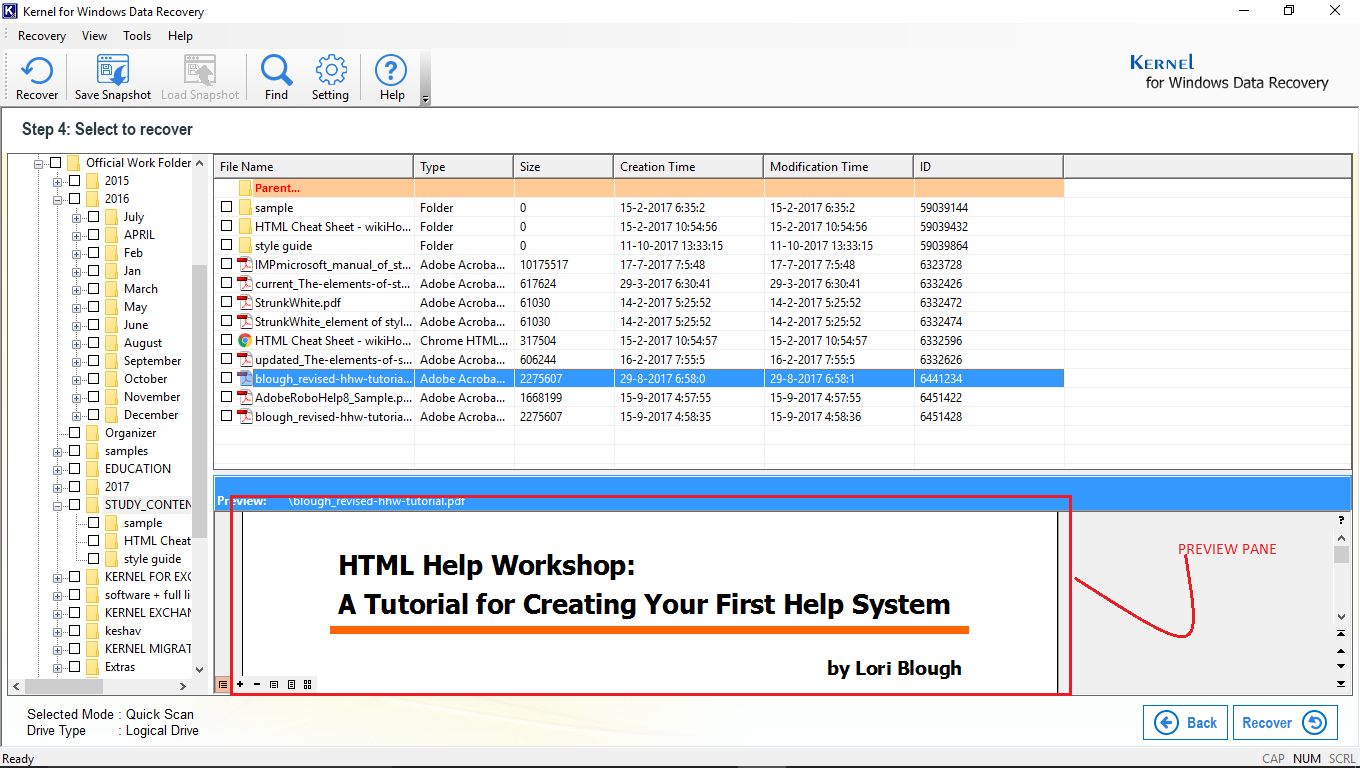
- Once it is done searching, it will show you the list of recovered data in the right pane. Check on the files that you want to recover and hit “Recover.”
 Note: If you are looking for a specific file or extension, then select the “Find File” option from the menu bar. Next, you can either choose to save the selected file or Start a new search.
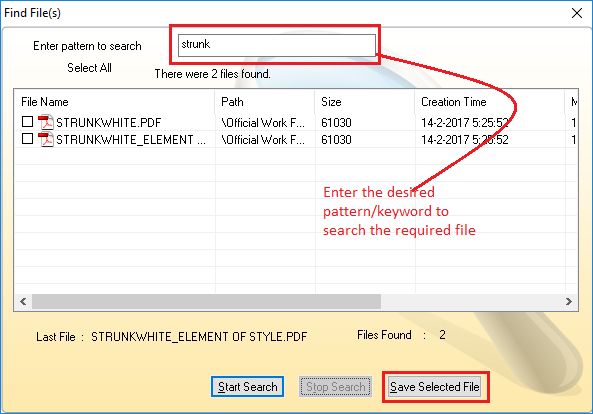
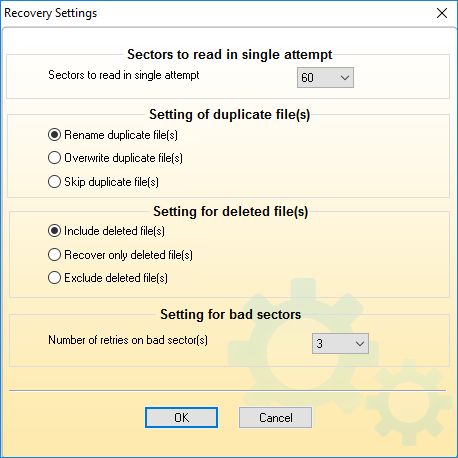
- Next, you can use recovery settings to manage the recovery of duplicate and deleted files including bad sectors retries.
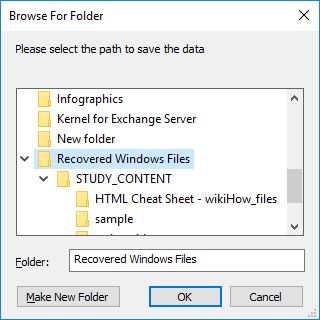
- Next, you can provide a location where you would like to save your recovered files.
- The progress bar shows the status of the saving process.
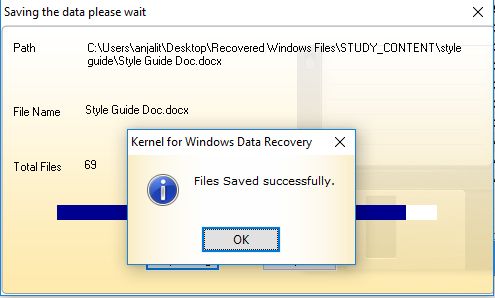
- A popup window displays a message once the files are successfully saved.
Conclusion
We have looked at a few simple ways to recover your lost data in case of an accidental Windows formatting. In such a scenario if all of these aforementioned fixes fail to recover the data, then the user is advised not to experiment with the affected drive/partition as this can cause a permanent data loss. Hence it is recommended to use a professional data recovery tool – Kernel for Windows Data Recovery. We have gone through the features of this tool in detail, and it is found to be quite efficient when recovering lost data from hard drives/partitions.