Read time: 7 minutes
Users use various file formats to preserve and share their content efficiently. One such format is the XPS (XML Paper Specification) file, developed by Microsoft to serve as an alternative to PDF format. However, XPS files are not as popular as PDF files, but they are still widely used in some government or corporate environments. Back in April 2018, Microsoft ended Windows support for default viewer, creating issues for users to open XPS files.
If you’ve come across an XPS file and are unsure how to open it, don’t worry. Read the methods mentioned in this guide to easily open OXPS files or XPS files in Windows 10 and 11.
How to Enable XPS Viewer in Windows 10 & 11?
Windows 11 and a few versions of Windows 10 do not have viewer installed on them by default. If you cannot find default viewer in your Windows you must enable it from the Settings.
Steps for Enabling in Windows 10
To open XPS files in Windows 10, you need to enable this viewer manually, if it is not installed by default. Follow these simple steps:
Step 1. Go to Windows Settings and click on Apps.
Step 2. In the Apps & Features section, click on the Optional features button.
Step 3. Click Add a feature button and look for XPS Viewer.
Step 4. Select XPS Viewer and click Install.
Steps for Enabling in Windows 11
Windows 11 does not include this viewer by default, but you can easily add it using optional features. Here are the steps to enable it:
Step 1. Open Settings, in the left pane select Apps.
Step 2. Select the Optional Features and click the View features button.
Step 3. In the Add an optional feature window, search for XPS Viewer.
Step 4. Tick the checkbox for XPS Viewer and click Install.
How to Open XPS files in Windows 10?
The method to open XPS file in Windows 10 is very simple. Follow the steps mentioned below:
Step 1. In Search Bar, type XPS Viewer and open it.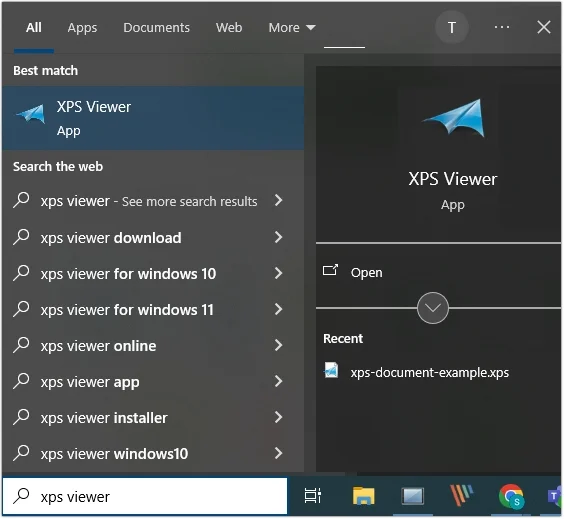
Step 2. Click on File >Open.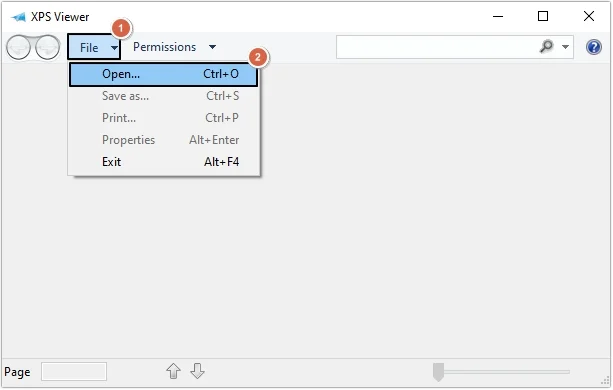
Step 3. Select the required XPS file and click Open.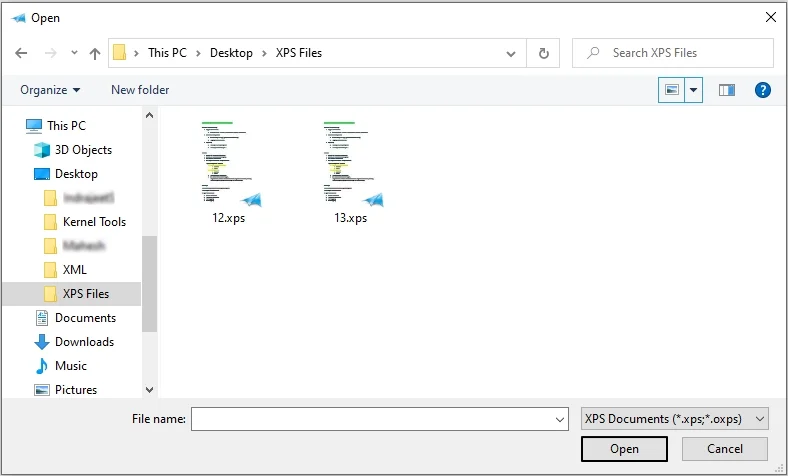
Step 4. In this way, you can easily open XPS/OXPS file in Windows 10.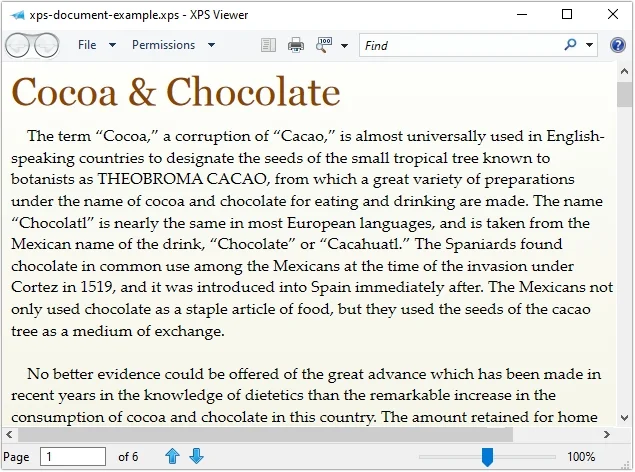
Note: This method will only work on the Windows 10 version prior to April 2018, as it provides the Viewer app by default. In the new installations of Windows 10 or later, you might need to install it manually.
How to Open XPS files in Windows 11?
There are a few methods to open XPS file in Windows 11. Here are the detailed steps of each method mentioned below:
Method 1. Open XPS Document with Google Drive
Open OXPS files and XPS files with Google Drive using the below mentioned steps:
Step 1. Open Google Drive and click on New.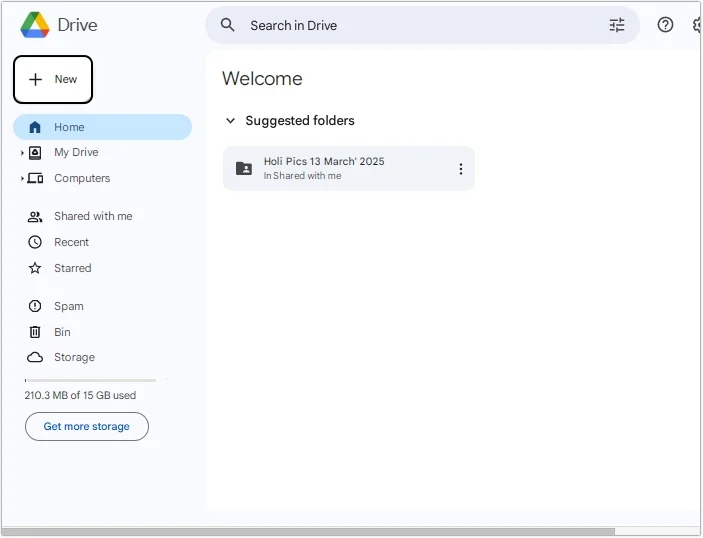
Step 2. Select File Upload option from drop-down list.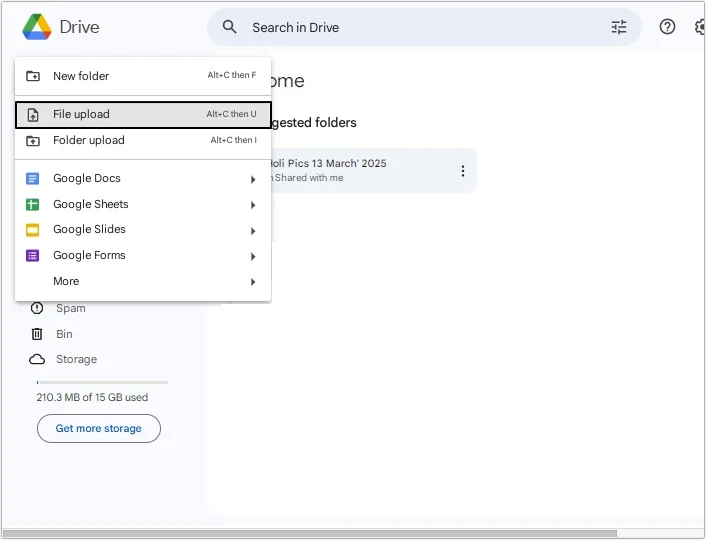
Step 3. Select the required XPS file and click Open.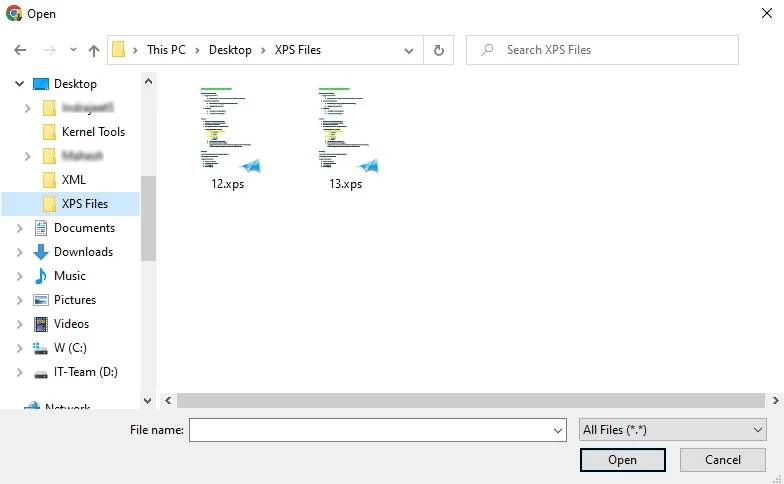
Step 4. Your XPS file will get added.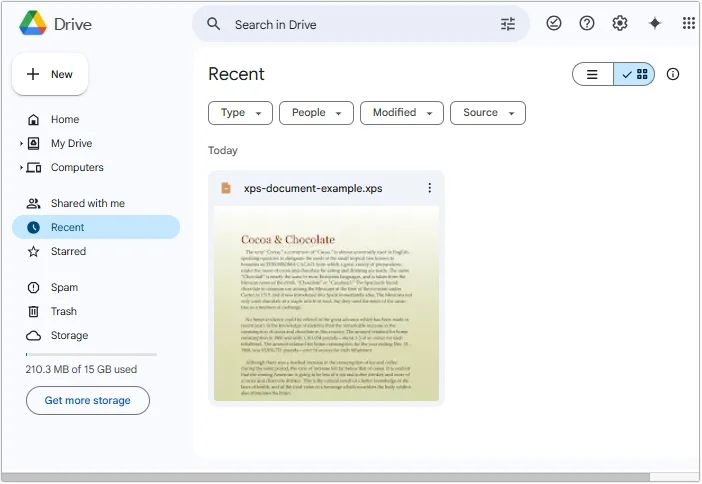
Step 5. Double click on the XPS file and get a preview of it.
Method 2. Open XPS Document with DISM
This method requires advanced knowledge to open XPS/OXPS files. Here are the steps to do so:
Step 1. Open Settings and search Command Prompt, then right-click on it and select Run as administrator.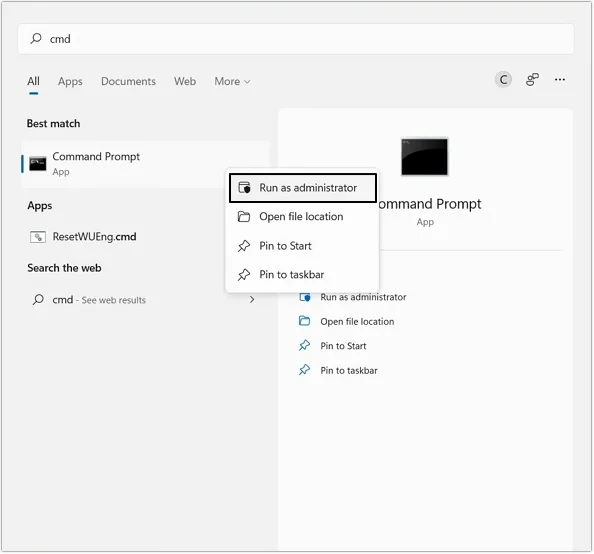
Step 2. Type the following command and hit Enter.
“DISM /Online /Add-Capability /CapabilityName:XPS.Viewer~~~~0.0.1.0”
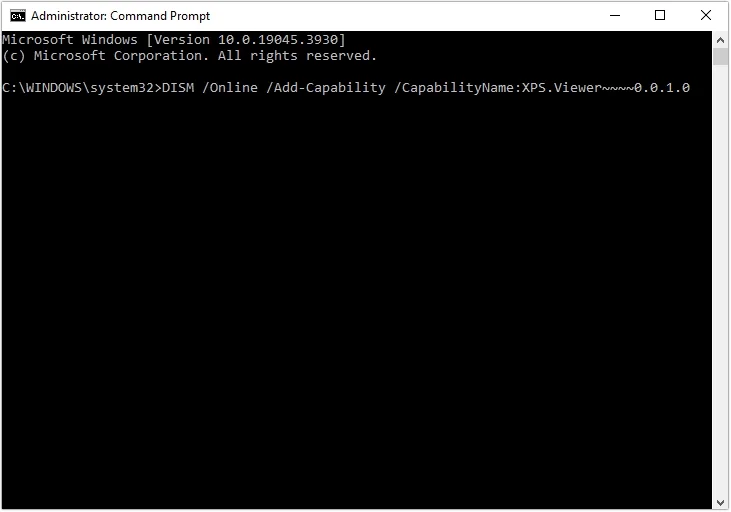
Step 3. Wait till the process completes.
After successfully installing, you can access your XPS files easily.
Open XPS Document with Free Tool
One simple and easy method is free XPS tool to access XPS/OXPS files on Windows 11. Kernel XPS Viewer is a software to open XPS files content. Add multiple XPS and OXPS files simultaneously to open their content.
This tool supports opening password-protected files content in a few easy clicks. Get preview of all contents including text, images, and formats. The software is designed with a simple interface for all types of users.
How to Open XPS Files using the free tool?
Here is the simple step-by-step process to open OXPS files and XPS files:
Step 1. Open the software and add files using any of the given options:
- Choose Files from Drive or Folder
- Search Files Across Your PC
We have selected Choose Files from Drive or Folder. After that, click Browse.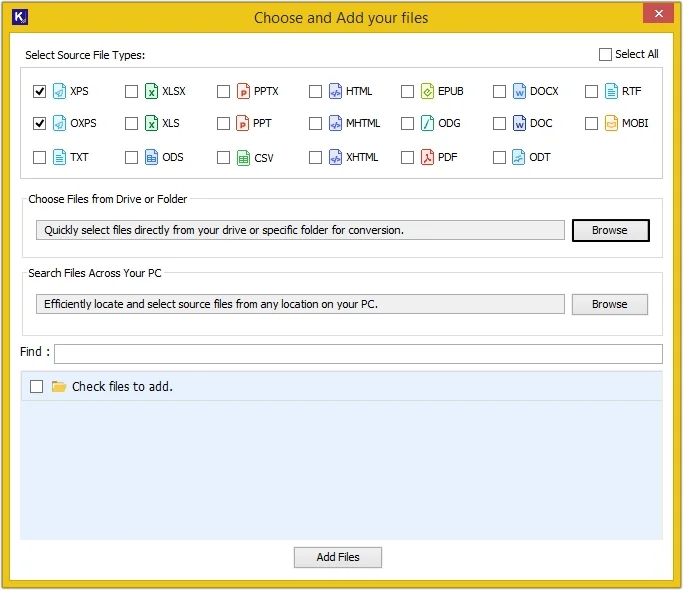
Step 2. Search and choose the XPS files and click Select.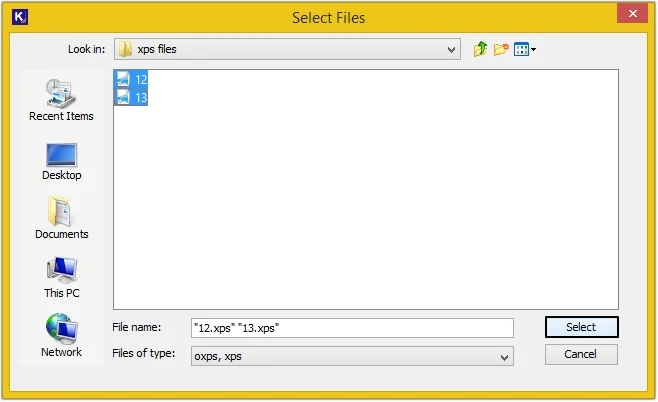
Step 3. Tick the checkbox adjacent to XPS files and click Add Files.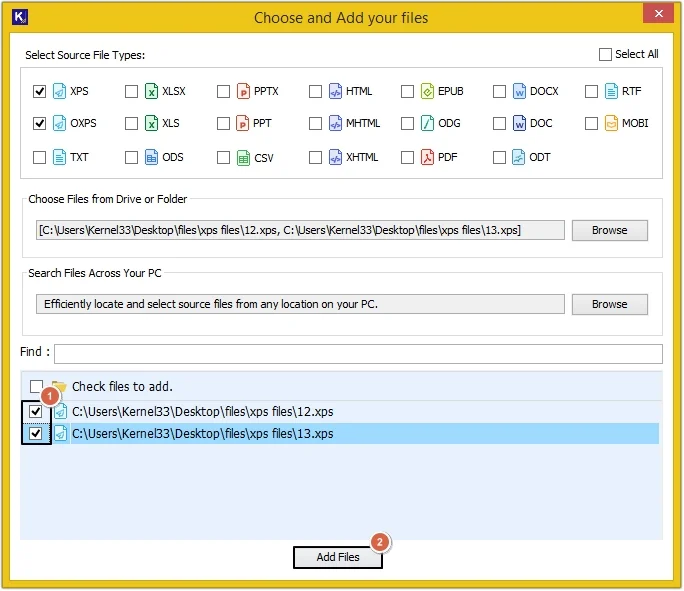
Step 4. Your XPS files will get added. Click any one of them and get complete preview of it.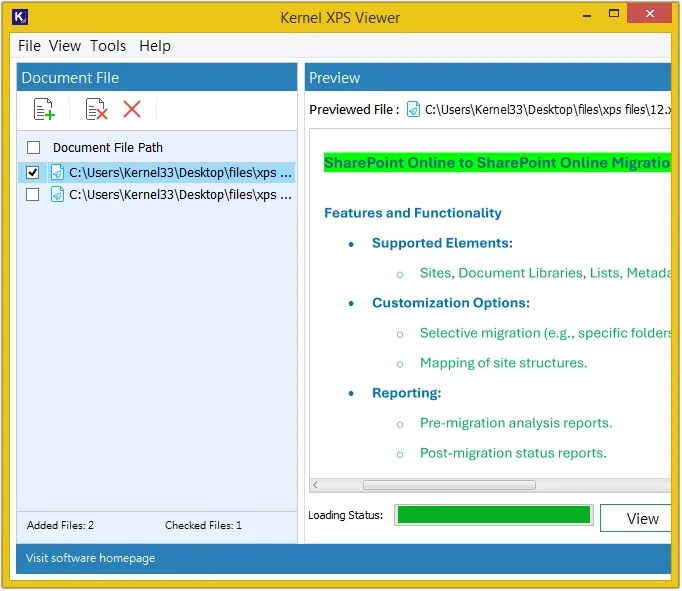
Conclusion
Opening XPS files on Windows 10 new installation and Windows 11 is challenging after Microsoft ended support for default viewer. To ease your issue, we discussed some easy methods to open XPS file on Windows 11. However, opt for the recommended free tool to open XPS file content for a quick and complete preview of XPS file data.