Read time: 9 minutes
POP3 (Post Office Protocol version 3) was the standard email protocol in the early days (now IMAP has taken its place). When you receive or send an email through a POP3-enabled email server, the server downloads a copy of the email to your local system and deletes it from the server. This functionality is helpful when it comes to saving storage space on the server, but it makes it challenging to synchronize emails across multiple devices.
It’s 2026, and cloud with anytime data access has become the new normal. Everyone needs an email service provider that allows users to send emails from any device they want with an internet connection. If you are still hanging on to your legacy old POP3 email account and want to migrate your POP3 email to Office 365, let me help you. Reasons, planning, migration methods, and post-migration finalizing procedures, we will cover everything in detail in this guide.
Reasons for POP3 to Office 365 Migration
Why do users or organizations want to migrate POP3 mail to Office 365? These are the top driving factors:
- Multi-Device Synchronization: POP3 downloads email to only one device. While in the Office 365 account, all your emails, read statuses, and folders get synced across all devices instantly.
- Data Security & Backup: Office 365 makes duplicate copies of your mailbox data and keeps it in different databases. This technique helps to make sure you never lose your emails.
- Collaboration Tools: POP3 to Office 365 migration offers shared calendars, global address lists, and integration with Teams and SharePoint. These features are missing in POP3 accounts.
- Larger Mailbox Storage: Legacy POP3 accounts often have storage limits. But Office 365 has various business plans with highly scalable infrastructure. Your mailbox size can accommodate hundreds of thousands of mailboxes without any lag.
How to Plan a Successful POP3 to Office 365 Migration?
Before you start moving your emails, you need a solid plan to carry out an error-free migration.
- Analyze the source POP3 account: List all user accounts and email addresses. Filter out what data to move and what to skip. Organize or categorize emails in different folders to make the migration easy. Also, calculate the total mailbox size.
- Check Source Server Capabilities: Most email providers support both IMAP and POP3. Check it in your server settings or refer to the server guide. If the server allows IMAP, migrating from POP3 to Office 365 will be quick and easy.
- Migration Type: Discuss with your team and finalize a type of migration. You can either do a Cutover migration (everyone at once) or a Staged migration (batches of users).
- Communication Plan: Make sure to notify your team 1-2 weeks in advance that email services may be interrupted during the POP3 migration to Office 365.
Things to Do Before you Begin to Migrate POP3 Email to Office 365
Perform these steps before starting the actual data move:
- Verify Domain Ownership: Add your domain (e.g., company.com) to the Office 365 Admin Center and verify ownership via TXT records.
- Create Users: Create the user accounts in Office 365 and assign licenses. Do not change the MX records yet.
- Clean Up Data: Ask users to delete spam and unnecessary emails from their current POP3 inboxes to reduce POP3 to Office 365 migration time.
- Back Up Local Data: To avoid losing any emails permanently during POP3 migration to Office 365, make sure to backup emails for every user.
POP3 to Office 365 Migration Methods
We will use Microsoft Outlook desktop application, the Exchange Admin Center (EAC), and an IMAP migration tool to migrate POP3 mail to Office 365. Let’s discuss them one by one:
Method 1: Migrate Emails Using the Outlook
When you only have a few emails, you can use Outlook to move them. Furthermore, this method also works in case your email server only supports POP3 and not IMAP. Follow the steps given below:
Step 1: Add POP3 account in Outlook and export emails to PST
- Open Outlook and configure your POP3 account in it.
- Then, go to File > Open & Export > Import/Export.
- Select Export to a file and choose Outlook Data File (.pst).
- Select the email folders you wish to export and save them in the PST file locally.

Step 2: Configure Target Office 365 Account in Outlook
- In Outlook, go to File > Add Account.
- Enter the new Office 365 email address and click Connect.
- Provide your account password to add the account to Outlook.
Step 3: Import PST to Office 365 Account
- Go to File > Open & Export > Import/Export.
- Select Import from another program or file.
- Click Browse and choose the .pst file you created in Step 1.
- Choose the Office 365 mailbox as the upload destination.

Outlook will start uploading the PST file to Office 365. This may take time depending on your upload speed and the size of the PST file.
In addition to the above method, you can also try the drag & drop method. When both source (POP3) and destination (Office 365) accounts are configured in the Outlook, select emails from source and drag them to the Office 365 account. Then, drop or release them to create a copy of those emails on the Microsoft cloud server.
Method 2: Migrate POP3 mail to Office 365 using EAC
If your email server supports IMAP along with POP3, most servers do, you can migrate IMAP mailboxes to Office 365 by creating a Migration Batch using the EAC. This approach is helpful and fast when you want to migrate multiple user’s data.
Verify if switching to IMAP is available and enable it. Then, follow the steps given below:
Step 1: Create a CSV file containing the following details: email address, username, and password.
Step 2: Open Chrome and log in to the Microsoft 365 Admin Center, and from the left menu, click Exchange.
Step 3: Select the Migration option and click on the Add migration batch.
Step 4: Provide a name, choose Migration Type as IMAP, and upload the CSV file you created in Step 1.
Step 5: Enter the IMAP server details and continue.
Step 6: POP3 migration to Office 365 will start.
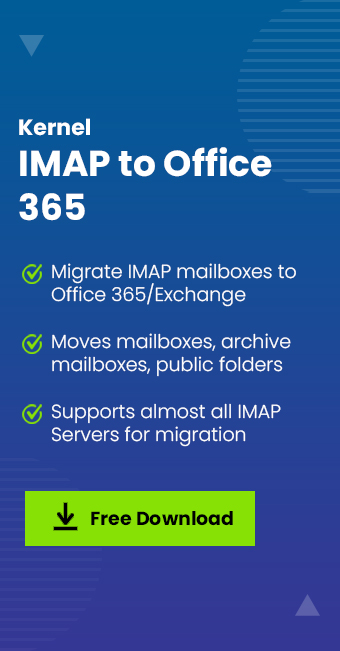
Method 3: Migrate Emails with an Advanced IMAP to Office 365 Migration Tool
For a quick and effortless email migration, system admins usually prefer to use a dedicated email migration tool. Kernel IMAP to Office 365 Migration software can easily move emails from multiple users to any Office 365 account on any tenant.
The best part is that you don’t need to be a migration expert to use our IMAP to Office 365 Migration tool. You can setup and complete the POP3 to Office 365 migration in just a few simple steps like this:
Step 1: Download and open the tool.
Step 2: Add the source and destination accounts and map the mailboxes.
Step 3: Select where to move the data, User Mailbox, Archive Mailbox, or Public Folder
Step 4: Apply the required filters for selective data transfer and click I am OK, Start migration.
Step 5: Save a migration report in CSV after the data transfer is complete.
Which Method Should You Choose?
This table will help you decide which method is best to migrate from POP3 to Office 365.
|
Feature |
Manual PST Import (Method 1) |
Admin Center Migration Batch (Method 2) |
Advanced Migration Tool (Method 3) |
|
Best For |
Very small teams (1-5 users) or POP3-only servers |
Larger teams (5+ users) with IMAP support |
Enterprises or complex migrations (multi-tenant) |
|
Effort |
High (Manual export/import for every user) |
Medium (Centralized via CSV and EAC) |
Low (Automated mapping and filtering) |
|
Downtime |
User cannot work during export/import |
Minimal (Background sync) |
Zero downtime (Continuous sync) |
|
Technical Skill |
Low (Basic Outlook knowledge) |
Medium (Admin access & CSV setup) |
Low to Medium (User-friendly interface) |
|
Data Integrity |
Risk of PST corruption or missed items |
High (Server-to-server) |
Highest (Includes detailed migration reports) |
What to do After a Successful Migration?
To make sure you can access the POP3 emails without any issue, make sure to carry out the following tasks:
- Verify Migration: Check if all the emails and folders are migrated to the target Office 365 account. If something is missing, do it again.
- Update MX Records: Log into your DNS provider and update the MX records. They should now point to the Office 365 account. This is crucial to make sure every new email you receive in your old POP3 Server is now received in the new Office 365 mailbox.
- Decommission Old Accounts: Once you have confirmed all data is present in Office 365, and MX records are updated, you can cancel the old email hosting subscription and remove the emails from POP3 server.
Conclusion
For a small-scale email migration, use Outlook. In case you have multiple email accounts to move, and your email server supports IMAP along with POP3, you can either use EAC or the professional Kernel IMAP to Office 365 Migration tool. Among all the POP3 to Office 365 migration methods we discussed above, using the automated tool is the easiest option. In addition to effortless email migration, you get multiple filters for selective migration and auto-generated migration reports for data validation.