Read time: 7 minutes
As the name itself suggests, unreadable image files cannot be read, opened, or viewed by the users. These image files are not lost but available in the corrupted form and have become inaccessible or unreadable now.
To access or open these ‘Unreadable’ images again, you need to repair them if a backup is not available to restore the images. But I can tell you, most of the unreadable images are recoverable if you act fast. Let’s explore all the methods that you can use to fix unreadable images.
What Causes Image Files to Become Unreadable?
There are multiple reasons why your images are unreadable, such as:
- Corrupted, damaged, or formatted SD card or hard drive.
- Interrupted files transfer or removal of SD card while writing data.
- JPEG header corruption
- Using software that does not support specific formats can cause incompatibility issues.
- Virus or malware altering or hiding data files.
- Camera/phone dies mid-write.
- File system corruption
Do This in the First 5 Minutes or Risk Permanent Loss
If your images are on SD card, USB, or SSD, then stop right now and do this instead:
- Don’t pull it in a hurry; eject safely.
- Don’t write anything else to it.
- Don’t re-download images to same folder.
- Don’t upload new photos to same SD card or USB.
Native Approaches to Fix Unreadable Images Issue
We are proposing some native solutions to fix Unreadable images and make it viewable again.
Method 1. Update or Downgrade the Photo Viewer Application
The photo viewer application that you are currently using can be the reason behind the issue. It is suggested to upgrade the photo viewer application or choose a different one. But when the ‘Unreadable Images’ issue has occurred just after you have changed the photo viewer application, you should downgrade the photo viewer application to the previous version and access the images.
Method 2. Scan with Sfc/scannow
It is a simple manual approach to repair corrupted images on the Windows system if the images are unreadable because system components are broken. First, as an administrator, run the Command Prompt and then follow the below-given procedure.
- Execute the following command to run the Inbox Deployment Image Servicing and Management tool.
- Now, run the scan over the system using this command.
- Wait now for the completion of the scan, and after that, check for the integrity of the image files, then restart computer.
DISM.exe /Online /Cleanup-image /Restorehealth
sfc /scannow
Method 3. Run CHKDSK Command
Sometimes disk errors or damages cause corruption in the image files. There is a manual way to check the disk integrity, repair bad sectors, and fix disk errors – this is done using the CHKDSK command in the Command Prompt (run as administrator).
- Type chkdsk (drive letter) /r and hit Enter.
- Wait till process completes, then restart your computer.
Method 4. Convert the File Format
There is another way to fix inaccessible photos, images or pictures, i.e., by converting the current file format to another format. You can open the image in Paint or another editor, then using the Save As option, select a different format to save the image.
Still Not Fixed? Use a Reliable Photo Repair Tool
Though we have multiple manual solutions available to repair Unreadable images, none of these are reliable. They are time-consuming and do not guarantee 100% success rates. And when it comes to valuable images, opting for a reliable photo repair tool can help in preventing data loss and corruption issues.
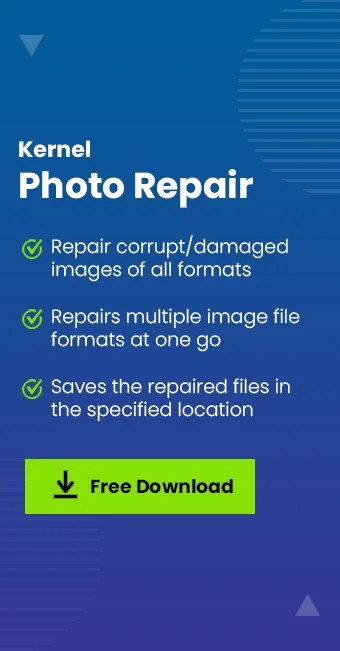
Kernel Photo Repair is a one-stop utility developed to fix all sorts of image file errors and corruptions. It works to resolve file corruptions and even fix faded photos easily.
Some advantages of this repair utility are:
- File size and number are not barriers
- All image file formats are supported
- Save repaired files at any desired location
- Fixes all the issues, errors, and corruptions
- Interactive graphic user interface
- Comes with a free trial version
- Focuses on preserving image quality
- Keeps image metadata intact
Repairing Unreadable Images with Kernel Photo Repair
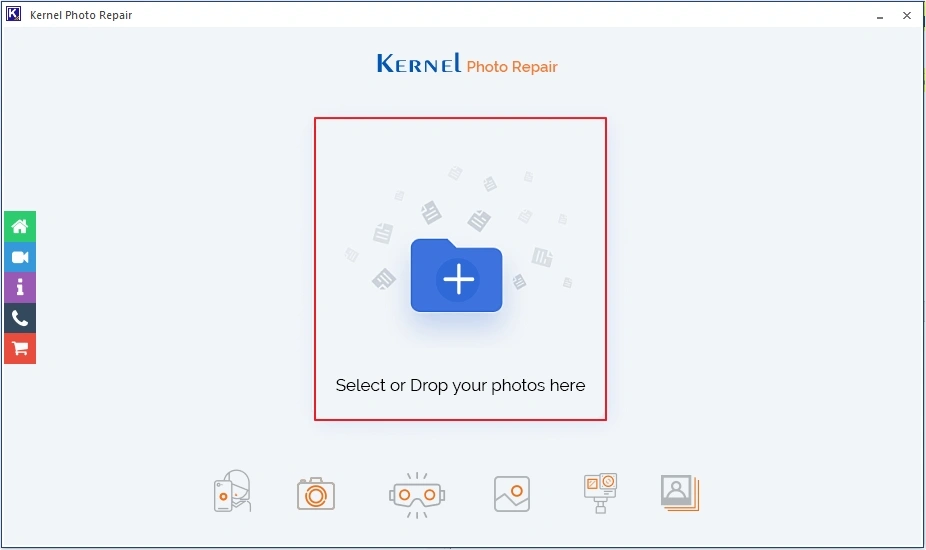
- Launch the Kernel Photo Repair tool on your system by clicking the application icon.
- On the Welcome Screen, click on the plus icon to add the affected image files from your system or external drive. You have another option to simply drag the location and drop it to the displayed icon.
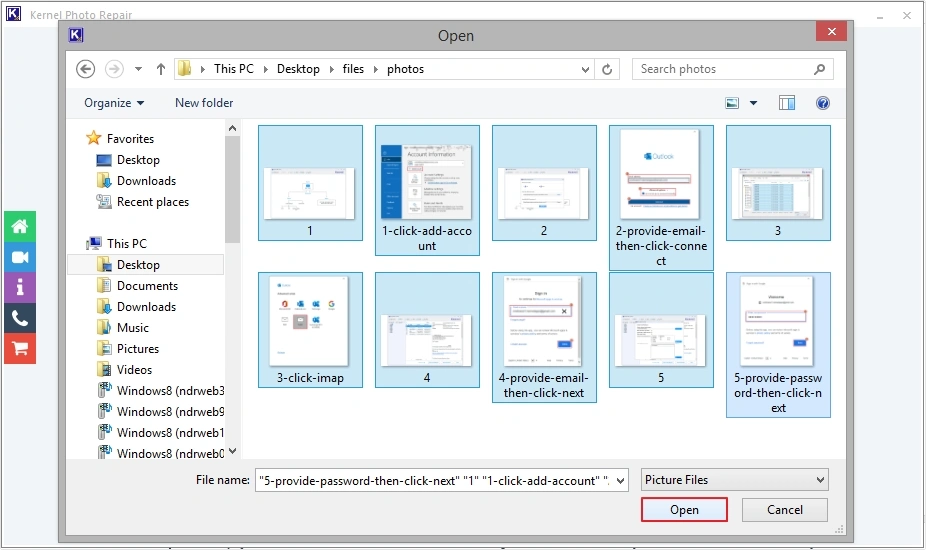
- Choose the files from the system or external drive and click on Open to add it.
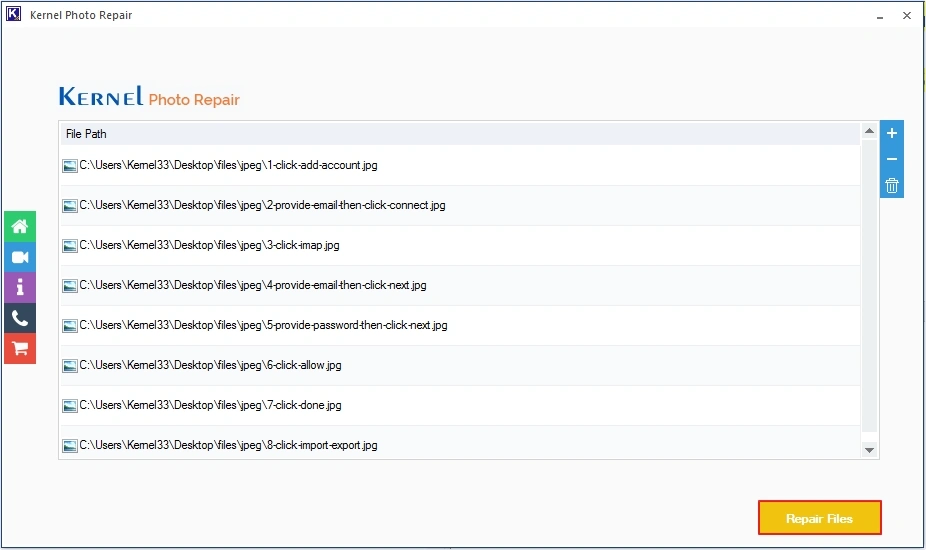
- The selected files will get added and displayed like this. Click Repair Files.
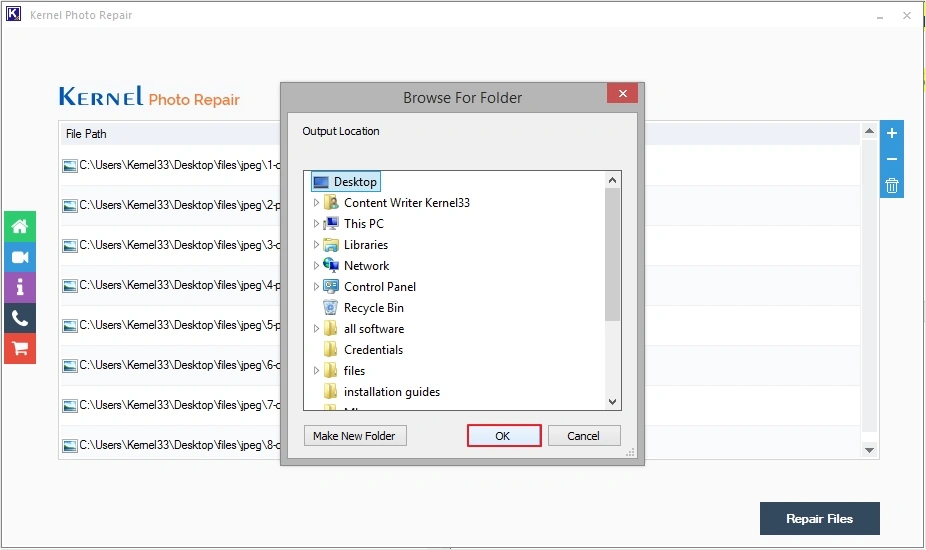
- Next, a prompt dialogue box would appear to provide the saving location for the repaired image files. Click OK after selecting the location.
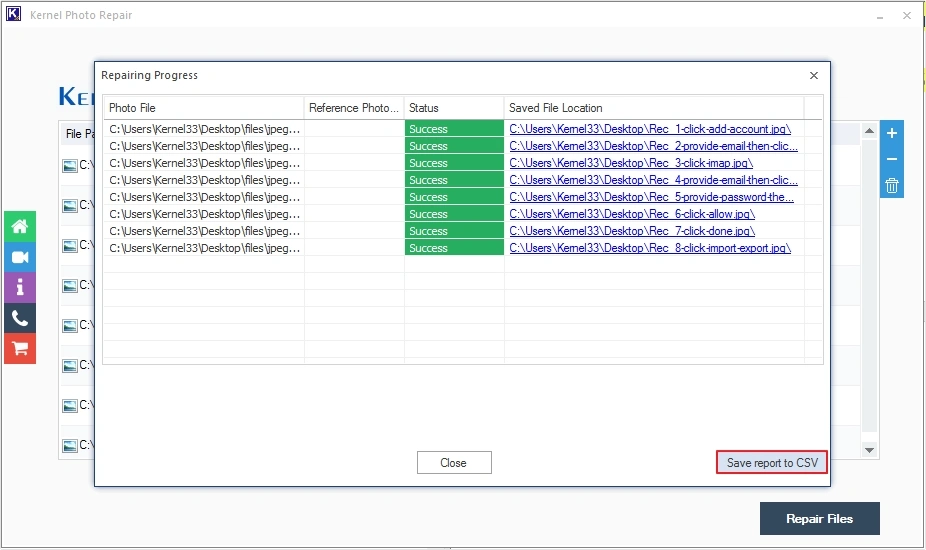
- The repair on the image files will start, and the live progress can be seen. Once the image files are repaired, you can click on the Save report to CSV option to save the repair report at the desired location.
Note: The tool supports all image file formats; so, you can add different types of formats together for repair.
Image files are now readable and can be viewed properly.
Tips To Prevent Images From Being Unreadable Again
Preventing images from becoming unreadable involves secure storage, proper handling of digital files, and using appropriate file formats. It also involves:
- Have at least three copies of images on different media types.
- Always use safe remove hardware or eject when removing SD card or USB.
- Make sure your device is fully charged to avoid interrupted transfer.
- Always use updated version of photo viewer apps.
- Use PNG and TIFF for editing and JPEG/JPG for sharing.
Final Words: Repair Unreadable Images
Unreadable images are definitely a headache for all. To make them accessible again, there are different manual solutions, but considering the unreliability of such methods, a trustworthy photo repair tool is recommended here. I personally prefer using an advanced software to repair corrupted images including JPEG, PNG, RAW, etc. It saves time and effort and also provides quick results.
Frequently Asked Questions
A. You need to use a specialized photo repair software if you have multiple unreadable images.
A. To recover lost/deleted media files from USB drives use Windows backup, CMD, or a professional tool.
A. Yes, but full format, not quick.